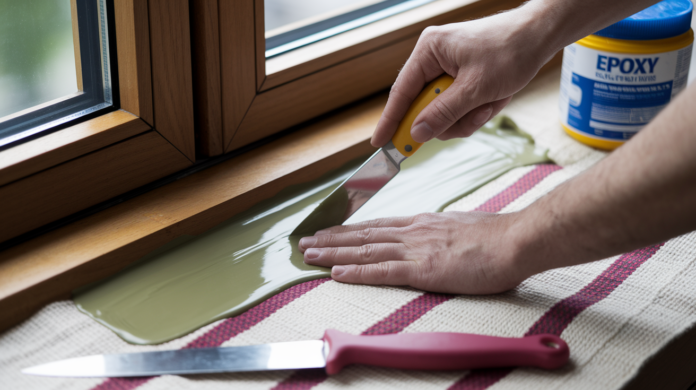

You wouldn’t patch a leaky roof with duct tape, so why use the wrong products on rotted window sills? Most failures happen before you even open the kit. Choosing materials that match your damage level, climate conditions, and sill material determines whether your repair lasts five years or fails in one. Quality repair kits include liquid hardener that soaks into compromised wood and paste filler that rebuilds structural integrity, creating waterproof bonds stronger than the original lumber when properly applied.
Top Window Sill Repair Kits: Brand Recommendations and Product Comparisons

Abatron WoodEpox and LiquidWood are the go-to professional grade window sill repair system. Easy to use, zero VOCs, and they deliver reliable results on severely weathered wood that looks like firewood. Most quality repair kits contain two parts: a liquid wood hardener that soaks into rotted wood like syrup into a sponge, and a paste filler with the consistency of play-doh that rebuilds damaged areas. These complete systems are formulated specifically for exterior wood repair, creating waterproof bonds that handle moisture better than the original lumber. The best kits give you everything needed to fix damaged sills without specialty tools or complicated procedures.
What separates quality products from cheap alternatives comes down to a few things. Zero VOC formulations mean safer indoor application and no harsh chemical smell hanging around for days. Simple 1:1 mixing ratios eliminate guesswork and measurement errors. Standard 5 year transferable warranties signal manufacturer confidence, covering both materials and workmanship if you sell the home before coverage expires. User reviews consistently highlight that professional grade kits deliver repairs you can’t distinguish from original wood when properly applied, bonding chemically with wood fibers to create waterproof repairs actually stronger than the lumber that rotted in the first place.
Quality repair kits run $30 to $80 depending on coverage area, a fraction of full sill replacement cost. You’ll find them at home improvement stores, lumber yards, and online retailers. Buying the right kit the first time prevents the recurring repairs that cheap products require within a year or two.
| Brand | Key Features | Typical Warranty | Price Range | Where to Buy |
|---|---|---|---|---|
| Abatron WoodEpox & LiquidWood | Zero VOC, 1:1 mixing ratio, marine grade epoxy, includes hardener and filler, no complicated procedures | 5 years transferable | $60-$80 | Home Depot, Lowe’s, Amazon, specialty paint stores |
| Bondo Wood Filler | Fast cure time, sandable in 15 to 20 minutes, single part formula, stainable and paintable | 1 year limited | $10-$20 | Auto parts stores, hardware stores, Walmart, online retailers |
| PC-Woody Wood Repair Epoxy | Two part paste epoxy, no mixing ratio measuring needed, paste consistency, permanent adhesion | 3 years | $30-$45 | Home Depot, Amazon, marine supply stores |
| J-B Weld Wood Restore Kit | Premium liquid hardener and filler system, rot repair for structural damage, waterproof seal | 2 years | $35-$50 | Hardware stores, Amazon, home centers |
Choosing the Right Repair Kit for Your Sill Damage
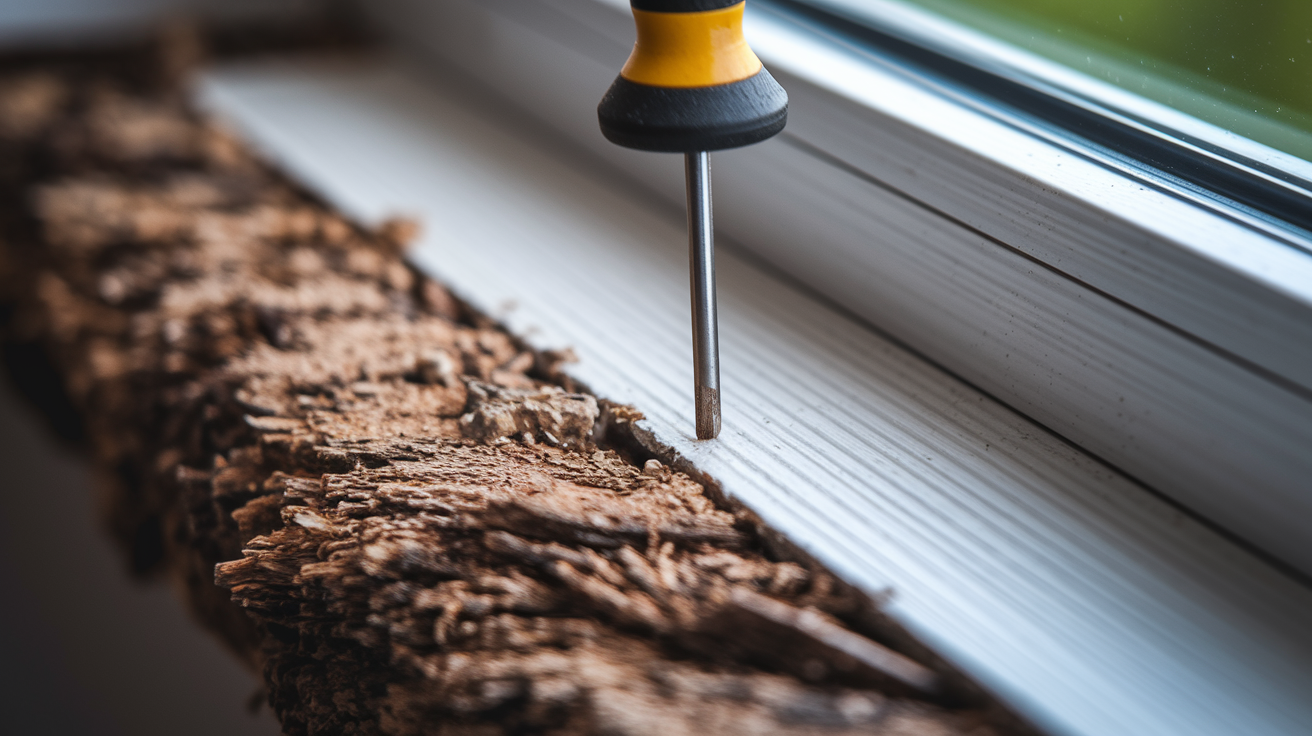
Selecting the right repair kit starts with honest damage assessment. Surface weathering that’s only skin deep versus rot that’s eaten into structural wood. Probe the sill with a screwdriver or awl to find out what you’re dealing with. Healthy wood resists penetration and feels solid. Rotted wood feels soft, spongy, and the screwdriver sinks in with little effort. The 50% rule guides the big decision: when rot affects more than half the structural wood or spreads into the main window frame, replacement makes more sense than repair. Everything below that threshold can be fixed with the right kit.
Material compatibility matters, though most quality kits work on traditional wood sills. Some newer formulations bond with composite materials, but check product specifications before buying. If your sills are PVC composite or engineered wood, you need a kit specifically labeled compatible with those materials.
Climate and regional conditions determine which materials will last. Northern regions need kits that resist freeze thaw cycles. Repeated expansion and contraction tears apart weak repairs. Coastal areas demand formulations that handle high humidity and salt spray that accelerates corrosion. Sunny climates require maximum UV resistance to prevent breakdown from constant sun exposure. Wood moisture content before application matters too. Aim for no higher than 12 to 15 percent, with arid climates needing below 10 percent and humid regions like Florida below 14 percent for stable wood that won’t shift as it continues drying.
Quality repair kits cost more upfront but prevent the recurring repairs that cheap products require within a year or two. Proper kit selection matched to your damage extent, sill material, and climate zone prevents callbacks and re-dos. Spending $60 on the right kit once beats spending $20 on the wrong kit three times plus the aggravation of watching your repair fail.
Complete Application Process: Preparation Through Finishing

Proper preparation and application technique together determine whether your repair lasts five years or five decades. Following manufacturer instructions combined with proven field techniques ensures professional results even on your first attempt.
-
Damage assessment and rot detection. Probe the entire sill with a screwdriver or awl, checking every six inches and any suspicious areas. Healthy wood resists penetration and bounces the tool back. Rotted wood feels soft and spongy, accepting the screwdriver with minimal force. Mark every compromised area because you need to treat all of them, not just the obvious damage.
-
Complete rot removal and excavation. Remove all rotted wood using an oscillating saw, chisel, or router. Cut at least one inch beyond the last visible trace of rot because decay spreads through wood grain invisibly, creeping further than what your eyes show. If you leave soft wood behind, the rot comes back within a year or two. Excavate until you hit solid wood on all sides. “Probably good enough” thinking here guarantees failure.
-
Fungus neutralization. Apply professional grade borate solution to the cavity and surrounding wood after rot removal. The solution neutralizes fungus that caused the decay and prevents future rot from starting in adjacent areas. Let the treated wood dry completely before moving forward. Skipping this step leaves active decay that undermines your repair from behind.
-
Moisture testing and drying. Check wood moisture content with a moisture meter if you have one, aiming for no higher than 12 to 15 percent. If the wood’s still damp, give it more drying time. Applying epoxy over wet wood traps moisture that prevents proper bonding and creates bubbles as trapped water tries to escape. In humid climates, this sometimes means waiting a few extra days for the wood to stabilize.
-
Surface cleaning and degreasing. Remove dirt, old paint flakes, dust, and any surface contaminants with a stiff brush or vacuum. Wipe the cavity with denatured alcohol or acetone to eliminate oils and residue. Even a thin film of dirt or grease blocks adhesion between the epoxy and wood fibers. Clean wood looks lighter and feels dry to the touch, not slick or dusty.
-
Drilling penetration holes for hardener. Create a series of small 1/8 inch diameter holes spaced about one inch apart into the solid wood surrounding the cavity. Angle the holes slightly downward so the liquid hardener flows into them rather than running back out. These holes let the consolidant penetrate deep into wood fibers that look solid but have started weakening, reinforcing the wood from the inside out.
-
Applying liquid wood hardener. Mix the two part liquid hardener according to package directions and let it sit for the recommended 15 minute setup time before application. Apply liberally into the drilled holes and across all exposed wood surfaces. The wood will drink it up like a dry sponge, often requiring multiple applications over a few minutes. Wait until the hardener becomes tacky before applying filler. Hot humid weather speeds this up, cold days slow it down significantly.
-
Mixing epoxy filler in small batches. Prepare only as much filler as you can apply within five to ten minutes. Epoxy starts curing as soon as you mix it, and working time varies with temperature. Knead two part paste fillers until you achieve uniform color with no streaks. Measure liquid type fillers precisely at the specified ratio. Mix thoroughly but quickly.
-
Pressing filler firmly into voids. Pack the epoxy into the cavity using a stiff putty knife, forcing it into all corners and gaps. Press firmly to eliminate air pockets that weaken the repair and create spaces where moisture can collect. Work the epoxy like you’re forcing grout into tile joints, not just spreading it across the surface. Intentionally overfill the repair area slightly, leaving a small mound of extra material that you’ll sand flush later. Adding more epoxy now is easier than patching low spots after it cures.
-
Allowing full cure time. Wait a complete 24 hours before shaping, sanding, or applying any finish. Epoxy needs this time to achieve full chemical bonding with the wood fibers. Working too early compromises strength and can leave soft spots that fail under pressure. Mark your calendar and resist the temptation to “just check it” earlier.
For complete professional level guidance on the removal and preparation steps, check out How to Repair a Rotted Window Sill Like a Pro for additional techniques.
Essential Tools and Safety Equipment for Application

Repair kits provide the epoxy and hardener, but successful application requires additional tools for preparation, mixing, application, and finishing. You probably own some of these already, and the ones you need to buy are affordable and useful for other projects. The difference between mediocre results and professional quality repairs often comes down to having the right tool for each step rather than trying to make do with whatever’s in the garage.
Epoxy repair kits contain chemicals requiring proper handling, though simple safety precautions make application safe. The biggest safety concern for older homes is lead paint. Homes built before 1978 require lead paint testing per EPA guidelines before you start cutting or sanding. Once you know what you’re working with, basic protective equipment handles the rest.
Combined Tool and Safety Checklist:
- Oscillating multi-tool with wood cutting blades for rot removal
- Sharp wood chisel for detail work and tight spots
- Small pry bar for removing loose wood pieces
- Putty knives in various widths (1 inch, 2 inch, 3 inch) for applying filler
- Disposable mixing sticks or paddles
- Rasps and files for initial shaping of cured epoxy
- Sandpaper in progressive grits: 80 grit for bulk removal, 120 grit for smoothing, 220 grit for final blending
- NIOSH approved respirator rated for organic vapors
- Chemical resistant nitrile gloves
- Safety goggles or glasses with side shields
- Acetone in a metal container for spills, cleanup, and thinning epoxy if needed
- Plastic sheeting or tarps for weather protection during curing
- Moisture meter (optional but helpful for damage assessment)
Temperature and weather affect epoxy curing dramatically. Cover repair areas with plastic sheeting when rain is expected or to prevent morning dew from settling on fresh epoxy. Work within the manufacturer specified temperature range, typically 50 to 90°F for most products. Colder weather slows curing to a crawl, while hot conditions accelerate it, sometimes too fast for thorough application. Ensure adequate ventilation during application, especially indoors. Open windows on opposite sides of the room to create cross ventilation that carries fumes away.
Shaping, Finishing, and Weatherproofing Your Repair

Sand the cured epoxy in three progressive stages to create an invisible repair that blends perfectly with surrounding wood. Start with coarse 80 grit sandpaper to remove bulk material and rough shape the repair to match the sill profile. Switch to 120 grit for smoothing out scratches left by the coarse paper, working the surface until it starts feeling uniform under your hand. Finish with 220 grit for blending where the repair meets original wood, feathering the edges so you can’t feel a transition line. Epoxy sands easily without requiring heavy pressure or aggressive grit. Larger patches cure faster than small ones, sometimes ready for sanding in less than 24 hours in warm weather. Patient sanding creates repairs so smooth you can’t tell where the fix starts and original wood ends.
Primer and paint application protects the repair from the moisture and UV exposure that destroyed the original wood. Apply exterior grade oil based or premium acrylic primer to seal both the epoxy repair and surrounding wood. Primer prevents moisture from penetrating into the wood while ensuring paint adheres properly to both the slick epoxy surface and bare wood. Let the primer cure completely according to package directions before painting. Use premium acrylic latex exterior paint formulated to expand and contract with temperature changes without cracking. Cheap paint develops hairline cracks within a season or two, opening pathways for moisture to reach the wood underneath and restart the rot cycle. Apply at least two coats, allowing proper drying time between coats. Once painted with quality materials, repaired areas are indistinguishable from original wood. Guests looking right at the repair won’t notice anything.
Proper sealing is as important as the repair itself because even perfect epoxy work fails if moisture reaches the underlying wood through unsealed gaps. The best repair combined with missed caulking fails faster than a mediocre repair that’s completely sealed. Use 100% silicone or advanced polymer caulk that remains flexible through years of temperature swings, humidity changes, and seasonal movement. Lesser caulks turn brittle and crack within a year, especially in regions with freeze thaw cycles, salt spray exposure, or intense humidity. Apply a thin, consistent bead that fills the gap without creating a bulky ridge that collects water.
Critical Sealing Locations:
- Joint between sill bottom and window frame where water runs off the glass
- Sill edges where they meet vertical trim pieces on both sides
- Junction where the sill meets home siding, creating a continuous moisture barrier
- Around window glass perimeter if accessible from the exterior
- Any visible cracks, gaps, or transitions between different materials
UV resistant topcoats add extra protection in sun exposed locations, though premium exterior paints already include UV inhibitors. Inspect caulk annually, especially after wet winters, catching failures early before they compromise the underlying repair. When you spot a crack or gap forming, scrape out the old caulk and reapply fresh material immediately. Waiting six months turns a five minute touch up into another rot excavation project.
Common Application Mistakes to Avoid with Repair Kits

Even quality repair kits fail when applied incorrectly, and understanding where others go wrong helps you avoid wasted time, money, and the frustration of watching repairs fail within a year. The mistakes that sink repairs aren’t exotic or rare. They’re simple oversights that seem minor until the damage reappears.
Common Application Mistakes:
- Skim coating entire sill surfaces with epoxy instead of only filling voids, cracks, and checks where moisture penetrates. Thin epoxy layers over sound wood trap moisture underneath that pushes repairs out as it expands.
- Using wrong products like automotive body filler (Bondo) or standard wood putty for exterior structural repairs. These materials fail spectacularly outdoors, cracking and popping loose within months.
- Applying epoxy over wet, damp, or contaminated wood without proper drying and cleaning. Moisture and surface oils block chemical bonding that makes epoxy repairs permanent.
- Mixing batches too large for the working time, then rushing to apply epoxy that’s starting to cure. Most epoxies give you five to ten minutes of working time after mixing. Respect that limit.
- Failing to press epoxy firmly into voids, leaving air pockets that weaken repairs and create spaces where moisture collects and freezes.
- Insufficient rot removal before repair, leaving soft wood that continues decaying beneath the epoxy patch. Cut one inch past visible damage because decay spreads invisibly through wood grain.
- Skipping critical sealing steps after epoxy and paint cure, allowing moisture to bypass the repair through unsealed gaps.
Avoiding these mistakes transforms mediocre repairs into professional quality work that lasts decades. The difference between success and failure isn’t skill or experience. It’s following the complete process without shortcuts.
Repair Kit Performance: Weather Resistance and Longevity

Quality two part marine grade epoxy repair kits create permanent fixes that outlast and outperform the original wood when properly applied. The chemical bond between epoxy and wood fibers produces waterproof repairs actually stronger than the lumber that rotted in the first place. These aren’t temporary patches that buy you a few seasons. They’re structural repairs formulated for the harshest exterior conditions that buildings face.
Performance across different climate challenges proves the versatility of marine grade systems. Northern regions throw freeze thaw cycles at repairs, where water expands and contracts repeatedly through winter, tearing apart weak repairs. Coastal areas deliver high humidity and salt spray that accelerates corrosion of fasteners and breakdown of organic materials. Sunny climates hammer repairs with intense UV exposure that degrades inferior products. Quality epoxy systems resist all of these because they’re engineered for boat hulls and marine structures that endure worse conditions than houses.
Longevity expectations for proper repairs are measured in decades, not years. Standard 5 year transferable warranties signal manufacturer confidence, but properly executed repairs often outlast the warranty period by a factor of three or four. The epoxy itself doesn’t rot, doesn’t absorb water, and doesn’t feed fungus. The three failure modes that destroyed the original wood.
Repair performance depends on complete execution with each step supporting the others. Quality materials applied incorrectly fail. Proper application technique using cheap materials fails. Perfect repairs without adequate sealing fail. The entire sequence works together to create repairs that match or exceed new wood performance.
Maintenance Schedule to Extend Your Sill Repair

Even the best repairs require periodic maintenance to achieve maximum lifespan, but we’re talking about minimal effort that prevents major re-repairs. Spending 15 to 30 minutes once a year inspecting and touching up your window sills extends repair life from years to decades. Small preventive actions catch problems while they’re still minor, before water infiltration starts new rot cycles behind your repair.
Annual Maintenance Tasks:
-
Post winter inspection timing. Check sills immediately after the rainy season ends when water damage from previous months is most visible. In the Bay Area, late spring works well. Look for changes in paint condition, caulk integrity, or any softness developing in previously repaired areas.
-
Paint condition assessment. Examine painted surfaces for cracking, peeling, or bubbling that indicates moisture is getting behind the finish. Premium acrylic latex exterior paints should remain intact without cracking for years, but even quality paint needs recoating every five to eight years depending on sun exposure.
-
Caulk integrity checks. Run your finger along all sealed joints checking for cracks, shrinkage, or areas where caulk is pulling away from wood or trim. Caulk failure is the number one cause of recurring water damage after successful repairs. When you find even small cracks, reapply high quality exterior caulk immediately. Waiting allows water infiltration that undermines the repair beneath.
-
Water drainage verification. Pour a cup of water on the sill and watch how it flows off. Water should drain away from the house, not pool on the surface or run toward the window frame. If you spot pooling, the sill may have settled or warped slightly, and additional drainage planning may be needed.
-
Touch up application procedures. Keep leftover paint and caulk from your original repair for quick touch ups. A small chip or crack caught early needs only minutes to fix. That same damage ignored for a year can require redoing the entire repair.
Fifteen to thirty minutes of annual inspection and minor touch ups extends repair life from five or ten years to twenty or thirty. The return on this small time investment is massive. Repairs that outlast your ownership of the home.
When to Choose Professional Installation Over DIY Kits
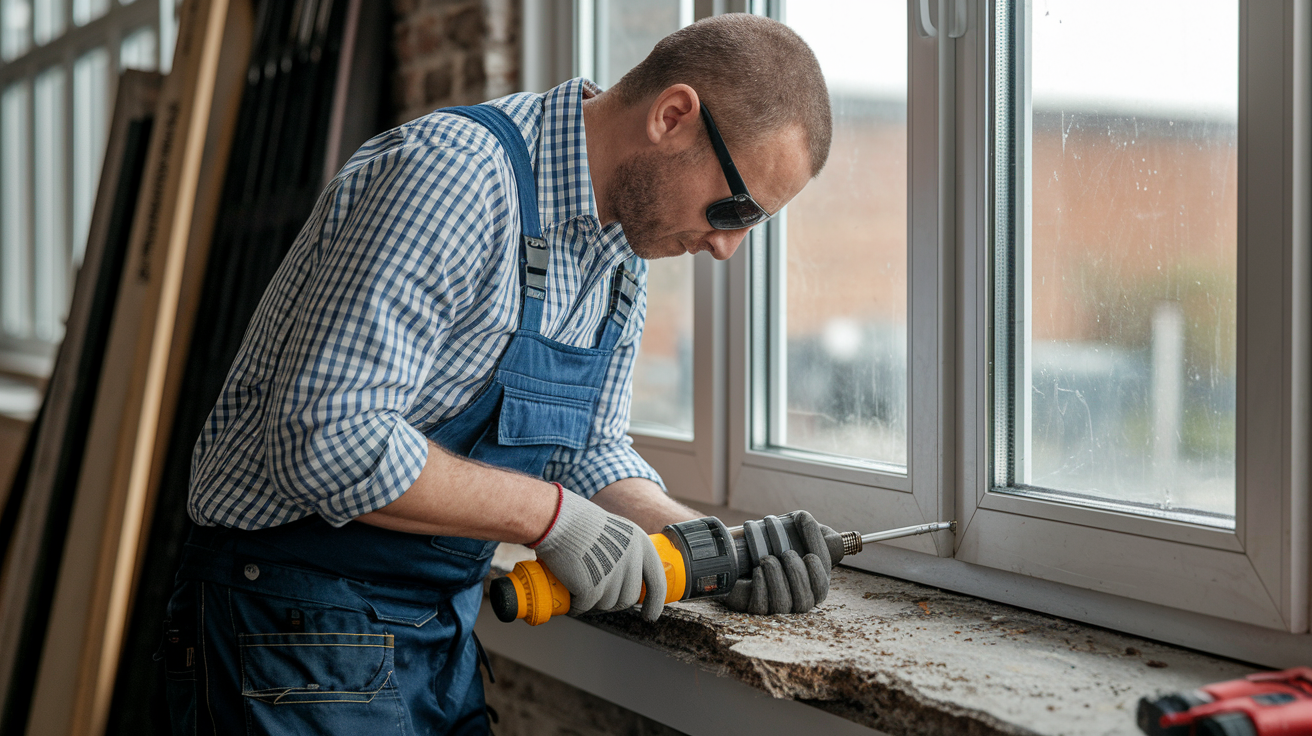
Repair kits work excellently for surface to moderate damage, but extensive structural rot requires professional assessment and custom fabrication that goes beyond what any retail kit can handle. Knowing when to call a pro prevents the frustration of attempting repairs beyond your skill level or the damage severity. If you’re uncertain about the extent of rot or whether a repair will hold, professional evaluation costs less than botched DIY attempts that have to be redone.
Specific situations require professional services rather than DIY repair kits. When damage exceeds 50% of the sill structure, replacement makes more sense than patching. Rot spreading into the main window frame requires removing the entire window, treating or replacing structural framing members, then reinstalling or replacing the window itself. Structural concerns affecting load bearing capacity need engineering evaluation before repair work starts. Hidden moisture problems require specialized detection equipment to locate the source before any repair will last.
Professionals bring specialized detection equipment and techniques that identify all problem areas. Moisture meters measure water content deep in wood where surface checks miss ongoing problems. Thermal imaging cameras spot temperature differences that indicate hidden moisture behind walls or under sills. Manual probing combined with decades of experience finds decay that homeowners miss. Complete fungus treatment with professional grade borate solutions prevents reinfection that undermines repairs. Custom milling matches original architecture exactly when standard lumber dimensions don’t fit older homes. Standard warranties covering materials and workmanship for five years give peace of mind that DIY work can’t match.
Professional repairs typically complete in one to two days per window depending on damage extent and whether custom fabrication is needed. They include thorough cleanup and EPA compliant procedures for lead based paint in pre-1978 homes. For more details on what professional services include and when they make sense, see Window Sill Repair Process: Tools, Steps, Warranty Info.
The higher cost of professional work makes sense for complex situations despite being multiples of DIY kit costs. When the alternative is botched repairs that fail within a year, causing additional water damage to walls and interior finishes, professional work proves cheaper in the long run.
Cost Analysis: Repair Kits Versus Full Sill Replacement

Repair kits typically cost $30 to $80 depending on coverage area and formulation quality, while professional sill replacement runs $200 to $600+ per window for materials and labor. The cost difference makes repair kits extremely attractive when damage is repairable rather than structural. A $60 repair kit that fixes three window sills saves $400 to $1,500 compared to professional replacement, money that covers a lot of other deferred maintenance around the house.
Hidden replacement costs add up beyond the obvious material and labor charges. Potential interior damage during sill removal can affect drywall, trim, and paint requiring additional repair. Trim replacement is often necessary because removing old sills damages surrounding woodwork. Repainting involves more than just the sill. You’re matching existing colors and often painting entire window surrounds for consistent appearance. Installation labor doubles or triples material costs in most markets. Weather delays can extend projects across multiple weeks when contractors schedule other jobs between installation stages.
| Repair Option | Material Cost | Labor Cost | Total Per Window | Timeline |
|---|---|---|---|---|
| DIY Kit Repair | $30-$80 | $0 (your time) | $30-$80 | 1 to 2 days with curing time |
| Professional Kit Repair | $50-$100 | $150-$300 | $200-$400 | 1 day scheduled visit |
| Full Sill Replacement | $100-$200 | $200-$500+ | $300-$700+ | 1 to 2 days plus potential weather delays |
Proper repairs protect property value and improve energy efficiency by eliminating drafts where damaged sills create gaps. The return on investment extends beyond immediate cost savings. Sealed, weatherproof sills reduce heating and cooling costs while preventing water damage to interior walls and flooring that costs thousands to remediate.
Final Words
The right window sill repair kit turns failing wood into durable, weatherproof surfaces when you follow proper techniques.
Match the kit to your damage level, prep thoroughly, and don’t rush the application or sealing steps.
Most repairs complete in a weekend and prevent the much higher cost of full replacement. With the products and methods covered here, your sills will outlast the original wood and stay solid through years of weather exposure.
FAQ
Can you repair a window sill?
You can repair a window sill using epoxy-based repair kits when rot affects less than 50% of the structural wood. These two-part systems bond chemically with wood fibers to create waterproof repairs stronger than the original material, making full replacement unnecessary for surface to moderate damage.
How do you repair a damaged sill?
To repair a damaged sill, remove all rotted wood at least one inch beyond visible damage, apply liquid wood hardener through drilled holes into sound wood, wait until tacky, then press epoxy filler firmly into voids to eliminate air pockets. After 24 hours of curing, sand progressively with 80-grit, 120-grit, and 220-grit sandpaper before priming and painting.
Can I replace a window sill without removing the window?
You can replace a window sill without removing the window by splicing in new wood sections alongside repairs. This approach works when damage affects more than 50% of the sill but hasn’t spread into the main window frame, using pressure-treated wood or cedar secured with exterior construction adhesive and galvanized screws.
How do you fix a peeling window sill?
To fix a peeling window sill, remove all loose paint and rotted wood beneath the surface, apply liquid wood hardener to strengthen weakened areas, fill voids with epoxy filler, then sand smooth before applying exterior-grade primer and two coats of premium acrylic latex paint. Seal all joints with 100% silicone or polymer caulk to prevent water penetration that causes recurring peeling.
What components are included in window sill repair kits?
Window sill repair kits include liquid wood hardener (consolidant) that penetrates and strengthens rotted wood, epoxy paste filler for rebuilding damaged material, and basic application tools. Quality kits use marine-grade two-part systems mixed at simple 1:1 ratios that bond chemically with wood fibers to create waterproof repairs.
How long do window sill repairs last?
Window sill repairs using quality epoxy kits typically last decades when properly applied and maintained, with standard warranties covering materials and workmanship for 5 years. Performance depends on complete rot removal, proper application eliminating air pockets, adequate sealing with flexible caulk, and annual maintenance checks of paint and caulk condition.
What moisture level is safe before applying epoxy to wood?
Wood moisture content should be no higher than 12-15 percent before applying epoxy, with arid climates requiring below 10 percent and humid climates below 14 percent for stable repairs. Use a moisture meter to verify dryness, and allow additional drying time if readings exceed these thresholds to prevent trapped moisture from weakening repairs.
When should you replace instead of repair a window sill?
You should replace instead of repair a window sill when rot affects more than 50% of structural wood or spreads into the main window frame. At this damage threshold, splicing in new wood sections or full replacement provides better structural integrity and longevity than attempting extensive epoxy repairs.
What tools do you need for window sill repair?
For window sill repair, you need removal tools (oscillating tool, chisel, pry bar), application tools (putty knives, mixing sticks), sanding tools (rasps, 80-grit through 220-grit sandpaper), and safety equipment including NIOSH-approved respirator, chemical-resistant gloves, safety goggles, and acetone for cleanup.
How do you prevent future window sill damage?
To prevent future window sill damage, seal critical joints with 100% silicone or polymer caulk between sill and frame, where sill meets trim, and at siding junctions. Apply premium acrylic latex exterior paint in two coats, conduct annual post-winter inspections, and immediately repair any caulk cracks or paint failures before moisture penetrates.