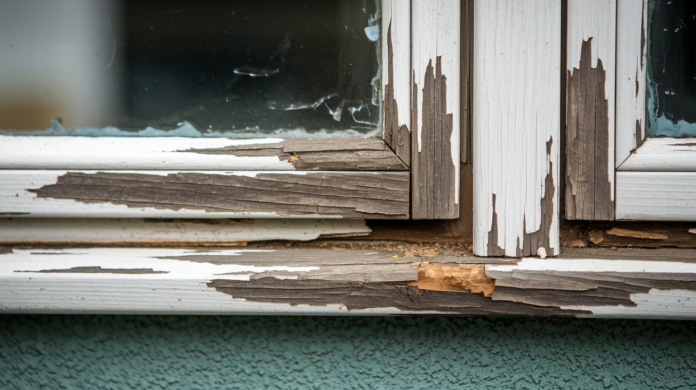

If your window sill feels soft when you press it with your thumb, you’re not dealing with a “little paint problem.” You’re looking at active wood decay that’s spreading deeper every day. Most people patch these spots with wood filler and fresh paint, then watch the same damage reappear within two years because they never stopped the rot or rebuilt the structure properly. This guide walks through consolidant and epoxy repair methods that actually stabilize decayed wood and address the moisture source, so the fix holds instead of becoming an annual maintenance ritual.
Identifying Deterioration Signs and Damage Assessment

You need to assess damage properly before you start work. This evaluation tells you whether you’re looking at a DIY repair or whether you need professional replacement. Spend real time examining what’s in front of you and documenting what you find. Skipping this step costs money and creates frustration when you’re halfway through a repair that never had a chance of working.
Look for these warning signs:
- Discoloration, dark stains, or water marks on the wood
- Soft, spongy texture when you press the sill with a screwdriver or fingernail
- Crumbling or cracked corners and edges
- Bubbling, peeling, or flaking paint
- Musty, damp, earthy smell coming from the sill area
- Visible fungal growth or powdery white deposits
- Drafts or light visible through cracks
The 10 to 25% rule gives you clear guidance. Damage affecting less than 10% of the sill is straightforward to repair with consolidant and epoxy. Between 10 and 25% requires careful evaluation of structural integrity and moisture source before you proceed. When rot exceeds 25%, complete replacement becomes more practical and cost effective than trying to salvage what’s left. This threshold exists because extensive decay compromises the sill’s ability to support the window frame securely. Patching large areas creates a patchwork that rarely performs well long term.
Use a moisture meter to measure the sill’s moisture content before beginning any repair. Wood must read 17% or below for consolidants and epoxies to penetrate properly and cure completely. Higher readings mean the repair will fail as trapped moisture continues feeding fungal decay beneath your carefully applied patches.
Understanding What Causes Dry Rot in Window Sills

Dry rot is a fungal infection requiring three elements: cellulose from wood, oxygen, and moisture between 20 to 40%. Despite the name, dry rot needs water to establish itself and spread. The fungus breaks down wood cell structure, converting solid timber into brittle, cracked material that crumbles when you touch it.
What makes dry rot particularly destructive is how it spreads through wood fibers, traveling beyond the obvious damage into areas that look fine on the surface. The fungus creates thread like structures that move through wood even when surface moisture has evaporated, leaving behind weakened timber that fails suddenly under load.
Improper or damaged window flashing creates the most common entry point for moisture. Flashing should overlap in layers that direct water away from the sill, but when installed incorrectly or damaged by settling, it allows water to seep behind the sill and become trapped. This hidden moisture feeds fungal growth in areas you can’t see until damage becomes extensive. Metal flashing deteriorates over decades. Caulked joints that substitute for proper flashing fail within years.
Failed caulking and sealant around the window perimeter create numerous small entry points for water infiltration. Caulk degrades from UV exposure, temperature cycling, and simple age. Gaps as small as 1/16 inch allow water to wick into wood through capillary action, and once inside these joints, water has no escape path. The sill absorbs moisture during every rain event, and decay begins in the corners where two caulk lines meet.
Condensation from indoor humidity meeting cold glass surfaces runs down windows and pools on sills. This happens most often during winter months when temperature differences are greatest. The water accumulation appears minor, just a thin film you can wipe away, but it occurs daily throughout the heating season. Over months and years, this constant dampness saturates the wood’s surface layer. Interior sills often show the first signs of condensation damage near the glass, where water collects before running to the ends.
Poor exterior drainage including clogged gutters and misdirected downspouts directs water onto window sills instead of away from the building. A clogged gutter overflows directly above the window during heavy rain, saturating the sill. Downspouts that terminate near the foundation create splash back that hits the wall and runs down across the sill. Even properly functioning gutters fail when debris dams them at corners, creating waterfalls that hit windows below.
Natural aging and loss of wood’s protective properties over time leaves untreated lumber vulnerable. Old growth lumber harvested before 1950 had natural rot resistance from tighter grain and higher resin content. Modern lumber lacks these qualities and depends entirely on applied treatments for protection. As factory treatments degrade and paint films crack, bare wood absorbs moisture readily. Untreated sills in protected locations may last 15 to 20 years, but exposure to weather can cause failure in under 10 years.
Successful repairs must address the moisture source or rot will return within 2 to 3 years. Treating the symptoms without fixing the cause just delays failure while rot continues spreading through the wood structure.
Complete Repair Process Overview and Required Materials
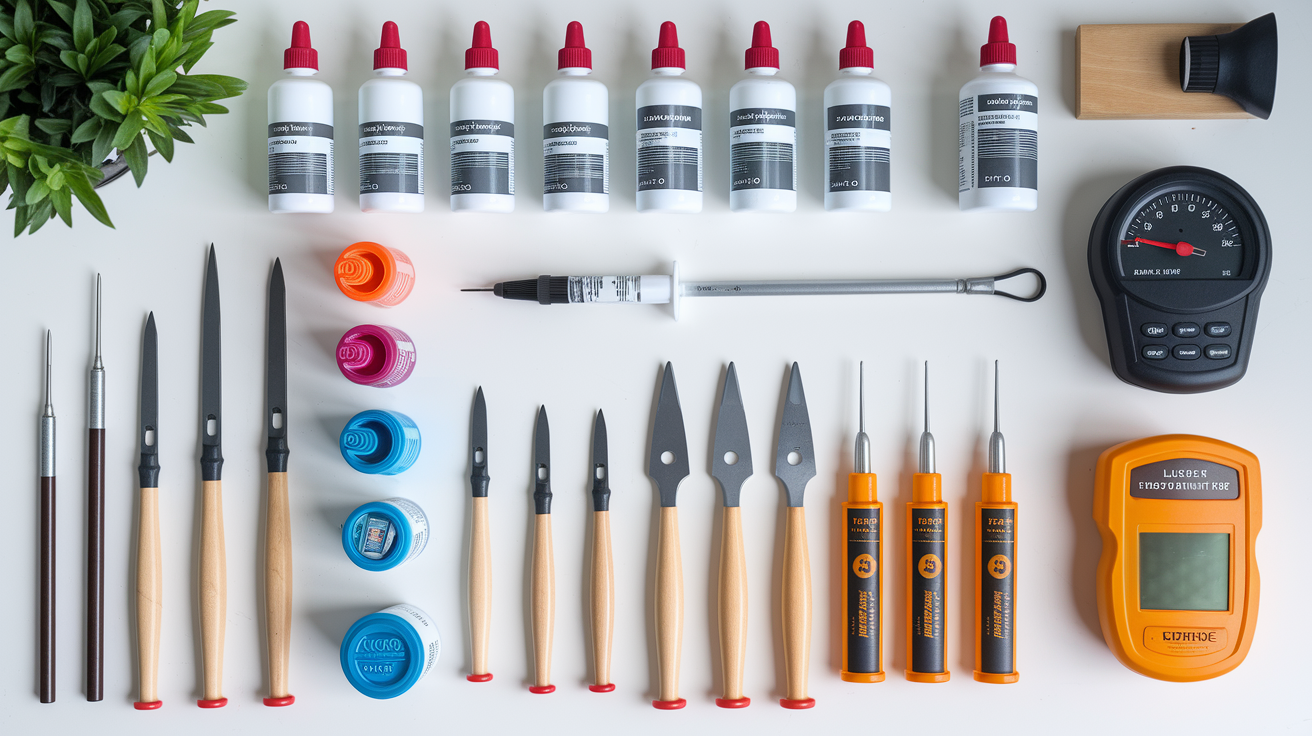
Dry rot repair is achievable for most homeowners when damage is limited to under 25% of the sill and the moisture source has been identified. The work requires patience more than advanced carpentry skills. The materials have become more reliable and user friendly in recent years.
The basic repair approach follows a logical sequence. Removal of compromised wood exposes the extent of damage. Consolidation of remaining structure creates a solid foundation. Filling cavities restores the original shape. Protective finishing prevents future moisture intrusion. Each step depends on the previous one being done properly.
Here’s the condensed repair process:
- Confirm moisture content is below 17% and damage is under 25% of sill
- Remove all rotted wood and drill test holes into damaged areas
- Apply penetrating consolidant and allow 24+ hours to cure
- Fill cavities with two part epoxy, building up in layers
- Sand smooth and shape to match original profile
- Prime and paint with exterior grade products
You’ll need these materials:
- Penetrating wood consolidant (Abatron LiquidWood or equivalent)
- Two part epoxy filler (WoodEpox or equivalent)
- Wood preservative
- Exterior grade primer
- Exterior paint
- Painter’s tape
- Clean rags
- Vacuum for debris removal
Each step will be detailed in subsequent sections. When properly executed, epoxy repaired sections become harder than original wood and can be drilled, screwed, and sanded just like solid timber. The repair essentially petrifies the damaged area, converting soft rotted wood into a rock hard composite that stops decay and restores structural strength.
Tools and Materials Required for Window Sill Rot Repair

Gathering all supplies before starting prevents mid project trips to the hardware store and keeps work moving efficiently. Most items are available at home centers, though specialized consolidants and epoxies may require online ordering.
Tools:
- Moisture meter
- Chisels (1/2 inch and 1 inch)
- Utility knife with fresh blades
- Scraper
- Drill with 1/8 inch and 1/4 inch bits
- Plastic syringe (10 to 20cc capacity)
- Putty knife (2 inch and 4 inch)
- Sandpaper (80, 120, 180, 220 grit)
- Paintbrushes (1 inch and 2 inch)
- Safety equipment (respirator mask, protective gloves, eye protection)
Materials:
- Penetrating wood consolidant (Abatron LiquidWood or equivalent)
- Two part epoxy filler (WoodEpox or equivalent)
- Wood preservative
- Exterior grade primer
- Exterior paint
- Painter’s tape
- Clean rags
- Vacuum for debris removal
Safety equipment is non negotiable. Dry rot releases fungal spores when disturbed, and wood dust from sanding rotten material shouldn’t be inhaled. Chemical consolidants and epoxies produce fumes during application and curing. Work in well ventilated areas, use fans to move air, and take breaks to step away from fumes. The materials are safe after curing, but wet products require careful handling.
Step by Step Repair Process: Removal, Consolidation, and Filling
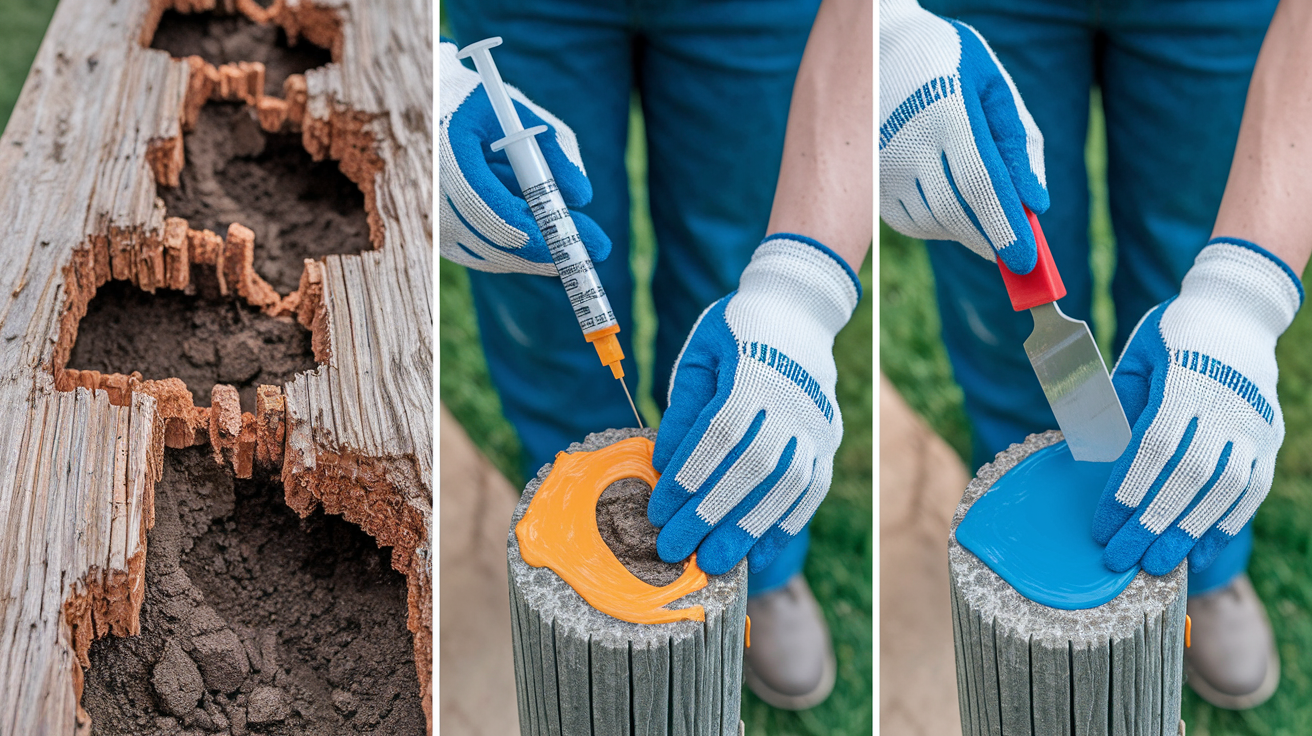
These three interconnected steps form the structural core of the repair process. The work requires attention to detail, but the techniques are straightforward and forgiving of minor imperfections.
Removing Rotted Wood and Preparing the Surface
Thorough removal of all compromised wood is critical for repair success. It’s better to remove slightly more than to leave any soft material that will continue decaying beneath your repair. The consolidant can harden spongy wood, but it can’t reverse decay that has destroyed the wood’s cellular structure.
Start at the most damaged area where rot is obvious. Use a sharp chisel to excavate soft wood, working with the grain when possible to avoid splitting good wood. The rotted material will come away easily, often in stringy clumps that pull apart with minimal pressure. Work systematically outward from the worst area until the chisel hits firm wood that resists excavation. Test firmness frequently by pressing with a screwdriver or awl. Solid wood will resist penetration, while compromised wood yields to light pressure.
After removing obvious decay, drill 1/8 inch test holes approximately one inch apart throughout the affected zone. These holes serve two purposes. They reveal hidden decay deeper in the wood, and they create injection points for consolidant in the next step. Stop drilling when you hit solid wood or when you’ve gone halfway through the piece. The drill will pull soft, punky material from these test holes, showing you where decay extends beyond what was visible on the surface.
Vacuum all debris and dust thoroughly. Rotted wood particles left in cracks and holes will absorb consolidant without adding strength. Wipe the area with a clean cloth to remove fine dust. Allow the area to dry completely before proceeding to treatment. If you discover moisture during excavation, you’ve found your problem but can’t proceed with repair until that moisture source is eliminated and the wood has dried below 17% content.
Applying Penetrating Consolidant
Penetrating consolidants soak into compromised wood fibers and harden them chemically, creating a solid substrate for filler. The product works by saturating the cellular structure that has been weakened by decay and polymerizing inside the wood. Think of it as liquid petrification that converts spongy wood into a hard substrate.
Use a plastic syringe to inject consolidant into pre drilled holes, working from the deepest areas outward. Fill each hole until liquid stops absorbing and begins pooling on the surface. The wood will drink consolidant rapidly at first, then slow as cells become saturated. Push the syringe plunger slowly and watch for liquid backing up. Apply liberally to all exposed surfaces with a brush, flooding any suspicious areas. The consolidant is thin and penetrates easily, so don’t worry about over application. Excess will drip off or evaporate as it cures.
Consolidant requires a minimum 24 hours to fully cure in moderate temperatures. Cool or humid conditions extend this time. The surface should feel hard and dry before proceeding, not tacky or soft. You can test by pressing your thumbnail into a treated area. Cured consolidant resists indentation. Applying heat with a hair dryer can accelerate drying if necessary, but natural curing produces better penetration and harder results.
Consolidant also functions as thinner for epoxy filler. Adding a few drops while mixing epoxy makes it easier to tool and smooth during application. This compatibility between products creates a chemical bond between the hardened wood substrate and the epoxy filler that follows.
Properly consolidated wood becomes significantly stronger than original material. The polymerized resin fills voids and bonds remaining cellulose fibers together. You can drive screws into consolidated wood, and it will hold without splitting or crumbling. This creates a foundation strong enough to support structural epoxy patches.
Filling with Two Part Epoxy
Two part epoxy fillers cure rock hard and can be shaped, drilled, and fastened like solid wood. These products consist of resin and hardener that chemically react when mixed. The resulting material is waterproof, rot proof, and harder than the surrounding wood.
Mix equal parts resin and hardener thoroughly until the color is completely uniform. Work in batches appropriate to the working time, which varies by product but typically ranges from 15 to 30 minutes. Mix only what you can apply before the epoxy begins to stiffen. Apply from bottom up to minimize air pockets, which create weak spots in the cured repair. Slightly overfill all cavities and damaged areas. You’ll sand away the excess later, and having too much material is better than discovering voids after the epoxy hardens.
Use a putty knife or scraper to roughly shape the epoxy while it’s still pliable. Press firmly to force material into corners and eliminate air bubbles. The epoxy should squeeze into all the irregular surfaces created when you removed rotted wood. Add consolidant as thinner if the mixture becomes too stiff to work. A few drops will restore workability without compromising strength.
Remember that larger masses cure faster due to the exothermic reaction. The chemical process generates heat. A thick application may become too stiff to work within 15 minutes, while a thin layer remains workable for 30 minutes. This seems counterintuitive but results from the chemistry of thermosetting plastics.
Multiple thin layers work better than one thick application for deep repairs. Apply a layer, allow it to partially cure until firm but not fully hard, then add the next layer. Each layer bonds to the previous one, building up the repair gradually. Trying to fill a deep cavity in one pour often traps air and creates uneven curing.
Most epoxies require 24 hours for full cure at room temperature. Cold weather extends this significantly. Cured epoxy can be sanded and shaped aggressively with coarse sandpaper or even a wood rasp. Properly applied epoxy creates repairs harder and more durable than original wood. The material is waterproof and immune to rot, so it will outlast the surrounding wood if moisture returns.
Sanding, Shaping, and Finishing Repaired Window Sills

Proper finishing is as important as the structural repair itself. The finish provides a moisture barrier that prevents water from reaching the wood and offers UV protection that prevents degradation of the epoxy. Without adequate finishing, repairs fail prematurely even when the structural work was done correctly.
Sanding technique matters. Begin with 80 grit sandpaper to remove excess epoxy and shape the repair. The epoxy will be rock hard and slow to sand, so use aggressive grit and apply firm pressure. Progress to 120 grit for smoothing once you’ve established the basic shape. Finish with 180 or 220 grit for a paint ready surface. Check frequently by running your hand over the area to detect imperfections. Your fingers will find bumps and ridges that your eyes miss. The repaired section should feel identical to the surrounding wood surface.
Apply exterior grade wood primer specifically formulated for epoxy and wood substrates. Not all primers bond well to epoxy, so verify the product label confirms compatibility. Brush primer into any remaining pores and surface irregularities. Allow full drying per manufacturer instructions, which typically ranges from 2 to 4 hours depending on temperature and humidity. Apply a second primer coat to bare wood areas if needed. The goal is complete coverage with no wood grain or epoxy visible through the primer.
Use exterior grade paint matching existing trim color. Thin, even coats perform better than one thick coat. Heavy paint application sags, drips, and takes days to fully cure. Two or three thin coats dry faster, look better, and provide superior protection. Allow proper drying between coats, typically 4 to 6 hours for latex paint. Light sanding with 220 grit between coats improves adhesion and smooths any texture.
Consider adding clear wood sealer over the final paint coat for maximum protection in high exposure locations. Sills facing south or west receive intense UV radiation and driving rain. The sealer creates an additional barrier that extends paint life and provides extra protection against moisture intrusion. Apply sealer after the final paint coat has cured for at least 48 hours.
Complete Sill Replacement: When Repair Isn’t Enough
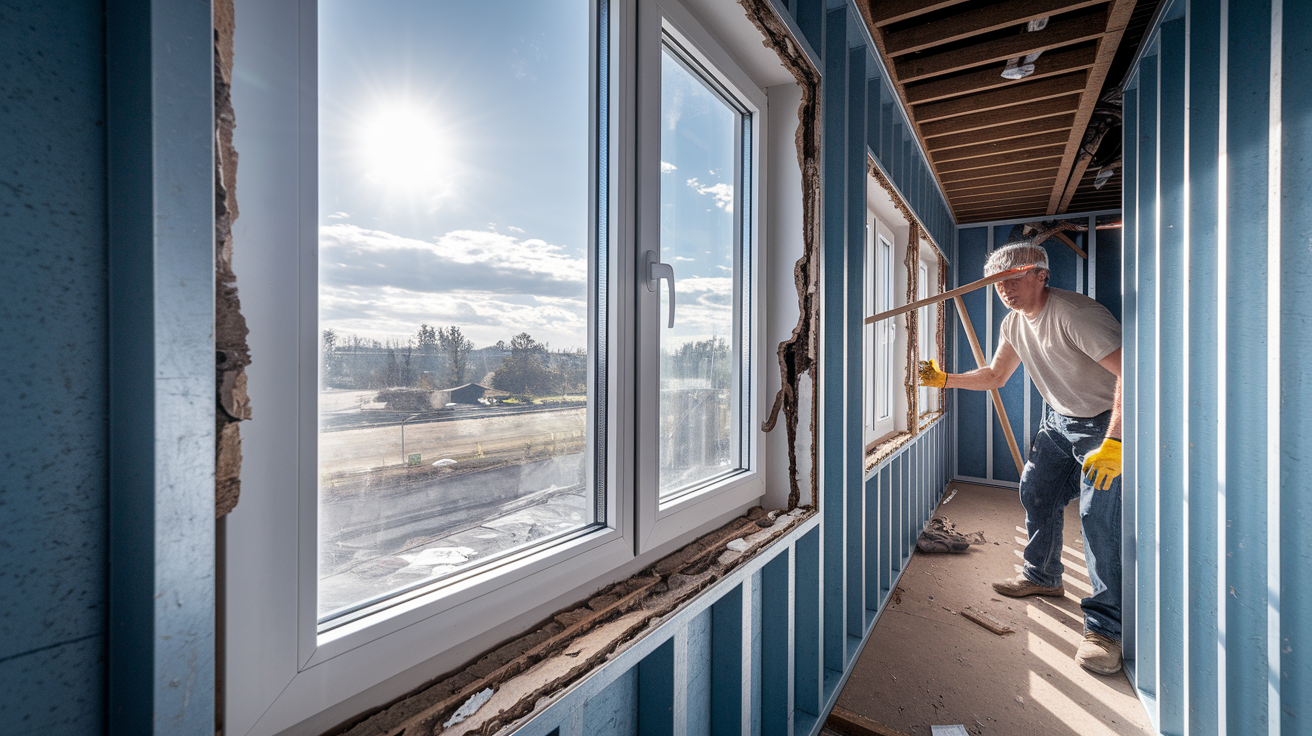
Extensive damage beyond 25% of sill area makes replacement more practical and cost effective than repair. At some point, you’re patching more epoxy than wood, and the repair becomes a multi day project that still leaves you with a compromised sill.
Replacement becomes necessary when rot extends into the window frame or wall framing underneath the sill. This indicates water has been infiltrating for years, and the damage has spread beyond the visible sill surface into structural elements. Structural weakness where the sill no longer supports the window weight adequately requires replacement regardless of rot percentage. Persistent moisture infiltration that will cause any repair to fail points toward replacement combined with proper flashing and drainage corrections. When multiple windows need attention, the efficiency of doing all the replacement work at once often justifies the larger project rather than serialized repairs.
The replacement process overview involves complete removal of the damaged sill, inspection and repair of underlying structure, installation of new rot resistant or composite sill material, proper flashing and sealing, and priming and painting. Each step requires precision because the sill forms the base of the window’s weather barrier. Mistakes create new leaks and repeat the rot cycle.
DIY versus professional considerations become significant for replacement. The work requires carpentry skills including precise cutting and fitting, understanding of window structure and weather barriers, and ability to maintain proper drainage slopes. Removing the old sill without damaging the window frame or wall requires finesse. Professional carpenters typically complete replacement in 2 to 4 hours per window because they have the specialized tools and experience to work efficiently. DIY replacement often takes 6 to 8 hours per window when you account for careful removal, multiple trips for materials, and learning curve mistakes.
Materials for replacement run $50 to $150 per sill depending on material choice and size. Professional installation adds $200 to $400 per window in most markets. But proper replacement eliminates recurring repair costs and provides a warranty that DIY work lacks. The labor cost seems high until you calculate your own time at even $25 per hour. Suddenly professional installation looks more reasonable.
Choosing Rot Resistant Materials for Sill Replacement
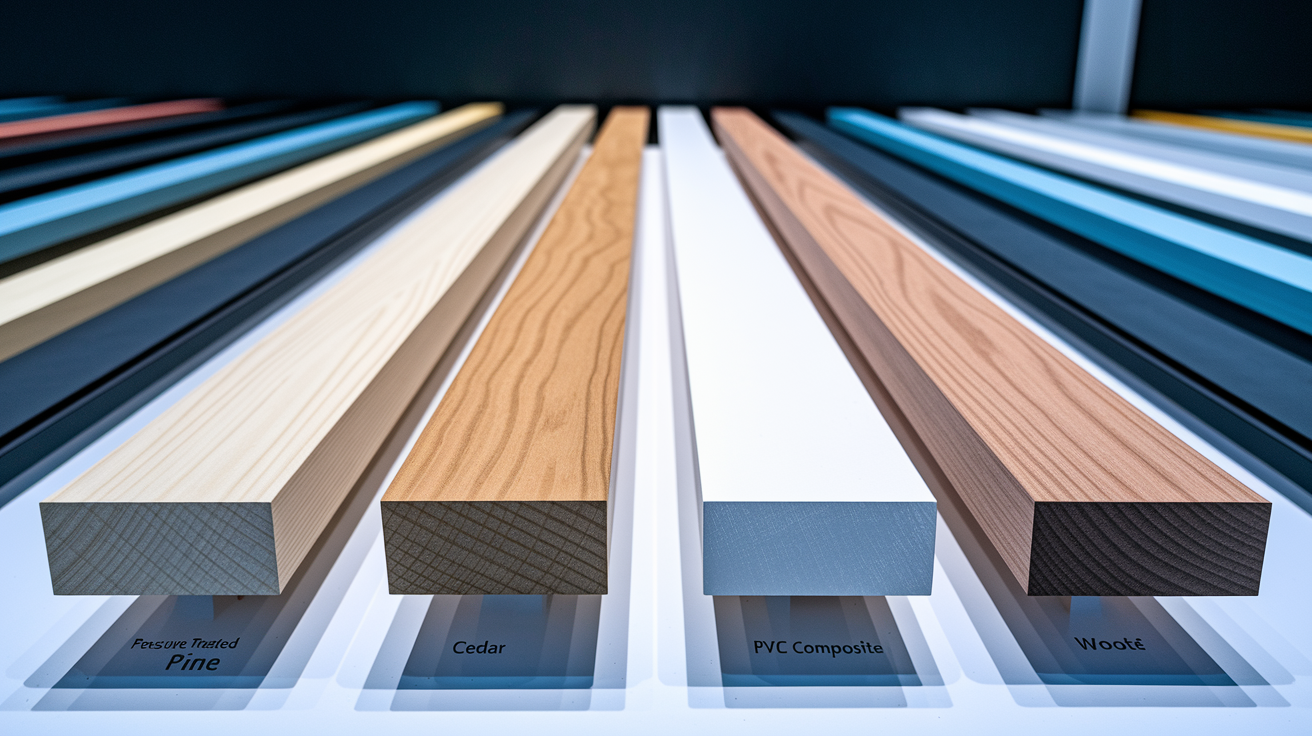
Material selection dramatically affects replacement lifespan and maintenance requirements. The wrong material in a high moisture location guarantees you’ll be doing this work again in 10 years. The right material can last 50+ years with minimal maintenance.
| Material Type | Rot Resistance | Typical Lifespan | Cost Level | Best Application |
|---|---|---|---|---|
| Pressure treated pine | High | 20 to 30 years | Low | Budget conscious exterior sills |
| Cedar | Moderate to High | 15 to 25 years | Moderate | Traditional appearance, natural resistance |
| Redwood | High | 25 to 35 years | High | Premium natural wood option |
| PVC/composite | Excellent | 30 to 50 years | Moderate to High | Zero maintenance, high moisture areas |
| Marine grade plywood | Moderate | 15 to 20 years | Moderate | Hidden sills under metal cladding |
| Accoya engineered wood | Excellent | 50+ years | High | Maximum performance with wood appearance |
| Aluminum wrapped wood | Excellent | 30 to 40 years | High | Maintenance free exterior with wood interior |
Rot resistant doesn’t mean rot proof. All materials still require proper installation, flashing, and periodic maintenance to achieve maximum lifespan. The best material improperly installed will fail faster than average material installed correctly. Focus on getting the installation details right, then choose the best material your budget allows.
Weatherproofing and Moisture Prevention for Window Sills
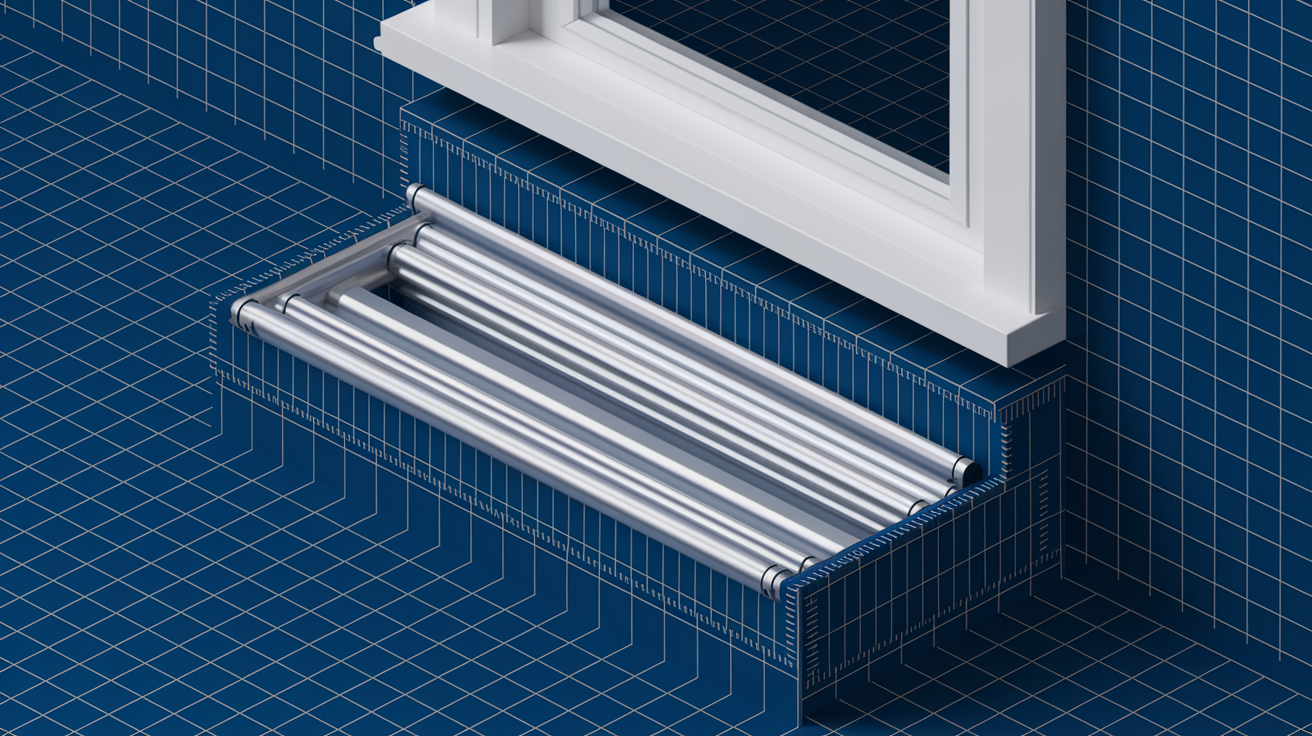
Proper weatherproofing extends sill life by decades and prevents the conditions that cause dry rot. The small effort of installing correct flashing and maintaining caulk eliminates expensive repair work and preserves your windows.
Window flashing installation creates overlapping layers that direct water away from the sill like shingles on a roof. Each piece laps over the one below, so water following gravity can’t flow upward beneath the barrier. Head flashing over the window top includes a drip edge that prevents water from running down the face and reaching the sill. This small metal or vinyl piece creates an overhang that throws water clear of the window. Sill pan flashing underneath the window forms a trough that directs any infiltration water back outside rather than into the wall cavity. The pan must have an outward slope and end dams that prevent water from running sideways into the framing.
Caulking and sealants fill the gaps where materials meet. Use high quality exterior grade polyurethane or silicone caulk that remains flexible through temperature cycles. Cheap acrylic latex caulk dries hard and cracks within 2 to 3 years. Apply a continuous bead where the sill meets the window frame and where the sill meets the wall. Tool the bead smooth with a wet finger or caulk tool to create a weather tight seal that won’t trap water. Inspect annually for cracks or separation where temperature cycling and UV exposure degrade the material.
Drip caps and overhangs provide protection above the window. A metal or vinyl drip cap installed above the window creates an overhang that deflects rain away from the sill. A minimum 2 inch overhang provides meaningful protection. Anything less just slows the water down without redirecting it. Roof overhangs or awnings offer additional protection for severe exposure locations like western walls that take driving rain. Windows on protected elevations or under roof overhangs rarely develop rot problems even with basic maintenance.
Exterior sills must slope outward a minimum 15 degrees to shed water quickly rather than allowing pooling. Water sitting on a horizontal surface finds every tiny gap and crack to infiltrate. A sloped surface sheds water before it can cause problems. Verify this slope during installation or repair by placing a level across the sill. The bubble should be well off center showing significant slope.
Preventing Future Dry Rot Through Maintenance and Inspection
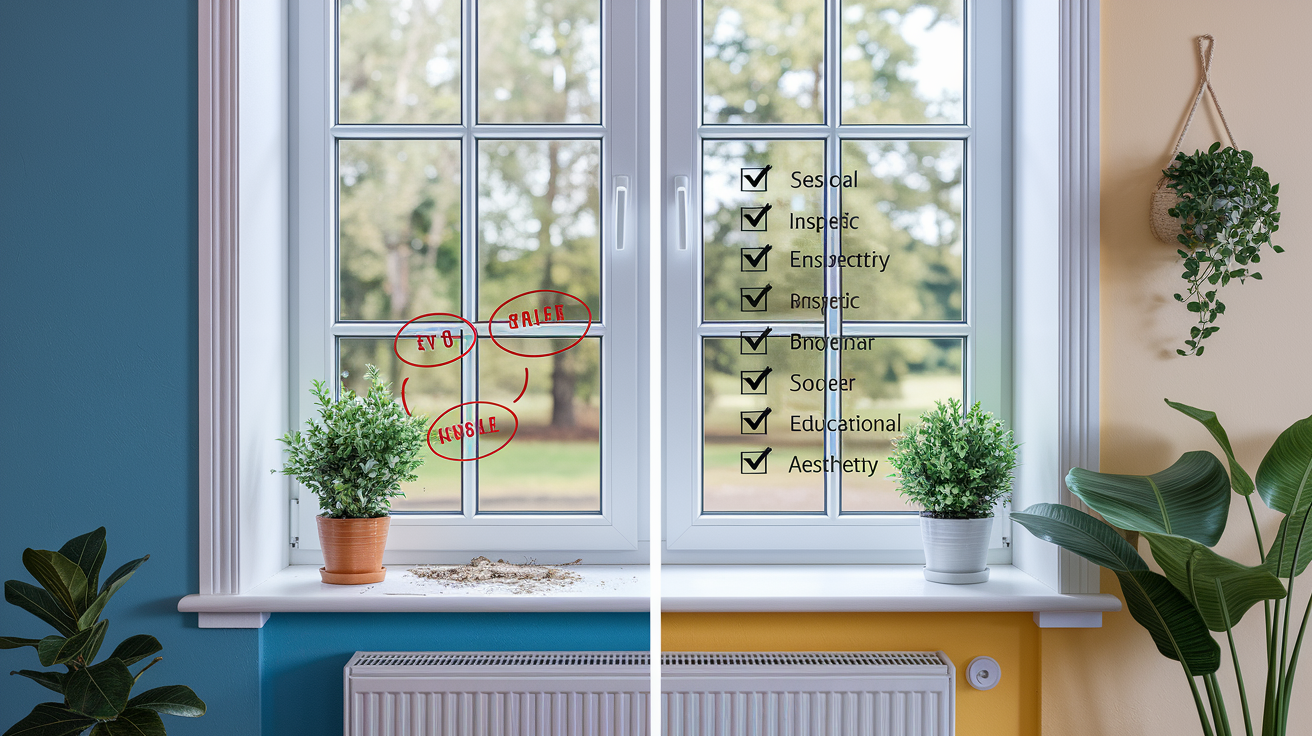
Consistent inspection and minor maintenance prevent expensive repairs and extend window sill life indefinitely. The work takes less than an hour twice per year but catches small problems before they become major projects.
Seasonal maintenance checklist:
- Spring: Inspect all window sills for winter damage, check caulking integrity, clean debris from sills
- Spring: Clean gutters and verify downspouts direct water at least 6 feet from foundation
- Summer: Check for condensation patterns on interior sills, improve ventilation in problem areas
- Summer: Repaint any areas where paint has failed or worn thin
- Fall: Re inspect caulking before winter, apply fresh bead where needed
- Fall: Final gutter cleaning before wet season
- Winter: Wipe interior sills regularly to remove condensation buildup
- Year round: Address any new water stains or soft spots immediately rather than waiting
Interior humidity control prevents condensation damage that destroys sills from the inside. Maintain indoor relative humidity below 50% using dehumidifiers if necessary, especially during heating season when warm humid indoor air contacts cold glass. Ensure bathroom and kitchen exhaust fans vent outside and are used during moisture producing activities. Improve whole house ventilation with trickle vents or mechanical ventilation systems that provide controlled air exchange without losing heat.
Early detection during annual inspections allows small problems to be fixed with minimal effort before they become expensive replacements. A soft spot the size of a quarter can be treated with consolidant in 30 minutes. That same spot ignored for two years becomes a full sill replacement requiring an entire weekend and professional help.
Cost Analysis: DIY Repair vs Professional Replacement
Cost considerations include materials, time, tools, and long term durability. The cheapest option today may become expensive if it fails prematurely and requires rework.
| Repair Option | Material Cost | Labor Cost (Pro) | Time Required (DIY) | Skill Level | Expected Longevity |
|---|---|---|---|---|---|
| Minor epoxy repair | $40 to $80 | $150 to $250 | 4 to 6 hours | Beginner to Intermediate | 10 to 20 years |
| Moderate epoxy repair | $60 to $120 | $200 to $350 | 6 to 10 hours | Intermediate | 10 to 15 years |
| Partial sill replacement | $80 to $150 | $250 to $400 | 8 to 12 hours | Intermediate to Advanced | 15 to 30 years |
| Complete sill replacement (wood) | $100 to $200 | $300 to $500 | 10 to 16 hours | Advanced | 20 to 30 years |
| Complete replacement (composite) | $150 to $300 | $350 to $600 | 10 to 16 hours | Advanced | 30 to 50 years |
Hidden costs affect DIY projects. You may need to invest $50 to $150 in specialized tools if you don’t already own them. The learning curve results in material waste or rework that adds to material costs. Mistakes can create moisture problems leading to more expensive repairs later, and those costs are difficult to predict but real. A botched flashing installation discovered during the next repair might add $500 to what should have been a $200 project.
Professional work includes warranty coverage, proper moisture management expertise from years of experience, and faster completion that gets your home back to normal quickly. Most contractors warranty repair work for at least one year and replacement work for 2 to 5 years. DIY provides learning experience you can apply to future projects, flexibility in scheduling that allows working around your availability, and significant labor cost savings when tackling multiple windows.
Combining approaches often provides the best cost to value ratio. Handle minor repairs DIY where the stakes are low and mistakes are easily corrected. Bring in professional help for extensive damage where proper execution matters for structural integrity and long term performance. This hybrid approach saves money while ensuring critical work is done right.
Safety Precautions and Working Conditions for Sill Repair
Dry rot repairs involve exposure to fungal spores, wood dust, and chemical fumes that require proper protection. These hazards are manageable with appropriate equipment and workspace preparation, but they can’t be ignored.
Required safety equipment:
- N95 or P100 respirator mask to filter fungal spores and chemical fumes
- Chemical resistant gloves (nitrile or neoprene) for handling consolidants and epoxies
- Safety glasses or goggles to protect from wood chips and liquid splashes
- Long sleeves and pants to minimize skin contact with chemicals
- Adequate ventilation (open windows, fans) when working indoors
- Drop cloths to protect surrounding areas from spills and drips
Workspace preparation matters. Ensure adequate lighting to identify all damage, using supplemental work lights if necessary to see into corners and under sills. Work from a stable ladder or scaffold when accessing upper windows. Reaching too far from an unstable position causes falls. Protect interior flooring and furnishings from chemical drips by taping plastic sheeting over surfaces below the work area. Have cleanup materials ready before opening chemical containers so spills can be addressed immediately.
Dried epoxy and consolidant products are inert and safe after curing. But uncured materials require careful handling and disposal according to manufacturer instructions and local regulations. Most jurisdictions classify liquid epoxy waste as household hazardous waste requiring special disposal. Never pour chemicals down drains or dispose of them in regular trash where they can leak.
Common Mistakes to Avoid During Window Sill Rot Repair
Most repair failures result from rushed preparation or ignoring moisture sources rather than product failure. The materials work when applied correctly to properly prepared surfaces, but they can’t overcome fundamental errors in approach.
Mistakes to avoid:
- Starting repair before identifying and fixing the moisture source causing rot
- Using automotive body filler (Bondo) which traps moisture and accelerates decay
- Beginning repair on wood with moisture content above 17%
- Failing to remove all soft, compromised wood before applying consolidant
- Under drilling test holes, missing hidden decay deeper in the wood
- Rushing consolidant drying time, applying filler before complete cure
- Creating air pockets by applying thick epoxy layers instead of building up gradually
- Skipping primer application before paint, reducing adhesion and protection
- Using interior grade products on exterior sills
The most critical mistake is repairing damaged wood without addressing the water infiltration cause. This guarantees repair failure within 1 to 3 years and often creates worse damage as moisture becomes trapped behind the repair. The epoxy forms a waterproof barrier that prevents the wood behind it from drying. New water entering through the unchanged leak path saturates the wood and has nowhere to go. Rot spreads faster under these conditions than it did originally.
Taking extra time for proper preparation, drying, and curing yields repairs that last decades rather than months. Consolidant rushed to 12 hour cure instead of the recommended 24 hours doesn’t fully harden and remains slightly soft. Epoxy applied to that soft substrate never develops full strength. The repair feels solid initially but fails within a year as the undertreated wood continues decaying.
Interior vs Exterior Window Sill Repair Considerations
Interior and exterior sills face different moisture sources and require different protective strategies, though basic repair techniques remain similar. Understanding these differences helps you select appropriate products and finishing approaches.
Exterior sills are exposed to direct rain, UV radiation, and temperature extremes that cycle from below freezing to above 100°F. They require weather resistant consolidants and epoxies formulated to cure in these conditions without degrading. All finishing products must be exterior grade with UV inhibitors and flexibility to handle expansion and contraction. The sill surface must have proper slope for water drainage built into the repair. Additional protection like drip caps and overhangs significantly extends repair life in severe exposure conditions.
Interior sills face condensation as the primary threat rather than direct water exposure. Warm humid indoor air contacts cold glass surfaces, and the resulting condensation runs down and pools on the sill. You can use a wider range of finishing products including interior paints and stains that offer better appearance options. Repair success depends heavily on controlling indoor humidity levels, which may require addressing ventilation inadequacies or installing dehumidification. Damage often indicates the window itself has inadequate insulation or failed seals between glass panes, requiring separate attention beyond just repairing the damaged sill.
Some windows have both interior and exterior sills (trim pieces), and severe rot often affects both sides. Water entering through failed exterior flashing travels through the sill and damages interior trim as well. Addressing only one side leaves rot in place that continues spreading. Coordinated repair from inside and outside addresses the full moisture pathway and prevents the hidden damage from undermining your visible repairs.
Building Codes, Permits, and Energy Efficiency Considerations
Minor repairs typically don’t require permits, but complete sill replacement may trigger permit requirements depending on local jurisdiction. The requirements become more likely when structural framing is affected or window removal is necessary to access the sill properly.
Building code considerations affect repair and replacement work. Repaired or replaced sills must maintain structural support for the window unit according to load requirements. Bedroom windows must preserve required egress dimensions for emergency escape even after repair work changes sill dimensions. Fire rated assemblies in multi family buildings require maintaining specific construction details where repairs might compromise ratings. Weather barrier continuity must meet current energy codes even if the original installation was grandfathered under older standards.
Energy efficiency opportunities arise during sill repair or replacement. The work provides access to add or upgrade insulation around the window rough opening where gaps often exist. Install or improve air sealing between sill and framing using spray foam or backer rod with caulk. Address thermal bridging issues where cold sill surfaces create condensation that contributes to rot, possibly by adding thermal breaks or upgrading to better performing sill materials.
Consultation with your local building department is worthwhile for projects involving structural repairs or multiple window replacements. A quick phone call clarifies whether permits are needed and what inspection requirements apply. Permitted work provides documentation valuable for future home sales, demonstrating that repairs were done to code standards rather than quick patches that might concern buyers or their inspectors.
Final Words
Soft spongy wood and peeling paint mean it’s time to act, not wait.
Window sill dry rot repair works when you remove all compromised material, consolidate what remains, and rebuild with two-part epoxy that cures harder than the original wood.
But the repair only lasts if you fix the moisture source first—failed flashing, missing caulk, or trapped condensation.
Skip that step and you’re back to square one in two years.
Done right, with proper prep and quality materials, a repaired sill outlasts the wood around it and saves you the cost and hassle of full replacement.
FAQ
Can you repair a rotted window sill?
You can repair a rotted window sill when damage affects less than 25% of the sill area and the wood’s moisture content is below 17%. The repair process involves removing all compromised wood, applying penetrating consolidant to harden remaining fibers, filling cavities with two-part epoxy, and finishing with exterior-grade primer and paint.
How much does it cost to repair dry rot windowsill?
Dry rot windowsill repair costs $40-120 for DIY materials including consolidant and epoxy filler, or $150-350 if hiring a professional for minor to moderate repairs. Complete sill replacement ranges from $100-300 in materials plus $300-600 for professional installation, depending on whether you choose wood or composite materials.
Can dry rot wood be repaired?
Dry rot wood can be repaired successfully when damage is limited and the moisture source is eliminated first. The repair uses penetrating consolidant to chemically harden compromised wood fibers, followed by two-part epoxy filler that cures harder than original wood, creating a durable repair lasting 10-20 years.
Can flex seal be used on rotted wood?
Flex seal should not be used on rotted wood because it creates a moisture barrier that traps existing dampness inside, accelerating decay rather than stopping it. Proper repairs require removing rotted material, applying penetrating consolidant, and filling with breathable two-part epoxy systems designed specifically for structural wood restoration.
When should you replace instead of repair a window sill?
You should replace instead of repair a window sill when rot affects more than 25% of the sill area, extends into the window frame or wall framing, or compromises structural integrity to the point where the sill can’t adequately support the window weight and maintain security.
What causes window sill dry rot?
Window sill dry rot is caused by persistent moisture from failed caulking and sealants, improper or damaged window flashing, condensation from indoor humidity meeting cold glass surfaces, clogged gutters directing water onto sills, and aging wood losing its natural protective properties over time.
How long does window sill repair take?
Window sill repair takes 4-6 hours of active work for minor damage and 8-12 hours for moderate repairs, spread across 3-4 days to allow proper drying and curing time. Consolidant requires minimum 24 hours to cure before applying filler, and epoxy needs another 24 hours before sanding and finishing.
What moisture content is safe to begin window sill repairs?
Safe moisture content to begin window sill repairs is below 17%, measured with a moisture meter. Wood above this threshold must be dried naturally under tented protection or carefully with heat guns before applying consolidant or epoxy, or the repair will trap moisture and fail within months.
Do you need permits to repair a window sill?
You typically don’t need permits to repair a window sill when only replacing damaged wood without affecting structural framing or removing the window unit. Complete sill replacement involving structural work or window removal may require permits depending on local jurisdiction, especially for egress windows in bedrooms.
What’s the best material for replacing rotted window sills?
The best materials for replacing rotted window sills are pressure-treated wood for budget-conscious projects, PVC or composite materials for zero-maintenance longevity, or Accoya engineered wood for maximum performance with traditional wood appearance. Each offers 20-50 year lifespans when properly installed with correct flashing and drainage slope.
How do you prevent window sill rot?
You prevent window sill rot by maintaining intact caulking around window perimeters, ensuring proper flashing directs water away from sills, cleaning gutters twice yearly, controlling indoor humidity below 50%, and inspecting sills annually to catch soft spots early before they require extensive repair.
Can you paint over epoxy-repaired window sills?
You can paint over epoxy-repaired window sills after sanding smooth with 180-220 grit sandpaper and applying exterior-grade primer formulated for both wood and epoxy substrates. Cured epoxy accepts paint readily, and properly finished repairs are indistinguishable from original wood while providing superior moisture resistance.