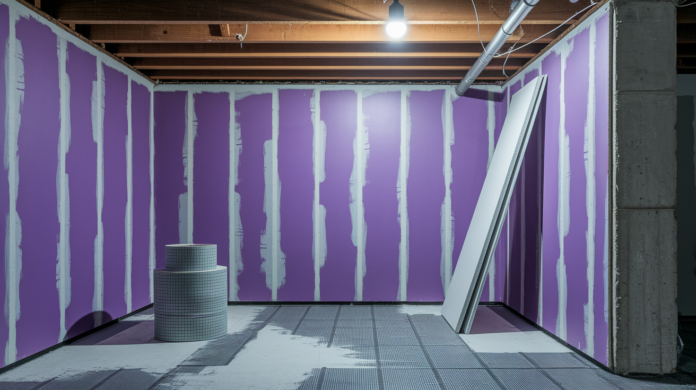

Most contractors still hang standard drywall in basements and wonder why they’re back fixing mold damage three years later. The paper facing on regular drywall is basically a buffet for mold spores the moment basement humidity creeps above 60 percent, which happens in nearly every below-grade space at some point. Mold-resistant drywall costs about twice as much up front, but it eliminates the organic material mold needs to colonize and saves you from tearing out walls later. This guide breaks down fiberglass-faced panels versus purple board products, when cement board makes more sense, and how to calculate costs so you only use premium materials where moisture risk is actually high.
Top Mold-Resistant Drywall Products and Brand Recommendations
For basements, you’re looking at fiberglass-faced panels or purple board products that combine moisture and mold resistance. Both work. But fiberglass-faced versions give you the most protection because they eliminate all organic materials mold can grab onto.
DensArmor Plus is the most recognized fiberglass-faced panel. It’s got a gypsum core wrapped in fiberglass mat on both sides and treated to resist moisture. No paper anywhere for mold to colonize, which is why it consistently outperforms other options in below-grade fungal resistance testing.
Georgia-Pacific ToughRock and National Gypsum XP also offer fiberglass-faced options with similar construction and performance characteristics. Warranty terms and moisture handling capacity vary slightly by manufacturer though.
Purple board products from USG Sheetrock and other manufacturers combine a moisture-resistant treated core with specially coated paper facing that resists mold growth. Good protection at a slightly lower price point than fiberglass-faced panels.
Performance differences show up in extreme conditions. Fiberglass-faced panels handle direct moisture contact and high humidity better than purple board because there’s zero organic material. Purple board works well in moderately damp basements with good moisture control.
Warranty coverage ranges from 3 years on standard purple board products to 10+ years on premium fiberglass-faced panels for mold resistance. Most exclude flood damage and require proper installation with functioning moisture control systems though.
Fungal resistance ratings from independent testing show fiberglass-faced panels scoring highest. They typically show no mold growth after 28 days in 90% humidity at 75°F. Purple board products score well but may show trace surface colonization under the same test conditions. In real basements with humidity kept below 60% and no standing water, both product types perform reliably for decades.
The technical difference is straightforward. Fiberglass-faced panels like DensArmor Plus eliminate the food source entirely. Mold spores land on glass fiber and treated gypsum with nothing to eat. Purple board reduces the risk by treating paper facing and the core with antimicrobial compounds, but paper is still organic material. If you’re finishing a basement that’s had water issues or sits in high water table areas, the fiberglass-faced version is worth the premium.
No product is completely waterproof or mold-proof. Direct water contact will damage any gypsum-based panel eventually. But for typical basement moisture (humidity, condensation, occasional dampness), fiberglass-faced panels demonstrate superior fungal resistance because they remove what mold needs to establish itself. Purple board is a solid choice when you’ve addressed moisture sources and just need protection against normal basement humidity fluctuations.
Cost Analysis and Material Pricing for Basement Drywall Projects

Mold-resistant drywall runs 30 to 50 percent more than standard sheets. A 4×8 sheet of standard ½-inch drywall costs $10 to $15 depending on your market. The same size in purple board runs $15 to $20. Fiberglass-faced panels like DensArmor Plus cost $20 to $25 per sheet. For a 600-square-foot basement (roughly 38 sheets at 4×8), that’s $380 to $570 in standard drywall, $570 to $760 in purple board, or $760 to $950 in fiberglass-faced product. Just for the panels before fasteners, tape, mud, and labor.
Whether to use mold-resistant material on every basement wall depends on your moisture situation. Exterior foundation walls that contact soil need it. Interior partition walls dividing finished basement rooms probably don’t if your basement stays dry and you’ve got humidity control. Calculate square footage for exterior walls only and you might cut material costs by 30 to 40 percent while still protecting the vulnerable surfaces. Labor costs typically don’t change much. Installers charge the same rate whether it’s standard or mold-resistant, though some add a small premium for fiberglass-faced panels that dull cutting blades faster.
Material price differences vary by product. Purple board costs 50% more than standard, fiberglass-faced costs 100% more, but both last decades longer in moisture-prone basements compared to standard drywall that may need replacement within 5 to 10 years if mold takes hold.
Square footage calculation requires measuring linear feet of exterior walls, multiplying by ceiling height, subtracting door and window openings, then dividing by 32 (coverage per 4×8 sheet) and adding 10% waste factor.
Labor cost premiums are minimal for mold-resistant drywall installation, around $2 to $4 per sheet for cutting and hanging. But if you need professional mold remediation before installation, that’s $500 to $6,000 depending on contamination extent.
Cost savings from targeted application mean using mold-resistant drywall only on exterior concrete walls and around plumbing while using standard drywall on interior partitions in dry areas. Easily saves $200 to $400 on typical basement projects.
Long-term cost benefits include avoiding $3,000 to $10,000 mold remediation and drywall replacement if standard drywall fails, plus maintaining indoor air quality and avoiding health issues.
Resale value impact is indirect. Finished basements increase home value 60 to 70 percent of project cost, and properly moisture-protected basements avoid deal-killing inspection failures that standard drywall installations risk in damp conditions.
Technical Differences Between Mold-Resistant and Standard Drywall

Standard drywall uses paper facing on both sides of a gypsum core. Paper made from wood pulp, which is an organic material mold loves. When moisture contacts that paper, mold spores in your basement air (and they’re always there) land, germinate, and colonize the surface. Mold-resistant drywall eliminates or treats that organic facing. Fiberglass-faced versions wrap the gypsum core in woven glass fiber mat instead of paper. An inorganic material mold can’t digest. Wax-treated paper versions coat the facing to repel moisture and add antimicrobial compounds, making the paper less hospitable but not completely mold-proof.
Green board is not the same thing and this matters for basements. Green board has a wax coating on the front paper facing that resists moisture. Useful for bathroom walls above grade where you get some humidity and occasional splashing. But the back side is still regular paper, and the core isn’t treated. In a basement where moisture can wick through concrete and contact the back of the drywall, or where humidity is consistently high, that back paper becomes mold food. Green board was never engineered for below-grade applications. It’s moisture-resistant in one direction, not mold-resistant in all directions.
Basements specifically need true mold-resistant products because they’re below grade. Soil against your foundation stays cool year-round, concrete wicks moisture, and warm interior air hitting those cool surfaces creates condensation. Sometimes visible on pipes and windows, sometimes invisible inside your wall assembly where humid air contacts cold concrete behind the drywall. Dark, damp, 60 to 75°F conditions are ideal for mold growth. Even with a finished basement that feels dry, relative humidity in that wall cavity can hit 70 to 80 percent.
Antimicrobial properties in treated gypsum cores add a second layer of defense. Manufacturers mix fungicides and mold inhibitors into the gypsum during production. If moisture does penetrate the facing, the core itself resists colonization. Combined moisture and mold-resistant products (purple board and similar) give you treated cores plus treated or wax-coated facings, which is why most pros now skip green board entirely for basement work. The treatment isn’t permanent and can degrade after years of moisture exposure, but it buys you time and adds protection standard drywall can’t match.
Cement Board and Alternative Materials vs. Mold-Resistant Drywall
Cement board is completely waterproof. It’s cement and fiber mesh with no gypsum, no paper, nothing organic. You can submerge it, dry it out, and hang it. For basement areas with regular direct water contact (behind a basement bathroom shower, around utility sinks, anywhere you expect standing water or splashing), cement board outperforms even the best mold-resistant drywall. It’s also far more impact-resistant if you’re finishing a workshop area or mudroom where walls take abuse. The tradeoffs are cost ($25 to $35 per sheet), weight (roughly twice as heavy as drywall), and installation difficulty. Requires carbide-tipped tools to cut and score, and it’s harder to finish smooth.
Other alternatives include DensGlass exterior sheathing repurposed for interior basement applications in extreme moisture conditions, fiber-cement panels similar to cement board but slightly easier to work with, and waterproof membrane systems like Kerdi board primarily used for shower enclosures but adaptable to high-risk basement zones. All share the same benefits: complete moisture immunity, excellent impact resistance, mold-proof construction. And the same drawbacks: higher material costs, specialized installation skills, and more labor time than standard drywall procedures.
Choose cement board or similar alternatives over mold-resistant drywall when you’re dealing with more than humidity control can fix. If your basement has a history of flooding and you’re installing a flood vent system but finishing anyway, cement board on the bottom 4 feet makes sense. You can hose it off after a flood, dry it out, and repaint. If you’ve got a basement bathroom and you’re tiling walls, cement board is the required substrate behind that tile whether it’s code-required or not. If your basement is consistently above 70% relative humidity even with dehumidification and you can’t fix the source, cement board eliminates the organic material mold needs. For most basements with functional moisture control, the cost and installation hassle aren’t worth it. Mold-resistant drywall handles the job. But in extreme conditions, cement board is insurance that mold-resistant drywall can’t match.
Installation Techniques and Framing Best Practices for Basement Applications
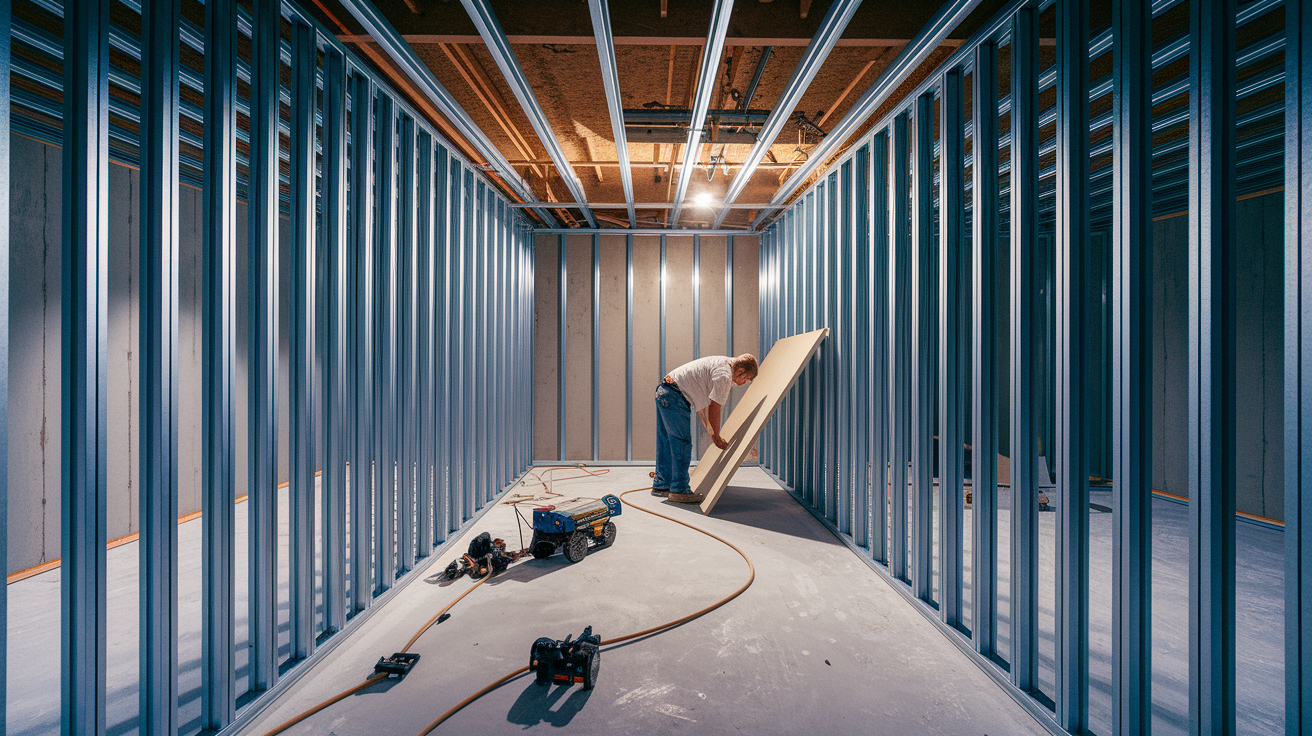
Mold-resistant drywall installs like standard sheets, but basement conditions require modifications to framing and substrate preparation to prevent moisture problems that even the best panels can’t overcome.
Framing material selection happens before you touch drywall. Use galvanized steel studs instead of wood whenever possible. Steel doesn’t rot, doesn’t absorb moisture, and eliminates organic material against your concrete foundation. If you’re framing directly against concrete, install a capillary break between the bottom track and the floor using self-adhering flashing membrane or closed-cell foam sill seal. This prevents moisture wicking from concrete up into your wall assembly (capillary action, where water climbs through tiny gaps in porous materials). If you’re using wood framing, use pressure-treated lumber rated for ground contact on any plate that touches concrete, and still install that capillary break. For furring strip applications directly against concrete walls, use metal hat channel or treated wood strips with a drainage gap behind. If moisture gets between concrete and drywall, it needs somewhere to dry. Space studs or furring at 16 inches on-center for ½-inch drywall, 24 inches for ⅝-inch panels. Proper framing creates airflow pathways and prevents moisture trapping, which is why cutting corners here ruins even premium drywall installations.
Test concrete for moisture before framing by taping 2×2 foot plastic sheets to the floor and walls for 24 hours. If you see condensation under the plastic or the concrete darkens, you’ve got active moisture movement that needs to be fixed before you frame or install drywall.
Measure and cut panels starting from the ceiling down, scoring the face with a utility knife, snapping backward, then cutting the back paper. Fiberglass-faced panels dull blades fast, so change often and use firm pressure.
Fasten to studs with drywall screws spaced 8 inches on-center on ceilings, 12 inches on walls for ½-inch panels, driving screws just below flush without breaking the facing. Fiberglass mat won’t tear like paper but overdriving still crushes the gypsum core.
Use fiberglass mesh tape on all seams instead of paper tape. Paper tape reintroduces organic material at every joint, which defeats the purpose of mold-resistant panels.
Apply joint compound formulated for moisture-prone areas (check label for mold resistance), feathering edges 8 to 10 inches beyond the tape in three coats. Sand between coats once fully dry, which takes longer in humid basements than upstairs rooms.
Integrate vapor barriers if required by code or existing wall design, typically positioning 6-mil poly between insulation and drywall on exterior walls only. Interior walls don’t need vapor barriers and adding them in the wrong location traps moisture.
Prep for paint by wiping down finished surfaces to remove dust, priming with a moisture-resistant primer that bonds to fiberglass or treated surfaces, and checking humidity is below 60% before painting.
Address moisture sources before closing walls. If water is actively seeping through concrete, no drywall will last, so seal foundation cracks, fix grading outside, and confirm sump pump operation first.
Common DIY mistakes include skipping the capillary break at bottom plates. Moisture wicks up from concrete into framing, then into drywall edges, causing mold behind trim within two years. Another is installing drywall before concrete is fully cured in new construction. New concrete releases moisture for months, and closing walls too soon traps it. Test moisture before you start, and if you see active water intrusion or efflorescence (white powdery deposits on concrete), stop and fix the source. Hire a professional if you’re dealing with chronic water problems, structural framing against foundation walls you’re not sure how to flash, or if you’ve never hung drywall. Mistakes on regular drywall waste materials, mistakes on premium mold-resistant products waste money.
Comprehensive Moisture Control Strategy for Basement Drywall Success

Mold-resistant drywall is one component in a system, not a fix by itself. You could hang the best fiberglass-faced panels made and still grow mold if water pours through foundation cracks or humidity stays above 70%. Address moisture sources, control humidity, and maintain ventilation. The drywall resists mold, but it can’t stop water intrusion or remove humid air.
| Moisture Issue | Prevention Solution | Implementation Timing |
|---|---|---|
| Foundation cracks allowing water intrusion | Seal with hydraulic cement or epoxy injection, apply waterproof coating to exterior if accessible | Before framing—water penetration ruins any wall assembly |
| Groundwater seepage through floor or walls | Install interior drain tile and sump pump system, apply waterproof membrane to walls | Before finishing—groundwater pressure is constant and sealants alone won’t stop it |
| Condensation on cold surfaces | Insulate foundation walls, wrap cold water pipes, install vapor barriers correctly | During framing—insulation stops warm air from hitting cold concrete |
| High ambient humidity above 60% | Install permanent dehumidifier sized for space (30-70 pint capacity typical), run continuously during humid months | Before and after drywall installation—ongoing maintenance requirement |
| Poor surface drainage directing water toward foundation | Regrade soil to slope away from house (6 inches drop over 10 feet), extend downspouts 6+ feet from foundation | Before finishing—exterior water management prevents interior problems |
| Inadequate ventilation trapping humid air | Install exhaust fans in bathroom and laundry areas, add mechanical ventilation or integrate with HVAC | During framing and electrical rough-in—mechanical ventilation is often code-required |
Before you install any drywall, fix water intrusion. Basement Waterproofing Essentials covers crack sealing with polyurethane or epoxy sealants designed for concrete (not general-purpose caulk, which fails under hydrostatic pressure), applying waterproof coatings like Drylok or similar products to bare concrete before framing, installing sump pumps in low spots if groundwater is an issue, and correcting exterior drainage problems with proper grading and downspout extensions. If you skip these steps and water continues entering after you finish walls, you’ll tear out new drywall to fix what you should have addressed first.
Ventilation and dehumidification run continuously after installation. Basements need mechanical air movement because natural ventilation is minimal. Warm air rises, so humid air settles and stays. Install exhaust fans in bathrooms rated for continuous operation (3 to 4 CFM per square foot of floor area), upgrade HVAC to include basement zones if possible, and size dehumidifiers based on space volume and moisture load (30-pint units for 500 square feet in moderately damp conditions, 50-70 pint for larger or very damp spaces). Position dehumidifiers centrally with clearance for airflow, run them year-round to maintain 40 to 50% relative humidity, and expect to empty collection buckets daily or plumb to a drain. Keeping humidity below 50% is non-negotiable. Mold-resistant drywall slows colonization but doesn’t prevent it above 60% humidity over time.
Monitor humidity continuously with digital hygrometers placed at multiple locations. Humidity varies by zone, and you need to catch problems early before condensation forms on surfaces.
Maintain dehumidifier operation by cleaning filters monthly, replacing them annually, and descaling coils if you’re in hard water areas. Units lose 20 to 30% efficiency when dirty.
Insulate cold water pipes with foam pipe sleeves to eliminate condensation drips that contribute to localized moisture problems even when ambient humidity is controlled.
Inspect quarterly for water stains on drywall near floor level, musty odors indicating hidden moisture, or efflorescence appearing on exposed concrete. These signal moisture control system failure.
Clean surfaces with damp cloths only when needed. Excessive water on mold-resistant drywall defeats the purpose, and harsh cleaners can remove antimicrobial treatments from treated surfaces.
Adjust ventilation seasonally by increasing runtime during summer months when humidity peaks and reducing in winter when dry air dominates, but never shut systems off completely.
Test moisture annually in high-risk areas using pin-type or pinless meters on drywall surfaces, especially near floor level on exterior walls. Readings above 16% indicate excessive moisture.
Early warning signs include musty odors that smell like damp soil or wet cardboard (indicating active mold growth somewhere), efflorescence reappearing on concrete near the wall base (showing water is still moving through foundation), condensation on basement windows or cold water pipes (humidity is too high even if drywall looks dry), and water stains appearing on drywall near floor or ceiling joints. Document these with photos and moisture readings for warranty claims if you installed premium products, because manufacturers typically require proof of proper moisture control. Catching problems at the first sign, before visible mold appears, is when mold-resistant drywall’s benefits are most clear. The panels slow colonization long enough for you to notice and fix the moisture source, where standard drywall would already be supporting active growth.
When Mold-Resistant Basement Drywall Is Necessary vs. Standard Options
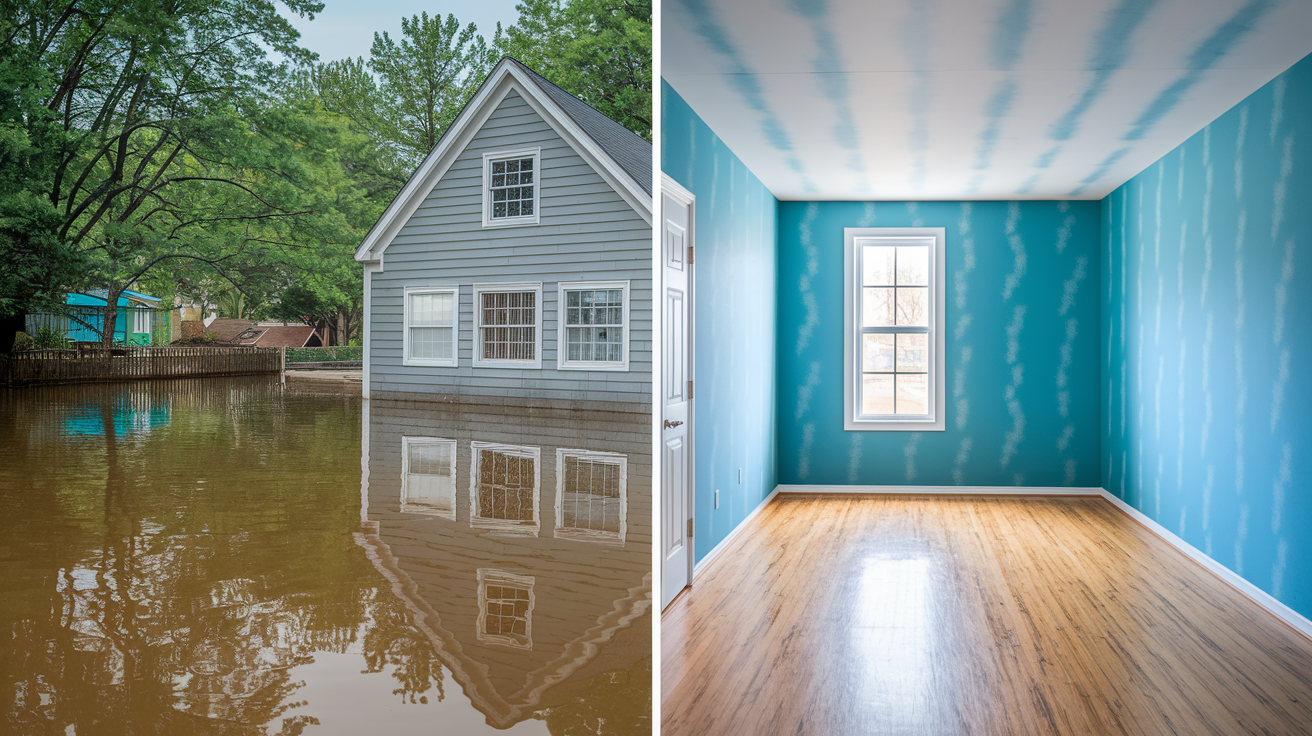
Mold-resistant drywall is necessary in basements with any history of water problems, consistently high humidity you can’t fully control, or soil conditions that push moisture through foundations. If your basement has flooded in the past decade, if you see water stains on existing walls, if dehumidifiers pull multiple gallons daily just to maintain 60% humidity, or if you’re in a high water table area where sump pumps run frequently, the cost premium for mold-resistant products is insurance against repeating expensive mold remediation. Flood-prone areas especially benefit. Even after waterproofing, the risk remains, and mold-resistant drywall buys you recovery time after water events before mold establishes.
Which walls need the premium material depends on moisture exposure. Exterior concrete foundation walls that contact soil always need mold-resistant drywall. This is where moisture wicks through, where condensation forms when warm interior air hits cold concrete, and where water intrusion happens first. Walls around plumbing (bathrooms, laundry, utility sinks) need it because leaks happen and humidity concentrates in these areas. Walls enclosing mechanicals (furnace, water heater) benefit from it because these areas often have less ventilation and equipment creates localized humidity. Interior partition walls dividing basement rooms (walls that don’t touch concrete and aren’t near water sources) can use standard drywall if your basement stays consistently dry with controlled humidity and you’ve addressed moisture sources. This targeted approach cuts costs by 30 to 40 percent while protecting vulnerable surfaces.
Risk assessment factors help you decide. If you’re in climate zones with cold winters and humid summers (most of the northern U.S. and Canada), temperature differentials create condensation issues that premium drywall addresses. Older foundations (pre-1980s) often have less effective waterproofing and more cracks from settling, increasing moisture risk. High water tables you can identify by asking neighbors if they run sump pumps or checking water levels in utility holes near your foundation. Existing moisture control measures matter. If you’ve got exterior waterproofing, interior drain tile, a functioning sump, and good exterior drainage, you might get away with standard drywall on interior walls while using mold-resistant material on foundation walls only. But if moisture control is minimal or you’re not sure what’s behind your concrete, assume worst-case and use mold-resistant products throughout. Replacing drywall once costs more than installing the right product initially.
Building Codes, Permits, and Compliance for Basement Drywall
Basement finishing requires building permits in most jurisdictions, and inspections happen at multiple stages to verify life safety systems, structural integrity, and habitability standards.
Fire resistance ratings for basement drywall typically require ½-inch Type X (fire-rated) or ⅝-inch standard gypsum board on walls and ceilings, providing 30 to 60-minute fire resistance depending on assembly. Mold-resistant drywall products meet these ratings. Manufacturers test and certify their panels to the same fire standards as regular drywall. Purple board and fiberglass-faced panels carry UL or similar fire ratings, so using them doesn’t create code conflicts. Minimum thickness requirements vary, but ½-inch is standard for most basement walls on 16-inch stud spacing, while ⅝-inch is required for ceilings or fire-separation walls between dwelling units in multi-family buildings.
Inspections include framing rough-in before drywall goes up, where inspectors check stud spacing, blocking around openings, proper fastening, and code-compliant framing lumber. If you’re using steel studs, they verify proper gauge and screw attachment. Electrical and plumbing rough-ins get separate inspections verifying wiring methods, outlet spacing, GFCI protection in required locations, and proper waste and vent sizing. Egress window requirements apply if you’re creating bedrooms below grade. Windows must provide 5.7 square feet of clear opening, 24-inch minimum height and width, and sill height no more than 44 inches above the floor, with window wells if below grade meeting minimum size requirements. After drywall installation, a final inspection checks finish work, ventilation systems, smoke and CO detector placement, and confirms all earlier inspection items were completed. Failing to pull permits risks having to expose finished walls later for inspection, potential fines, and insurance and resale complications if unpermitted work is discovered.
Insulation and Thermal Barriers with Moisture-Resistant Drywall
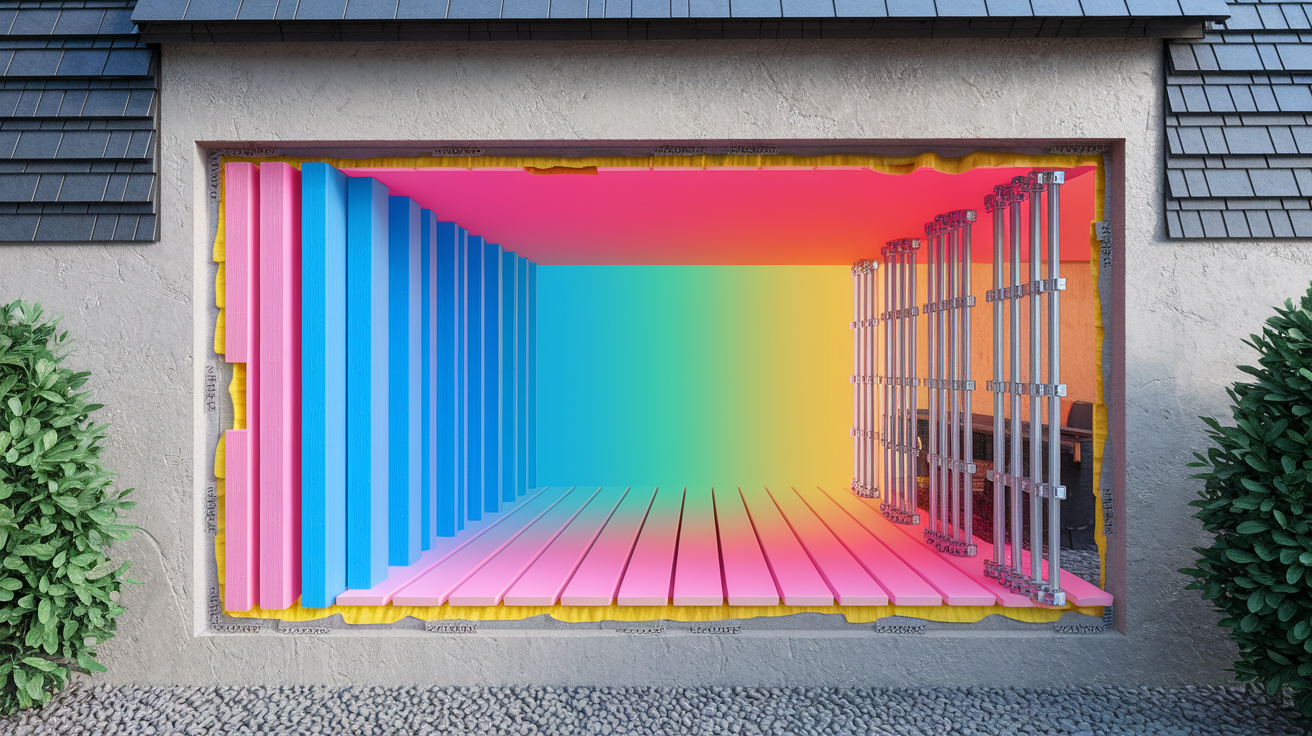
Proper insulation prevents condensation, which is often more important than the drywall itself in basement moisture control. When warm, humid basement air contacts cold concrete foundation walls, water vapor condenses into liquid water. This happens inside wall cavities where you can’t see it, soaking insulation and creating the damp conditions mold needs. Insulating the concrete brings it closer to interior temperature, reducing the temperature differential that causes condensation.
The three insulation types for basements each handle moisture differently. Rigid foam boards (extruded polystyrene in pink or blue, or expanded polystyrene in white) install directly against concrete before framing, resisting moisture and providing an R-value of 5 per inch for XPS or 3.8 per inch for EPS. They don’t absorb water, don’t support mold growth, and create a thermal break between concrete and living space. Closed-cell spray foam applied directly to concrete gives R-6 to R-7 per inch, seals air gaps completely, and acts as both insulation and vapor barrier. It’s the most expensive option but handles moisture best in problem basements because it’s impermeable and fills every crack. Fiberglass batt insulation with kraft paper or foil facing can work if you’ve already solved moisture issues and install it with the vapor barrier facing the heated space, but it’s the risky option because wet fiberglass loses R-value, supports mold if paper facing gets damp, and doesn’t seal air gaps.
R-value requirements depend on climate zone. Zone 4 (mid-Atlantic, lower Midwest) requires R-15 in basement walls, zone 5 (upper Midwest, northern states) requires R-19, and zone 6 and higher require R-21 to R-25. Meeting these with rigid foam means 3 to 5 inches of XPS, which is expensive but allows thin wall assemblies. Spray foam hits these values in 2.5 to 4 inches but costs $1.50 to $3 per square foot installed. Vapor barrier positioning matters. In basements, the heated interior is almost always warmer than the exterior concrete, so vapor barriers go on the warm (interior) side between insulation and drywall if you’re using permeable insulation like fiberglass. With impermeable insulation (foam or spray foam), you don’t need additional vapor barriers and adding them can trap moisture. If you’re installing mold-resistant drywall over properly selected insulation, you’ve addressed both thermal and moisture control. The insulation prevents condensation, the drywall resists mold if condensation happens anyway. Skip insulation or install it wrong, and even the best drywall fights a losing battle.
Finishing, Priming, and Paint Selection for Basement Drywall

Priming mold-resistant drywall correctly maintains the moisture resistance you paid for. Standard drywall primers aren’t formulated for fiberglass surfaces or treated paper, and using them can create adhesion problems. Use primers specifically labeled for fiberglass-faced gypsum or moisture-resistant drywall. Zinsser Gardz, Kilz PVA, or manufacturer-recommended primers designed to seal and bond to non-paper surfaces. These penetrate the fiberglass mesh or treated paper, creating a sealed surface for finish paint while maintaining vapor permeability where needed. Apply one coat, let it dry completely (which takes longer in humid basements, 24 to 48 hours), and check for uniform coverage before painting.
Paint selection determines long-term performance. Antimicrobial paints containing mildewcides or fungicides (Zinsser Perma-White, Benjamin Moore Aura Bath & Spa, Sherwin-Williams Duration Home) kill mold spores that land on painted surfaces, extending protection beyond the drywall itself. These cost $45 to $65 per gallon versus $25 to $35 for standard paint, but they’re worth it in basements and other high-humidity areas. Finish selection matters. Semi-gloss or satin finishes resist moisture better than flat paint because the higher resin content creates a less porous surface, making it harder for moisture and mold to penetrate. Flat paint absorbs moisture and is harder to clean. Low-VOC or zero-VOC formulations improve indoor air quality in basements with limited ventilation, though some antimicrobial paints use higher VOCs to maintain effectiveness. Vent well during and after painting.
Trim and final touches should maintain moisture resistance at vulnerable transitions. Cellular PVC base trim (Azek, Versatex, or similar) installs at floor level where walls meet and around cabinet bases. It’s completely waterproof, won’t rot or support mold, and handles the occasional damp mopping or minor water contact that wood or MDF trim can’t survive. Use paintable caulk formulated for moisture-prone areas (DAP Kwik Seal Plus, GE Supreme Silicone) around penetrations, trim joints, and anywhere gaps exist. Cheap caulk shrinks and cracks in high-humidity environments. If you want texture on ceilings or walls, use premixed joint compound formulated for moisture resistance, apply with standard knockdown or orange peel techniques, then prime and paint. Skip texture if you’re concerned about future moisture issues. Smooth surfaces are easier to inspect, clean, and repaint.
Existing Mold Remediation Before Installing Basement Drywall
You cannot install mold-resistant drywall over active mold and expect good results. Mold growing on existing materials releases spores continuously, those spores spread to new surfaces, and the moisture problem feeding existing mold will feed new growth behind your fresh walls.
Mold exposure during renovation creates health risks: respiratory irritation, allergic reactions, and in sensitive individuals more severe responses. Professional remediation protects indoor air quality by containing work areas with plastic sheeting, using negative air machines with HEPA filtration, and properly disposing of contaminated materials. DIY removal is possible for small areas (less than 10 square feet of surface mold) using N95 respirators, eye protection, and disposable coveralls, but extensive contamination needs professionals with proper equipment.
| Mold Severity | Remediation Approach | Professional Required |
|---|---|---|
| Minor surface mold on concrete or non-porous surfaces, less than 10 square feet | Scrub with detergent solution, rinse, dry completely, treat with antimicrobial | No—DIY with proper PPE is acceptable |
| Moderate mold on framing or insulation, 10-100 square feet, limited to one area | Remove contaminated porous materials, HEPA vacuum, treat surfaces, confirm clearance testing | Yes—containment and proper disposal needed |
| Extensive mold damage, over 100 square feet, multiple areas, inside wall cavities | Full remediation with containment, demolition of affected assemblies, structural drying, clearance testing | Yes—health risk and complexity require professional assessment |
| Mold with ongoing water damage, sewage contamination, or structural concerns | Address water source first, then full professional remediation, possible structural repairs | Yes—requires licensed remediation and possibly engineering assessment |
Complete Mold Removal Guide covers the remediation process: remove all contaminated porous materials including drywall, insulation, carpet, and cardboard. Mold penetrates these materials and cleaning isn’t sufficient. Treat affected wood framing and concrete with antimicrobial solutions, allowing proper dwell time (usually 10 to 15 minutes contact) before wiping or rinsing. HEPA vacuum all surfaces to remove spore-laden dust. Identify and fix the moisture source. If water still enters or humidity remains high, remediation is temporary and mold returns. Test moisture in remaining materials with a meter. Wood framing should read below 16%, concrete below 4 pounds per 1,000 square feet in 24-hour calcium chloride testing. Some situations require third-party clearance testing by industrial hygienists to confirm remediation success before closing walls. If you find extensive mold during demolition, stop and assess whether the scope exceeds DIY capability. Improperly handled remediation spreads contamination and creates greater health risks than leaving it exposed until professionals can address it properly.
Final Words
Mold resistant drywall for basement applications works best when you treat it as one layer in a complete moisture management system, not a standalone fix.
Get the waterproofing right first. Seal foundation cracks, grade the soil away from your house, and install a working sump pump if you need one.
Then pick fiberglass-faced panels for the wettest zones and maintain humidity below 50% year-round.
If you address water at the source and choose the right products for high-risk areas, your basement drywall will stay clean and dry for decades.
FAQ
Q: Do I need mold resistant drywall in the basement?
A: You need mold resistant drywall in the basement if you have flood-prone areas, water intrusion history, high water tables, poor exterior drainage, or consistently high humidity levels. Exterior concrete foundation walls, areas near plumbing, and laundry zones require mold-resistant products, while interior partition walls in dry basements with good moisture control may work with standard drywall.
Q: What type of drywall is mold resistant?
A: Mold resistant drywall types include fiberglass-faced panels with treated gypsum cores (like DensArmor Plus) and purple board products that combine moisture and mold resistance. Fiberglass-faced versions offer superior protection by completely eliminating organic paper materials that mold can colonize, while purple board uses specially treated surfaces with antimicrobial properties in the gypsum core.
Q: What’s the best drywall to use in a basement?
A: The best drywall for basements is fiberglass-faced mold-resistant drywall because it completely eliminates organic materials that support mold growth and handles moisture better than alternatives. Products like DensArmor Plus outperform purple board and green board in high-moisture below-grade conditions, though they cost 30 to 50 percent more than standard drywall sheets.
Q: Is it worth it to get mold resistant drywall?
A: Mold resistant drywall is worth the 30 to 50 percent cost premium in basements because it prevents costly mold remediation, protects indoor air quality, and increases resale value. The investment pays off through long-term mold growth prevention and reduced callback repairs, especially when combined with proper moisture control including dehumidification and waterproofing measures.
Q: Can mold resistant drywall be installed over existing mold?
A: Mold resistant drywall cannot be installed over existing mold or contaminated framing because it will not solve underlying mold problems. You must completely remediate existing mold first by removing contaminated porous materials, treating affected surfaces, conducting moisture testing, and verifying complete remediation before installing new mold-resistant drywall to protect indoor air quality.
Q: What is the difference between green board and mold resistant drywall?
A: Green board differs from mold resistant drywall because it only provides moisture resistance on the front surface and still contains organic paper materials on the back that mold can colonize. True mold-resistant drywall uses non-organic facing materials like fiberglass mesh or specially treated surfaces on both sides, making it more suitable for basement applications than green board.
Q: Do I need to use special tape with mold resistant drywall?
A: You need to use fiberglass mesh tape instead of paper tape with mold resistant drywall to maintain mold resistance throughout the installation. Paper tape contains organic materials that mold can colonize at joints, defeating the purpose of using mold-resistant panels. Fiberglass mesh tape keeps the entire wall assembly free of mold food sources.
Q: Should I use steel or wood framing for basement drywall?
A: You should use galvanized steel framing instead of wood studs for basement drywall because it eliminates mold risk from moisture exposure when water wicks up from concrete. If using wood framing, you must use pressure-treated lumber and isolate bottom plates from concrete with self-adhering flashing or sill seal to create a capillary break.
Q: What humidity level prevents mold growth in basements?
A: Humidity levels below 50 percent prevent mold growth in basements when maintained consistently using dehumidifiers and proper ventilation. Monitor humidity with hygrometers to track moisture levels, adjust dehumidification systems seasonally, and ensure mechanical ventilation or exhaust fans provide adequate air circulation to prevent condensation on surfaces regardless of drywall type.
Q: When should I use cement board instead of mold resistant drywall?
A: You should use cement board instead of mold resistant drywall in areas with direct water contact, flood-prone basements with regular water intrusion, behind tile installations in wet areas, and extremely high-humidity environments. Cement board provides complete waterproof properties and higher impact resistance but costs more and requires more difficult installation than even the best mold-resistant drywall.
Q: Does mold resistant drywall require special paint?
A: Mold resistant drywall requires antimicrobial paint containing mold-killing agents and moisture-resistant finishes like semi-gloss or satin rather than flat paint. Proper primer selection that seals fiberglass surfaces or treated paper without compromising moisture resistance is critical, as standard primers may not be optimal for maintaining the drywall’s protective properties in high-humidity basement spaces.
Q: Do I need a permit to install drywall in my basement?
A: You need a permit to install drywall in your basement for most finishing projects because they must meet specific code requirements for habitable spaces including fire resistance ratings, minimum thickness standards, and egress window requirements for bedrooms. Inspection checkpoints include framing inspection before drywall installation, electrical and plumbing rough-in inspections, and final inspection requirements.