

Your basement stays dry until one day it doesn’t, and suddenly you’re pricing out a repair that costs more than your car. Most homeowners try gutters, grading fixes, and wall sealants before accepting the truth: if water keeps coming back, it’s traveling underground where you can’t see it. An interior French drain intercepts that subsurface flow before it pushes through your foundation, but the work involves jackhammering your floor, digging trenches around the perimeter, and coordinating slope, gravel, and pipe so water actually drains instead of pooling in your basement. This guide walks through the full installation process, material choices that prevent early system failure, and the decision points that determine whether you tackle this yourself or call a contractor.
Step-by-Step Process for Installing an Interior French Drain
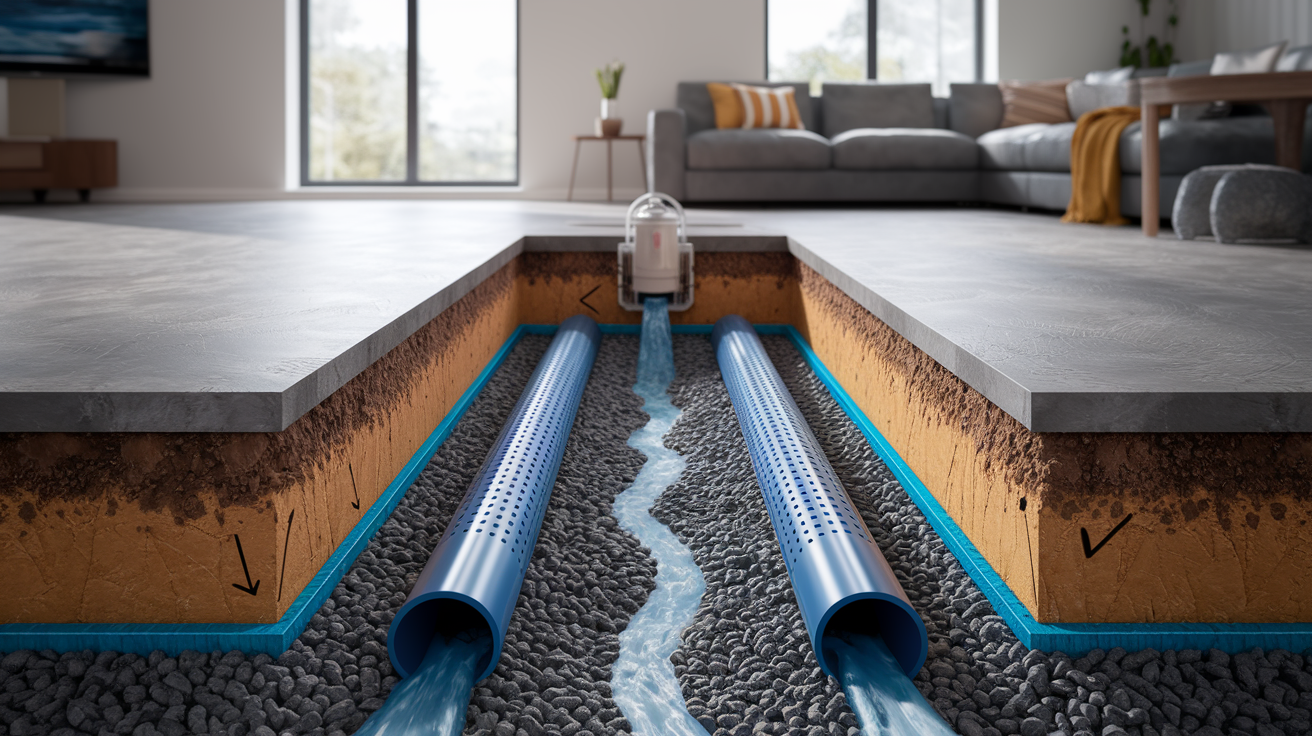
An interior French drain is a perimeter trench dug under the basement floor containing perforated pipe and gravel that collects groundwater before it seeps through foundation walls or floor cracks. This system positions along the inside basement perimeter at a depth below the floor level, redirecting water to a sump pump or exterior discharge point. By intercepting water at the footer level, the drainage system relieves hydrostatic pressure that would otherwise push moisture through foundation walls and create damp, moldy conditions.
Step 1: Breaking and Removing Concrete
Mark the perimeter line 12 to 18 inches from the basement wall using chalk or spray paint. Use a concrete saw to score a cut line 1/4 inch deep along the marks. This prevents the jackhammer from creating jagged edges that spread beyond your work zone.
Start jackhammering at one corner and work systematically around the perimeter. Break the concrete into manageable chunks, typically 12 to 18 inches across, that you can lift without help. Most basement floors are 3 to 4 inches thick, so the jackhammer should punch through quickly if you’re hitting straight concrete. If you hit rebar or wire mesh, you’ll need bolt cutters or an angle grinder to clear it.
Haul the broken concrete out immediately. Debris piles make the workspace dangerous and slow down every step that follows.
Step 2: Digging the Perimeter Trench
Dig the trench 6 inches wide and 18 to 24 inches deep, measured from the top of the existing floor. The depth needs to reach below the foundation footing so water can drain before it builds pressure against the wall.
Set up a laser level or string line to establish 1% slope toward your discharge point. That’s a 1 inch drop for every 100 inches of trench length. Check the slope every 8 to 10 feet as you dig. If the grade is wrong, water sits in the pipe instead of flowing out.
Compact the trench bottom with a hand tamper. Loose soil settles over time and creates low spots where water pools.
Step 3: Installing Filter Fabric and Base Gravel
Line the trench with geotextile filter fabric, leaving enough material hanging over the edges to eventually fold over the top of the gravel. The fabric stops soil particles from migrating into the gravel and clogging the system. Skip this step and you’ll be flushing sediment out of the pipe within two years.
Pour a 2 to 3 inch layer of three quarter inch clean stone into the bottom of the trench. Rake it level and verify the slope again before placing the pipe. The gravel layer creates a stable bed and provides the first stage of filtration for water entering the system.
Step 4: Positioning the Perforated Pipe
Lay 4 inch perforated PVC or corrugated plastic pipe along the trench with the holes facing down. That sounds backwards, but water enters the pipe from below after filtering up through the gravel. Holes facing up collect sediment that drops from above and clog faster.
Connect pipe sections with coupling fittings and check that each joint sits flush. Gaps let soil intrude. Run the pipe continuously around the perimeter until it reaches the sump basin location. If you need to join sections at an angle, use adjustable elbows rather than forcing straight couplings to bend.
Verify slope one more time before covering anything. Once gravel goes in, repositioning pipe means shoveling everything back out.
Step 5: Covering with Gravel and Fabric
Fill the trench with three quarter inch clean stone until the gravel level sits 2 to 3 inches below the original floor height. Pour slowly and check that the pipe stays in position. Heavy dumping can shift it off grade.
Fold the excess filter fabric over the top of the gravel, overlapping the edges by at least 6 inches. This creates a complete envelope that prevents concrete fines from the new floor from washing down into the drainage bed during the first few years.
Step 6: Connecting to Sump Pump and Restoring Floor
Dig a sump basin pit at the low point of your drainage system, typically in a corner. The basin should sit deep enough that the inlet pipe enters near the top and the pump discharge exits above the high water activation level.
Connect the perforated drain pipe to the sump basin inlet. Install your primary sump pump according to the manufacturer’s specifications, making sure the discharge line runs to an exterior exit point at least 10 feet from the foundation.
Mix and pour new concrete to restore the basement floor, bringing it flush with the existing surface. Trowel smooth and let cure for 48 hours before walking on it. The concrete seals the system and creates a clean finished surface.
After the floor cures, run water through the system to verify flow. Pour five gallons of water into an access point or directly over the fabric covered trench in a section where you can temporarily peel back the fabric. The sump pump should activate within two to three minutes if the slope and connections are right. If water sits in the trench, you’ve got a grade problem or a clog that needs fixing now, not after the first real rain.
Essential Materials and Tools for French Drain Installation

Quality materials determine whether your interior French drain functions for three years or thirty years. Cheap pipe cracks under the weight of the concrete floor, thin fabric tears during installation, and wrong gravel grades clog with sediment. Spending an extra $200 on proper materials saves thousands in excavation costs when the system fails early.
Material selection also affects how much maintenance the system requires. Premium components filter water effectively, resist chemical breakdown from soil contact, and maintain structural integrity through freeze thaw cycles in the gravel bed.
- 4 inch PVC or corrugated plastic perforated pipe — Choose PVC in acidic soil conditions where corrugated plastic degrades faster, schedule 40 thickness minimum
- Three quarter inch clean stone — Angular crushed stone, never river rock or pea gravel which pack tight and block water flow
- Geotextile filter fabric — 4 ounce weight minimum, non woven fabric that filters particles while allowing water through
- Concrete mix — Standard 3,000 PSI mix for floor restoration, approximately 0.6 cubic feet per linear foot of 6 inch wide trench
- Waterproofing membrane — Apply to foundation wall before backfilling if walls show existing moisture damage
- Sump pump — 1/3 HP for basements under 1,200 square feet, 1/2 HP for larger areas, with 3,000+ gallons per hour capacity
- Sump basin — 18 to 24 inch diameter basin with pre drilled inlet holes and solid bottom
- Discharge pipe — 1 1/2 inch PVC from pump to exterior, sized to match pump outlet
- Pipe couplings and elbows — Same diameter as drain pipe, solvent weld PVC or sealed corrugated connections
- Check valve — Install on discharge line to prevent backflow into basin when pump shuts off
- Expansion joints — Flexible couplings every 20 to 30 feet for pipe runs exceeding 50 feet total length
- Concrete bonding agent — Apply to existing concrete edges before pouring new floor section for structural connection
Tool requirements separate casual DIYers from people who should hire professionals. A jackhammer rental costs $75 to $150 per day, but operating one safely in a confined basement requires experience. Beginners punch through the floor into utilities or create uneven trench depths that ruin drainage slope. You need a laser level ($300 to $600 purchase, $40 to $60 rental) to verify 1% grade accurately across 40 or 50 feet of trench. Hand levels and string lines introduce too much error. Safety equipment matters more than anything else: respirator with P100 filters for silica dust ($35 to $60), safety glasses, hearing protection, and steel toe boots. Concrete dust from jackhammer work permanently scars lung tissue. This isn’t optional gear.
Preparing Your Basement for Interior Drain Installation

Interior French drains become necessary when water problems persist despite surface solutions like gutters and grading. If you’ve already extended downspouts, regraded the yard away from the foundation, and sealed obvious wall cracks but the basement still gets damp, subsurface water is finding paths through the footer and floor joint that exterior fixes can’t address.
Certain conditions make interior drains the only effective long term solution: high water tables that keep soil saturated year round, properties at the bottom of slopes where groundwater flows toward the foundation, and locations with clay soil that holds moisture against basement walls for weeks after rain.
Warning signs that indicate you need subsurface drainage:
- Water seeping through foundation walls during dry weather when no rain has fallen for five or more days
- White mineral deposits (efflorescence) forming on walls, which indicates water is evaporating through concrete and leaving dissolved salts behind
- Musty odors that persist even with dehumidifier operation
- Foundation cracks that leak during every rain event despite repeated sealant application
- Previous repair failures where sealants, coatings, or patches stopped working within two years
- High water table location confirmed by soil borings or neighboring properties with similar drainage systems
- Seasonal flooding that recurs every spring when snow melts or every fall during heavy rain periods
- Wall dampness that appears in the same spots regardless of weather conditions
- Recurring puddles on the basement floor along the perimeter, especially near corners
Assess the basement by mapping every location where moisture appears. Look for patterns. If water only shows up on one wall, the problem might be a single grading issue outside that wall. If the entire perimeter gets damp, you’re dealing with hydrostatic pressure from saturated soil around the whole foundation.
Check for utilities in the floor before anyone starts cutting concrete. Most basements have electrical conduits, plumbing drains, and sometimes gas lines embedded in the slab. Opening the breaker panel shows which circuits serve the basement, but it doesn’t tell you where wires run under the floor. Call 811 for utility location marking, then hire a contractor with ground penetrating radar to map what’s in the slab. Hitting a live electrical line with a jackhammer can kill you. Striking a drain pipe means raw sewage flooding the workspace. Gas line damage creates explosion risk.
Permit and building code requirements vary by jurisdiction. Most municipalities require permits for interior French drain installation because the work involves structural concrete removal and plumbing connections. Permit fees typically run $100 to $300 and trigger inspections at the rough in stage (after pipe installation, before concrete restoration) and final completion. Code compliance ensures proper slope, adequate pipe sizing, appropriate sump pump discharge routing, and backflow prevention. Skipping permits seems cheaper until the building department issues a stop work order or you try to sell the house and can’t provide documentation of legal installation. Some jurisdictions prohibit sump pump discharge into sanitary sewer systems and require dedicated exterior discharge lines. That’s the kind of rule you learn about during permit application, not after you’ve already connected everything wrong.
Integrating Your French Drain with a Sump Pump System
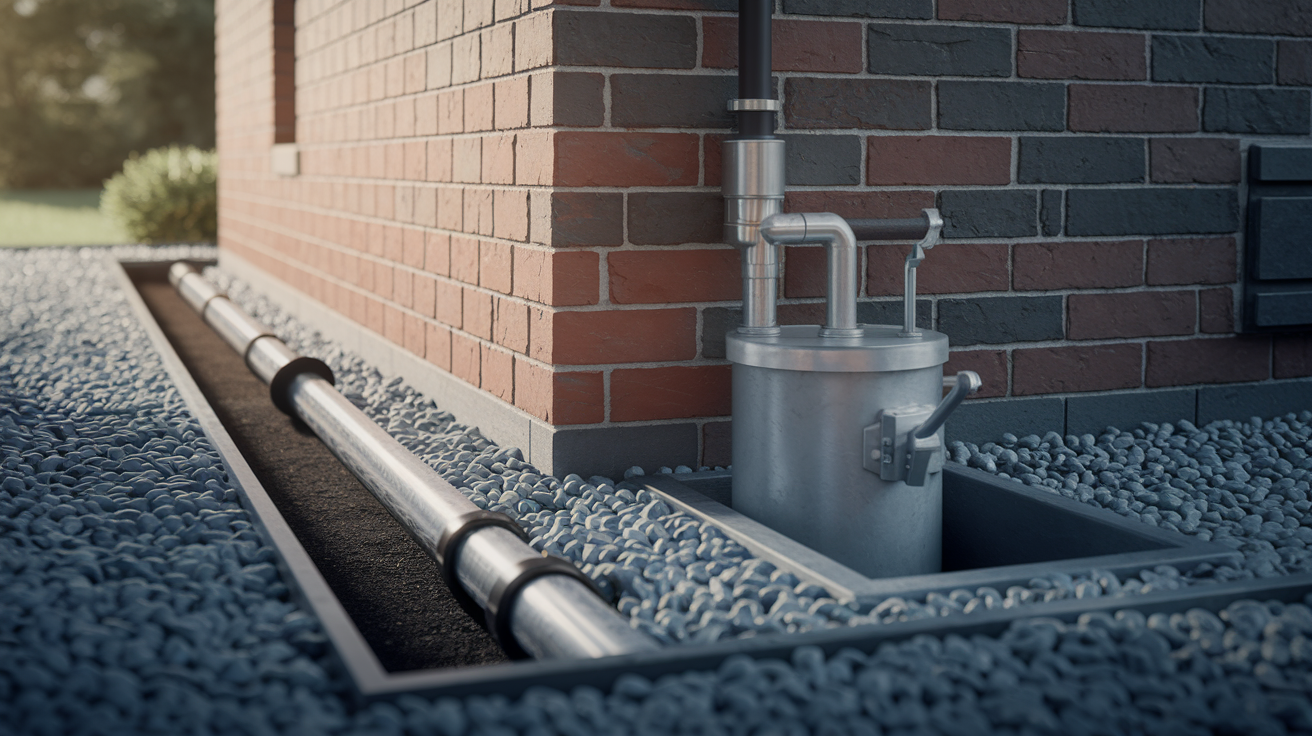
The French drain collects water into the perforated pipe, but gravity alone won’t remove it from a basement below exterior grade. That’s where the sump pump takes over. The drain pipe feeds into a sump basin, typically 18 to 24 inches in diameter and deep enough to hold 15 to 20 gallons. When water fills the basin to a preset level, usually 6 to 8 inches from the bottom, a float switch activates the pump and pushes water through a discharge line to an exterior exit point.
Primary pump selection depends on your basement size and how fast water enters during heavy rain. A 1/3 horsepower pump handles most basements under 1,200 square feet with discharge capacity around 3,000 gallons per hour. Larger basements or locations with severe water intrusion need 1/2 horsepower pumps that move 4,000 to 5,000 gallons per hour. Match the pump’s vertical lift capacity to how far the discharge line must rise to reach exterior grade. If the outlet sits 10 feet above the basin, you need a pump rated for at least 12 feet of head pressure to maintain flow at the top. Undersized pumps run constantly during storms, overheat, and fail when you need them most.
Backup options matter because sump pumps fail during power outages that coincide with heavy storms. Exactly when the French drain is collecting the most water. Battery backup pumps install in the same basin as the primary pump and activate automatically if the main pump stops running or can’t keep up with incoming water. These backup systems use deep cycle marine batteries and typically provide 5,000 to 7,000 gallons of pumping capacity per charge, enough to handle 6 to 12 hours of moderate water intrusion. Alarm systems add another safety layer by sounding when water reaches a critical level, warning you of pump failure before the basement floods. High water alarms cost $30 to $80 and mount on the basin lid with a float sensor.
| Sump Pump Component | Purpose | Typical Cost |
|---|---|---|
| Primary pump (1/3 to 1/2 HP) | Removes collected water during normal operation | $150 – $400 |
| Battery backup pump | Provides pumping during power outages | $300 – $800 |
| Check valve | Prevents discharge water from flowing back into basin | $15 – $35 |
| Discharge pipe (1-1/2 inch PVC) | Routes water from pump to exterior exit | $2 – $4 per linear foot |
| High-water alarm system | Alerts homeowner to pump failure or overflow risk | $30 – $120 |
Complete Cost Analysis for Interior French Drain Systems

Interior French drain systems typically cost $3,000 to $8,000 for complete installation, though that range expands significantly based on basement size and complexity. Professional installation includes labor, materials, equipment rental for concrete cutting and removal, and concrete floor restoration. These prices assume standard basement conditions: 8 foot ceiling height, accessible work area, and straightforward discharge routing.
Cost varies most dramatically by basement square footage and soil conditions. Small basements under 800 square feet need roughly 80 to 100 linear feet of drain pipe to cover the perimeter, while large basements over 1,200 square feet require 140 to 160 linear feet or more.
Cost factors that affect final pricing:
- Small basement (600 to 800 square feet) — $4,000 to $6,000 for 80 to 100 linear feet of perimeter drain
- Medium basement (800 to 1,200 square feet) — $6,000 to $10,000 for 100 to 140 linear feet of perimeter drain
- Large basement (1,200+ square feet) — $10,000 to $17,000 for 140+ linear feet of perimeter drain
- Concrete thickness and reinforcement — Floors over 4 inches thick or with heavy rebar add $500 to $1,500 to removal costs
- Clay heavy soil conditions — Increases labor costs 15% to 25% compared to sandy soil due to difficult excavation
- Sump pump integration — Primary pump installation adds $500 to $1,200, battery backup adds another $300 to $800
- Permit fees — Typically $100 to $300 depending on jurisdiction
- Waterproofing membrane application — Foundation wall treatment adds $500 to $1,500 for full perimeter coverage
- Extended discharge line — Routing pump discharge more than 20 feet from foundation adds $800 to $2,000
- Combined French drain and sump pump systems — Complete installations with redundant pumping cost $5,500 to $20,000 for severe water intrusion scenarios
Geographic location affects costs through labor rate variations. Urban areas like Indianapolis and Fort Wayne see labor rates of $65 to $85 per hour, while rural Indiana areas average $45 to $65 per hour for the same work. The labor portion typically represents 40% to 50% of total project cost, so a job running $8,000 in the city might cost $5,500 in a rural county.
Soil conditions create the most unpredictable cost variations. Clay heavy soil, common throughout Indiana and the Midwest, requires more time for trench excavation and creates disposal challenges because wet clay weighs significantly more than sandy soil. Rocky soil conditions can double excavation time when contractors hit bedrock or large stone deposits that require breaking before removal. If soil testing or initial excavation reveals difficult conditions, expect the estimate to increase 15% to 25% from the initial quote.
DIY installation seems cost effective when you eliminate $3,000 to $5,000 in labor charges, but equipment rental and safety requirements consume much of that savings. Jackhammer rental runs $100 to $150 per day, and most DIYers need three to five days to complete concrete removal that professionals finish in six hours. You need a concrete saw ($75 to $100 per day rental), a wet dry vacuum with HEPA filtration for dust control ($40 to $60 per day), safety equipment including respirator and protective gear ($100 to $150 purchase), and a laser level for slope verification ($40 to $60 per day rental). Material costs stay the same whether you DIY or hire pros: $800 to $1,500 for pipe, gravel, fabric, and concrete. The real DIY cost comes from mistakes. Improper slope that requires re excavation and re piping adds another week of work, concrete cuts that damage utilities create $1,000 to $5,000 in emergency repair costs, and silica dust exposure without proper ventilation risks permanent lung damage that no amount of savings justifies. Professional installation provides warranty coverage, typically 5 to 10 years on workmanship, that DIY work never includes. When the drain fails in year three because the slope is wrong, the DIY “savings” turn into a complete re installation at full cost.
DIY Installation Risks vs. Professional French Drain Services

Interior French drain installation is not recommended as a DIY project due to major construction requirements including jackhammering concrete basement floors, precise excavation to maintain proper drainage slope, and integration with sump pump systems. The physical demands alone exceed what most homeowners can safely manage. Breaking 80 to 120 linear feet of 4 inch thick concrete creates days of exhausting jackhammer operation that leaves beginners with arm and shoulder injuries. Silica dust from concrete cutting permanently scars lung tissue and causes silicosis, an incurable disease that reduces breathing capacity over time. Professional contractors use wet cutting techniques and industrial ventilation systems that capture 95% of airborne silica particles. DIY setups with shop vacuums and basic respirators don’t provide adequate protection, especially in confined basement spaces where dust concentrations spike quickly.
Professional installation brings specialized equipment that makes the job safer and faster while producing better results. Contractors use ground penetrating radar to map utilities before cutting concrete, eliminating the risk of hitting electrical conduits, plumbing drains, or gas lines embedded in the slab. They own laser levels that verify 1% slope across the entire trench length with accuracy that string lines and hand levels can’t match. Getting slope wrong means water pools in the pipe instead of draining, requiring complete re excavation to fix. Professionals understand drainage calculations including pipe capacity requirements based on basement square footage, soil saturation rates, and local rainfall intensity data. They know when 4 inch pipe is adequate and when 6 inch pipe is necessary to handle water volume during heavy storms. Code compliance knowledge matters too. Professionals understand local requirements for sump pump discharge routing, backflow prevention, and inspection procedures that keep the installation legal and warrantied.
Typical professional installation takes one to two days for an average basement compared to two to three weeks for DIY attempts. Contractors have crews of two to three workers who rotate between jackhammer operation, debris removal, and trench excavation, maintaining steady progress instead of the stop and start pace of solo work. They finish concrete removal in four to six hours that takes a DIYer two full weekends. The trenching and pipe installation that consumes another weekend for homeowners gets completed in a single eight hour workday by experienced crews. Professional concrete restoration uses proper mixing ratios, bonding agents on existing concrete edges, and finishing techniques that create smooth, level surfaces. DIY concrete work often results in uneven floors, poor bonding that creates cracks within months, and visible seams that reduce basement usability.
Professional installation includes warranty coverage that protects your investment and provides recourse if the system fails. Comprehensive warranties cover structural integrity of the concrete restoration, long term drainage effectiveness for 5 to 10 years, material defects, and workmanship errors. If the drain stops working in year four because pipe slope is inadequate or connections leak, the contractor returns and fixes it at no additional cost. Liability insurance protects homeowners if workers are injured on site or if installation work damages the foundation. DIY projects offer no such protection, leaving you personally liable for any problems. Permits and inspections verify that work meets code requirements, essential for home resale and insurance coverage. Many homeowner policies deny water damage claims if they determine that unpermitted DIY waterproofing work contributed to the flooding.
Interior vs. Exterior French Drain: Quick Comparison
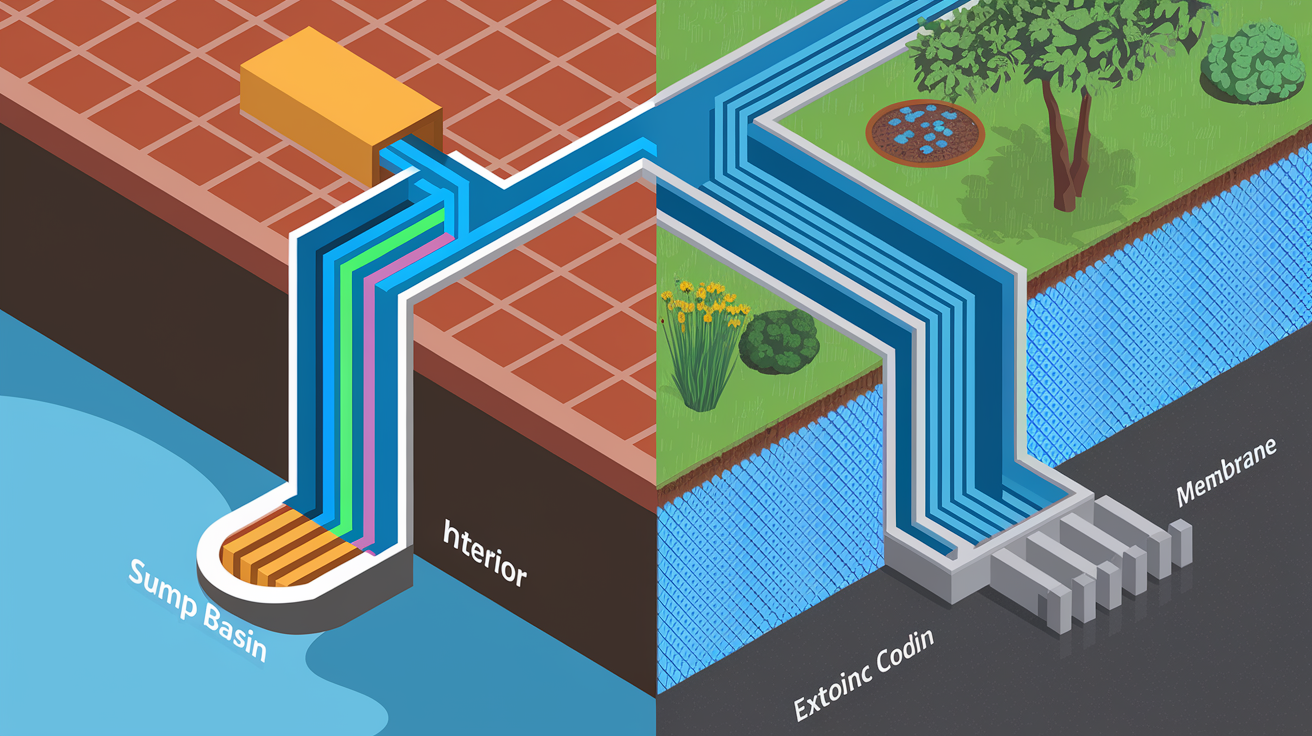
Exterior French drains install at the foundation footing level around the perimeter outside the home, intercepting water before it reaches the foundation and preventing moisture from building pressure against basement walls. Interior drains install under the basement floor and manage water that has already entered the soil around the foundation, collecting it before it seeps through foundation walls or the floor wall joint. The cost difference between the two approaches is substantial. Interior systems average $3,000 to $8,000 while exterior installations run $16 to $18 per square foot of basement wall, totaling $12,000 to $25,000 for most homes once you factor in excavation, waterproofing membrane application, and landscape restoration.
Interior installation makes more sense when you have finished landscaping you don’t want to destroy, when the foundation already has waterproofing protection but the floor wall joint still leaks, or when budget limitations rule out the higher cost of exterior excavation. Accessibility matters too. If the foundation perimeter includes deck footings, concrete patios, or HVAC equipment installations, removing these obstacles to dig an exterior drain adds thousands in demolition and rebuilding costs. Interior drains work around these limitations by keeping all work contained within the basement.
| Factor | Interior French Drain | Exterior French Drain |
|---|---|---|
| Installation location | Under basement floor along interior perimeter | At foundation footing level outside home perimeter |
| Cost range | $3,000 – $8,000 for typical basement | $12,000 – $25,000 including excavation and restoration |
| Excavation impact | Basement floor removal only, no landscape damage | Perimeter excavation to footer depth, landscape replacement required |
| Best application | Existing homes, finished basements, budget conscious projects | New construction, major foundation issues, complete waterproofing projects |
| Lifespan | 30 to 50 years with proper maintenance | 40 to 60 years with proper installation |
| Maintenance access | Requires floor removal to access pipe, sump pump accessible | Requires excavation to access, cleanout ports improve access |
Maintaining Your Interior French Drain for Long Term Performance
Properly maintained interior French drains last 30 to 50 years with minimal intervention, far exceeding the 8 to 12 year lifespan of sump pumps and the 5 to 10 year effectiveness of basement sealants. The gravel bed and perforated pipe create a passive system that keeps working as long as water can flow through the gravel and pipe perforations remain unclogged.
Regular maintenance prevents expensive repairs and keeps drainage effectiveness at design levels. Systems that receive annual attention rarely develop the clogs and sediment buildup that cause premature failure in neglected installations.
Maintenance tasks that extend system life:
- Post rain inspection — Check sump basin within 24 hours after heavy rain to verify pump activated and water drained completely from basin
- Annual flushing — Pour 10 to 15 gallons of water into accessible sections of the system to flush sediment through pipe and verify flow reaches sump basin
- Sump pump testing — Test pump operation every three months by pouring water into basin until float switch activates, confirming discharge flows to exterior
- Discharge line inspection — Check exterior discharge point twice yearly to ensure outlet pipe isn’t clogged with debris, ice, or vegetation
- Monitoring for slow drainage — Watch for water pooling on basement floor near the perimeter, which indicates pipe clog or slope failure requiring professional cleaning
- Cleaning accessible components — Remove debris from sump basin twice yearly and clean pump intake screen to prevent motor strain
Professional inspection every three to five years verifies that the system maintains design performance as the house ages and soil conditions change. Inspectors use cameras to view inside the drainage pipe, checking for sediment accumulation, root intrusion, and pipe integrity. They measure water flow rates through the system and compare results to installation specifications, identifying capacity reductions before they cause flooding. Camera inspection costs $200 to $400 but catches problems like partial clogs, crushed pipe sections, and fabric breakdown that aren’t visible from the basement. Contractors verify that slope hasn’t shifted due to foundation settling and assess whether sump pump capacity still matches the basement’s water intrusion rate. If the water table has risen since installation or if nearby construction has changed drainage patterns, the inspection reveals whether system upgrades are necessary to handle increased water volume.
Common French Drain Installation Challenges and Solutions

Clay heavy soil creates the most common installation challenge because it holds moisture and resists excavation. Indiana, Illinois, and Ohio basements often sit in clay that turns rock hard when dry and sticky when wet, slowing trench digging and requiring wider gravel beds to filter water effectively. Clay soil needs gravel beds 8 to 10 inches wide instead of the standard 6 inches because clay particles are finer than sand and more likely to migrate through filter fabric if the gravel layer is too thin. Professional contractors working in clay conditions calculate 15% to 25% additional labor time compared to sandy soil jobs and often use mechanical trenchers instead of hand digging to maintain schedule.
High water table locations present another significant obstacle because the trench fills with water during excavation, making it difficult to maintain proper depth and slope. When groundwater sits 12 to 18 inches below the basement floor, contractors must continuously pump water out of the trench while installing gravel and pipe. This requires bringing a secondary pump to the job site just for dewatering, adding equipment costs and extending installation time. High water conditions also demand more robust sump pump systems. Basins need check valves and backup pumps because the main pump will cycle more frequently than in drier basements. Some high water installations require oversized pipe, 6 inch diameter instead of 4 inch, to handle the constant inflow during wet seasons.
Structural limitations including floor joists, support columns, and load bearing walls force routing modifications that complicate the perimeter path. Most basements have steel support columns sitting on concrete footings that extend below the floor level. The drain trench can’t cut through these footings without compromising structural support, so the pipe route must jog around columns and reconnect on the other side. Each directional change requires elbow fittings and careful attention to maintain slope. If the detour creates a low spot, water pools there and the whole section drains poorly. Utilities embedded in the floor create similar routing challenges. Plumbing drains, electrical conduits, and HVAC ductwork buried in the slab require the trench to shift position, sometimes moving 18 to 24 inches away from the wall to avoid conflicts. Ground penetrating radar reveals these obstacles before cutting starts, allowing contractors to plan routes that maintain functionality while avoiding expensive utility repairs.
Thermal expansion in long pipe runs becomes an issue when the perimeter exceeds 80 linear feet, particularly in basements with seasonal temperature swings. PVC pipe expands approximately 0.6 inches per 100 feet for every 100 degree temperature change. A basement that drops from 70°F in summer to 40°F in winter creates enough contraction to crack rigid connections if the pipe can’t move slightly. The solution involves installing expansion joints every 20 to 30 feet. These flexible couplings allow the pipe to expand and contract without breaking seals at the rigid connections. Long runs also need flexible connections where the drain pipe meets the rigid sump basin inlet. If that connection is solid PVC, winter contraction can crack the basin or rip the inlet fitting loose, causing leaks that dump water under the basement floor instead of into the pump.
Selecting a Qualified Contractor for Your Installation Project

Hiring experienced contractors with drainage system specialization prevents the mistakes that turn functional designs into failed installations requiring complete replacement within five years. French drain work demands knowledge that general handymen and basic concrete contractors often lack: understanding groundwater behavior, calculating pipe capacity for local rainfall rates, and building systems that stay effective as houses settle and soil conditions evolve.
Proper installation prevents costly failures including flooded basements when systems can’t handle water volume, cracked foundation walls from continued hydrostatic pressure, and mold growth from moisture that the drain was supposed to eliminate. Code compliant work ensures the installation passes inspection, maintains home value for resale, and protects homeowner insurance coverage that sometimes excludes water damage when unpermitted work contributes to flooding.
Contractor qualifications to verify before signing contracts:
- State licensing and liability insurance — Confirm active license through state board and $1 million minimum liability coverage
- Local building code knowledge — Ask about permit requirements, inspection timing, and discharge routing restrictions in your municipality
- Drainage system experience — Request examples of five or more recent French drain installations with references from those homeowners
- Equipment ownership — Verify contractor owns or regularly rents jackhammers, laser levels, concrete saws, and ground penetrating radar rather than attempting installation with basic tools
- References from recent projects — Contact three homeowners whose installations occurred within the past two years, asking about timeline accuracy, cleanup quality, and post installation performance
- Warranty offerings — Compare warranty terms, with comprehensive coverage for five years minimum on workmanship and materials
- Permit handling — Confirm contractor pulls permits, schedules inspections, and provides documentation of code compliance
- Detailed written estimates — Review itemized costs showing labor, materials, equipment, permits, and contingency amounts for unexpected soil or utility conflicts
Contract essentials protect both parties by defining scope, timeline, payment structure, and performance standards before work begins. The scope section should specify exact work including linear feet of drain pipe, concrete removal and restoration thickness, sump pump model and capacity, discharge line routing, and waterproofing membrane application if included. Timeline commitments matter because extended projects disrupt household routines. Request start and completion dates with allowances for weather delays or material delivery issues. Payment schedules should follow work completion phases: deposit at contract signing (typically 10% to 15%), payment after concrete removal and trenching (30% to 40%), payment after pipe installation and pump connection (30% to 40%), and final payment after concrete restoration and system testing (10% to 15%). Never pay more than 50% before the system is operational.
Comprehensive warranty coverage should include structural integrity of concrete restoration for minimum three years, drainage effectiveness guaranteeing dry basement conditions for five to ten years, material defects covering pipe and pump failures, and workmanship errors addressing any installation mistakes that reduce system performance. Clarify what the warranty excludes. Most don’t cover damage from homeowner modifications, extreme weather events beyond design capacity, or lack of routine maintenance. Get warranty terms in writing as part of the contract rather than relying on verbal promises that become impossible to enforce when problems develop years after installation.
Complementary Waterproofing Methods for Complete Protection
French drains work best as part of a comprehensive waterproofing strategy that addresses both surface water management and subsurface moisture control. The drain handles groundwater that accumulates around the foundation, but it can’t fix problems caused by poor grading, clogged gutters, or vegetation that dumps water against the basement walls. Combining exterior water diversion with interior drainage creates layered protection that prevents water problems instead of just reacting to them.
Exterior water management starts with proper grading that slopes away from the foundation at 5% minimum grade for the first 10 feet. That’s a 6 inch drop over 10 feet of horizontal distance. Walk the perimeter and identify spots where soil has settled toward the house or where hardscaping like patios and walkways directs water back against the foundation. Regrade these areas with compacted fill dirt, creating smooth slopes that carry rain away from the building. Gutter maintenance matters more than most homeowners realize. Clogged gutters overflow during rain and dump thousands of gallons directly beside the foundation instead of routing water to controlled discharge points. Clean gutters twice yearly in spring and fall, and install gutter guards in areas with heavy tree cover. Downspout extensions are cheap insurance, directing water 10 to 15 feet from the foundation rather than allowing it to pool in the soil adjacent to basement walls. Vegetation management includes avoiding high water need plants like willows and poplars within 20 feet of the foundation. These trees develop aggressive root systems that seek moisture and can damage drain systems while increasing soil saturation near basement walls.
Interior moisture control builds on the protection that the French drain provides by addressing water that enters through foundation walls above the drain level and by managing humidity that contributes to damp conditions. Wall flashing installation involves applying waterproof membrane strips along the bottom of foundation walls at exterior grade height, creating a barrier that directs wall seepage down into the French drain system rather than allowing it to spread across
Final Words
Interior french drain installation protects your basement by intercepting groundwater before it damages your foundation walls or floods your floor.
The work itself takes one to two days for most basements, but the system you install now should keep working for 30 to 50 years with basic maintenance.
Get the slope right, use quality materials, and make sure the sump pump integration is solid.
If the scope feels beyond your skill set, bringing in a qualified contractor with drainage experience usually pays off in time saved and long-term reliability.
FAQ
How deep does an interior French drain need to be?
An interior French drain needs to be 18 to 24 inches deep from the basement floor surface, positioned below the foundation footings to effectively intercept groundwater before it seeps through foundation walls or floor cracks.
How much does an interior French drain system cost?
An interior French drain system costs between $3,000 and $8,000 for most installations, with total expenses varying based on basement size, concrete thickness, soil conditions, sump pump integration requirements, and regional labor rates.
How to install a French drain interior?
To install an interior French drain, jackhammer and remove the concrete perimeter, dig a sloped trench 6 inches wide and 18-24 inches deep, install filter fabric and gravel base, position perforated pipe with holes down, cover with gravel, connect to sump pump, and restore the concrete floor.
Do interior French drains work?
Interior French drains work effectively by collecting groundwater along the basement perimeter before it seeps through foundation walls, redirecting water to a sump pump or discharge point and relieving hydrostatic pressure that causes foundation damage and flooding.
What slope does a French drain trench need?
A French drain trench needs exactly 1% slope (one inch of drop per 100 inches of length) toward the discharge point or sump basin to ensure proper gravity-driven water flow and prevent standing water in the pipe.
What type of pipe is used for interior French drains?
Interior French drains use 4-inch perforated PVC or corrugated plastic pipe positioned with holes facing downward, surrounded by three-quarter-inch clean stone and filter fabric to prevent clogging while allowing water entry and drainage.
When should you choose an interior French drain over an exterior one?
You should choose an interior French drain when you have finished landscaping to protect, limited excavation access, budget constraints, existing foundation waterproofing, or when water problems persist despite surface drainage improvements like gutters and grading.
How long do interior French drains last?
Interior French drains last 30 to 50 years with minimal maintenance when installed with quality materials including proper filter fabric, clean gravel, durable perforated pipe, and correct slope that prevents sediment buildup and maintains drainage effectiveness.
Can you install an interior French drain yourself?
You should not install an interior French drain yourself because the project requires jackhammer operation creating dangerous silica dust, utility strike risks, precise slope calculations, specialized equipment like ground-penetrating radar and laser levels, and code compliance knowledge.
What are signs you need an interior French drain?
Signs you need an interior French drain include water seeping through walls during dry weather, white mineral deposits on foundation walls, persistent musty odors, foundation cracks with moisture, recurring floor puddles, and previous surface repair failures.
How does an interior French drain connect to a sump pump?
An interior French drain connects to a sump pump by directing the perforated pipe to a sump basin installed at the lowest point, where the pump activates when water reaches a set level and discharges it away from the foundation through an exterior discharge line.
What materials should you avoid for French drain installation?
You should avoid river rock and sand that cause clogs, thin filter fabric that tears easily under soil pressure, poor-quality pipe materials that crack, and inadequate waterproofing products that reduce the system’s 20-plus year expected lifespan.