

You’ve been told interior basement waterproofing only hides the problem instead of fixing it. That’s partly true if you’re talking about painting on a waterproof coating and calling it done. But a real interior system, with perimeter drains, a sump pump, and proper discharge lines, actually intercepts groundwater before it reaches your basement floor and walls. This post walks through how these components work together, what warning signs mean you need one, and when surface treatments are enough versus when you need the full drainage setup.
Complete System Overview: Components and Effectiveness
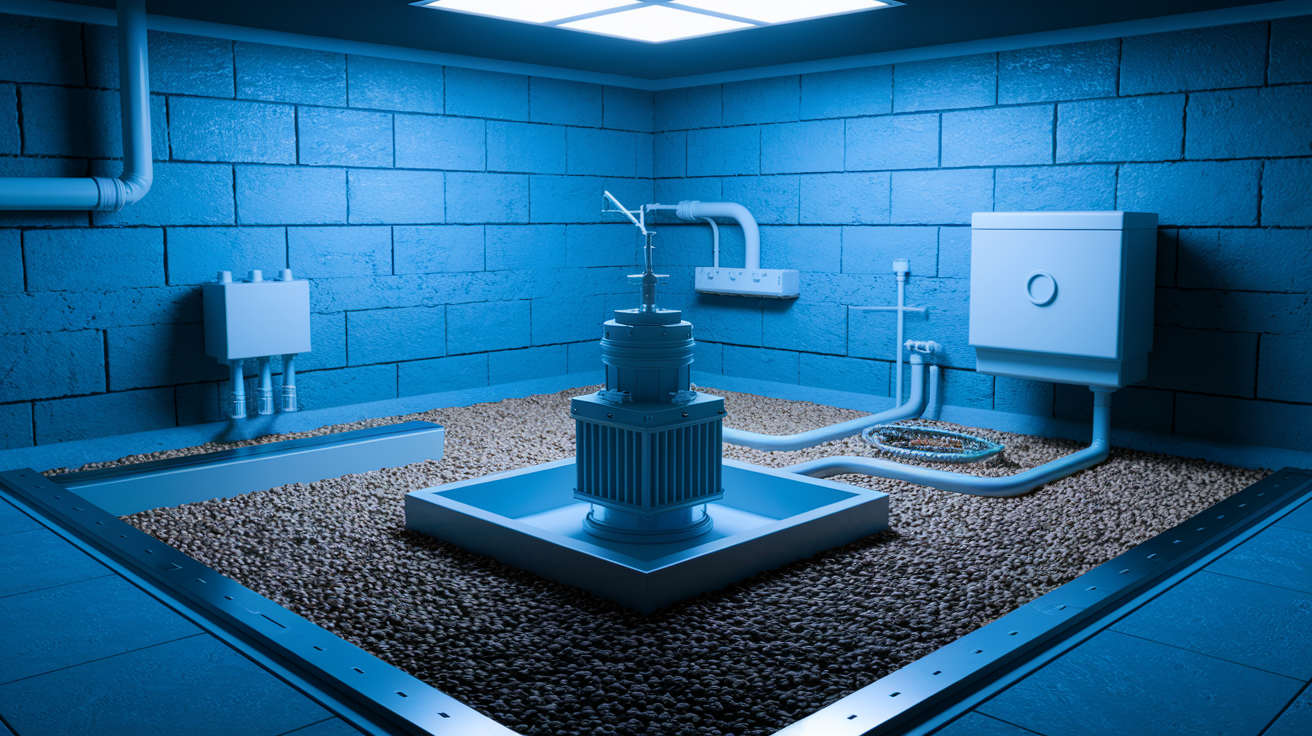
Interior basement waterproofing systems manage water intrusion by intercepting groundwater below floor level before it reaches your basement living space. Unlike surface treatments, these systems capture water through subsurface drainage networks and evacuate it with high capacity pumps that can handle thousands of gallons per hour. The approach combines multiple components working together to keep moisture from penetrating walls, floors, and the basement environment.
Core system components include:
- Perimeter drain channels – Trenches excavated along basement floor edges, typically 12 to 18 inches deep, that intercept groundwater at entry points before it surfaces
- French drain system with gravel base and filter fabric – Perforated drainage pipes surrounded by crushed stone and wrapped in geotextile material to prevent soil infiltration while allowing water flow
- Sump pump with basin placement – Collection pit installed at the lowest basement point, housing pumps with 1/3 to 3/4 horsepower capacity rated for continuous operation during heavy water intrusion
- Discharge line with backflow valve – PVC piping that carries evacuated water away from the foundation, equipped with check valves preventing reverse flow back into the basement
- Battery backup systems – Secondary power supply maintaining pump operation during electrical outages when storm related flooding risk peaks
- Vapor barriers applied to foundation walls – Moisture resistant membranes installed on interior concrete surfaces to block capillary water movement through porous masonry
- Sensor equipped monitoring – Automatic water detection devices that trigger pump activation when moisture reaches predetermined thresholds
The integrated mechanism works through coordinated water interception and removal. Perimeter trenches capture groundwater seeping through foundation walls or rising through floor cracks. Water flows through filter fabric into perforated drainage pipes, following gravity to collection basins positioned at strategic low points. When water reaches the sump pit, float switches activate pumps that force water through discharge lines, expelling it to approved drainage areas at least 10 to 15 feet from the foundation perimeter.
Professional installation typically requires 2 to 3 days for most residential basements. The work proceeds entirely from inside the structure without disturbing exterior landscaping, driveways, or hardscaping. Contractors access all components through the basement interior, eliminating excavation concerns that come with exterior waterproofing approaches.
This drainage approach differs fundamentally from temporary DIY sealant solutions that only address surface moisture symptoms without managing the actual water source. It also provides a practical alternative to costly exterior excavation methods that require digging around the entire foundation perimeter, potentially damaging established landscaping and requiring extensive site restoration. Interior systems deliver permanent water management from inside the basement, positioning drainage infrastructure where it intercepts groundwater before moisture reaches walls and floors.
Identifying Water Problems and Understanding Root Causes
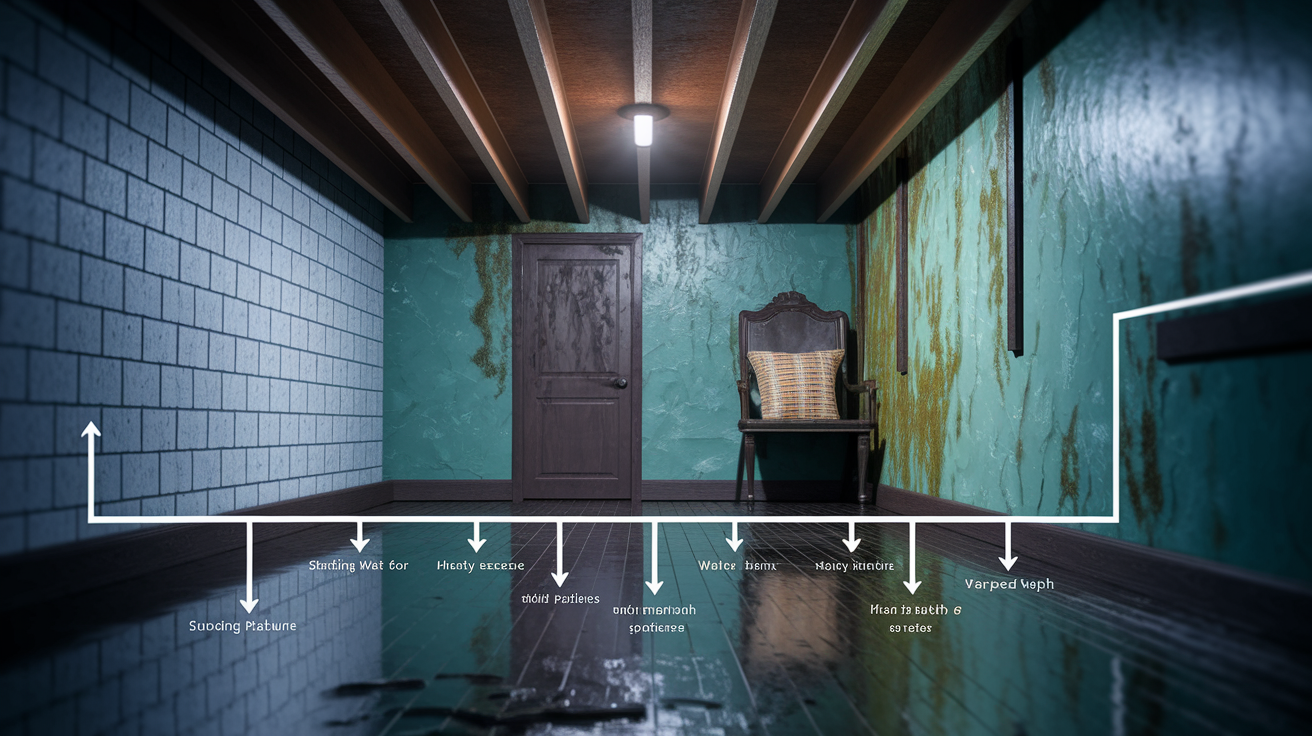
Early detection of basement water problems prevents minor issues from escalating into extensive structural damage and costly repairs. Recognizing warning signs lets you address moisture intrusion before it compromises foundation integrity or creates health hazards.
Visible warning signs of basement water intrusion:
- Standing water or persistent wet spots – Puddles forming on basement floors, particularly after rainfall or snow melt events
- White chalky deposits on masonry walls – Mineral residue left behind when water evaporates from concrete or block surfaces
- Musty or moldy odors – Distinctive smell indicating moisture accumulation and organic material decomposition in hidden areas
- Visible mold or mildew growth – Black, green, or white patches appearing on walls, floors, wooden framing, or stored items
- Water stains on walls or floors – Discolored patches or tide lines marking previous water levels during intrusion events
- Peeling paint or wallpaper – Finish materials losing adhesion as moisture penetrates from behind wall surfaces
- Warped wood paneling or buckled flooring – Building materials swelling and deforming from sustained moisture exposure
- Rust on metal fixtures or appliances – Corrosion developing on furnace components, water heaters, electrical boxes, and stored metal items
Hydrostatic pressure serves as the primary force driving water through foundation barriers. Saturated soil conditions develop around foundations when high water tables rise during spring thaw, heavy rainfall events deposit excessive moisture, snow melt releases accumulated frozen precipitation, or poor site drainage allows water to pool against basement walls. This saturated soil creates pressure that progressively increases as water seeks lower elevations, pushing against foundation walls and floor slabs with force measured in hundreds of pounds per square foot.
Foundation vulnerabilities provide pathways for pressurized water to enter basements once hydrostatic force builds sufficiently. Wall cracks develop from settlement, shrinkage during concrete curing, or lateral pressure from expanding soils. Floor cracks appear where control joints were improperly placed or where slab sections settle at different rates. Cove joints (the seam where basement floors meet walls) represent particularly vulnerable entry points because this junction lacks reinforcement and experiences differential movement between vertical and horizontal foundation elements.
External contributing factors compound hydrostatic pressure problems by directing additional water toward foundations. Improper grading slopes create drainage patterns that guide rainfall runoff toward basement walls rather than away from the structure. Poor yard drainage systems fail to intercept and redirect surface water before it infiltrates soil adjacent to foundations. Clogged gutters overflow during rainstorms, depositing concentrated water volumes directly beside foundation perimeters rather than routing it through downspouts to safe discharge locations.
Soil expansion during freeze thaw cycles creates additional pressure that progressively worsens foundation cracks over time. Water trapped in soil pores freezes during winter, expanding with force sufficient to widen existing cracks and create new fractures in concrete. Repeated freeze thaw cycling gradually enlarges these openings, transforming hairline cracks into significant structural vulnerabilities that admit increasing water volumes. Early intervention prevents this progressive deterioration from compromising foundation integrity beyond repair through basic waterproofing measures.
Interior Waterproofing Methods and Materials

Interior waterproofing approaches divide into surface treatments that manage minor moisture and comprehensive drainage solutions that handle significant water intrusion. Surface treatments address symptoms by blocking moisture transmission through existing foundation surfaces, while drainage systems manage root causes by intercepting and removing water before it penetrates living spaces.
Penetrating sealers provide molecular level protection by chemically reacting with concrete components. Concrete sealers absorb into porous masonry, filling capillary pathways that normally transmit moisture through foundation walls. Crystalline waterproofing products trigger chemical reactions within concrete that form insoluble crystal structures, physically blocking water movement while allowing vapor transmission that prevents trapped moisture damage. These penetrating products work from within the concrete matrix rather than forming surface films.
Coating products create physical barriers on foundation wall surfaces to block water transmission. Epoxy coatings form rigid, impermeable layers bonded to concrete surfaces, providing reliable protection in dry conditions but potentially failing if applied over damp substrates or subjected to crack movement. Polyurethane coatings offer flexible moisture barriers that accommodate minor foundation movement without cracking. Waterproof membranes like the 40 mil thick WM40 self adhering sheet provide robust protection against hydrostatic pressure, particularly suited for insulated concrete form applications where polymer sheets bond to smooth concrete surfaces. These coating systems must be applied to properly prepared surfaces: clean, dry, and free from previous failed coatings.
Crack repair materials provide targeted fixes for gaps and imperfections that serve as water entry points. Hydraulic cement offers quick setting repair for active leaks, expanding as it cures to form tight seals in holes and cracks. Epoxy injection systems deliver structural repairs for dormant cracks, pumping two part resins that cure to concrete like strength and permanently bond fractured sections. STPE joint fillers (silyl terminated polyether) provide superior adhesion for sealing cracks, gaps, and substrate imperfections where materials meet or where control joints require flexible weatherproof protection.
Reinforced wall liners and vapor barriers deliver comprehensive moisture protection as engineered moisture management systems. Wall liner panels combine drainage channels with moisture barriers, creating continuous protection that directs infiltrating water downward to perimeter drains rather than allowing it to enter living spaces. Vapor barriers installed as sheet membranes prevent moisture transmission through foundation walls while allowing the wall assembly to dry toward the interior when exterior moisture conditions decrease. Sealants and coatings represent more affordable options for managing minor moisture compared to the significant investment required for complete French drain and sump pump drainage systems.
Interior vs Exterior Basement Waterproofing Comparison

Interior and exterior waterproofing methods address basement moisture through fundamentally different strategies. Interior systems manage water after it reaches the foundation while exterior methods prevent water from contacting foundation surfaces.
| Factor | Interior Waterproofing | Exterior Waterproofing |
|---|---|---|
| Cost | $3,000 to $8,000 typical range for drainage systems | $10,000 to $30,000+ requiring excavation equipment |
| Installation Time | 2 to 3 days for most residential basements | 1 to 2 weeks including excavation and backfill |
| Invasiveness | Work contained inside basement, no landscaping disruption | Requires excavating entire foundation perimeter, destroys landscaping |
| Maintenance Access | All components accessible from basement interior | Buried systems require excavation to inspect or repair |
| Effectiveness | Manages water after foundation entry, suitable for minor to moderate issues | Prevents water from reaching foundation, addresses source problems |
| Longevity | 20 to 25 years with proper maintenance and accessible repairs | 25 years design life but often 5 to 8 years actual performance due to soil movement |
Interior systems deliver cost effective moisture management through less disruptive installation that maintains landscaping investments and completes quickly without weather delays. You gain easier maintenance access since all system components (pumps, drainage channels, backup batteries, and discharge lines) remain visible and reachable from inside the basement. Repairs and inspections proceed without excavation equipment or soil removal, reducing ongoing maintenance costs and simplifying troubleshooting when performance issues develop.
Exterior methods provide source level water prevention by installing waterproof barriers and drainage systems on the outside faces of foundation walls where water first contacts the structure. This approach proves particularly effective in areas with high water tables or persistent hydrostatic pressure that overwhelms interior drainage capacity. But exterior waterproofing requires extensive excavation around the entire foundation perimeter, potentially damaging existing landscaping, underground utilities, concrete walkways, and adjacent structures. Costs run significantly higher due to excavation equipment requirements, labor intensity, and site restoration work. Polymer based waterproofing sealants applied to exterior foundation walls carry design specifications for 25 year service life but frequently underperform, remaining effective for only 5 to 8 years as soil movement and hydrostatic pressure cycles progressively damage the waterproofing layers.
Step by Step Interior Waterproofing Installation Process

Professional interior waterproofing installation typically requires 2 to 3 days for most residential basements, with work proceeding systematically from assessment through final restoration without disrupting exterior landscaping or requiring you to vacate the property.
The complete installation sequence:
-
Initial inspection and moisture source identification – Contractors examine basement perimeter, identify active leak locations, assess wall and floor crack patterns, measure moisture levels, and determine optimal drainage system routing based on basement layout and lowest floor elevations.
-
Jackhammering perimeter trench along basement floor edges – Concrete saws cut control lines 12 to 18 inches from walls, then jackhammers break and remove concrete to create trenches approximately 12 inches deep and 8 to 10 inches wide around basement perimeter or in targeted problem areas.
-
Installing gravel base and filter fabric in trench – Workers place 2 to 3 inches of crushed stone in trench bottom for drainage base, then line trench sides with geotextile filter fabric to prevent soil infiltration while allowing water passage.
-
Placing perforated drainage pipe in trench – 4 inch diameter PVC pipe with perforations facing downward rests on gravel base with slight slope (1/8 inch per foot minimum) directing water toward collection point, with filter fabric wrapped over pipe before backfilling with additional crushed stone.
-
Creating sump pump basin and installing pump unit – Contractors excavate deeper pit at lowest basement point, install plastic or concrete basin, position submersible pump with float switch, and connect intake to drainage pipe network and discharge line to exterior.
-
Applying waterproof coatings or vapor barriers to walls – After drainage installation, workers prepare wall surfaces by cleaning and repairing cracks, then apply specified waterproof membranes, coatings, or vapor barriers to foundation walls from floor level to grade level or higher.
-
Pouring new concrete to restore floor surface – Fresh concrete fills trenches over drainage pipe, leveled flush with existing floor, tooled smooth, and allowed to cure, with expansion joints cut at appropriate intervals to control shrinkage cracking.
Professional installation ensures proper below floor level drainage positioning that intercepts water before it surfaces in living spaces, creating hydrostatic relief that reduces pressure against foundation walls and floors. The concrete restoration phase requires 24 to 48 hours curing time before foot traffic and 5 to 7 days before full loading, with installers scheduling work to minimize disruption and coordinating temporary access arrangements for basement utilities and storage areas during the project.
Waterproofing System Costs and Budget Planning

Interior waterproofing project costs vary significantly based on basement dimensions, moisture problem severity, and selected system components, with pricing reflecting both material specifications and installation complexity required to achieve effective long term water management.
Primary factors affecting total project investment:
- Basement square footage – Larger basements require more linear footage of drainage trenching, additional drainage pipe, extended vapor barrier coverage, and potentially multiple sump pumps to manage water from distant perimeter sections
- Drainage system extent (partial vs full perimeter) – Targeted installations addressing specific problem walls cost $2,000 to $4,000, while complete perimeter systems protecting entire basement footprints range $5,000 to $8,000 or more
- Sump pump type and backup systems – Basic 1/3 horsepower submersible pumps start around $150 to $300, while higher capacity units with battery backup systems and water powered secondary pumps add $800 to $1,500 to project costs
- Wall treatment products selected – Economy concrete sealers run $0.50 to $1.50 per square foot for materials, mid grade coating systems cost $2 to $4 per square foot, and premium waterproof membranes with vapor barrier properties reach $4 to $7 per square foot
- Professional vs DIY installation – DIY surface treatments using sealants and hydraulic cement for minor moisture issues may total $200 to $800 in materials, while professional drainage system installation ranges $3,000 to $8,000 including labor, equipment, materials, and project management
Basic sealant applications addressing minor dampness and surface moisture cost significantly less than complete drainage systems incorporating French drains, sump pumps, vapor barriers, and comprehensive crack repair. If you’re facing light condensation or occasional seepage after heavy rains, you may achieve adequate protection with $500 to $1,500 invested in quality sealers, dehumidification, and targeted crack repairs. Properties experiencing standing water, recurring flooding, or persistent moisture that threatens structural integrity typically require drainage system investments in the $4,000 to $8,000 range for lasting protection.
Interior waterproofing delivers cost effective moisture management compared to exterior excavation methods where total project costs commonly reach $10,000 to $30,000 for foundation perimeter excavation, waterproofing membrane application, drainage system installation, and landscape restoration. The long term investment value extends beyond immediate water control, protecting finished basement improvements, preventing mold related health issues, maintaining indoor air quality, preserving property values, and avoiding costly structural repairs that result from ongoing moisture damage to foundations, floor joists, and wall framing.
Sump Pump Selection and Backup Systems
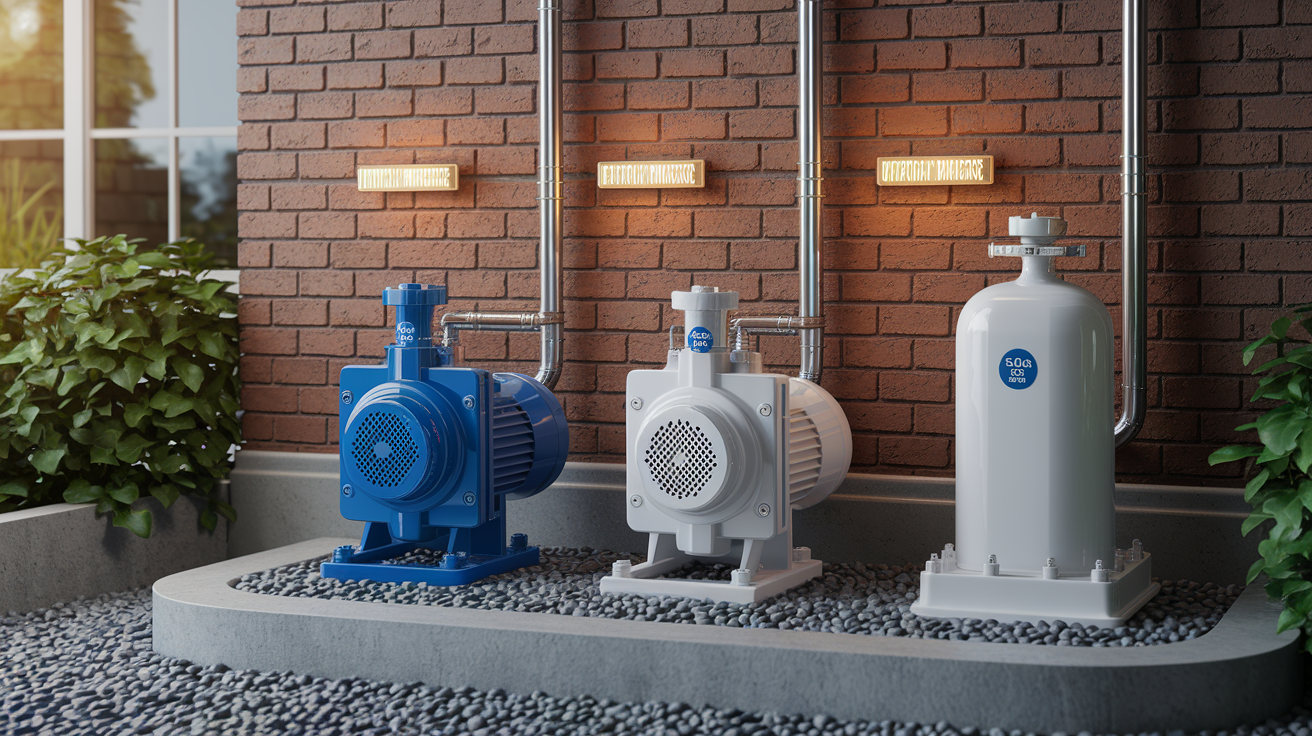
Sump pumps function as the critical evacuation component in interior waterproofing systems, collecting water channeled through perimeter drains and forcibly removing it from basement collection basins through discharge piping that carries thousands of gallons per hour away from foundation perimeters during heavy water intrusion events.
Two primary pump configurations serve residential applications with distinct installation characteristics and performance profiles. Submersible sump pumps sit entirely within collection basins below water level, operating quietly with motors sealed against moisture infiltration and typically delivering 2,000 to 4,000 gallons per hour pumping capacity through 1 1/4 or 1 1/2 inch discharge connections. Pedestal sump pumps mount motors on posts above basin water levels with pump impellers submerged below, offering easier motor access for maintenance but generating more operational noise and generally providing similar flow rates through comparable discharge fittings. Horsepower ratings from 1/3 HP for light duty applications to 3/4 HP for high volume situations determine pumping capacity, with proper sizing based on basement square footage, typical water infiltration rates, and vertical lift height from basin to discharge point.
Discharge line routing requires careful planning to prevent evacuated water from returning to foundation areas. PVC piping typically 1 1/2 inches in diameter carries pumped water from basin through basement walls to exterior discharge points positioned at least 10 to 15 feet from foundations. The discharge line should slope continuously downward without low spots that trap water and create freeze points during cold weather. If routing through unheated spaces, discharge lines require insulation or heating cable protection to prevent ice blockages that stop water flow and cause pump failures during critical winter moisture events.
Battery backup systems maintain pump operation during power outages when flooding risk reaches peak levels. Severe storms that knock out electrical service also generate maximum rainfall and groundwater intrusion. Quality backup systems use marine grade deep cycle batteries rated for 40 to 75 amp hours that power DC sump pumps capable of operating 5 to 7 hours on battery reserves, sufficient to handle typical storm duration flooding while main power remains interrupted. More sophisticated backup configurations incorporate water powered secondary pumps that use municipal water pressure to create venturi suction, evacuating sump water without electricity or batteries while main pumps remain inoperative, though these systems operate less efficiently and increase water bills during extended outages.
Sensor equipped advanced sump pump systems provide automatic water detection and emergency protection through float switches, electronic water level sensors, or pressure activated triggers that initiate pump operation when water reaches predetermined collection basin levels. High water alarms add secondary protection by sounding audible alerts or sending wireless notifications when water levels rise beyond normal operating thresholds, warning you of potential pump failures, power outages, or water intrusion volumes exceeding system capacity before basement flooding occurs.
Crack Repair as Part of Interior Waterproofing
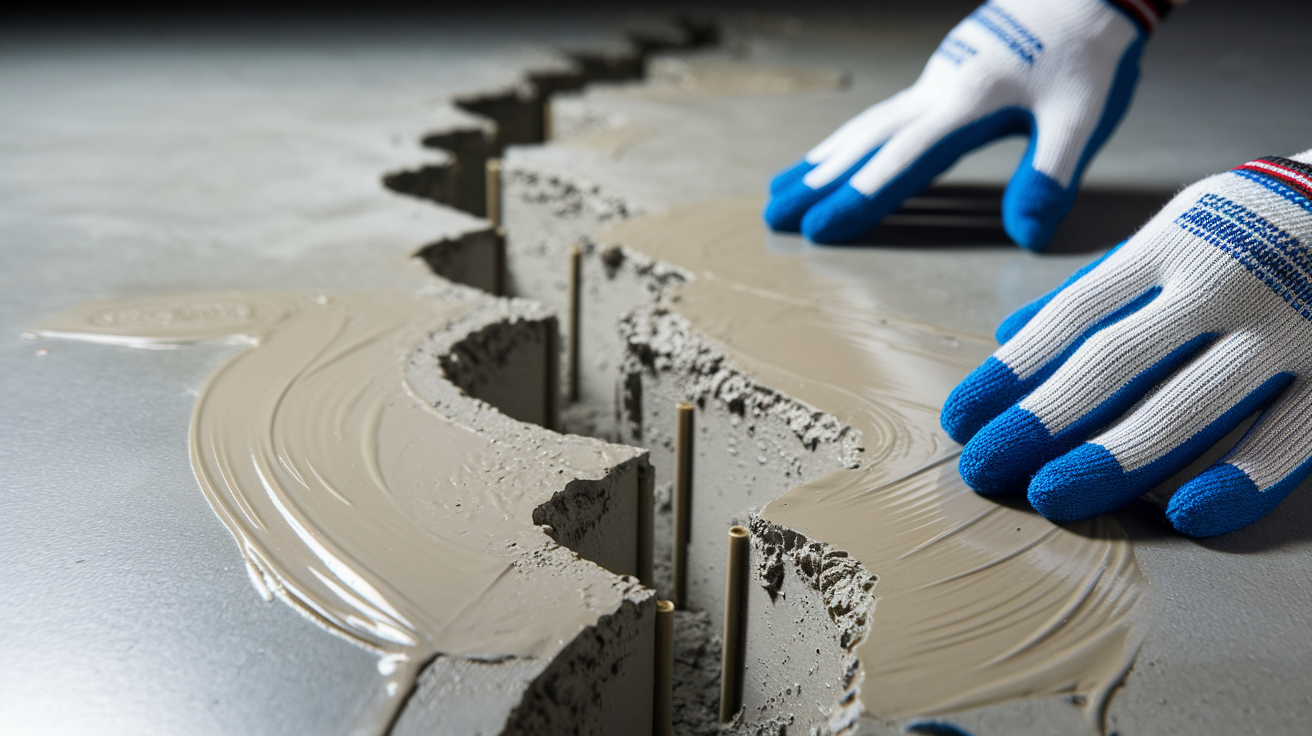
Foundation cracks serve as primary water entry pathways that compromise interior waterproofing system effectiveness, requiring proper repair even when comprehensive drainage systems are installed to manage bulk water intrusion through floor level collection and removal.
Wall cracks develop from multiple structural and environmental factors: foundation settlement as soil beneath footings compresses, concrete shrinkage during initial curing periods, lateral pressure from expansive soils, freeze thaw cycling that progressively widens small fractures, and excessive loads from above grade structures. These cracks permit water passage when hydrostatic pressure builds against exterior foundation surfaces, with even hairline fractures allowing moisture infiltration that manifests as dampness, staining, or active streaming during rainfall events. Proper crack repair addresses these specific entry points with materials matched to crack characteristics and ongoing movement potential.
Hydraulic cement provides quick temporary sealing for active leaks and holes where water currently flows through foundation walls. The material expands slightly as it cures, creating mechanical pressure that forces cement into crack depths and forms water resistant plugs within minutes. Before mixing your next batch, plug the active leak with your first application, because hydraulic cement sets up in 3 to 5 minutes. This rapid set characteristic makes hydraulic cement ideal for emergency repairs during active flooding but less suitable for permanent solutions since the material lacks flexibility to accommodate foundation movement and may crack out if structural shifting continues.
Epoxy injection systems deliver structural repairs for dormant cracks that no longer exhibit movement but require permanent bonding to restore foundation integrity. Contractors install injection ports along crack lengths, then pump two part epoxy resins under pressure that fill crack voids from deepest penetration points outward to surface openings. Cured epoxy achieves compressive strength exceeding concrete specifications, effectively welding fractured sections back together with bonds that resist future water intrusion. Epoxy injection suits vertical wall cracks in poured concrete foundations but works less effectively in block walls where hollow cores prevent complete cavity filling.
Polyurethane injection addresses active water leaks through cracks that continue admitting moisture despite surface patching attempts. The expanding foam material reacts with water during application, generating pressure that forces polyurethane deep into crack channels while the chemical reaction creates flexible, closed cell foam barriers that accommodate ongoing minor foundation movement without losing seal integrity. This method proves particularly effective for floor cracks and cove joints where seasonal ground movement prevents rigid repair materials from maintaining waterproof bonds.
Cove joint sealing targets the vulnerable seam where basement floors meet walls, a junction that experiences differential movement between vertical and horizontal foundation elements and commonly admits water even when wall and floor surfaces appear crack free. STPE (silyl terminated polyether) joint fillers provide superior adhesion for these challenging locations, bonding to both concrete surfaces while remaining flexible enough to accommodate normal expansion and contraction cycles. The advanced polymer chemistry resists moisture deterioration and maintains elasticity across temperature ranges encountered in basement environments.
Ignoring crack repair during interior waterproofing installation compromises long term structural integrity and system effectiveness regardless of drainage capacity installed. Water continuing to exploit foundation vulnerabilities progressively widens cracks through freeze thaw action, dissolves lime compounds from concrete, and eventually undermines structural support provided by foundation walls. The flowing water also carries soil particles through cracks in a process called piping, which creates voids beneath basement floors and behind foundation walls that lead to settlement, additional cracking, and escalating repair costs. Comprehensive waterproofing addresses both water removal through drainage systems and entry point elimination through proper crack repair, creating layered protection that manages moisture from multiple approaches rather than relying on single method solutions vulnerable to specific failure modes.
Dehumidification and Air Quality Management

Interior waterproofing systems effectively manage liquid water intrusion through drainage and pump evacuation, but comprehensive moisture control requires addressing airborne humidity that contributes to condensation, musty odors, and mold growth in basement environments even after waterproofing installation prevents direct water entry.
Condensation develops when warm humid air contacts cooler basement surfaces: foundation walls, cold water pipes, metal ductwork, and concrete floors. This causes moisture to condense from vapor into liquid water droplets that accumulate on surfaces and promote mold growth, material deterioration, and indoor air quality degradation. This moisture source persists even with perfect drainage systems because it originates from air humidity rather than groundwater infiltration. Seasonal conditions worsen condensation problems during summer months when hot outdoor air enters basements and encounters 55 to 65°F foundation walls that remain cool due to surrounding earth temperatures, creating ideal conditions for sustained moisture deposition.
Maintaining optimal relative humidity levels between 30 and 50% prevents condensation formation while inhibiting mold growth that requires humidity above 60% for spore germination and colony development. Humidity control eliminates musty odors caused by mildew and mold growing on organic materials like cardboard boxes, wood framing, paper faced drywall, and stored fabrics. Proper humidity management also protects air quality by reducing airborne mold spores, dust mite populations that thrive in damp conditions, and volatile organic compounds released by moisture damaged building materials. Health benefits extend to reduced respiratory irritation, fewer allergy symptoms, and decreased asthma triggers for sensitive occupants.
Dehumidifier sizing depends on basement square footage, typical humidity levels, and moisture load characteristics. Units rated for 30 to 50 pint daily moisture removal suit basements up to 1,500 square feet with moderate dampness, while spaces larger than 2,000 square feet or areas with severe moisture problems require 70 to 90 pint capacity models. Energy efficient units carrying Energy Star certification reduce operating costs during continuous summer operation. Dehumidifiers require regular maintenance including monthly filter cleaning, seasonal coil inspection, and continuous drainage connections or frequent bucket emptying to maintain performance as collected moisture fills reservoirs.
Dehumidifiers complement interior drainage systems rather than replacing them. They address airborne moisture while drainage manages liquid water intrusion. This dual approach creates comprehensive moisture control by preventing both flooding from groundwater infiltration and surface dampness from humidity condensation. Running dehumidifiers year round maintains consistent humidity control even during winter when heating systems lower indoor humidity but cold foundation surfaces still cause localized condensation. The combination of effective drainage removing water before it enters living spaces and dehumidification managing air moisture creates dry, healthy basement environments suitable for storage, mechanical equipment protection, and finished living space development.
Installation Approach: DIY Feasibility and Professional Requirements
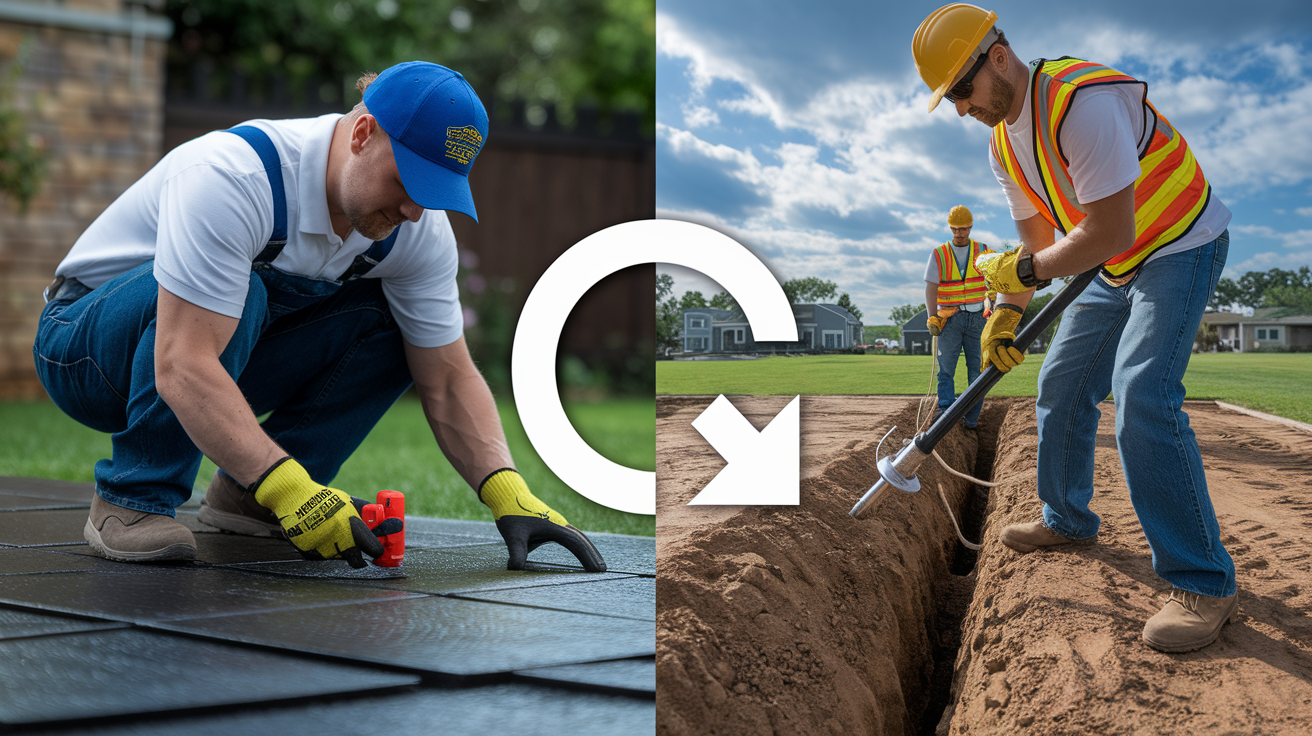
Interior waterproofing approaches range from straightforward DIY surface treatments to complex professional drainage installations, with project selection depending on moisture severity, available skills, equipment access, and tolerance for installation risks that affect long term system performance.
| Approach | Suitable For | Limitations | Cost Range |
|---|---|---|---|
| DIY Sealants | Minor dampness, light condensation, surface moisture on walls | Does not address active water intrusion, wears off in 2 to 5 years, requires reapplication | $200 to $800 materials |
| DIY Crack Repair | Individual cracks under 1/4 inch wide, non structural damage, accessible locations | Difficult to achieve proper injection depth, may not stop active leaks permanently | $50 to $300 per crack |
| Professional Drainage Systems | Recurring flooding, standing water, high water tables, comprehensive protection | Higher upfront cost, requires 2 to 3 day installation disruption, needs ongoing maintenance | $3,000 to $8,000 installed |
DIY sealant applications and minor crack repairs suit homeowners facing light moisture issues like occasional dampness after heavy rains or seasonal condensation on foundation walls. These surface treatments work when bulk water intrusion isn’t occurring and basement floors remain dry between rainfall events. Concrete sealers, waterproof paints, and hydraulic cement repairs fall within average homeowner capabilities with basic hand tools, though surface preparation determines success more than product selection. Rushed application over dirty, damp, or efflorescence covered surfaces causes premature coating failure regardless of product quality.
French drain installation exceeds most homeowner capabilities due to equipment requirements, physical demands, and technical knowledge needed for proper system design. Jackhammering concrete floors generates extreme noise, hazardous dust, and physical strain requiring industrial demolition hammers weighing 30 to 60 pounds operated for hours at a time. Improper drainage slope calculations cause water pooling in trenches rather than flowing to sump basins. Incorrect gravel sizing or missing filter fabric allows soil infiltration that clogs drainage pipes within months. Sump pump installation requires understanding plumbing codes, electrical wiring for pump motors and backup systems, and discharge line routing that prevents water from returning to foundation areas or violating municipal stormwater regulations.
Professional installation benefits justify the investment through multiple value additions beyond DIY capabilities. Experienced contractors design systems matched to specific moisture problems rather than applying generic solutions, calculating proper drainage capacity, sump pump sizing, and backup power requirements based on basement dimensions and local soil conditions. They provide warranty coverage protecting against installation defects and system performance failures for periods typically ranging 5 to 10 years transferable to future property owners. Professional equipment access includes ride on concrete saws, high capacity jackhammers, laser levels for precision slope measurement, and concrete mixing equipment that restores floors to specifications matching original construction. The 2 to 3 day completion timeline minimizes disruption compared to DIY projects stretching across multiple weekends while risking incomplete installations that leave basements vulnerable during extended construction periods.
Contractor selection criteria for professional waterproofing projects:
- Valid licensing and insurance coverage including general liability and workers compensation protecting you from installation accident liability
- Specialized waterproofing experience spanning minimum 5 years with documented basement drainage installations rather than general remodeling background
- References from recent similar projects verifiable through direct homeowner contact discussing system performance and contractor responsiveness
- Detailed written estimates with scope breakdown separating materials, labor, equipment, permits, and optional upgrades rather than lump sum pricing
- Transferable warranty coverage clearly specifying what components and failure modes are covered for how many years after installation
- Membership in industry associations like the Basement Health Association or National Association of Waterproofing and Structural Repair Contractors demonstrating professional commitment
Project planning for professional drainage installation requires realistic expectations about temporary disruptions and long term commitments. The 2 to 3 day installation timeline means limited basement access during work hours as contractors operate loud equipment, stage materials throughout spaces, and create dust despite containment efforts. Temporary utility access interruptions may occur when working near furnaces, water heaters, electrical panels, or sump pump areas requiring shutdowns for safe equipment installation. Permit requirements vary by jurisdiction but commonly include plumbing permits for sump pump discharge connections, electrical permits for pump wiring, and building permits for substantial foundation work, with permit fees typically adding $100 to $400 to project costs. Building code compliance particularly affects sump pump discharge routing. Many municipalities prohibit connections to sanitary sewers or direct discharge to adjacent properties, requiring dedicated stormwater connections or overland discharge to streets or drainage easements.
Getting multiple quotes from qualified contractors provides cost comparisons and installation approach variations that inform decision making, but don’t select based solely on lowest price. Bargain pricing frequently indicates inexperienced contractors, substandard materials, or incomplete scope that omits critical components like backup pumps, adequate discharge capacity, or proper wall treatments. Quality installation and comprehensive warranty protection justify cost premiums of 10 to 20% above lowest bids, particularly for systems protecting finished basement investments or irreplaceable stored possessions from water damage.
Maintenance Requirements for Interior Systems
Interior waterproofing systems provide easier ongoing maintenance compared to buried exterior methods since all components remain accessible from inside basement spaces without excavation requirements for inspection, cleaning, or repair procedures.
Regular maintenance tasks with recommended frequencies:
-
Quarterly sump pump testing and basin cleaning – Pour 5 gallons of water into sump basin to verify float switch activation, confirm pump operation, check discharge flow, and remove accumulated sediment from basin bottom that can interfere with float movement or clog pump intakes.
-
Annual discharge line inspection for clogs or freezing – During late fall before freeze up, trace discharge line from pump outlet to exterior terminus checking for obstructions, verify proper slope without low spots, confirm exterior discharge point directs water away from foundation, and insulate exposed sections in unheated areas to prevent ice blockages.
-
Biannual dehumidifier filter replacement – Clean or replace air intake filters every 6 months to maintain airflow efficiency, inspect collection buckets or drainage connections for proper operation, and clean coils if dust accumulation reduces performance.
-
Annual drainage channel inspection for sediment buildup – Remove access covers from perimeter drain inspection ports if installed, check for sediment accumulation in channels, flush drains with garden hose if accessible, and verify water flows freely to sump basin without pooling in trenches.
-
Seasonal battery backup testing before storm seasons – In early spring and late fall, disconnect primary pump power to verify battery backup activates, confirm backup pump operates properly, check battery charge levels, test high water alarm functions, and replace batteries showing diminished capacity.
-
Annual professional inspection of wall coatings and vapor barriers – Schedule yearly examinations by waterproofing contractors to identify coating deterioration, check for new cracks requiring repair, assess vapor barrier adhesion, verify system components function as designed, and address minor issues before they escalate.
Regular maintenance extends system service life from typical 15 to 20 years for neglected installations to 25 to 30 years for properly maintained systems, preventing costly emergency repairs when pumps fail during peak flooding periods or drainage channels clog and allow water to bypass collection systems. Proactive maintenance also protects substantial basement investments in finished spaces, stored possessions, and mechanical equipment from water damage that results from system failures during your absence.
Accessible interior system components make DIY maintenance feasible for most homeowners comfortable with basic mechanical tasks. Sump pump testing requires nothing more than buckets of water and observation of pump cycles. Discharge line inspection involves visual examination and simple garden hose flushing. Battery testing uses inexpensive multimeters or simple load tests disconnecting primary power. Only specialized tasks like drainage channel cleaning or vapor barrier inspection require professional service, and even these procedures cost far less than excavating buried exterior systems for similar maintenance needs.
When Interior Waterproofing Is the Right Choice
Interior waterproofing systems deliver effective solutions for specific moisture scenarios while proving impractical or insufficient for others, with optimal application depending on water intrusion severity, site constraints, budget parameters, and long term property goals.
Interior drainage systems excel for minor to moderate water intrusion where groundwater seepage, seasonal flooding, or cove joint leaks create recurring dampness without catastrophic flooding or severe structural compromise. These installations provide practical permanent solutions when exterior excavation faces prohibitive costs, site access limitations, or physical obstacles preventing perimeter work. The approach manages water after it reaches foundation surfaces rather than preventing initial contact, positioning drainage infrastructure where water can be captured and removed before entering living spaces.
Scenarios where interior waterproofing provides ideal solutions:
- Limited exterior access due to landscaping features including mature trees, established gardens, decorative hardscaping, or underground utilities preventing excavation without significant damage
- Budget constraints preventing $10,000 to $30,000 exterior excavation investments while still requiring more protection than surface sealants provide
- Water pooling under basement slabs from high water tables or hydrostatic pressure beneath floor surfaces where exterior work cannot address sub slab moisture
- Existing finished basements requiring minimal disruption to living spaces, with work completed from inside without removing drywall, flooring, or built in features
- Seasonal water issues rather than constant flooding, such as spring snowmelt or summer storm events that overwhelm temporary measures but don’t warrant full exterior waterproofing
- Properties with shared walls including townhomes, row houses, or commercial buildings where excavating one foundation side proves impossible without affecting adjacent structures
- Situations requiring quick implementation during real estate transactions
Final Words
An interior basement waterproofing system handles water below floor level, keeping your basement dry without tearing up the yard.
The core components—perimeter drains, sump pumps, vapor barriers, and discharge lines—work together to capture groundwater and pump it away from your foundation.
Installation takes 2 to 3 days, costs less than exterior excavation, and gives you easier access for future maintenance.
Pair it with proper grading, clean gutters, and regular sump pump checks, and you’ve got a reliable defense against water intrusion that protects your home’s structure and value for years to come.
FAQ
Does interior basement waterproofing work?
Interior basement waterproofing works by managing water after it reaches the foundation, using drainage systems to capture groundwater below floor level and pump it away before it enters living spaces. These systems effectively handle minor to moderate water intrusion, removing thousands of gallons per hour through integrated perimeter drains and sump pumps. While they don’t prevent water from reaching the foundation like exterior methods, properly installed interior systems keep basements dry when combined with crack repairs and moisture barriers.
How do you waterproof an interior basement?
You waterproof an interior basement by installing a perimeter drainage system that captures water below floor level, directs it to a sump pump basin, and evacuates it through discharge lines away from the foundation. The process typically involves jackhammering trenches along basement floor edges, installing perforated drainage pipes in gravel beds, placing a sump pump, applying waterproof coatings or vapor barriers to foundation walls, and restoring concrete floors. Professional installation usually takes 2 to 3 days.
How much does interior basement waterproofing cost?
Interior basement waterproofing costs vary based on basement square footage, moisture problem severity, system complexity, and whether you choose basic sealant applications or complete drainage systems with French drains and sump pumps. Basic sealant and coating applications cost significantly less than full perimeter drainage installations. Total project costs also depend on wall treatment products selected, backup system additions, and professional versus DIY installation approaches.
What are the disadvantages of interior waterproofing?
The disadvantages of interior waterproofing include managing water after it reaches the foundation rather than preventing entry at the source, which means moisture still contacts foundation walls before drainage systems capture it. Interior systems also reduce usable floor space slightly where drainage channels run along basement perimeters. These methods work best for minor to moderate water issues, with severe foundation damage or extremely high water tables potentially requiring exterior solutions instead.
When should you choose interior waterproofing over exterior methods?
You should choose interior waterproofing over exterior methods when exterior access is limited by landscaping or structures, budget constraints prevent costly excavation, you need quick implementation with minimal property disruption, or you’re dealing with water pooling under basement slabs. Interior systems also make sense for existing finished basements, seasonal water issues rather than constant flooding, properties with shared walls like townhomes, and situations where maintenance accessibility from inside the basement is preferable.
How long does interior basement waterproofing last?
Interior basement waterproofing lasts longer when properly maintained because components remain accessible for inspection and repairs from inside the basement. Regular quarterly sump pump testing, annual drainage channel cleaning, and seasonal battery backup checks extend system life and prevent failures. Supplementary maintenance of wall coatings, vapor barriers, and discharge lines ensures long-term effectiveness, with properly maintained systems providing decades of reliable moisture control.
Can you finish a basement after interior waterproofing?
You can finish a basement after interior waterproofing once the system effectively manages moisture below floor level and maintains dry conditions suitable for building materials. Properly installed drainage systems with vapor barriers prevent moisture from reaching walls and floors, protecting drywall, flooring, and furnishings from mold growth and water damage. Effective moisture control creates healthy indoor air quality and reduces energy losses, making waterproofed basements safe for conversion into living space.
What maintenance does an interior waterproofing system need?
An interior waterproofing system needs quarterly sump pump testing and basin cleaning, annual discharge line inspections for clogs or freezing, biannual dehumidifier filter replacement, annual drainage channel checks for sediment buildup, seasonal battery backup testing before storm seasons, and annual professional inspections of wall coatings and vapor barriers. These accessible interior components make DIY maintenance feasible for most homeowners, with regular upkeep extending system life and preventing costly emergency repairs.
Should interior waterproofing include crack repair?
Interior waterproofing should include crack repair because foundation cracks serve as primary water entry points that compromise system effectiveness even with drainage installed. Hydraulic cement provides quick temporary fixes, epoxy injection repairs structural concerns in dormant cracks, and polyurethane injection stops active water leaks. Ignoring crack repair during waterproofing allows water to continue exploiting foundation vulnerabilities, threatening long-term structural integrity and reducing drainage system performance.
How does a sump pump work with interior waterproofing?
A sump pump works with interior waterproofing by collecting water from perimeter French drains and basement floors in a basin, then evacuating it through discharge pipes away from the foundation. These pumps remove thousands of gallons per hour, with capacity ratings based on basement size and expected water volume. Advanced systems include sensors that automatically activate when water is detected, and battery backup units maintain operation during power outages when flooding risk peaks.