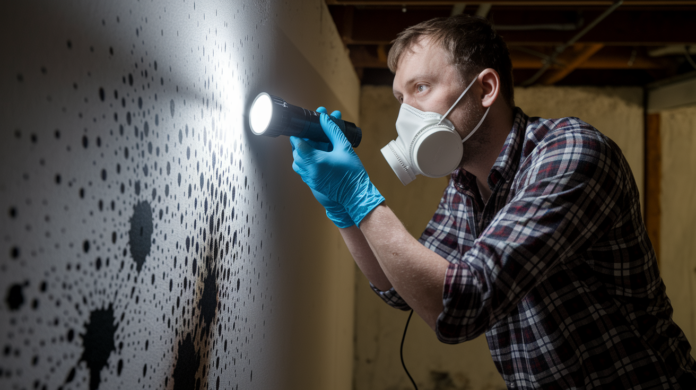

You might think professional mold testing after a flood is overkill, especially if you don’t see obvious black spots yet. But mold spores start growing within 24 to 48 hours of water contact, often in wall cavities and under flooring where you can’t spot them until the damage is serious. Testing during that narrow window tells you whether your drying efforts are working or if contamination is already spreading through your home’s hidden spaces. This guide walks through visual inspections, DIY test kits, moisture meter use, and when to call a pro so you can catch the problem early and avoid a full remediation project.
Immediate Post-Flood Mold Detection Steps
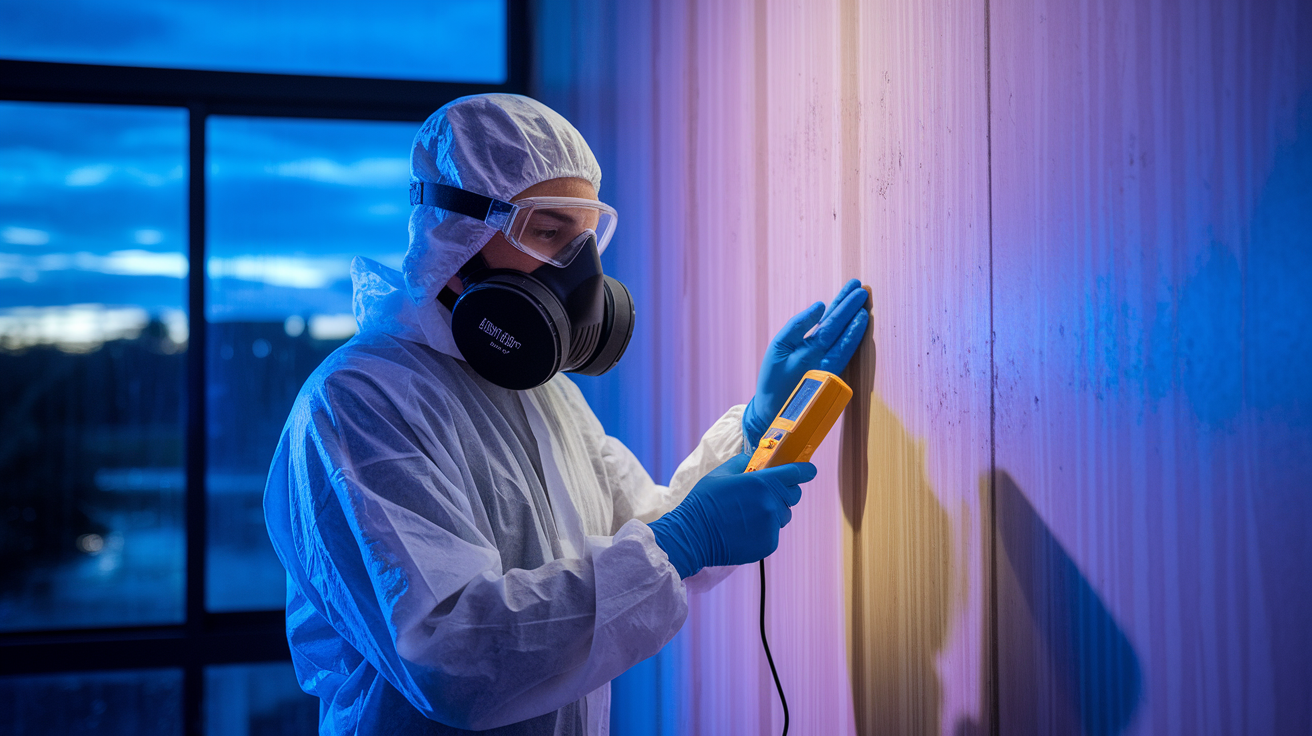
Mold spores start germinating within 24 to 48 hours of water exposure. That’s your window where testing becomes critical, not optional. The clock starts the moment flood water touches building materials, and every hour you delay gives mold a stronger foothold. Early detection during this period makes the difference between a manageable cleanup and a full remediation project costing thousands. Wait until visible growth appears on walls? You’re already dealing with established colonies that have spread through drywall, insulation, and structural cavities.
Before you start any inspection, put on an N95 respirator or better, nitrile gloves, safety goggles, and disposable coveralls if you’re entering spaces with standing water or visible contamination. Mold releases spores into the air when disturbed. Breathing those spores during testing exposes you to the same health risks you’re trying to assess. Gloves prevent skin contact with contaminated surfaces. Goggles keep spores out of your eyes, where they can cause irritation even if you’re not allergic. If the affected area is larger than a single room or smells strongly of mildew, treat the space like a contaminated zone and don’t skimp on protection.
Check walls, ceilings, and floors for black, green, or brown spots that weren’t there before the flood. Look for bubbling or peeling paint, which signals moisture trapped behind the surface. Water stains show up as yellow or brown discoloration, often with darker edges where the water line dried. Warped baseboards, buckled flooring, and ceiling sag all indicate ongoing moisture problems that’ll support mold growth. Don’t just check obvious flood zones. Water wicks through drywall and travels along framing, so inspect rooms adjacent to the flooded area and floors directly above basement flooding.
Walk through every affected room and note any musty, earthy, or damp basement smell. That odor comes from microbial volatile organic compounds mold releases as it grows, and it’s often your first indicator that growth has started even when you can’t see it yet. Take photos and videos of every stain, discolored area, and damaged material with your phone’s timestamp turned on. Shoot wide shots that show room context, then close-ups of specific damage. These records document the progression of contamination, establish a baseline for insurance claims, and help you track whether your drying efforts are working or if the problem’s spreading.
Watch for health symptoms in anyone who enters the flooded space: persistent coughing that gets worse in certain rooms, sneezing fits that start after being in the house, sinus congestion that clears up when you leave, headaches that don’t respond to normal treatment, unexplained fatigue, skin rashes, or watery eyes. These symptoms don’t prove mold is present, but they’re secondary indicators that contamination exists somewhere in the space, possibly in hidden cavities where visual inspection can’t reach. If multiple people develop respiratory issues after the flood, that pattern suggests airborne spore concentration has reached problematic levels and testing should escalate to professional methods immediately.
DIY Mold Testing Methods After Water Damage
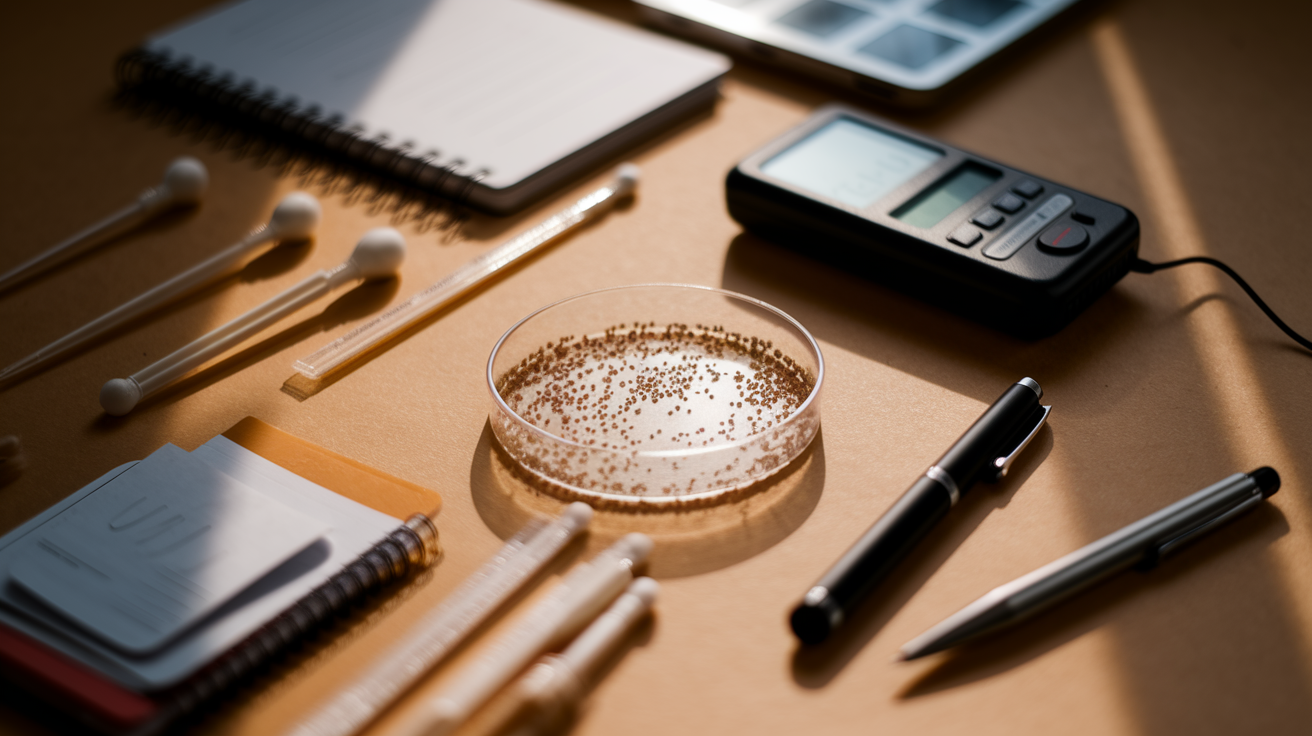
Home improvement stores sell petri dish kits, swab tests, and tape lift sampling strips that let homeowners collect samples for lab analysis without hiring an inspector. These kits cost $10 to $50 and provide basic screening for mold presence. The petri dish approach exposes a growth medium to room air, then you seal it and wait 48 to 96 hours to see what colonies develop. Swab tests work like the petri method but you physically wipe a suspected surface with the collection tool. Tape lift samples use clear adhesive strips pressed against discolored areas, then sent to a lab that identifies what’s stuck to the tape under a microscope.
Start testing moisture levels before you test for mold itself, because moisture tells you where growth is happening or about to start. Use a pin-type or pinless moisture meter on drywall, holding the tool flat against the surface and taking readings every two feet along walls that got wet. Moisture meters show percentage readings. Anything above 20 percent means that material is wet enough to support active mold growth and needs immediate attention. Test behind baseboards by removing a short section, test inside closets against exterior walls, and test ceiling drywall below any upper-floor bathrooms or plumbing. Use a digital hygrometer to measure ambient humidity in each room. Hold it at chest height in the room’s center and let it stabilize for five minutes. If humidity reads above 60 percent, the air itself is damp enough for surface mold on fabrics, wood, and paper even if the walls test dry. That tells you dehumidifiers need to run around the clock until readings drop below 50 percent.
The biggest limitation of DIY kits? They can’t identify toxic species or give you spore concentration numbers. A petri dish might grow mold colonies, but you won’t know if it’s harmless Cladosporium or dangerous Stachybotrys without lab analysis that costs extra and takes seven to ten days for results. Tape samples show what’s on the surface you tested, but they don’t tell you what’s in the air or hidden behind walls. Swab tests only work if you sample actual mold growth. Testing a clean-looking wall next to a moldy one gives a false negative. All DIY methods give you presence/absence information, not the full picture a professional assessment provides.
If your DIY test shows mold growth, or moisture readings stay above 20 percent after a week of drying, that’s the signal to call a professional. DIY results are useful for confirming your suspicion and deciding whether professional help is worth the cost, but they shouldn’t be used alone to rule out serious contamination or determine that a space is safe to occupy.
| Testing Method | Cost Range | Results Timeline | What It Detects | Limitations |
|---|---|---|---|---|
| Petri dish test | $10-$40 | 48-96 hours | Airborne spore presence in sampled area | Cannot identify species or toxicity without additional lab work |
| Swab testing | $10-$30 | 48-72 hours | Surface contamination at swabbed location | Only tests exact spot contacted, misses hidden growth |
| Tape lift sample | $15-$35 | 72-120 hours with lab | Surface mold species through microscope analysis | Requires visible growth, does not measure spore concentration |
| Moisture meter | $30-$150 | Immediate | Material wetness percentage | Shows moisture only, not actual mold presence |
Professional Mold Inspection Services and When They’re Necessary
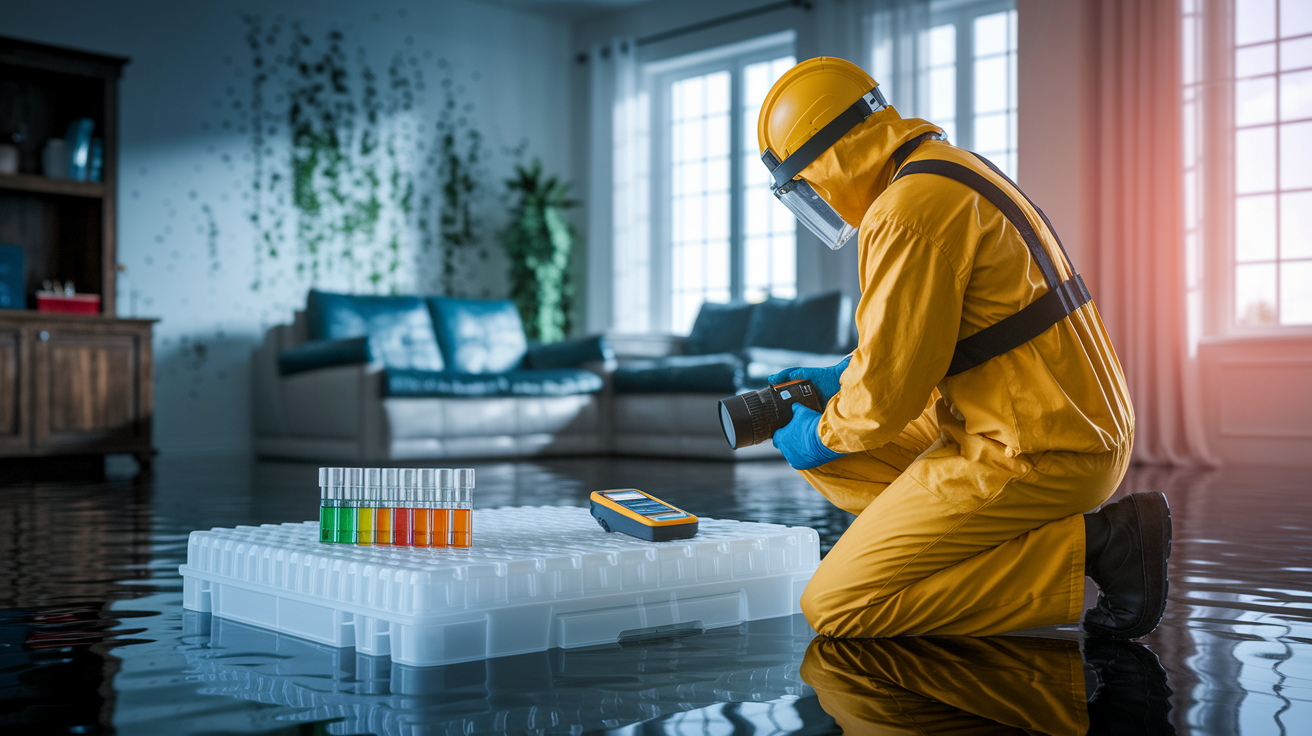
Call a professional inspector when contamination covers more than 10 square feet of continuous area, when multiple rooms show signs of growth, when the HVAC system got flooded and may be distributing spores, or when you suspect toxic mold species based on black or dark green coloration with a slimy texture. Professional assessment is also necessary if structural framing is damaged and needs moisture testing you can’t reach with consumer tools, or if anyone in the house has a compromised immune system, asthma, chronic allergies, is elderly, or is a young child. These vulnerable populations face serious health risks from exposure levels that wouldn’t bother healthy adults, so you need accurate spore counts and species identification to make informed decisions about occupancy and remediation.
Professional inspectors use thermal imaging cameras that detect temperature differences behind walls, revealing wet insulation and trapped moisture without cutting inspection holes. They carry commercial moisture meters with deeper penetration than DIY models and take readings through finished surfaces to map moisture patterns in wall cavities. Air sampling equipment pulls measured volumes of room air through collection filters that trap spores for lab counting. Surface sampling uses sterile swabs and bulk material samples sent to mycology labs for species identification. This equipment combination detects growth you can’t see, measures contamination levels instead of just confirming presence, and identifies species so you know whether you’re dealing with common molds or the types that produce mycotoxins.
Look for inspectors certified by the Indoor Air Quality Association, the American Council for Accredited Certification, or state licensing programs where applicable. Certification matters less than real-world experience with flood scenarios specifically. Ask how many flood-damaged properties they’ve inspected in the past year and whether they’ve worked with your home’s construction type before. Verify they carry errors and omissions insurance and don’t perform both inspection and remediation services, which creates a conflict of interest. An inspector who also runs a remediation company has a financial incentive to find more mold than exists.
Lab analysis identifies mold down to the species level by examining spore morphology under high-powered microscopes or using DNA sequencing. The report comes back with a list of genera and species found in your samples: Stachybotrys chartarum (black mold), Aspergillus species, Penicillium species, Cladosporium, and others. Each species gets a concentration measurement showing spores per cubic meter of air or colony-forming units per square centimeter of surface. The lab compares indoor readings to an outdoor control sample collected the same day. If indoor Stachybotrys reads 500 spores per cubic meter and the outdoor sample shows none, that’s strong evidence of an indoor problem requiring remediation. Species identification tells you whether mycotoxin-producing molds are present and helps remediation contractors plan containment and disposal procedures.
Professional remediation starts with containment barriers made from plastic sheeting that seal off work areas and prevent spore migration to clean spaces. Air scrubbers with HEPA filtration run continuously during the work, creating negative pressure that pulls air into the containment area rather than letting it escape. Workers remove and bag contaminated materials following protocols that minimize disturbance and airborne release. Antimicrobial treatments apply EPA-registered fungicides to structural surfaces that can’t be removed, though these chemicals don’t replace proper drying and moisture control. After material removal, the space gets final HEPA vacuuming and a post-remediation inspection with clearance testing confirms spore levels have returned to normal ranges. Only hire remediation contractors who hold proper licensing, carry pollution liability insurance, and can provide references from recent flood jobs.
Testing Hidden Mold Behind Walls and Surfaces

Wall cavities and subfloors trap moisture where air circulation can’t reach, creating perfect growth environments that stay wet long after visible surfaces dry. Insulation acts like a sponge, holding water against studs and sheathing. Vapor barriers meant to control humidity become moisture traps after flooding. By the time mold breaks through drywall and becomes visible, heavy colonization has already spread through the cavity. That’s why hidden mold testing matters more than surface inspection. It catches problems while they’re still manageable and before they compromise structural integrity or create sick building syndrome where the whole house becomes a spore distribution system.
Paint that bubbles away from drywall signals moisture trapped between the paint layer and the substrate. Peeling paint near baseboards or in lower wall sections indicates rising damp from wet subfloors or foundation leaks. Yellowing drywall, especially along seams or in ceiling corners, shows water has soaked the gypsum core. Warped baseboards pull away from the wall because they’ve absorbed water and expanded. If you smell musty odors near electrical outlets or switch plates, that’s air movement from the wall cavity carrying volatile compounds from active mold growth. Press your hand flat against suspect walls. If they feel cooler than surrounding areas, that temperature difference suggests trapped moisture.
High-risk locations requiring detailed inspection:
- Wall cavities behind and around all plumbing penetrations including supply lines, drain stacks, and fixture rough-ins where flood water enters through gaps around pipes
- Behind vinyl or wood baseboards in any room that got wet, especially against exterior walls where condensation combines with flood moisture
- Subfloor spaces under carpeting, engineered wood flooring, or any flooring installed before the flood and not yet removed for inspection
- Ceiling spaces below bathrooms or any upper floor that got wet, where water drains through floor assemblies into the ceiling cavity below
- Insulation layers in walls, floors, and attics that absorbed water and can’t dry without removal
- Crawl spaces under the home where flood water pooled and ground moisture continues rising
- Behind kitchen appliances including dishwashers, refrigerators with ice makers, and washing machines where supply line connections and drain hoses hide leaks
- Inside HVAC ductwork, air handlers, and plenums where flood water or excess humidity promotes growth that spreads throughout the house
When surface indicators point to hidden contamination, invasive testing means removing small sections of baseboard to inspect the wall base, or cutting inspection ports in drywall to visually check cavities and take moisture readings inside. Cut ports near the floor where damage is most likely and repairs are easiest to patch. Use a flashlight and inspection mirror to look up into cavities from the opening. If you see discoloration, measure moisture, or smell mold, assume the entire cavity is affected and plan for full drywall removal in that section rather than trying to spot-treat through small access points.
Air Quality Testing Versus Surface Sampling

Air sampling and surface testing measure different types of contamination and answer different questions about your mold problem. Air testing catches what’s floating through the house. Spores that disperse from active colonies and circulate through HVAC systems or natural ventilation. Surface testing examines what’s growing on materials, giving you a snapshot of colonization at specific locations but not telling you whether those spores are becoming airborne.
Air sampling works best when you have health symptoms or strong odors but no visible mold growth, or when you’ve completed remediation and need to verify the space is clean. A pump draws a measured volume of air through a collection cassette that traps particles including mold spores. The cassette goes to a lab where technicians count spores and identify types under a microscope. Air results show spore concentration in counts per cubic meter. Think of it as a census of what you’re breathing at the moment of sampling. If your air shows 2,000 Aspergillus spores per cubic meter but outdoor air shows 500, the difference indicates an indoor source needs location and removal. Air testing finds hidden problems because spores from wall cavities or above ceilings eventually escape into room air even when you can’t see the source colony.
Surface sampling with swabs, tape lifts, or bulk samples identifies what’s growing on visible discoloration or suspect areas. You rub a sterile swab across the stained spot, press adhesive tape against fuzzy growth, or cut a small piece of contaminated material for lab analysis. These methods work when you have confirmed visible mold and need to know the species before planning remediation. Surface results don’t measure air contamination. Just because a wall sample shows heavy Stachybotrys doesn’t automatically mean airborne levels are dangerous. Mold can grow without releasing many spores if conditions are stable, or it can sporulate heavily if disturbed during cleanup attempts without containment.
Choose air sampling when symptoms are present without obvious cause, when you’ve lived with unexplained respiratory problems that improve when you leave the house, or when you need post-remediation clearance proving the space meets acceptable air quality. Choose surface sampling when visible growth appears and you need species confirmation for insurance claims, when health departments require documentation, or when you’re testing small spots to decide whether they’re mold or just dirt and staining. Combine both methods when contamination is extensive. Surface samples identify the species growing in walls or on materials, while air samples reveal whether remediation efforts are controlling spore distribution or if your containment strategy is failing.
Testing Flood-Affected Basements and Crawl Spaces

Basements and crawl spaces are mold factories after flooding because standing water pools longest in below-grade spaces, concrete foundations stay damp for weeks, organic materials stored in basements got soaked, and natural ventilation is minimal. These spaces typically store cardboard boxes, wood furniture, paper records, and fabric items that provide perfect growth surfaces when wet. Concrete doesn’t grow mold itself, but it absorbs moisture that keeps humidity high and creates surface condensation on cooler areas. Porous concrete block walls wick ground water continuously even after flood water recedes.
Measure humidity with a digital hygrometer placed at floor level where dampness concentrates, not at standing height where readings appear better than reality at ground level. Take readings in multiple locations because humidity varies significantly across large basement spaces. Target humidity should stabilize between 30 and 50 percent. Readings above 60 percent mean mold growth is actively happening on any available surface, and materials dry too slowly to prevent colonization. Run dehumidifiers continuously, sized appropriately for space volume. A 70-pint unit handles about 2,000 square feet in moderately damp conditions but flood basements need commercial units running nonstop with continuous drain hoses dumping water outside. Increase ventilation by opening basement windows if outdoor humidity is lower than indoor, or by running exhaust fans that pull damp air outside while fresh air enters through opposite openings to create cross-flow.
Test every porous material that got wet for moisture content and visible contamination. Wood floor joists in basements absorb water through cut ends and bottom surfaces that touched flood water or trapped humidity against wet concrete piers. Probe joists with a moisture meter in several spots along each member. Readings above 20 percent mean that wood is actively decaying and growing mold inside grain patterns where you can’t see it. Insulation between floor joists or in rim joist bays holds moisture indefinitely and must be removed if it was submerged or exposed to prolonged 70+ percent humidity. Cardboard storage boxes, paper records, books, and particle board furniture grow mold across all surfaces when they get wet because cellulose feeds aggressive species. Don’t try to dry and save these materials. Bag them for disposal because dried mold stays allergenic and spores release with any disturbance. For proper basement waterproofing guidance that prevents future flooding issues, waterproofing existing foundations and installing drainage systems addresses the root cause better than responding to repeated basement floods with testing and remediation cycles.
Identifying Black Mold and Toxic Mold Species

“Black mold” describes visual appearance, not species, and plenty of dark-colored molds aren’t toxic while some toxic species appear gray, white, or greenish. The term creates confusion because homeowners see any dark spot on a wall and panic about toxicity when they might be looking at harmless mildew or Cladosporium that rarely causes problems. Stachybotrys chartarum is the species that earned the toxic black mold reputation, and it does grow dark greenish-black colonies with a slimy texture when actively growing, but color alone cannot confirm species or toxicity. You need lab identification.
The three species most common in flooded homes are Stachybotrys chartarum, which grows on high-cellulose materials like drywall paper, ceiling tiles, and cardboard when they stay wet for weeks. It produces trichothecene mycotoxins that cause serious respiratory problems and neurological symptoms with chronic exposure. Aspergillus species appear as powdery patches in many colors including black, green, yellow, and white depending on which of hundreds of species colonized your materials. Several Aspergillus types produce toxins and all cause allergic reactions. Penicillium grows fuzzy blue-green colonies that smell musty and appears quickly after water damage on virtually any damp surface. While less likely to produce dangerous toxins than Stachybotrys, it still triggers respiratory problems and should be removed.
A black slimy patch on wet drywall might be Stachybotrys, but it could also be Alternaria, Ulocladium, Chaetomium, or simple dirt and mineral deposits from contaminated flood water. Green fuzzy growth might be toxigenic Aspergillus fumigatus or harmless Cladosporium. Lab analysis under microscope reveals the spore structure and reproductive characteristics that definitively identify species. For toxicity confirmation, advanced labs run mycotoxin assays using mass spectrometry to detect specific toxic compounds in the growth sample. This testing adds cost but provides concrete evidence of whether your contamination produces toxins or simply looks scary while being relatively benign. The results guide remediation planning. High toxicity species require stricter containment, worker protection, and disposal procedures than common molds.
Health effects from toxic mold exposure include chronic coughing that doesn’t respond to typical treatments, persistent sinus infections, difficulty breathing or chest tightness especially when entering affected rooms, severe headaches, unusual fatigue that improves away from home, memory problems and difficulty concentrating, skin rashes from contact or systemic exposure, and immune system suppression that leads to frequent infections. These symptoms develop with repeated exposure over weeks or months as mycotoxins accumulate in body tissues. Species identification matters because it tells you whether current symptoms could be mold-related and how urgently you need remediation. It also influences insurance claims, legal liability if you’re a landlord, and long-term health monitoring decisions.
Testing HVAC Systems and Plumbing After Flood Damage

HVAC systems turn into spore distribution highways when ductwork, air handlers, or plenums get contaminated during flooding. Supply ducts deliver conditioned air to every room, meaning mold growing in one section of ductwork spreads spores house-wide every time the system runs. Return air picks up spores from moldy rooms and carries them back through the system where they deposit on coils, filters, and internal surfaces. If flood water reached your air handler or furnace, assume internal components are contaminated even if you can’t see growth on external surfaces.
Check the evaporator coil condensate drain pan first. This pan collects moisture from cooling operations and typically has standing water by design, but if that water got contaminated with flood bacteria and organic material, it’s now a perfect mold growth site. Look inside the air handler cabinet if you can safely access it, checking for water marks, mineral deposits, or visible growth on blower components and cabinet walls. Inspect ductwork starting at the air handler, looking into supply trunks with a flashlight for staining, debris accumulation, or visible colonization. If flexible ductwork got submerged or sat in standing water, the fiberglass insulation inside likely stayed wet and grew mold even if the outer vapor barrier looks clean. That insulation can’t be cleaned and the whole duct section needs replacement.
Plumbing leaks and water damage create localized mold growth that spreads if not caught during testing. Check under every sink in the house, removing stored items and using a flashlight to inspect the cabinet back wall and floor for staining, swelling, or active growth. Look around faucet bases and mounting holes where water splashes through gaps during normal use then gets worse during flooding. Open bathroom vanity cabinets and kitchen base cabinets, checking inside and behind for water damage on bottom panels and back walls near plumbing penetrations. Press against drywall directly behind visible plumbing. Soft spots or moisture readings above 20 percent indicate leaks or trapped water from the flood event. Check around HVAC condensate drain lines, pressure relief valve discharge pipes, and main water line shutoff valves. These areas leak slowly and get missed during initial assessments, but they keep introducing moisture that supports recurring mold growth.
Run air scrubbers with HEPA filtration during all testing and cleanup in spaces with confirmed mold contamination. These units pull room air through multi-stage filters that trap spores before exhausting clean air back into the space. Place one scrubber per 1,000 square feet of affected area and run them continuously during work. HEPA filtration prevents the testing process itself from making air quality worse. Disturbing mold to collect samples releases spores, and containment with active filtration is how you keep that disturbance from creating a larger problem than you started with.
Documentation and Timing for Post-Flood Testing

Start visual inspection within the first 24 hours after water recedes, checking for standing water, structural stability, and obvious contamination before deciding whether the space is safe to enter for detailed testing. Perform DIY moisture testing and sampling at the 48 to 72-hour mark after water exposure, because mold spores need that minimum time to germinate and begin forming colonies that produce the volatile compounds you can smell and the growth you can see. Schedule professional testing if moisture meters still show readings above 20 percent after one week of drying efforts, if musty odors persist despite removing visibly damaged materials, or if health symptoms begin in occupants during the first week of reoccupancy. This timeline balances the urgency of early detection with the practical reality that mold takes time to become testable.
Document everything with photos and video that include timestamps. Shoot overview images showing entire rooms from multiple angles, establishing context for where damage occurred relative to building layout. Take close-up photos of every stain, water line, damaged material, and suspect growth spot. If you’re using a moisture meter, photograph the display showing the reading with the meter’s probe tips visible against the material being tested. Create written logs that describe conditions: “8/15/2024, 3:00 PM, master bedroom south wall, moisture reading 32% at 3 feet height, musty odor strong near baseboard, paint bubbling in 6-inch section.” This written detail supplements photos by recording conditions that cameras don’t capture like odor intensity and material texture. Document before and after every major action. Before removing baseboards, after opening walls, before demolition, after drying equipment has run for a week.
Check structural safety before entering any flooded space, especially basements where floor joists may have rotted or lost bearing support. Look at the floor from below if possible through basement or crawl space access. If sagging is visible or joists show discoloration and soft spots when probed with a screwdriver, don’t walk on that floor until structural repairs are made. Test stairs for stability before using them. Watch for electrical dangers where outlets or panels were submerged. Shut off power to affected circuits before entering spaces with standing water or heavy moisture damage.
Thorough documentation supports insurance claims by proving the extent of damage and the timeline of deterioration, which matters when policies have specific coverage triggers for mold versus flood damage. Photos with timestamps show when you first discovered problems and how quickly you acted to mitigate, which can prevent claim denials based on delayed response or inadequate mitigation. For proper documentation of flood damage for insurance claims, detailed photographic evidence combined with written descriptions of damage, moisture readings, and remediation efforts creates a complete record that adjusters need to process claims efficiently. Baseline documentation also lets you track whether remediation is working by comparing moisture readings and visible conditions at multiple points during the drying and cleanup process.
Interpreting Test Results and Setting Acceptable Levels

No federal agency has established safe exposure limits for mold spores in indoor air, mostly because sensitivity varies enormously among individuals and spore counts fluctuate by season, weather, and building ventilation rates. The EPA, CDC, and HUD all avoid publishing threshold numbers, instead recommending that indoor mold levels should be lower than outdoor baseline readings and that visible growth requires removal regardless of test numbers. Industry guidelines from inspection associations suggest indoor counts shouldn’t exceed outdoor counts by more than 2:1 ratios for common species, and any detection of water-indicator species like Stachybotrys, Chaetomium, or Fusarium indoors warrants remediation since those species shouldn’t appear in normal dry buildings.
Professional lab reports show spore counts as raw numbers like “1,200 spores per cubic meter” or “300 colony-forming units per square centimeter” depending on whether testing was air or surface sampling. Each identified species gets its own count. Compare indoor readings to the outdoor control sample the inspector collected the same day. If outdoor Penicillium reads 800 spores per cubic meter and indoor reads 900, that’s normal background infiltration through doors, windows, and ventilation. If indoor Penicillium reads 5,000 while outdoor is 800, the 6:1 ratio indicates significant indoor growth requiring source location and removal. Species diversity matters too. Outdoor samples typically show 10 to 20 different species while contaminated indoor samples show one or two species dominating the count, indicating localized colony growth rather than natural background levels.
Several factors affect how you interpret results. Spring and fall produce higher outdoor spore counts as plants decay and fungi reproduce, meaning your indoor acceptable levels shift seasonally. Geographic location matters because desert climates naturally show lower outdoor counts than humid regions, so the same indoor reading might be normal in Georgia but alarming in Arizona. Building ventilation status during sampling changes results. Sampling with windows open pulls in outdoor spores that make indoor counts look worse, while sampling with HVAC running and windows closed might miss contamination in areas with poor circulation. False positives happen when technicians use sampling pumps at wrong flow rates, collect samples too close to contamination sources, or fail to use proper sterile technique when handling collection media. False negatives occur when sampling happens in winter with all mold growth dormant, or when sampling locations miss the actual problem areas. If results don’t match your symptoms or visual observations, consider retesting with different methods or locations before assuming the space is clean.
Preventing Future Mold Growth After Flood Testing
Start drying immediately with industrial fans positioned to create airflow across all wet surfaces, pointing fans so air hits walls then exhausts through windows or doors to outside. Use box fans at floor level to dry subfloor areas and carpets if you’re removing flooring materials. Set up high-velocity air movers that blast concentrated airflow to dry specific problem spots like behind removed baseboards or inside opened wall cavities. Run commercial dehumidifiers rated for 70+ pints per day, dumping condensate continuously through hose connections rather than relying on bucket collection that requires frequent emptying. This equipment combination pulls moisture from materials into room air, then strips moisture from the air before exhausting it outside, creating a drying cycle that drops material moisture content from dangerous levels above 20 percent down to safe stable levels around 10 to 15 percent.
Monitor humidity daily with a digital hygrometer, maintaining 30 to 50 percent relative humidity in all affected spaces. Below 30 percent causes building materials to over-dry and crack, while above 50 percent allows mold spores to germinate on any surface with organic material. Take moisture meter readings on all materials that got wet, checking progress every few days. Drywall should drop below 18 percent moisture content, wood framing below 16 percent, and concrete below 12 percent before you consider materials dry enough to seal behind new finishes. If readings stay high after a week of continuous drying equipment, that indicates hidden moisture sources. Unrepaired plumbing leaks, groundwater infiltration, or trapped water in assemblies that need disassembly to dry.
Long-term prevention requires fixing the water intrusion path so flooding doesn’t recur, which might mean regrading soil away from foundations, installing sump pumps in basements, adding gutters and downspout extensions, or waterproofing foundation walls. Improve ventilation in naturally damp spaces like bathrooms and kitchens by upgrading exhaust fans to higher CFM ratings and running them on timers that operate after showers. Schedule quarterly inspections where you check previously flooded areas with a moisture meter and visually inspect for new staining or odors. Look behind furniture against exterior walls, inside closets with poor air circulation, and in crawl spaces where you don’t spend regular time. Annual professional inspections catch problems before they become extensive. An inspector can thermal scan walls to find hidden moisture accumulation and test air quality to verify your prevention efforts are working.
| Timeframe | Prevention Action | Target Measurement |
|---|---|---|
| Immediate (0-48 hours) | Remove standing water, place industrial fans and dehumidifiers, remove soaked materials that can’t be dried | Humidity below 60%, begin moisture content reduction |
| First week | Continue drying equipment 24/7, monitor moisture readings daily, remove additional damaged materials as needed | Humidity 40-50%, material moisture dropping below 20% |
| First month | Confirm all materials dry before enclosing, repair water intrusion sources, install permanent dehumidification if needed | Humidity stable 30-50%, all materials below 15% moisture |
| Quarterly | Visual inspection of previously flooded areas, spot-check moisture levels, verify ventilation systems functioning | No visible growth, no odors, moisture readings stable and normal |
| Annually | Professional air quality testing or thermal imaging inspection, HVAC duct cleaning if contamination occurred, update prevention systems | Indoor spore counts equal to or lower than outdoor baseline |
Final Words
Water damage starts the mold clock ticking, and how to test for mold after a flood determines whether you catch it early or deal with a bigger mess later.
Get in there with protective gear within 48 hours. Use a moisture meter to find hidden wet spots and document everything with photos.
DIY kits give you a starting point, but they can’t identify toxic species or tell you if concentrations are dangerous. If you’ve got widespread damage, health symptoms, or readings that won’t drop, call a certified inspector.
Test the spaces water hides: wall cavities, subfloors, crawl spaces, and HVAC systems. Keep humidity between 30 and 50 percent with dehumidifiers and fans.
Stopping mold before it spreads saves time, money, and your lungs.
FAQ
How do you know if you have mold after a flood?
You know if you have mold after a flood by looking for musty odors, black/green/brown spots on walls or ceilings, bubbling or peeling paint, and water stains within 24-48 hours of flooding. Use a moisture meter to check if readings exceed 20 percent, which indicates mold risk.
What are the 10 warning signs of mold toxicity?
The 10 warning signs of mold toxicity include chronic coughing, persistent sneezing, sinus congestion, recurring headaches, constant fatigue, skin irritation or rashes, watery eyes, asthma flare-ups, increased allergy symptoms, and respiratory problems. These symptoms indicate possible mold exposure even when visible growth isn’t apparent.
Should people sample their homes for mold after a flood?
People should sample their homes for mold after a flood when contamination exceeds 10 square feet, multiple rooms are affected, HVAC systems are involved, or health symptoms persist without visible mold. DIY tests work for initial screening, but professional lab analysis is necessary to identify toxic species and spore concentrations.
Does FEMA pay for mold remediation?
FEMA does not typically pay for mold remediation directly, as mold damage is considered preventable through prompt drying and cleanup. Document all flood damage immediately with photos and moisture readings for insurance claims, since standard flood insurance policies may cover mold if remediation begins within the policy’s specified timeframe.
When should you call a professional mold inspector instead of using DIY tests?
You should call a professional mold inspector instead of using DIY tests when contamination covers more than 10 square feet, toxic mold species are suspected, structural damage is present, or vulnerable occupants like children or immunocompromised individuals live in the home. Professionals use infrared cameras and air sampling that DIY kits cannot replicate.
What moisture meter reading indicates mold growth risk?
A moisture meter reading above 20 percent indicates mold growth risk in walls, floors, and ceilings after flooding. Take readings at multiple locations including areas near plumbing, exterior walls, and basements, then focus attention on any surface showing elevated moisture concentration patterns.
How long after flooding can mold start growing?
Mold can start growing within 24 to 48 hours after flooding occurs, making immediate action critical. Conduct visual inspection within 24 hours, begin DIY testing at 48-72 hours, and arrange professional testing if moisture remains after one week despite drying efforts.
What’s the difference between air sampling and surface testing for mold?
Air sampling measures concentration of airborne mold spores and works best when health symptoms exist without visible mold, while surface testing uses swabs or tape lifts to analyze confirmed visible growth on walls or materials. Air sampling detects dispersed contamination throughout rooms; surface testing identifies specific growth locations.
Can you identify toxic black mold by appearance alone?
You cannot identify toxic black mold by appearance alone, as color doesn’t determine toxicity. All dark-colored mold isn’t stachybotrys, and professional lab analysis is essential to confirm species type and mycotoxin presence. Visual identification provides clues but never definitive species confirmation.
What humidity level prevents mold growth after a flood?
A humidity level between 30 and 50 percent prevents mold growth after a flood. Use hygrometers to monitor ambient moisture, and run dehumidifiers continuously until readings stabilize in this range. Humidity exceeding 60 percent creates conditions where mold thrives on damp surfaces.
Where does hidden mold grow after flooding?
Hidden mold grows in wall cavities near plumbing, behind baseboards, in subfloors under carpeting, ceiling spaces, insulation layers, crawl spaces, behind appliances, and inside HVAC system components after flooding. Look for bubbling paint, warping drywall, and musty odors near outlets as indicators of concealed growth.
How do HVAC systems spread mold after a flood?
HVAC systems spread mold after a flood by circulating contaminated air through ductwork to every room if drain pans, air handlers, or ducts become contaminated during flooding. Inspect these components for moisture and growth, then use HEPA filtration during cleanup to prevent airborne spore distribution.
What documentation do you need for mold insurance claims?
You need timestamped photos of all damage, written condition descriptions, moisture meter readings, and before-and-after comparisons for mold insurance claims. Document findings immediately after flooding and throughout the remediation process to establish baseline conditions and prove claim legitimacy.
How do you interpret professional mold test results?
You interpret professional mold test results by comparing indoor spore counts to outdoor baseline measurements, since no federal “safe” limits exist. Lab reports show spore count numbers, species identification, and concentration measurements. Indoor counts should generally be lower than outdoor levels for the same location and season.
What DIY mold testing methods work after water damage?
DIY mold testing methods that work after water damage include petri dish tests, swab kits, and tape lift samples for surface growth, plus moisture meters to identify areas with readings above 20 percent. These methods provide initial screening but cannot identify toxic species or provide accurate spore concentration data.