

A soft window sill that crumbles when you press it isn’t just cosmetic damage. It’s a structural weak point that gets worse every time condensation forms or rain finds its way past the caulk line. Most interior sill rot starts from a failed seal or missing flashing you can’t even see, and by the time the paint bubbles or the wood feels spongy, water’s been working for months. This guide walks you through assessment, method selection, and step-by-step repairs so you fix the damage once and address the moisture source that caused it.
Assessing Your Interior Window Sill Rot Damage
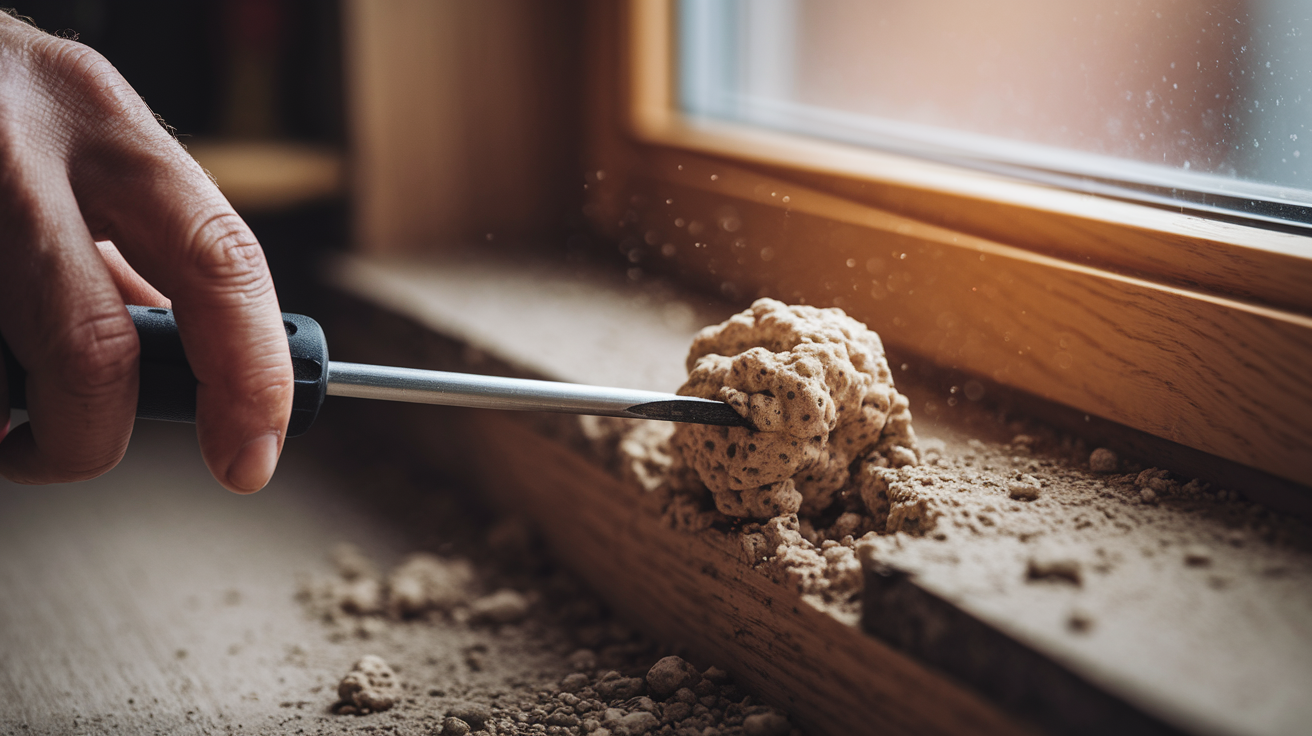
Start by testing suspected rot areas with a flat blade screwdriver. Push the tip into the wood at several points along the sill surface and edges. Healthy wood resists penetration and feels solid. Rotted wood lets the screwdriver sink in easily, sometimes disappearing a quarter inch or more with light pressure. Note how deep the tool goes at each test point and whether the wood crumbles or feels spongy when you twist the blade.
Next, estimate what percentage of the total sill area shows decay. Measure the sill’s length and width to calculate total square footage, then measure the damaged sections. Divide damaged area by total area to get your percentage. A sill measuring 36 inches long by 8 inches wide has 288 square inches of surface. If rot covers a 12 inch by 6 inch section, that’s 72 square inches or 25 percent of the total sill.
Watch for these diagnostic signs during inspection:
- Spongy or soft texture when pressed with your thumb
- Paint bubbling or peeling in specific areas, especially near the window frame
- Discoloration or dark staining patterns indicating water penetration
- Crumbling edges when scraped with a fingernail or screwdriver
- Window operation difficulty or sticking when opening and closing
- Drafts felt around the sill area, particularly at corners
You’ll encounter one of three rot types. White rot appears whitish or bleached, feels spongy when touched, and makes the wood feel lightweight and fibrous. Brown rot shows a dry, cracked appearance and causes serious structural damage as the wood loses strength and crumbles into cube shaped pieces. Soft rot creates a honeycomb pattern inside the wood grain but remains uncommon on interior window frames since it requires very high moisture levels.
The 20 percent threshold determines your repair path. Rot affecting less than 20 percent of the sill allows epoxy filler repair. Damage exceeding 20 percent requires a Dutchman patch or full sill replacement to maintain structural integrity.
Choosing Your Repair Method Based on Damage Severity

The percentage of rot you measured in the assessment determines which of three repair approaches makes sense for your situation.
| Damage Level | Rot Percentage | Recommended Method | Typical Completion Time |
|---|---|---|---|
| Minor | 0-20% | Epoxy Filler Repair | 4-6 hours |
| Moderate | 20-40% | Dutchman Patch | 6-8 hours |
| Severe | 40%+ | Full Sill Replacement | 3-4 hours |
Epoxy filler repair works best when rot appears as surface decay or small isolated pockets covering under 20 percent of the sill. This method works when the underlying sill structure remains sound and only the surface wood has deteriorated. It’s the most affordable option, requires the least invasive work, and leaves existing trim and casing in place.
The Dutchman patch technique fits situations where rot exceeds 20 percent but the framing below the sill remains solid and dry. This approach cuts out the damaged wood and replaces it with a precision fitted piece of rot resistant wood species. The method provides true structural integrity rather than just filling voids. It’s the preferred choice for historic preservation projects and quality repairs where longevity matters more than speed.
Full sill replacement becomes necessary when rot exceeds 40 percent, involves the framing members below the sill, or affects the structural integrity of the window assembly. Choose replacement when previous repairs have failed multiple times or when you’re already planning to upgrade the window trim. This comprehensive solution eliminates questions about hidden decay that partial repairs might miss.
Essential Tools and Materials for Sill Rot Repair
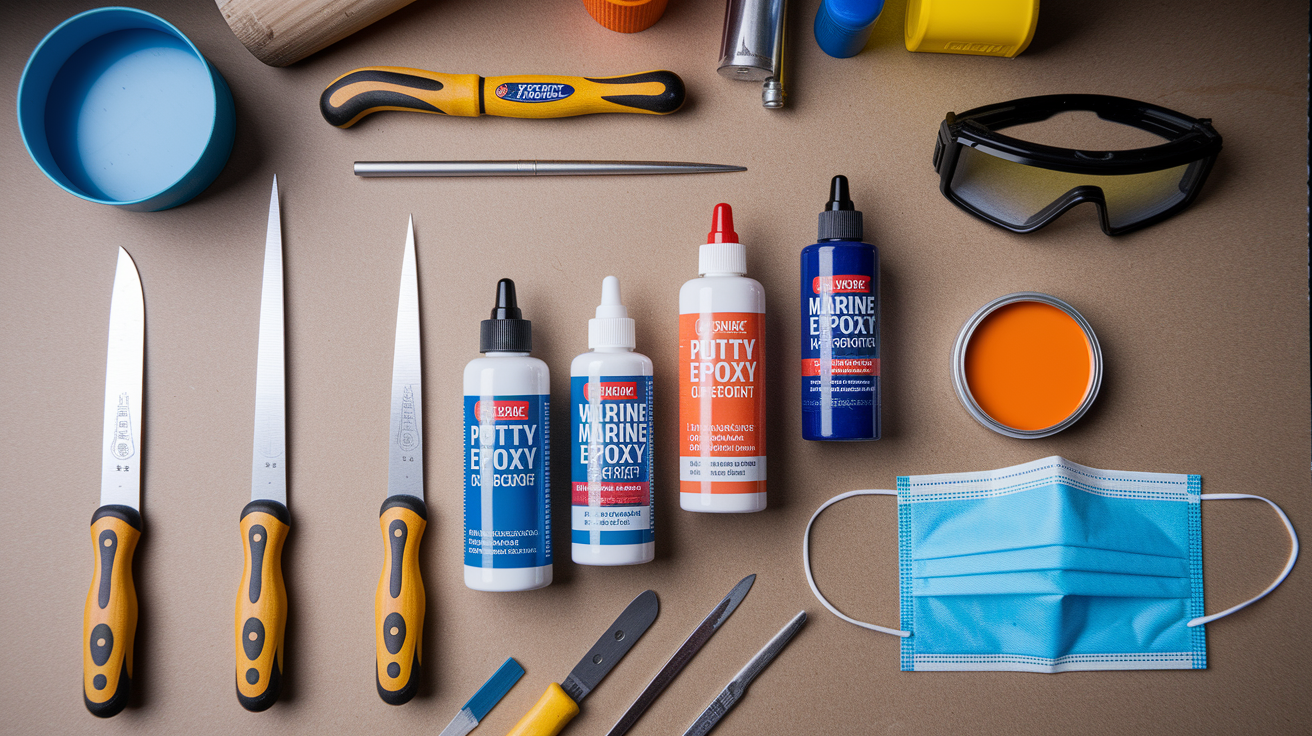
Having the correct tools and materials before starting prevents mid project delays and produces better results than improvising with whatever’s in the garage.
| Category | Item | Purpose |
|---|---|---|
| Hand Tools | Sharp wood chisel set | Remove rotted material to healthy wood |
| Hand Tools | Putty knife | Apply and shape epoxy filler |
| Abrasives | 120-grit sandpaper | Smooth cured repairs and prep for paint |
| Adhesives | Two-part marine epoxy | Bond repairs with moisture resistance |
| Consolidants | Wood hardener | Strengthen weakened fibers around decay |
| Coatings | Oil-based primer | Seal wood and provide paint adhesion |
| Coatings | UV-resistant paint | Protect from sunlight and moisture |
| Sealants | Paintable acrylic caulk | Seal joints against water penetration |
| Safety | Safety goggles | Protect eyes from chips and dust |
| Safety | Dust mask or respirator | Prevent breathing wood dust and fumes |
| Cutting | Utility knife | Score caulk lines and trim foam |
| Assessment | Flat-blade screwdriver | Test for rot penetration depth |
Choose marine grade two part epoxy rather than general purpose wood filler for superior moisture resistance. Use oil based primer on all repairs because it seals better than water based products and prevents tannin bleed through that causes brown staining.
Epoxy Filler Repair Method for Minor Window Sill Rot

This method applies when your assessment showed rot affecting under 20 percent of the sill area. Complete removal of all rotted material determines whether the repair lasts two years or twenty.
-
Mark the rot boundaries with pencil after screwdriver testing shows where firm wood begins.
-
Use a sharp chisel held at a 45 degree angle to remove all rotted material until only firm wood remains, working from the outside edges toward the center of the damage.
-
Vacuum all debris from the cavity and wipe the area completely dry with clean rags.
-
Apply wood hardener liberally to the exposed porous wood, allowing it to penetrate fully into the grain.
-
Mix two part epoxy according to the manufacturer’s exact ratios, noting the working time printed on the container.
-
Apply a first thin coat of epoxy as a glue layer brushed onto all cavity surfaces, then build up subsequent layers with structural filler mixed into the epoxy.
-
Overfill the cavity slightly to allow for sanding, and shape the filler surface before it begins to cure.
-
Wait a full 24 hours for complete cure, then sand the repair smooth using 120 grit sandpaper.
Wood hardener penetrates and consolidates weakened wood fibers in the zone surrounding visible rot damage. Apply it by brushing or dabbing onto all porous areas until the wood won’t absorb more liquid. The hardener typically dries in 2 to 4 hours before you can proceed with epoxy application.
Proper epoxy mixing requires exact ratios between resin and hardener, usually printed right on the containers. Working time ranges from 20 to 40 minutes depending on temperature and product formulation. Fill deep cavities by building up multiple layers rather than one thick application. Use a putty knife to press epoxy into all edges and corners. Shape it while still workable rather than waiting to sand away excess later.
Cure times run 8 to 24 hours depending on ambient temperature and the specific epoxy system. The repair needs temperatures above 50°F for proper hardening. Don’t sand too early or you’ll create a rough, torn surface instead of a smooth finish. Press your thumbnail into an inconspicuous spot. If it leaves no impression, curing is complete.
Dutchman Patch Method for Larger Rotted Window Sill Areas
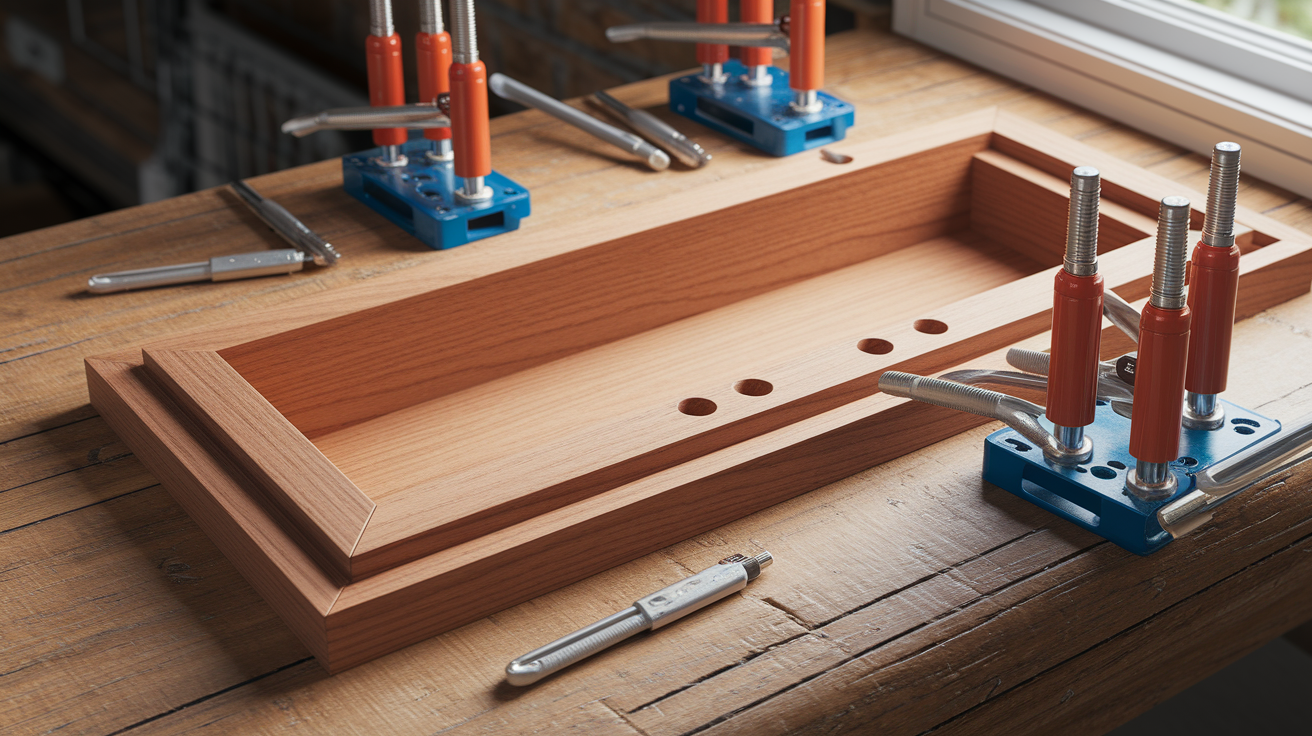
This technique applies when your rot assessment showed 20 to 40 percent damage but the framing below the sill remains solid. The Dutchman patch is a precision wood replacement method that maintains structural integrity by fitting a new piece exactly into a carefully cut void.
Stepped cutting creates a key and shelf system that increases the glue surface area between the patch and the original sill. The shelf provides an indexing surface so the patch rests at the correct height and doesn’t sink below the surrounding sill when you apply clamping pressure during glue up.
-
Cut a rectangular cavity using a router set to 3/8 inch depth, running the router base against a straightedge guide clamped to the sill to create clean perimeter cuts.
-
Make multiple router passes in 1 inch strips moving inward from the perimeter, creating stepped edges that form shelves and increase the total glue contact area.
-
Square all corners with a sharp chisel since the router bit leaves rounded inside corners that prevent tight patch fit.
-
Measure the cavity dimensions precisely with a ruler or calipers and cut a matching patch from rot resistant wood stock.
-
Use a table saw to create intersecting rip cuts that form a stepped key effect on the patch edges, matching the stepped cavity you routed.
-
Test the dry fit repeatedly, making small adjustments with sandpaper or chisel until all four patch sides contact all four cavity sides with no visible gaps.
-
Apply marine grade epoxy to all mating surfaces, insert the patch, and apply clamps or weights for 24 hours while the adhesive cures.
Western Red Cedar and Mahogany offer inherent insect and rot resistance that makes them superior patch materials compared to pine or fir. Match the wood grain direction and pattern to the existing sill grain so the repair becomes nearly invisible after priming and painting. Cut the patch wood slightly oversized in thickness so you can plane or sand it flush with the surrounding sill surface after the glue cures completely.
Full Interior Window Sill Replacement Process
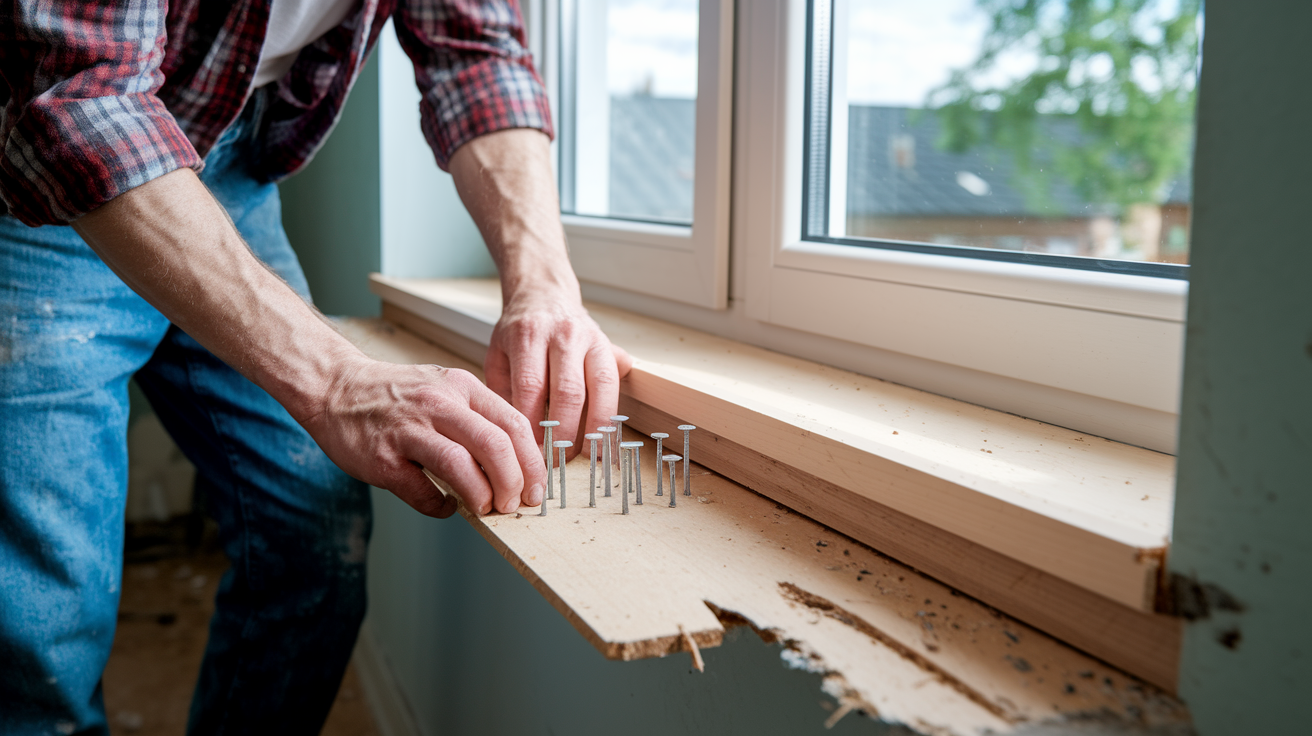
Full replacement applies when your rot assessment showed over 40 percent damage, structural compromise in the sill itself, or rotted framing members beneath the sill. Replacement provides the most comprehensive solution and eliminates any uncertainty about hidden decay that partial repairs might leave behind.
-
Cut all caulk lines around the existing sill and side casing using a sharp razor knife to prevent paint from tearing and taking drywall paper with it.
-
Remove the side casing carefully with a flat prybar, placing a scrap wood block against the wall behind the prybar to prevent dents in the drywall.
-
Pry out the old sill in one piece if possible, keeping it intact to use as a cutting template for the replacement.
-
Inspect all framing below the sill for rot damage, treat any soft areas with wood hardener, and fill gaps with window spray foam to create an air seal.
-
Cut away excess cured foam with a razor blade so it sits flush with the framing surfaces.
-
Cut the new sill using the old sill as a template, then add a bullnose edge using a router and roundover bit or purchase pre milled sill board from the lumber yard millwork section.
-
Dry fit the new sill multiple times since walls are rarely perfectly straight, adjusting the fit until gaps disappear on all sides.
-
Secure the sill by nailing through its top surface into the framing below using 2 inch finishing nails spaced every 8 inches. Do not use construction adhesive as it prevents future repairs.
-
Reinstall the side casing on top of the sill, caulk all seams between sill and casing, then apply wood filler and finish coats.
Material costs typically run under 50 dollars for a single window sill replacement using standard pine or poplar stock. Professional labor adds 100 to 250 dollars depending on your region and whether the contractor needs to address rot in the framing. DIY completion time runs 3 to 4 hours when you have the proper tools and aren’t troubleshooting hidden damage. The side casing sitting on top of the sill prevents upward movement of the sill, which is why construction adhesive isn’t necessary and actually makes future repairs harder.
Finishing and Painting Repaired Window Sills

Wait the full 24 hours after epoxy or filler application before attempting to sand the repair. Use 120 grit sandpaper and feather the edges where the repair meets original wood so no ridge appears. Fill any nail holes and small remaining voids with wood filler thinned slightly with water for better flow into tight spaces. Wipe away excess filler with a damp sponge that has defined edges for controlled application in narrow ridges and grain lines.
Apply oil based primer to the entire sill surface, not just the repair area, to ensure color consistency and proper adhesion. Brush primer into all corners and edges where casing meets sill. Oil based primer seals the wood more effectively than latex and blocks tannin stains that can bleed through lighter paint colors. Allow the primer to dry according to the label instructions before applying finish paint.
Apply two coats of UV resistant paint in satin or semi gloss sheen for durability and easy cleaning. Sills take direct sunlight that breaks down cheap paint, turning it gummy so items placed on the sill stick to the surface. Light sanding with 120 grit paper between coats removes dust nibs and creates better adhesion for the second coat. The second coat provides complete hide and weather protection that a single thick coat can’t match.
Sealing and Waterproofing Interior Window Sills After Repair

Moisture penetrates behind paint films and trim pieces, then sits on the horizontal sill surface where it can’t easily evaporate. Proper sealing at vulnerable joints matters more than the repair work itself because it controls whether moisture reaches the wood again.
Seal these critical locations with paintable caulk:
- Junction between sill and side casing where vertical meets horizontal
- Gap between sill and window frame at the back edge
- Nail holes and fastener penetrations after setting nails below the surface
- Seam between apron trim and sill bottom if your window has an apron
- Any cracks in existing trim pieces that appear during removal and reinstallation
Use paintable acrylic latex caulk for all interior applications rather than silicone, which can’t be painted and doesn’t clean up with water. Cut the caulk tube tip at a 45 degree angle to create a small opening about 1/8 inch wide. Apply steady pressure while dragging the tube along the joint, then tool the bead smooth with a wet finger or damp sponge before the caulk skins over.
Preventing Future Window Sill Rot and Moisture Damage

Rot requires both fungal spores and persistent moisture to develop and spread. Controlling moisture eliminates one of the two necessary conditions, which stops the decay process before it starts.
Follow these prevention practices:
- Maintain indoor humidity below 50 percent using exhaust fans and ventilation
- Improve room ventilation and airflow by not blocking vents with furniture or curtains
- Wipe condensation from sills promptly when it appears, especially in bathrooms and kitchens
- Apply fungicide treatment annually to all wood window components
- Inspect caulk lines every 6 months for cracks or separation
- Re seal any cracks immediately when found, before water penetrates behind the paint
- Maintain a quality paint coating with no peeling or bubbling areas
- Use a dehumidifier in high moisture rooms like bathrooms, laundries, and basements
Set up a seasonal inspection schedule in spring and fall when temperature swings cause the most condensation. Run your hand along all caulk joints checking for gaps. Press the sill surface in several spots checking for soft areas that indicate early rot. Early detection prevents a small repair from becoming a full replacement job.
Common Mistakes When Repairing Rotted Window Sills

Most repair failures happen because someone rushed through steps or skipped what seemed like minor details at the time.
Watch for these errors that cause repairs to fail:
- Failing to remove all rotted wood before filling, leaving soft material that continues to decay under the patch
- Not allowing proper cure time between steps, applying paint over epoxy that hasn’t hardened or sanding filler too early
- Using cheap paint that becomes sticky and gummy when exposed to sunlight through the window
- Skipping wood hardener application on porous areas, which leaves weak wood that crumbles later
- Applying epoxy to wood that’s still damp from cleaning or previous water damage
- Not addressing the moisture source that caused the rot, guaranteeing the problem returns
- Forcing swollen epoxy coated patches into cavities without adjusting for the slight size increase epoxy causes
Get professional assessment when rot extends into structural framing, when damage covers more than half the sill area, or when you can’t identify where water is entering. Major structural repairs need engineering review and proper permitting in most jurisdictions.
Cost and Time Estimates for Interior Window Sill Rot Repair
Total project costs vary based on how much rot exists and which repair method your assessment indicated.
| Repair Type | Materials Cost | DIY Time | Professional Cost |
|---|---|---|---|
| Minor epoxy patch (under 10% rot) | $15-$25 | 4-5 hours | $100-$150 |
| Moderate epoxy repair (10-20% rot) | $25-$40 | 5-6 hours | $150-$200 |
| Dutchman patch (20-40% rot) | $30-$60 | 6-8 hours | $200-$300 |
| Full sill replacement (over 40% rot) | $40-$75 | 3-4 hours | $250-$400 |
Several factors push costs higher than these baseline estimates. Sills that are difficult to access because of radiators or built in furniture add time. Premium wood species like oak or mahogany for visible unpainted sills cost more than standard pine. Repairing multiple windows in one project often reduces the per window labor cost. Regional labor rates vary significantly, with urban markets charging more than rural areas. DIY work saves all labor costs but requires the right tools and enough skill to avoid mistakes that cost more to fix than hiring a professional from the start. Historic windows or custom millwork profiles can triple professional costs when exact replication matters for preservation requirements or resale value.
Final Words
Rot happens when moisture meets wood and sticks around too long. The fix depends entirely on how much damage you’re dealing with.
If you caught it early and tested under 20 percent, epoxy and hardener will hold for years. Moderate rot needs a Dutchman patch with proper stepped cuts and marine-grade glue. Severe cases mean full replacement, but that’s still just an afternoon with the right approach.
The real work isn’t how to repair rotted window sill interior damage. It’s preventing the next round. Control humidity, inspect caulk lines twice a year, and wipe condensation before it soaks in.
Fix the moisture source first, or you’ll be back here next season doing it again.
FAQ
Q: Can you repair a rotted window sill?
A: You can repair a rotted window sill if the decay covers less than 40 percent of the sill surface and the framing beneath remains solid. Use epoxy filler for damage under 20 percent, Dutchman patch for 20 to 40 percent, and full replacement when rot exceeds 40 percent or affects structural components.
Q: What is the inside window sill called?
A: The inside window sill is called the window stool, which is the horizontal interior shelf that projects into the room. The stool sits on the framing below the window and supports the trim casing. The apron is the trim piece beneath the stool that covers the wall junction.
Q: Is it easy to replace an internal window sill?
A: Replacing an internal window sill is straightforward for someone comfortable with basic carpentry and takes 3 to 4 hours with the right tools. The process involves removing casing, prying out the old sill, cutting a new one, and reinstalling trim. Walls may not be straight, requiring multiple dry-fit adjustments.
Q: How much does it cost to replace an interior window sill?
A: Replacing an interior window sill costs under 50 dollars for materials when doing it yourself, or 100 to 250 dollars for professional labor plus materials. Total professional cost ranges from 150 to 300 dollars depending on sill accessibility, material type, and regional labor rates.
Q: How do you test wood for rot on a window sill?
A: You test wood for rot on a window sill by pushing a screwdriver tip into suspected areas and noting how easily it penetrates. Healthy wood resists penetration, while rotted wood feels soft or spongy and allows the screwdriver to sink in. Check multiple spots to map the damage extent.
Q: What percentage of rot requires full sill replacement?
A: Rot exceeding 40 percent of the sill surface requires full sill replacement, especially when structural framing is affected or previous repairs have failed. Damage between 20 and 40 percent can use Dutchman patch method, while rot under 20 percent works with epoxy filler repair.
Q: What causes interior window sill rot?
A: Interior window sill rot is caused by persistent moisture from condensation, water penetrating behind trim and caulk, poor ventilation, or leaks from the window assembly above. Rot requires both fungus and moisture, so the horizontal sill surface traps water that cannot dry thoroughly between wetting cycles.
Q: How long does epoxy take to cure on rotted wood?
A: Epoxy takes 8 to 24 hours to cure on rotted wood depending on temperature and product type. Wait the full 24 hours before sanding to prevent rough surfaces. Epoxy requires temperatures above 50°F for proper hardening, and rushing this step compromises repair strength.
Q: What wood is best for Dutchman patch repairs?
A: Western Red Cedar and Mahogany are best for Dutchman patch repairs because of their inherent insect and rot resistance. Match the patch wood grain direction and pattern to the existing sill for invisible repair after painting. Cut the patch slightly oversized for final shaping after glue cures.
Q: Should you use glue when installing a new window sill?
A: You should not use glue when installing a new window sill because it makes future repairs difficult. Secure the sill with 2-inch finishing nails into the framing below instead. The casing sitting on top of the sill prevents upward movement without requiring adhesive.
Q: What type of primer works best on repaired window sills?
A: Oil-based primer works best on repaired window sills because it provides superior adhesion, moisture resistance, and stain blocking. Apply quality oil primer to the entire sill surface after sanding, then follow with two coats of UV-resistant paint in satin or semi-gloss sheen.
Q: How often should you inspect window sills for rot?
A: You should inspect window sills for rot twice yearly during spring and fall seasons. Check caulk lines, paint condition, and wood firmness with the screwdriver test. Early detection prevents major repairs, and immediate re-sealing of any cracks stops moisture penetration before decay starts.