

Wall cabinets rip out of drywall because there’s nothing solid behind the screws. You can’t fix that problem after cabinets are hanging, dishes are loaded, and the drywall’s already cracked. Blocking solves it by creating permanent horizontal attachment points between studs that distribute cabinet weight properly and prevent mounting screws from crushing through drywall under load. This guide walks through the complete blocking installation process, from locating studs and cutting lumber to correct screw angles and flush mounting techniques that keep cabinets secure even when fully loaded.
Complete Blocking Installation Process for Wall Cabinets

Blocking installation creates permanent horizontal attachment points between wall studs to support cabinet weight and prevent future failures. Properly installed blocking distributes cabinet loads across multiple studs, prevents drywall crushing under mounting screws, and keeps cabinets secure even when they’re fully loaded with dishes, cookware, or stored items.
-
Locate and mark all wall studs using a stud finder, marking positions along the entire wall where cabinets will mount. Measure low on the wall where studs are straightest to avoid distortion. Mark stud centers with light pencil lines running vertically from floor to ceiling, checking multiple heights to confirm you’ve got accurate locations. Wood studs respond well to magnetic stud finders. Older homes with metal lath may require tapping to confirm hollow versus solid areas.
-
Measure and mark cabinet height positions on the wall, accounting for standard cabinet dimensions (typically 30 to 42 inches for upper cabinets). Mark horizontal lines using a chalk line for blocking placement at both top and bottom cabinet mounting points. Upper cabinets typically hang with their bottom edge 54 inches above finished floor (18 inches above standard 36 inch countertops), requiring blocking at approximately 54 inches and again at 84 to 96 inches depending on cabinet height. Transfer these marks to each stud location for consistent blocking height.
-
Measure the exact distance between stud centers (typically 14.5 inches for studs on 16 inch centers) and subtract 3 inches (1.5 inches per stud width) to determine blocking length. Use inside measurements taken directly between the stud faces rather than relying on assumed spacing. Actual stud placement often varies by half an inch or more from layout plans. Cut test pieces if you’re uncertain, as blocking that’s too long won’t fit and pieces cut too short won’t provide adequate attachment surface.
-
Cut 2×4 or 2×6 dimensional lumber using a circular saw to fit snugly between studs without forcing. Make sure blocking thickness matches stud depth (typically 3.5 inches for 2×4 studs) so it sits flush with the front edge of studs. Square cuts matter more than perfect length. Slight gaps at the ends won’t compromise strength but angled cuts create uneven screw angles and reduce holding power. Stack cut pieces in order if you’re working across a long wall to maintain organization during installation.
-
Position blocking horizontally at marked cabinet heights and use a carpenter’s level to check horizontally before proceeding. Adjust position or use shims if needed to achieve perfect level. If the blocking sits low on one end, the cabinet will follow that angle and create visible gaps above countertops or between cabinet boxes. Shim behind the low end with wood shingles or plywood scraps to bring blocking level, then recheck before fastening.
-
Drill pilot holes through blocking ends into stud sides at a slight angle using drill bits slightly smaller than screw diameter to prevent wood splitting. Angle screws slightly toward the center of the stud (about 15 degrees) to maximize wood engagement and pull the blocking tight against the stud face. Pilot holes should penetrate through the blocking completely and about half an inch into the stud to guide the screw threads accurately.
-
Drive 3 inch construction screws or lag screws through each end of the blocking into studs, making sure you get at least 1.5 to 2 inches of screw penetration into stud wood. Use two screws per end for longer blocking pieces. Start screws by hand or at low drill speed to confirm they’re tracking properly through pilot holes before running them home with full power. If a screw starts drifting or feels loose, back it out and drive a fresh screw through a new pilot hole slightly above or below the failed attempt.
-
Verify blocking is level and flush with stud faces before final attachment to prevent drywall bulging. Run your hand across the stud face and blocking to feel for any proud edges. Sight down the wall from an angle to spot high spots visually. Blocking that sticks out even 1/8 inch will telegraph through drywall and create visible ridges or humps that become obvious after paint.
Upper cabinets require two rows of blocking (top and bottom mounting points) while base cabinets need one row at the top. Particularly heavy cabinets may require additional blocking at mid height for extra support and proper cabinet weight distribution. The bottom row of upper cabinet blocking carries most of the weight through a mounting rail or ledger strip, while the top row prevents the cabinet from pulling away from the wall when doors swing open with force. Base cabinets rely primarily on floor support but need top blocking to prevent tipping under countertop weight, especially for cabinets positioned away from adjacent cabinets or walls that would otherwise provide lateral stability.
Essential Tools and Materials for Cabinet Blocking Projects
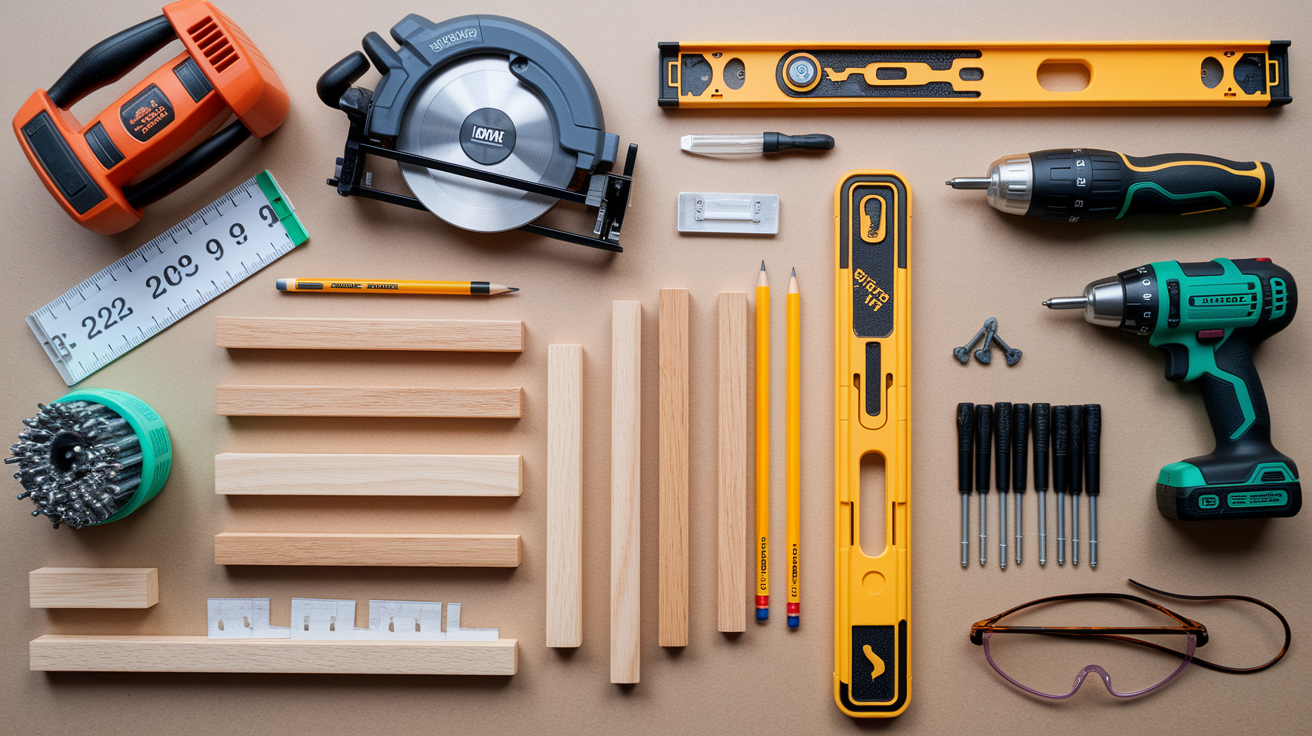
Gathering all supplies before starting installation prevents mid project stops that break workflow and extend timeline. Missing a single tool can turn a two hour blocking job into a two day affair if you need to wait for store delivery or borrow equipment from neighbors.
Necessary Tools:
- Stud finder (magnetic or electronic models both work, with electronic versions offering more precision in complex walls)
- Measuring tape (25 foot tape handles most cabinet walls without repositioning)
- Circular saw or miter saw for cutting blocking to length
- Power drill with assorted drill bits for pilot holes
- Impact driver (optional but speeds installation and provides better control than drill alone)
- Carpenter’s level (4 foot level works best for checking blocking across multiple studs)
- Chalk line or plumb line for marking consistent horizontal blocking heights
- Safety equipment including impact rated safety glasses and work gloves
Required Materials:
- Dimensional lumber (2×4 or 2×6 blocking depending on wall stud depth)
- Construction screws (3 inch minimum length for adequate stud penetration)
- Lag screws (optional, for heavy cabinets exceeding 100 pounds loaded weight)
- Pilot hole bits sized slightly smaller than screw shaft diameter
- Pressure treated lumber (optional, for blocking in moisture prone areas like laundry rooms or near sinks)
- Construction adhesive (optional, adds supplemental holding strength between blocking ends and stud faces)
Lumber thickness should match wall stud depth for proper flush mounting, with 2×4 blocking standard for 2×4 stud walls and 2×6 blocking required for 2×6 stud walls common in exterior walls or areas with additional insulation depth. Screw placement should penetrate at least 1.5 inches into studs for adequate load bearing capacity, creating mechanical attachment that won’t pull out under cabinet loads even if wood dries and shrinks slightly over time. Screws shorter than 3 inches rarely achieve sufficient stud penetration after passing through blocking thickness, while screws longer than 4 inches risk protruding through exterior sheathing or hitting utilities buried in wall cavities.
Alternative Blocking Methods Using Plywood Strips
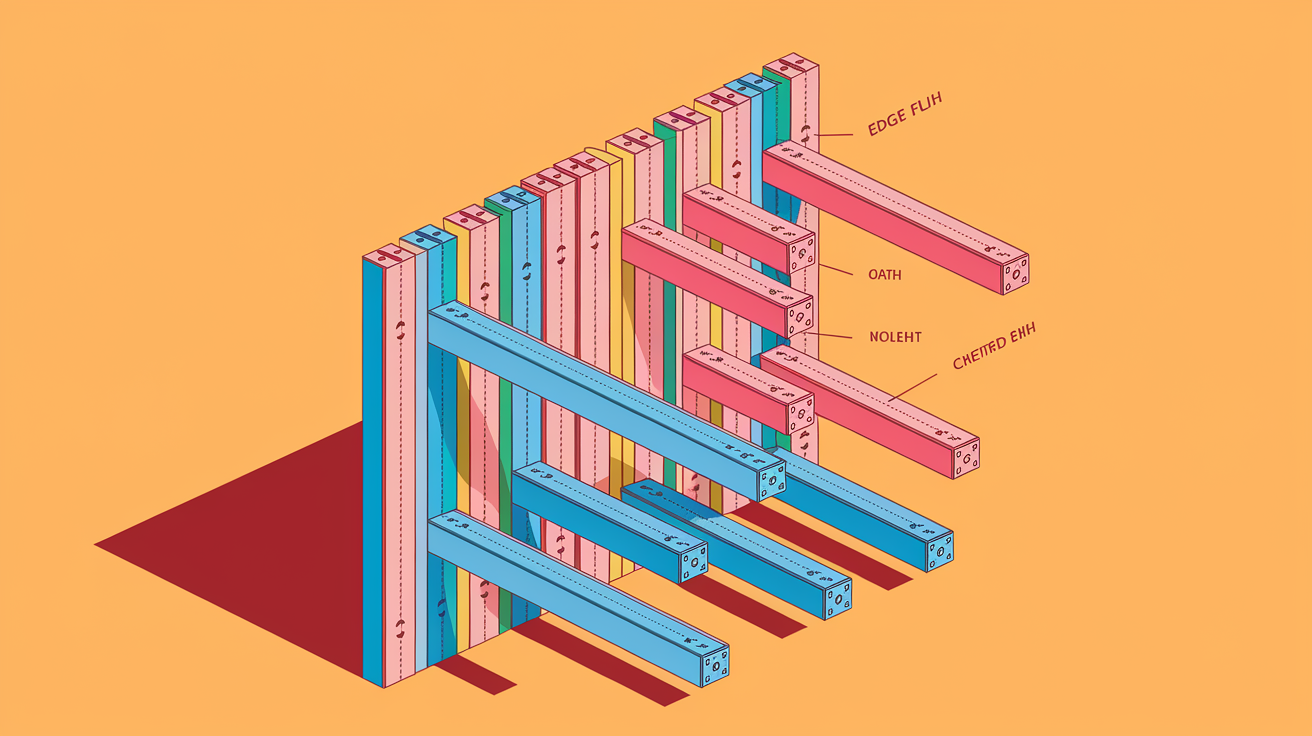
Plywood strips provide effective blocking with specific installation advantages that make them preferable in certain situations.
Cut 3/4 inch plywood into 6 inch wide strips sized to fit between studs, drill pocket holes in both ends using a pocket hole jig set for 3/4 inch material thickness, and secure the plywood flush with stud faces using pocket hole screws for clean wall attachment points. The pocket hole jig creates angled holes that drive screws at approximately 15 degrees, pulling the plywood strip tight against the stud face while burying screw heads below the plywood surface. This eliminates proud screw heads that could interfere with drywall installation. Plywood strips cut from construction grade sheathing work fine for this application. Remnant pieces from other projects often provide enough material for several cabinet walls without purchasing full sheets.
Plywood strips leave more cavity space for insulation compared to dimensional lumber that fills the full 3.5 inch stud depth. Plywood is less prone to splitting during installation because its cross grain construction resists crack propagation. The method works equally well for kitchen renovation and other remodeling best practices. A 2×4 blocks about 5.25 square inches of wall cavity cross section per linear foot, while a 6 inch plywood strip blocks only 4.5 square inches, preserving about 15 percent more insulation space in exterior walls where thermal performance matters. Plywood’s layered construction also means it won’t split along grain lines when screws drive near edges, a common problem with 2×4 blocking cut from lumber with visible grain runout or knots near the ends.
Some installers add construction adhesive along plywood edges for additional reinforcement methods, running a bead along the back face where the strip contacts each stud before driving pocket screws for maximum attachment strength. The adhesive fills minor gaps between slightly bowed studs and the plywood, distributes loads more evenly across the entire contact area rather than concentrating stress at screw points, and creates a mechanical adhesive bond stronger than either method alone. This technique provides the same load bearing capacity as traditional blocking, with testing showing no performance difference for typical cabinet loads when proper fastening techniques and adhesive application create full contact between blocking and studs.
Common Blocking Installation Mistakes and How to Prevent Them

Preventing mistakes during blocking installation saves time fixing problems later and keeps cabinets secure for decades.
Common Blocking Installation Mistakes:
- Installing blocking at wrong heights that don’t align with cabinet mounting points, leaving installers scrambling to add supplemental blocking through drywall or forcing cabinets to mount at non ideal heights
- Failing to check for level before securing permanently, resulting in sloped cabinet installations that create visible gaps and uneven door swings
- Not drilling pilot holes leading to split lumber, especially near board ends where grain orientation makes wood most vulnerable to splitting forces
- Overlooking electrical outlet placement or plumbing interference behind walls, creating conflicts discovered only after blocking installation when removal and reinstallation waste time and materials
- Using screws too short for adequate penetration into studs, creating attachments that hold initially but pull loose under cabinet loads over months or years
- Installing blocking proud of stud faces causing drywall bulges that show as ridges or waves after finishing and painting
- Ignoring uneven walls that require shimming adjustments, particularly in older homes where stud faces vary by quarter inch or more from plumb
Checking local building codes for blocking requirements in your area prevents installations that fail inspection or violate structural standards. Photographing blocking locations before drywall installation creates permanent reference documentation for future remodeling or repairs. Understanding that proper blocking prevents cabinet loosening, sagging, wall damage, and potential injury from falling cabinets motivates careful work during this hidden but critical installation phase. Building inspectors in many jurisdictions require blocking for any wall mounted cabinet exceeding 30 inches in width, and some areas mandate blocking for all upper cabinets regardless of size as a safety measure to prevent failures that could injure occupants. Taking photos from multiple angles with a measuring tape visible in frame documents blocking height, spacing, and fastening details that become inaccessible once drywall covers the framing. These photos prove invaluable when mounting cabinets months or years after blocking installation.
Blocking Requirements for Different Cabinet Types and Installation Scenarios

Blocking requirements change based on cabinet type, weight, and installation location. Proper planning creates adequate support without over building.
Timing considerations drive blocking installation strategy. Blocking must be installed before drywall in new construction, but kitchen renovation projects often require existing drywall removal to access stud bays, making this the ideal time for blocking installation. Installing blocking after drywall is possible by cutting access holes but creates additional patching work best avoided through proper planning. New construction offers clean access to framing and allows blocking installation at a comfortable standing height before drywall installers cover everything up. Renovation projects typically remove drywall in cabinet areas anyway to update plumbing and electrical systems, so adding blocking during this open wall phase adds minimal time or cost. Retrofit blocking installation after drywall finish requires cutting horizontal access slots between studs, installing blocking through these slots, then patching and refinishing the drywall. It works but adds several hours of messy finishing work that most homeowners prefer to avoid.
Upper cabinets and wall cabinets require two horizontal rows (one row 1 to 2 inches below cabinet top where upper mounting screws attach, one row at cabinet bottom where ledger board or cabinet rail system attaches) for secure mounting. Base cabinets need one row at the top back for securing to walls. The lower blocking row on upper cabinets carries the primary weight load through a mounting rail that spans across multiple cabinets, distributing weight evenly and preventing individual cabinets from sagging as contents load them down. The upper blocking row prevents rotation and keeps cabinet tops tight against the wall even when lower cabinet doors swing open with force or when tall items stored on upper shelves create leverage that tries to tip cabinets away from the wall. Base cabinets sit on floors that carry their weight, but top rear blocking prevents them from tipping forward under countertop overhangs or when multiple drawers pull open simultaneously, shifting the center of gravity forward beyond the cabinet footprint.
Special considerations apply to different installation scenarios. Bathroom vanity support may need blocking at sink mounting heights if vessel sinks or wall mount faucets attach to the wall rather than the vanity top. Laundry room cabinets storing heavy detergents benefit from extra blocking rows spaced at 16 inch vertical intervals. Garage storage cabinets require reinforced blocking for tool weight that can exceed 50 pounds per linear foot when fully loaded. Corner cabinets may need blocking positioned to accommodate angled backs that don’t align with standard stud spacing. Vessel sink installations typically require blocking 32 to 36 inches above finished floor to support faucet bodies and supply lines that attach to the wall behind the sink, while wall mount faucets need blocking precisely located at faucet mounting height with lateral positioning matching the sink centerline. Laundry detergent jugs, fabric softener bottles, and bulk supplies create concentrated loads that benefit from blocking at multiple heights rather than just top and bottom mounting points. Garage cabinets holding power tools, paint cans, and automotive supplies easily exceed residential cabinet weight limits and justify upgraded blocking using 2×6 lumber or doubled 2×4 layers for increased strength.
Load bearing capacity increases with additional blocking rows. Particularly heavy wall cabinets filled with canned goods or dishes should have blocking installed at three heights rather than two for maximum support. Cabinets storing canned goods can weigh 200 pounds or more when fully loaded, creating significant point loads at mounting screw locations. Adding a third blocking row at cabinet mid height distributes this weight across additional mounting points, reducing stress on each screw and preventing long term failures from wood compression or screw creep that can occur when two point mounting systems carry excessive weight for years.
Working Around Obstacles: Electrical, Plumbing, and HVAC Considerations
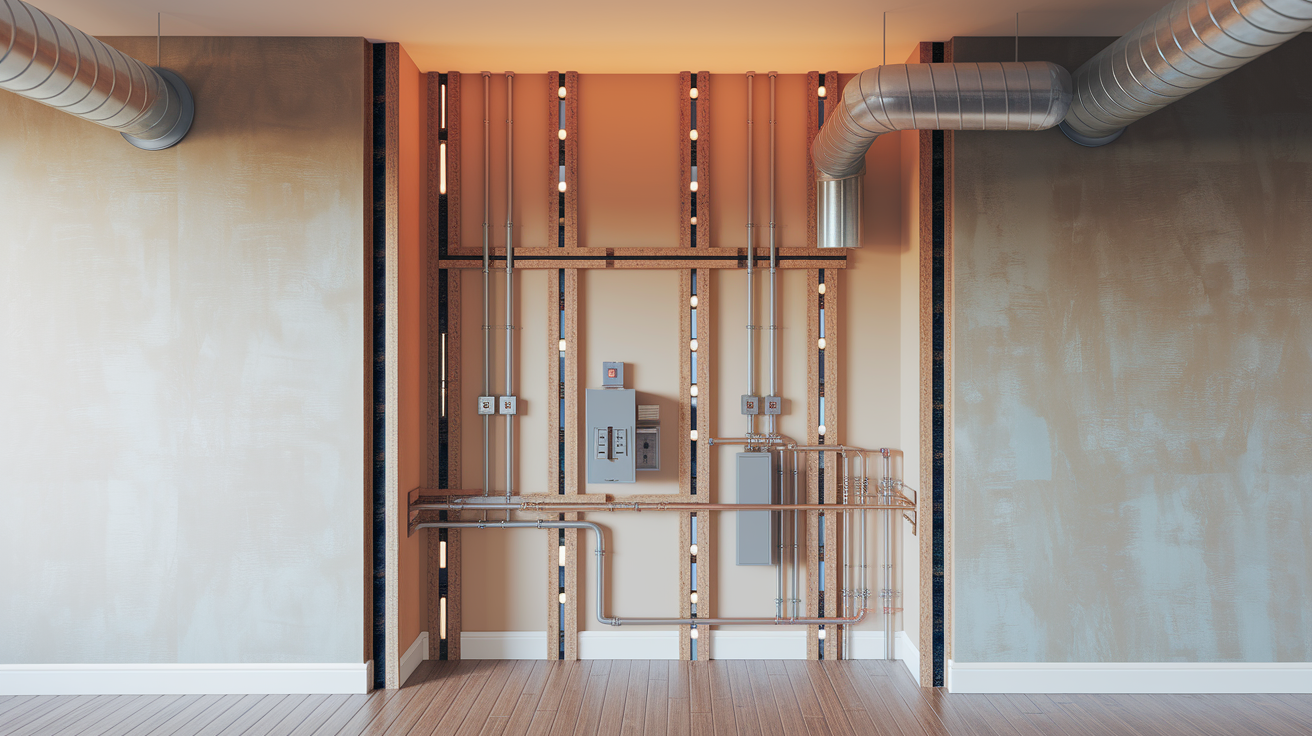
Identifying obstacles before installation prevents damage to utilities and eliminates the need to relocate blocking after discovering conflicts.
Electrical outlet placement requires careful attention. Turn off power at the circuit breaker and use a voltage tester to confirm circuits are dead, then examine outlet box positions and route blocking around electrical boxes or relocate outlets if necessary to avoid interference. Most electrical boxes mount directly to studs, so blocking typically passes behind boxes without conflict, but occasionally boxes positioned between studs require blocking to notch around them or installers to shift blocking height slightly to clear the box. Outlet relocation involves disconnecting wires, removing the existing box, cutting new drywall openings at the desired location, installing a new box on the nearest stud or using an old work box secured to drywall, and running new cable to reach the relocated position. This adds time but proves necessary when blocking must occupy space where outlets currently sit, particularly in kitchens where backsplash areas need outlets for small appliances and these outlets often fall exactly where upper cabinet blocking would install.
Plumbing interference considerations include avoiding water supply lines and drain pipes. Blocking should never compromise water supply or drain lines. HVAC duct routing may require notching blocking or choosing alternative placement heights. Insulation removal around blocking is acceptable as long as vapor barrier integrity is maintained for moisture protection. Water supply lines typically run vertically up from floor level to reach sinks and appliances, while drain lines slope gradually downward to maintain flow. Both systems commonly route through stud bays, and blocking installation must accommodate them without pinching pipes or creating contact points where vibration could eventually wear through pipe walls. HVAC ducts in exterior walls serving floor registers sometimes occupy the same stud bays where cabinet blocking needs to install, requiring creative solutions like routing blocking through adjacent stud bays and connecting across studs with metal strapping, or notching blocking to pass over ducts while maintaining adequate attachment to studs on either side. Insulation inevitably gets disturbed during blocking installation. Careful workers compress it around blocking rather than removing it entirely to maintain thermal performance, but vapor barriers torn during installation need repair with housewrap tape or additional plastic sheeting to prevent moisture infiltration that could lead to condensation, mold, and wood rot in wall cavities.
Building codes in most areas prohibit blocking that damages or restricts access to utilities. Professional consultation may be necessary when extensive utility conflicts exist during installation. Code language typically states that “plumbing, electrical, and mechanical systems shall not be damaged or have serviceability impaired by other construction activities,” which prevents installers from notching studs excessively to fit blocking around utilities or driving fasteners through concealed pipes and wires. Complex utility routing found in older homes or areas with multiple system retrofits sometimes makes code compliant blocking installation difficult without relocating utilities. Hiring a qualified contractor to evaluate options and execute installations saves homeowners from failed inspections or potentially dangerous utility damage discovered only after drywall installation conceals the problems.
Professional Installation vs. DIY Blocking for Wall Cabinets

Project complexity, existing conditions, and personal capability determine whether DIY blocking installation makes sense or professional help provides better value.
DIY installation works well for straightforward projects with accessible stud bays, standard cabinet configurations, and no utility conflicts, typically saving on cost estimation while following remodeling best practices. Homeowners comfortable using power tools can install blocking in a standard kitchen in four to six hours, compared to professional charges ranging from $300 to $800 depending on regional labor rates and project scope. Standard cabinet layouts in homes built within the last 30 years typically feature regular stud spacing, minimal utility conflicts, and straight walls that make blocking installation predictable and error free for careful DIY installers who follow measurement and leveling procedures. Cost savings from DIY installation can fund upgraded cabinet hardware, better lighting, or other visible improvements that directly enhance kitchen function and appearance.
Professional installation makes sense for several scenarios. Complex multiple fixture installations across entire kitchens. Older homes with irregular stud spacing or plaster walls. Situations involving load bearing walls requiring structural modifications. Extensive wall modifications requiring building codes compliance. Or when homeowners lack necessary tools and experience. Full kitchen renovations involving 15 or more cabinets across multiple walls benefit from professional installation that ensures consistent blocking height and alignment across the entire room, preventing small errors that compound across long cabinet runs and create noticeable alignment problems. Homes built before 1950 often feature balloon framing, plaster and lath walls, or irregular stud spacing that complicates blocking installation and increases the risk of damaging historical features during work. Load bearing walls sometimes require structural engineer approval before installing blocking, particularly if blocking installation requires notching or drilling studs beyond code allowed limits. Extensive projects involving utility relocation, wall straightening, or structural modifications to accommodate larger cabinets exceed most DIYers’ capabilities and justify professional installation costs through reduced risk of errors and code violations.
Contractor consultation before starting identifies potential issues invisible to homeowners during initial planning. Professional installation often includes warranty considerations that protect the investment in both blocking and cabinet installation. Experienced contractors spot problems like undersized studs, concealed utility routing, or wall conditions requiring reinforcement that homeowners often miss until problems emerge during installation. Consultation fees of $100 to $200 prove worthwhile when they prevent $1000+ repair costs from mistakes. Professional installation typically includes workmanship warranties covering blocking failures for one to five years, giving homeowners recourse if cabinets sag or pull loose due to installation defects, whereas DIY installations leave all risk with the homeowner who performs the work.
Final Words
Blocking between studs creates the solid mounting surface your wall cabinets need to stay put.
Cut your 2x4s to fit snugly, drill pilot holes to prevent splits, and double-check level before driving screws.
Two rows of blocking for uppers, one for base cabinets, and extra support for heavy loads keeps everything secure.
When you know how to install blocking for wall cabinets correctly, you avoid callbacks, sagging, and the headache of patching drywall twice.
Take your time on prep and stud location. The cabinets will hang exactly where you want them.
FAQ
Where should you place blocking for wall cabinets?
Blocking for wall cabinets should be placed horizontally between wall studs at two locations: one row positioned 1-2 inches below the cabinet top and another row at the cabinet bottom where mounting hardware attaches.
Is cabinet blocking necessary for installation?
Cabinet blocking is necessary to provide secure mounting points for heavy wall cabinets, preventing loosening, sagging, and wall damage while distributing weight across multiple studs rather than relying on drywall alone for support.
Is blocking required by building code?
Blocking requirements vary by location and building codes in your area, but most jurisdictions require adequate backing for wall-mounted cabinets and heavy fixtures to ensure structural integrity and prevent safety hazards from falling installations.
Can you use 2×4 lumber for cabinet blocking?
You can use 2×4 lumber for cabinet blocking as long as it matches your wall stud depth (typically 3.5 inches) and sits flush with stud faces, providing adequate load-bearing capacity when secured with proper screws.
What tools do you need for blocking installation?
Blocking installation requires a stud finder, measuring tape, circular saw, power drill with bits, impact driver, carpenter’s level, chalk line, and safety equipment including glasses and gloves for complete project preparation.
How do you prevent blocking from splitting during installation?
Prevent blocking from splitting by drilling pilot holes through blocking ends before driving screws, using drill bits slightly smaller than screw diameter, and avoiding overtightening when securing to stud sides.
When should you install blocking during construction?
You should install blocking before drywall installation in new construction or during gut renovations when stud bays are accessible, as installing blocking after drywall requires cutting access holes and additional patching work.
Do base cabinets need blocking like wall cabinets?
Base cabinets need one row of blocking at the top back for wall attachment, while upper cabinets require two rows (top and bottom) because they carry full weight suspended from the wall rather than resting on floors.
Can you use plywood instead of dimensional lumber for blocking?
You can use 3/4-inch plywood strips cut 6 inches wide as blocking, secured with pocket-hole screws flush to stud faces, which leaves more cavity space for insulation and resists splitting better than solid lumber.
How do you work around electrical boxes when installing blocking?
Work around electrical boxes by turning off power, checking outlet placement with a voltage tester, then routing blocking around boxes or relocating outlets if necessary to avoid interference while maintaining code compliance.
Should you hire a professional for blocking installation?
Hire a professional for blocking installation when dealing with complex multiple-fixture projects, older homes with irregular framing, load-bearing wall modifications, or when you lack necessary tools and experience for safe installation.
What screws work best for securing cabinet blocking?
Use 3-inch construction screws or lag screws for securing cabinet blocking, driving two screws per end to ensure at least 1.5-2 inches of penetration into stud wood for adequate load-bearing capacity.