

You can’t stop water from reaching your foundation, but you can control where it goes once it gets there. Interior basement waterproofing works by accepting that groundwater will find the foundation and managing it before damage happens. Drainage systems intercept water beneath the floor, sump pumps remove it, and sealants block entry points while coatings handle moisture vapor. This approach treats the basement as a collection zone rather than a watertight vault, focusing on removal and control instead of impossible exterior barriers.
Understanding Interior Basement Waterproofing Methods
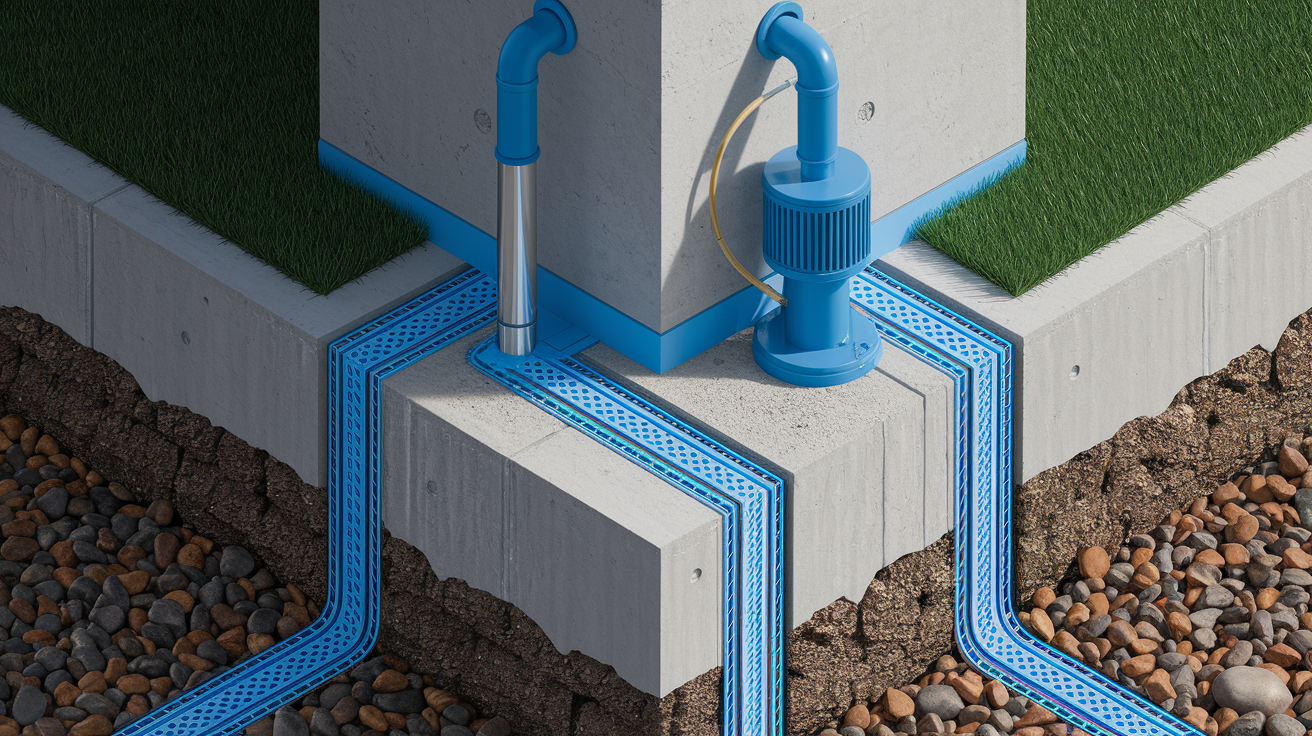
Interior basement waterproofing manages water after it gets inside the foundation envelope instead of blocking it at the exterior surface. It uses multiple methods working together. Drainage systems collect groundwater, sump pumps remove it, crack sealing stops entry points, and coatings create moisture barriers. The strategy accepts that water will find its way to the foundation and focuses on controlling it before it damages your basement.
Drainage systems form the foundation of most interior waterproofing installations. Perforated pipes sit beneath your basement floor, surrounded by gravel, collecting groundwater in the hydrostatic zone before it surfaces through cracks or porous concrete. These pipes channel water to collection points where it concentrates for removal. The system intercepts water at the lowest point, under the floor, rather than waiting for it to appear at floor level where it causes visible damage.
Sump pump systems provide the active removal mechanism. Once drainage channels deliver water to the collection basin, the pump kicks on and discharges thousands of gallons per hour through exterior discharge lines. Modern systems include battery backup to keep operating during power outages, which tend to happen during the heavy storms that stress waterproofing systems most. The pump acts as the final exit point for all water the drainage network collects.
Crack sealing and repair methods address water entry at source points in foundation walls and floors. Epoxy or polyurethane injections fill gaps and create watertight seals that prevent future seepage. Epoxy creates rigid structural repairs for stable cracks, while polyurethane foam expands to fill voids and stays flexible for cracks that experience minor movement. These repairs stop water before it enters the basement, reducing the volume that drainage systems need to handle.
Waterproof coatings and sealants create moisture barriers on interior wall surfaces. Acrylic, cement based, and epoxy formulations get brushed or rolled onto foundation walls, forming seamless protective layers on the negative pressure side where water pushes inward. These coatings work best for walls experiencing minor seepage through porous concrete rather than active water intrusion through cracks. They complement drainage systems by managing moisture vapor and minor infiltration that doesn’t need active removal.
Vapor barriers and humidity control components complete the system by managing moisture in the air. Dehumidifiers regulate humidity levels in below ground spaces, preventing condensation on cold surfaces and controlling conditions that promote mold growth. Some installations include moisture resistant wall panels that combine vapor barriers with finished surfaces and insulation. These components address the reality that basements naturally maintain higher humidity than above grade spaces, and moisture control prevents problems even after liquid water gets removed.
Effective interior waterproofing typically combines multiple methods tailored to specific water problems rather than relying on a single approach. A comprehensive system might include perimeter drainage, sump pump installation, targeted crack repairs, and a dehumidifier working together. Installation generally wraps up in 2 to 3 days without exterior excavation, allowing work to proceed regardless of landscaping, weather, or outdoor access constraints that would complicate exterior waterproofing.
Interior Drainage Systems and French Drain Installation
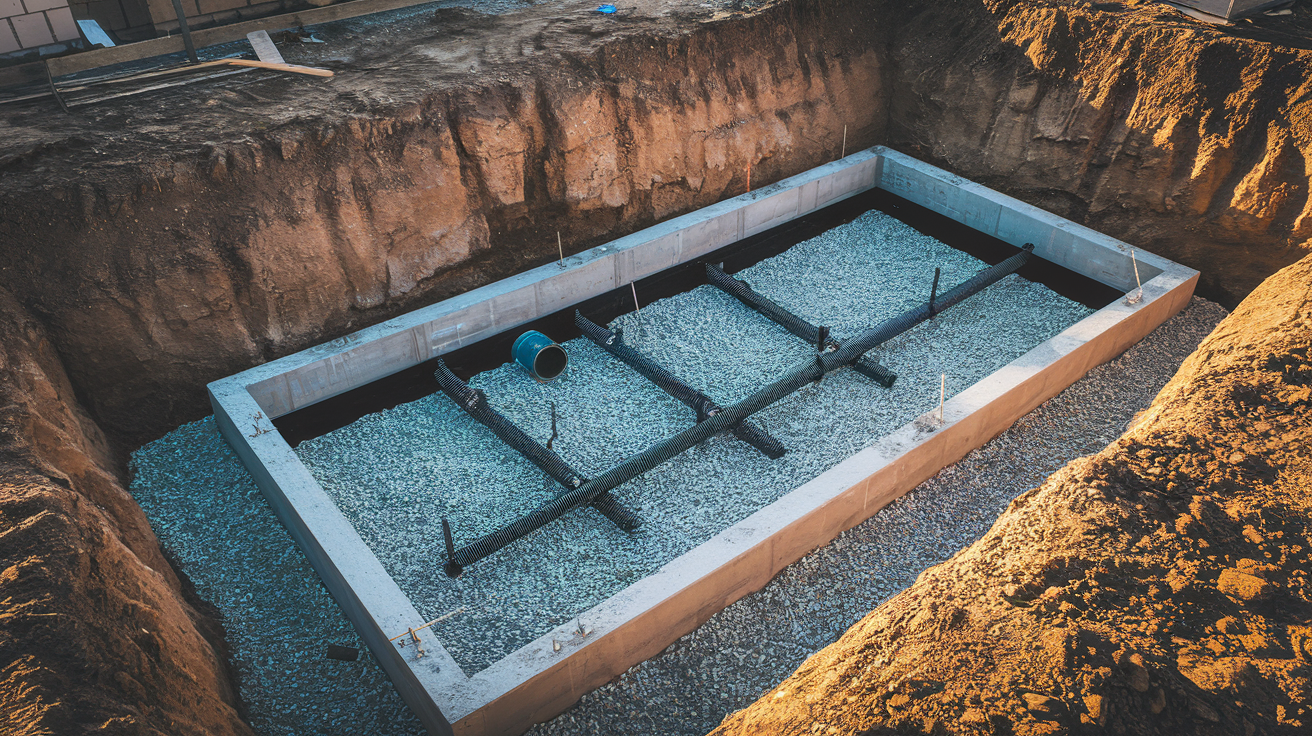
Interior French drains form the foundation of most interior waterproofing systems, collecting groundwater before it surfaces through the basement floor. The installation disrupts the basement perimeter but leaves exterior landscaping untouched.
Installation Process
Installation starts by removing a channel of concrete at the cove joint where the floor meets the walls. This strip, typically 12 to 18 inches wide, exposes the footing and the soil beneath the floor slab. Excavation continues 12 to 24 inches deep depending on footing depth and the water table level. The excavated trench runs along the entire basement perimeter or targets specific wet areas. Workers use concrete saws and jackhammers to cut and remove the floor section, creating a clean channel for the drainage system. The concrete removal generates dust and noise but typically completes in one day for an average basement.
After excavation, the trench gets leveled and sloped toward the sump pump location at roughly 1/8 inch per foot. This slight grade ensures water flows consistently toward collection points rather than pooling in low spots. Clean gravel or drainage aggregate fills the bottom of the trench, creating a porous bed that allows water to move freely.
System Components
The drainage system builds up in layers that each serve a specific function. Filter fabric lines the trench walls and bottom, preventing soil particles from migrating into the drainage aggregate and eventually clogging the perforated pipes. This geotextile barrier allows water through while blocking sediment.
Perforated drainage pipes, typically 4 inches in diameter, sit in the gravel bed with holes facing down. Water enters through the perforations, fills the pipe, and flows toward the sump basin following the installed slope. Additional gravel surrounds and covers the pipe, creating a continuous drainage zone. The gravel layer acts as a reservoir, temporarily storing water during heavy infiltration before the pipe and pump remove it.
Weep holes drilled through the foundation wall at the footing level connect the exterior drainage zone to the interior system. These holes allow water accumulating outside the foundation to flow inward where the interior system captures it. Without weep holes, hydrostatic pressure can build behind the wall, potentially causing structural stress or forcing water through cracks higher up the wall.
Coverage and Configuration
Systems run along the entire perimeter for comprehensive protection or target specific wet areas to reduce cost when water problems are localized. Complete perimeter systems offer redundancy. If one section experiences high water volume, adjacent sections help manage the load. Targeted installations work when water entry is clearly limited to one wall or corner, often related to exterior grade or a specific drainage failure outside.
Multiple drain lines converge at the sump pump location, which typically gets placed at the lowest point of the basement or in a corner for convenient discharge routing. Junction points use solid pipe sections and sealed fittings to prevent soil infiltration. The network channels all collected water to a single collection basin for removal.
Professional installation ensures proper slope throughout the system and prevents future issues like standing water in low spots or inadequate flow to the sump basin. Installers check slope with levels at multiple points and test water flow before covering the system. The trench then gets covered with new concrete, restoring the floor and encapsulating the drainage system for decades of operation.
Sump Pump Systems in Interior Waterproofing

The sump pump serves as the endpoint where all drainage channels converge. Water flows through the perimeter drains and collects in a basin, typically a 2 foot diameter plastic liner set into the floor at the lowest point of the drainage system. The basin extends roughly 2 to 3 feet deep, providing enough volume for the pump to cycle efficiently rather than running constantly during moderate inflow.
Pumps activate via float switches that rise with the water level. When water reaches a preset depth, the float triggers the pump motor. Once the pump lowers the water level, the float drops and shuts off the motor. This automatic operation means the system responds immediately to water intrusion without homeowner intervention. Some systems use electronic sensors instead of mechanical floats, offering more precise control and resistance to debris interference.
Discharge capacity determines how quickly the system removes water during heavy infiltration. Residential sump pumps typically move 2,000 to 5,000 gallons per hour, with the exact capacity matched to the basement size and expected water volume. A 1/3 horsepower pump handles most residential applications, while larger basements or properties with severe water problems may require 1/2 or 3/4 horsepower units. Water exits through discharge lines, rigid PVC or flexible corrugated pipe, that run from the pump through the rim joist or foundation wall to an exterior drainage point. The discharge line slopes away from the foundation, releasing water at least 10 to 20 feet from the house where it can’t re-enter the system.
Critical features extend system reliability beyond basic pumping. Battery backup systems maintain operation during power outages, which often coincide with storms that stress waterproofing systems. The backup battery activates automatically if power fails, preventing basement flooding when the main pump can’t run. Check valves installed on the discharge line prevent backflow. Without a check valve, water in the discharge pipe flows backward into the basin after the pump shuts off, causing premature cycling and reducing pump life. Alarm systems alert homeowners to pump malfunction, high water levels, or power failures, providing warning before water reaches floor level.
| Pump Type | Capacity | Key Features | Best For |
|---|---|---|---|
| Submersible Pump | 2,000-5,000 GPH | Motor sealed in waterproof housing, sits submerged in basin, quieter operation, longer lifespan | Finished basements, areas requiring quiet operation, installations with consistent high water volume |
| Pedestal Pump | 1,800-4,500 GPH | Motor mounted above basin on pedestal, easier to service, less expensive, louder operation | Unfinished basements, budget installations, locations where service access is important |
Crack Repair and Sealing Methods for Basement Walls

Crack sealing is essential before applying coatings or installing drainage systems because unaddressed cracks allow water to bypass other waterproofing measures. Active water intrusion through cracks can overwhelm drainage capacity and create localized flooding even when perimeter systems function properly. Sealing these entry points reduces the total water volume entering the basement and allows drainage systems to manage groundwater rather than fighting point source leaks.
Epoxy injection methods work for structural cracks in poured concrete walls where both sides of the crack need to be bonded together permanently. The process starts with drilling entry ports along the crack length at intervals of 6 to 12 inches. Plastic injection ports are installed in these holes, and the crack surface gets sealed with epoxy paste to prevent leakage during injection. Low viscosity epoxy resin then gets pumped into the lowest port under pressure, filling the crack from the inside out as material travels through the full depth of the concrete. The injection continues at each port moving upward until epoxy appears at the next port or surface seal. Once cured, epoxy creates a rigid, structural bond stronger than the surrounding concrete, preventing future movement and creating a permanent watertight seal.
Polyurethane foam injection addresses active leaks where water is currently flowing through the crack. Unlike epoxy, which requires relatively dry conditions, polyurethane reacts with water and expands to fill voids, making it effective even when cracks are actively weeping. The foam stays flexible after curing, allowing it to accommodate minor wall movement without cracking. Installation follows a similar process to epoxy, drilling ports and surface sealing, but the polyurethane is injected starting from the top of the crack. As material flows downward, it meets rising groundwater and begins its expansion reaction, filling the crack and any voids behind the wall. The foam typically expands to 20 times its liquid volume, ensuring complete void filling. Polyurethane injection stops active leaks quickly, often within minutes of injection.
Hydraulic cement works for surface level repairs where crack depth is shallow or structural bonding isn’t required. This fast setting cement compound can be applied to damp surfaces and even sets up underwater, making it useful for stopping minor active leaks during emergency repairs. The material is mixed to a putty like consistency and troweled into the crack, where it sets in 3 to 5 minutes. Hydraulic cement forms a mechanical bond rather than a chemical one, so it’s appropriate for non structural cracks under 1/8 inch wide and less than 2 inches deep. For wider or deeper cracks, injection methods provide more reliable long term seals.
Surface preparation for all crack repairs requires removing loose concrete, dirt, and any failed previous repair materials. Cracks are cleaned with wire brushes or grinders to create a sound substrate for bonding. For epoxy injections, surfaces must be relatively dry. Surface moisture is acceptable but standing water must be removed. Polyurethane can be applied to wet cracks. After injection, epoxy typically requires 24 to 48 hours to cure fully before applying additional waterproofing coatings, while polyurethane achieves handling strength in 15 to 30 minutes.
Waterproof Coatings and Sealant Applications
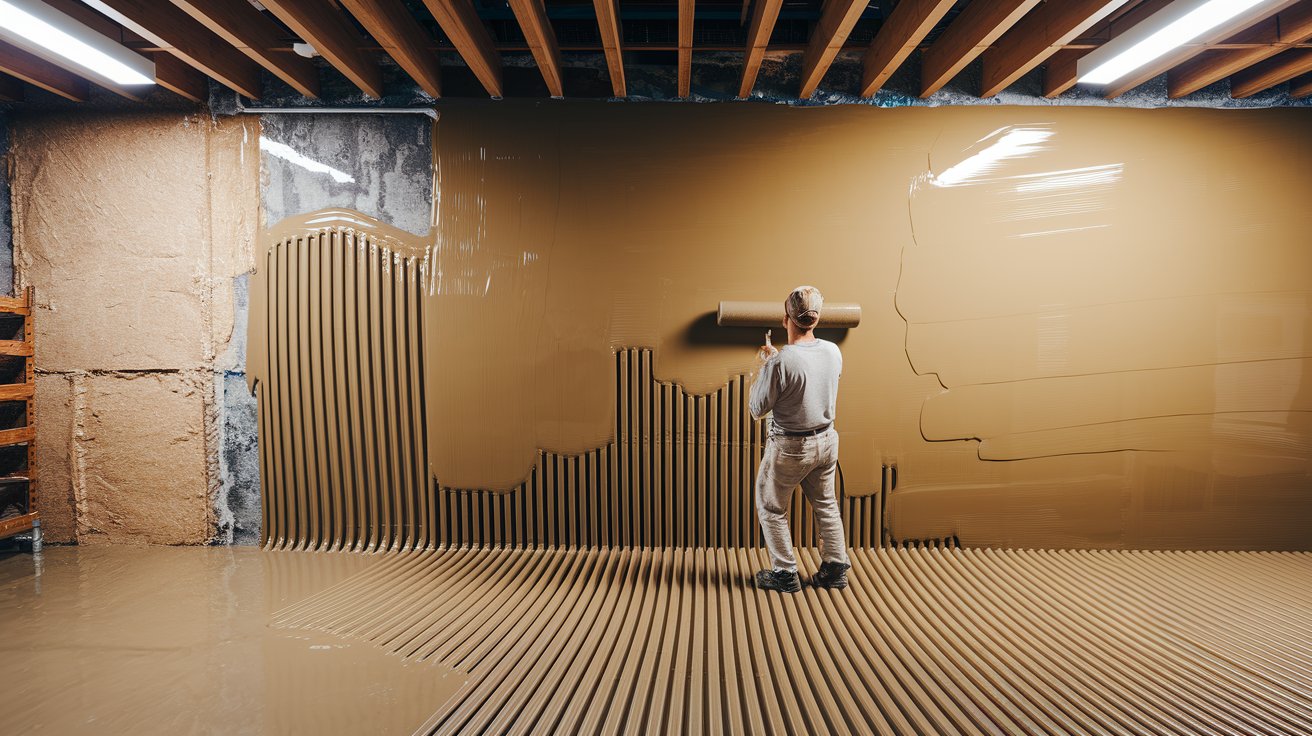
Coating types are selected based on the wall condition and the level of water pressure. Acrylic coatings work for walls with minor dampness or moisture vapor transmission but limited water pressure. They dry quickly, allow some breathability, and are easy to apply with standard painting equipment. Cement based waterproofing compounds handle higher moisture levels and slight hydrostatic pressure, bonding mechanically to the concrete surface and creating a thick, cementitious barrier. Epoxy formulations provide the highest moisture resistance, creating an impermeable membrane suitable for walls experiencing moderate hydrostatic pressure or frequent dampness.
Negative side application means applying waterproofing to the interior face where water pressure pushes against the coating rather than the exterior face where coatings are pressed into the wall by water pressure. This is less ideal than positive side waterproofing but necessary for interior systems where exterior access doesn’t exist. Negative side coatings must bond aggressively to the concrete and resist the lifting force of water trying to push through the wall. This is why cement based and epoxy products perform better than simple paint like coatings for interior basement applications.
Effectiveness limitations are real. Coatings work best for managing moisture vapor and minor seepage through porous concrete. They won’t stop water flowing through cracks or gaps where hydrostatic pressure concentrates. Those entry points require crack repair or drainage systems. Coatings also won’t address water pooling on the floor from inadequate drainage. They’re most effective as part of a complete system where drainage handles bulk water and coatings manage surface moisture.
Application process for interior waterproofing coatings:
- Clean all surfaces with wire brushes or pressure washers to remove dirt, efflorescence, paint, or previous coatings that would prevent bonding
- Repair all cracks and gaps with appropriate injection or filling materials and allow repairs to cure fully
- Dampen the concrete surface with clean water for cement based products (dry surfaces draw moisture from the coating too quickly, preventing proper curing) or ensure surfaces are completely dry for epoxy products
- Apply the first coat with a masonry brush or roller in horizontal strokes, working the material into the concrete pores to ensure good contact and penetration
- Allow first coat to cure according to manufacturer specifications, typically 4 to 24 hours depending on product type and ambient conditions, then apply second coat in vertical strokes to ensure complete coverage and adequate thickness
Most systems require two coats to achieve the specified dry film thickness needed for waterproofing effectiveness. Single coats often leave thin spots or pinholes where moisture can penetrate.
Vapor Barriers and Moisture Control Components
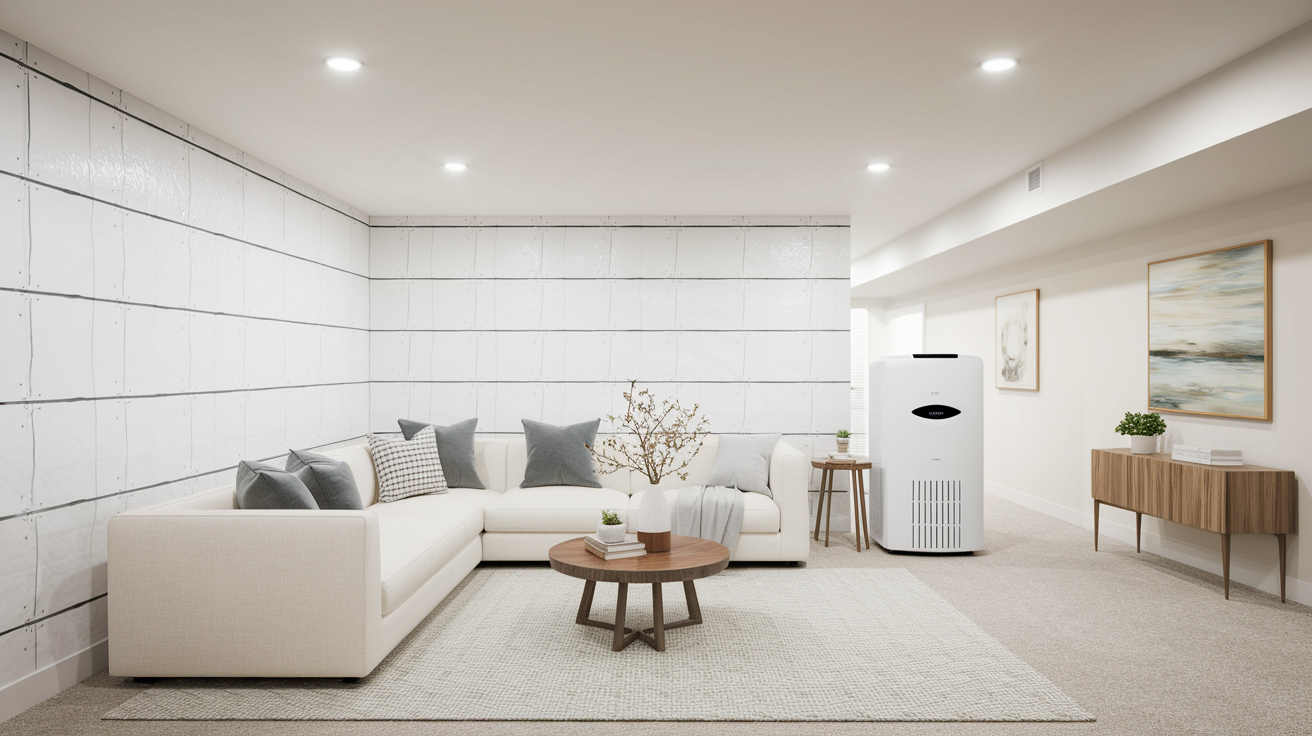
Vapor barriers prevent moisture transmission through foundation walls beyond what coatings alone can manage. These barriers are typically plastic sheeting or specialized membrane products applied directly to interior foundation walls or incorporated into wall finishing systems. They create an impermeable layer that stops water vapor from entering the basement air, reducing humidity and preventing condensation on cold surfaces during summer months when warm, humid outdoor air contacts cool concrete walls.
Dehumidifiers work as active moisture control to maintain optimal humidity levels below 60 percent, which prevents mold growth and musty odors. In basements, dehumidifiers combat the constant moisture source from concrete walls that naturally transmit some water vapor and from lingering dampness after rain events. Units with built in humidistats automatically cycle on and off to maintain setpoint humidity, operating continuously during humid summer months but rarely in winter when cold air holds less moisture. Proper sizing matters. A unit too small runs constantly without achieving target humidity, while an oversized unit short cycles inefficiently. Sizing is based on basement square footage and moisture level, with typical residential units ranging from 50 to 70 pint capacity for average basements up to 2,500 square feet.
Basement wall panel systems combine moisture barriers with finished surfaces and insulation in a prefabricated assembly. These panels, made from fiberglass, vinyl, or foam insulation with moisture resistant facings, attach directly to foundation walls without framing. The panels include a built in vapor barrier and drainage channels that direct any wall moisture downward to the floor drainage system rather than into the basement space. They provide thermal insulation that reduces condensation by keeping interior wall surfaces warmer and offer a finished appearance that conceals foundation imperfections. Installation requires mechanical fasteners or adhesive appropriate for concrete, and panels interlock to create a continuous moisture barrier across the wall. These systems cost more than simple paint on coatings but deliver finished space immediately without the mold risk of traditional framed walls with drywall.
Proper ventilation and moisture control prevent mold growth and musty odors even after waterproofing installation removes active water intrusion. Basements need air circulation to prevent stagnant humid air from settling in corners and behind stored items. Simple interventions help: running HVAC returns to the basement to integrate it into whole house air circulation, installing small fans to move air in dead zones, avoiding carpet and fabric furnishings that hold moisture, and ensuring dryer vents exhaust outside rather than into the basement. Even with perfect waterproofing, basements remain cooler than above grade spaces, making them prone to condensation during humid weather. Combining drainage, dehumidification, and air movement creates conditions where mold can’t establish.
Interior Waterproofing Versus Exterior Methods
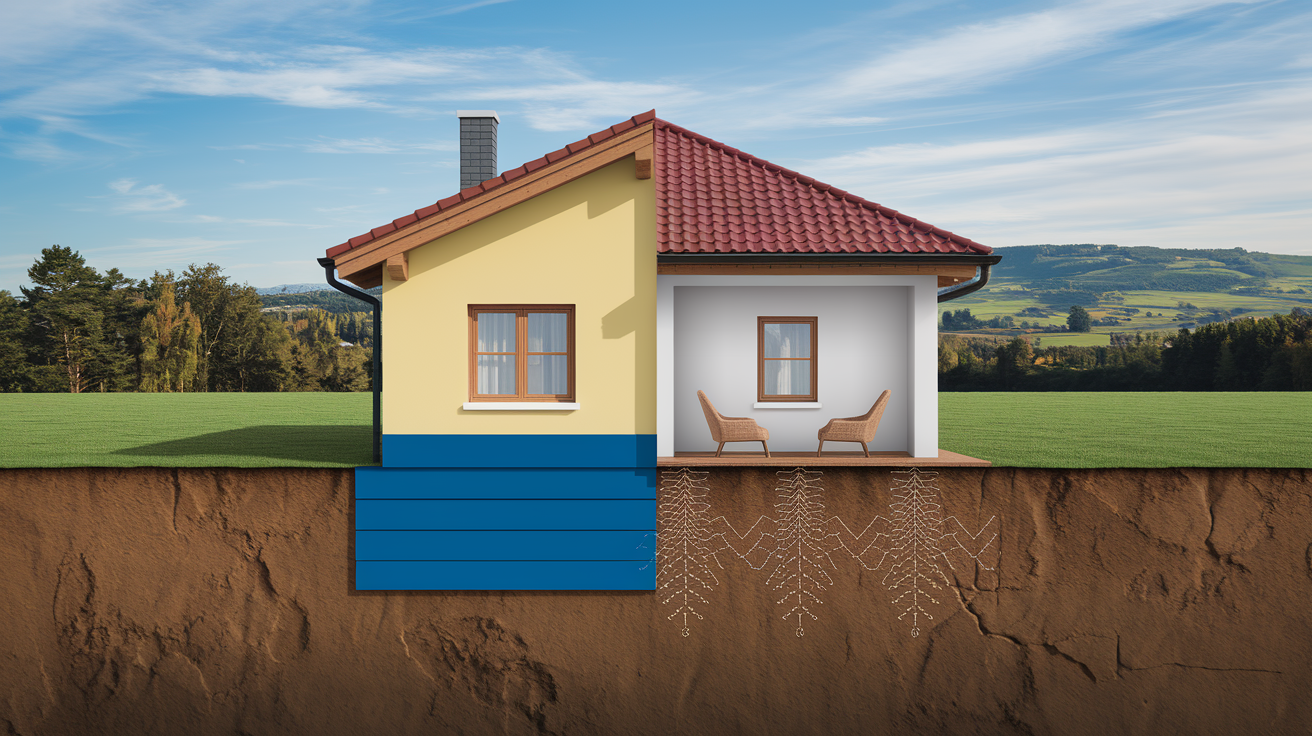
The fundamental difference between exterior and interior waterproofing is where water is controlled. Exterior waterproofing blocks water before it reaches the foundation, applying sealants and membranes to outside walls and installing drainage at the footing level to divert groundwater away. Interior waterproofing manages water after it enters the foundation envelope, using drainage systems to collect it beneath the floor and pumps to remove it. Both approaches work, but they serve different scenarios based on access, budget, and timing.
Exterior waterproofing theoretically provides better protection by keeping water completely away from the foundation. But the reality is more complex. Both methods can effectively keep basements dry when properly installed and maintained.
| Factor | Interior Waterproofing | Exterior Waterproofing |
|---|---|---|
| Cost | $4,000-$8,000 average for complete system | $10,000-$25,000+ requiring full excavation |
| Installation Time | 2-3 days for most basements | 1-2 weeks plus weather delays |
| Landscaping Impact | No exterior disruption | Requires excavation around perimeter, destroys existing landscaping, sidewalks, decks |
| Effectiveness Duration | 25+ years with minimal maintenance | Designed for 25 years but often degrades to 5-10 years due to backfill settlement and soil movement |
| Maintenance Needs | Quarterly sump pump testing, annual system inspection | Drainage system inspection, potential re-grading after 8-10 years as backfill settles |
| Best Use Cases | Existing homes, finished basements, hydrostatic pressure issues, properties with landscaping/hardscaping, limited budgets, year-round installation | New construction, severe foundation cracks, complete drainage system failure, properties without existing landscaping |
Interior waterproofing makes sense for finished basements where preserving existing living space is critical, for properties with established landscaping that would cost thousands to replace after excavation, and in situations where exterior access is limited by lot lines, adjacent structures, or driveways. It also works regardless of season. Installation proceeds in winter when frozen ground would halt exterior excavation. Budget constraints favor interior systems because they eliminate excavation costs that often exceed the waterproofing materials themselves. For homes where exterior waterproofing was attempted but failed due to backfill settlement or root intrusion, interior systems provide reliable alternative protection without repeating the expensive excavation process.
Cost Factors and Pricing for Interior Basement Waterproofing

General cost ranges for complete interior waterproofing systems typically run $4,000 to $8,000 for an average basement of 1,000 to 1,500 square feet requiring perimeter drainage, sump pump installation, and crack sealing. Component only installations cost less. Adding a sump pump to an existing system might run $1,500 to $2,500, while crack injection repairs typically range from $300 to $800 depending on crack length and number. Surface coating applications covering 800 to 1,000 square feet of wall area run $2,000 to $3,500 for professional application. These prices reflect complete professional installation including materials and labor.
Interior waterproofing costs substantially less than exterior methods because there’s no excavation requiring heavy machinery, no removal and disposal of soil, no destruction and replacement of landscaping, sidewalks, or patios, and installation proceeds faster with less labor. Exterior waterproofing often costs $100 to $150 per linear foot of foundation wall, while interior systems average $50 to $70 per linear foot. The cost difference becomes more dramatic for homes with established landscaping, where replacing mature plantings, irrigation systems, and hardscaping can add $10,000 or more to exterior projects.
Long term value includes multiple benefits beyond immediate water control. Interior waterproofing systems protect finished basement spaces, preventing the $20,000 to $40,000 in damage that a single flood event causes to drywall, flooring, furniture, and stored belongings. Home resale value increases when buyers see documented waterproofing. A dry basement with a transferable warranty becomes a selling point rather than a concern requiring inspection and negotiation. Prevented damage costs extend beyond the basement itself. Water intrusion leads to mold remediation ($2,000 to $6,000 for professional treatment), structural repairs if moisture reaches framing, and ongoing HVAC inefficiency as humid basements stress cooling systems. Most reputable installers offer warranties ranging from 10 years to lifetime, covering both materials and labor. Transferable warranties add value at resale, and long warranty terms indicate installer confidence in the system.
Factors affecting final cost:
- Basement square footage and perimeter length. Larger basements require more drainage pipe, more sump capacity, and longer installation time
- Linear feet of drainage required. Complete perimeter systems cost more than targeted installations addressing localized wet areas
- Sump pump type and backup systems. Basic 1/3 HP pumps cost less than higher capacity models with battery backup and alarm systems
- Number and severity of cracks. Extensive cracking requiring multiple injection repairs adds to material and labor costs
- Coating area and product type. Cement based coatings cost more than acrylic but provide better moisture resistance
- Regional labor rates. Installations in higher cost of living areas command premium pricing
- Warranty length and transferability. Lifetime warranties with transferability cost more upfront but provide long term value
Effectiveness and Limitations of Interior Systems
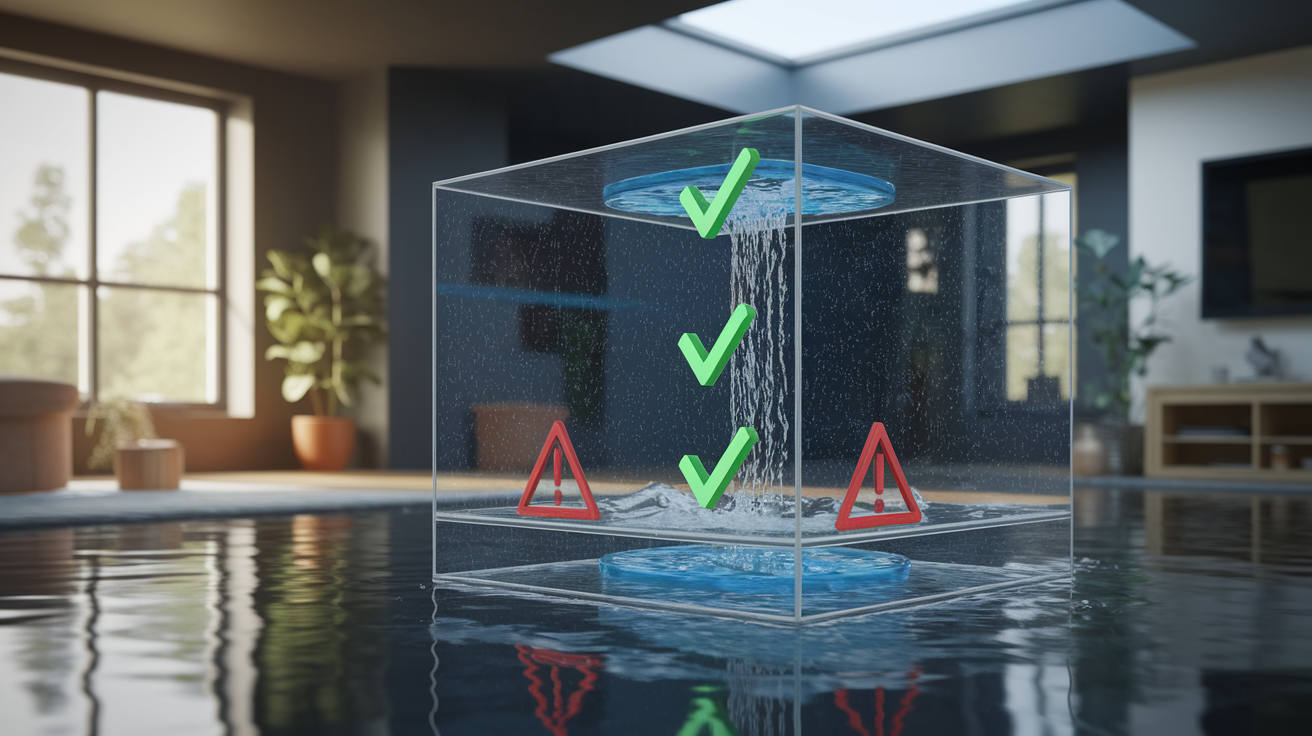
Interior waterproofing is highly effective for specific situations. Managing hydrostatic pressure that drives groundwater through floors and lower walls, protecting finished basement spaces without demolition, and handling seasonal water infiltration from high water tables. Systems work reliably when properly designed for the water volume and installed with correct drainage slope and adequate pump capacity. Thousands of basements stay dry year round using only interior systems.
Effectiveness depends on proper installation and addressing contributing exterior factors. An interior system will manage water reaching the foundation, but if gutters dump water directly against the house or grade slopes toward the foundation, water volume can overwhelm even well designed systems. The best results come from combining interior drainage with basic exterior improvements. Extending downspouts away from the foundation, correcting negative grade slopes near the house, and ensuring proper surface drainage.
Key advantages interior waterproofing offers:
- Manages high hydrostatic pressure by intercepting groundwater at the footing level before it builds enough pressure to crack floors or walls
- Protects finished basements without demolition of drywall, flooring, or trim. Drainage can be installed by removing only the floor perimeter
- Works year round since installation happens inside protected space unaffected by frozen ground, rain, or snow
- Costs significantly less than exterior waterproofing by eliminating excavation and landscaping restoration
- Suitable when exterior access is impossible due to property lines, adjacent structures, driveways, or patios built against the foundation
Important limitations to understand:
- Doesn’t address exterior drainage problems like poor grading or clogged gutters that contribute to water infiltration. These must be fixed separately for best results
- Requires periodic maintenance including sump pump testing, battery backup checks, and drainage system inspection to ensure continued operation
- Won’t fix structural foundation issues like large cracks from settlement, bowing walls, or deteriorating concrete that require foundation repair
- Industry currently operates without federal or state regulation, requiring homeowners to research contractors carefully, verify licensing and insurance, and check references before installation
The importance of combining interior waterproofing with exterior drainage improvements can’t be overstated. Interior systems manage water reaching the foundation, but reducing that water volume protects the foundation itself from constant moisture exposure and extends system life by reducing pump runtime and wear. Simple exterior improvements work in combination: clean gutters prevent roof water from saturating soil near the foundation, extended downspouts move that water at least 10 feet away, and corrected grade slopes direct surface runoff away from the house. Together, exterior improvements and interior waterproofing create comprehensive protection.
When to Choose Interior Waterproofing for Your Basement
Ideal scenarios for interior waterproofing include finished basements where preserving carpet, drywall, and trim makes exterior excavation impractical, properties with established landscaping where mature trees, extensive plantings, irrigation systems, and hardscaping would cost thousands to remove and replace, limited exterior access in homes where property lines sit close to the foundation or adjacent structures prevent equipment access, homes on slopes where exterior excavation would require extensive retaining wall work, budget constraints when comprehensive waterproofing is needed but exterior costs are prohibitive, and multi unit buildings where exterior work requires coordination with neighbors or HOA approval that complicates scheduling and cost sharing.
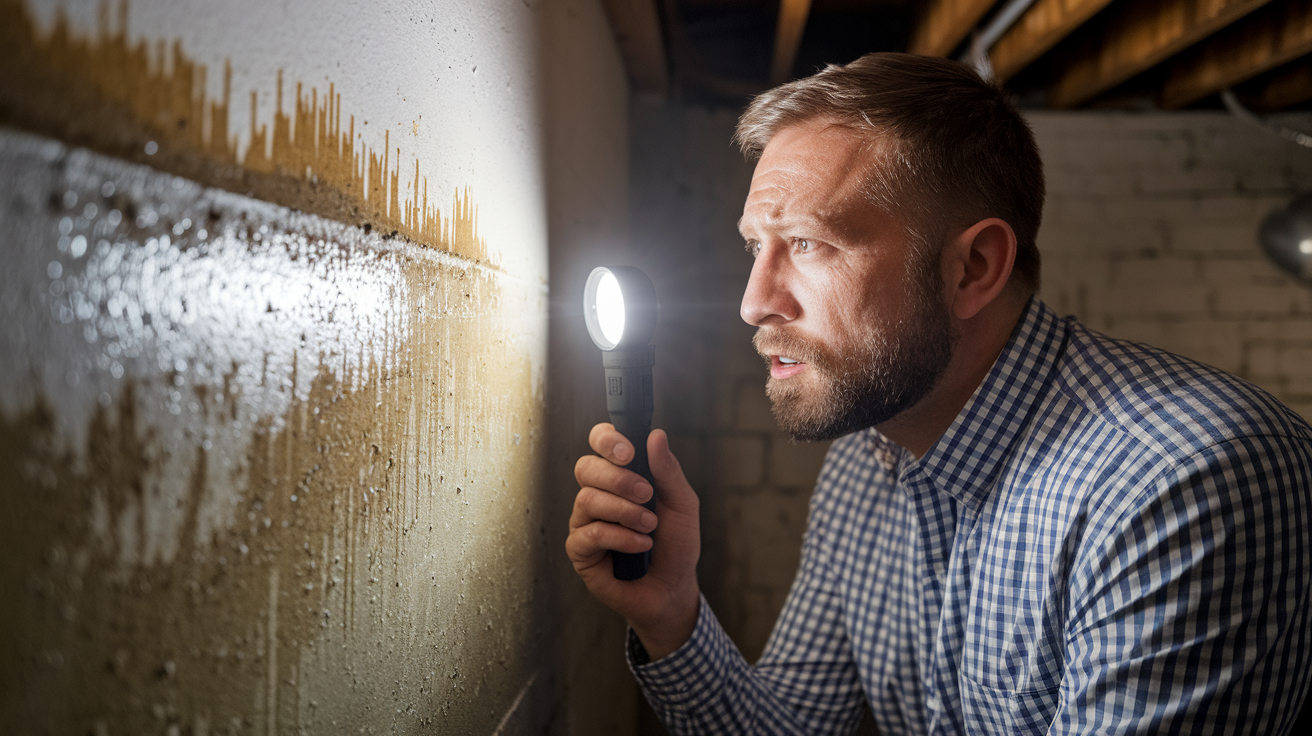
Situations requiring interior waterproofing include active hydrostatic pressure causing water to enter through floor cracks or cove joints as groundwater rises, seasonal water seepage during spring thaw or heavy rain periods when water tables temporarily rise above the basement floor level, condensation problems where cool concrete walls meet warm humid air creating moisture that drips or runs down walls, minor wall cracks allowing water infiltration but not indicating structural movement requiring foundation repair, and need for quick installation when water problems must be resolved immediately to protect belongings or allow basement use.
The root causes of basement water intrusion that interior systems address start with hydrostatic pressure. Groundwater in saturated soil surrounding the foundation exerts pressure against walls and under the floor, forcing water through any available opening. Groundwater infiltration occurs when the water table rises seasonally above the basement floor level, creating constant upward pressure. Foundation settlement creates new cracks as homes age and soil consolidates unevenly under the footings. Water enters through foundation cracks in poured concrete walls or through mortar joints in block walls where settlement or thermal expansion created gaps. Porous concrete allows water transmission even without visible cracks. Concrete naturally contains microscopic pores that permit slow moisture movement under pressure. Floor wall joints at the cove where the floor slab meets the foundation wall create a natural weak point where water concentrates because this joint often lacks proper sealing.
External contributing factors like improper grading where soil slopes toward the foundation rather than away directs all surface runoff toward the basement walls, clogged gutters that overflow and dump roof water directly at the foundation line saturate soil adjacent to walls, and poor drainage systems including missing downspout extensions, inadequate yard drainage, or failed exterior footing drains that no longer move groundwater away from the foundation. These factors should be addressed alongside interior waterproofing to reduce total water volume reaching the foundation. Fixing surface drainage and gutter problems often costs only a few hundred dollars but dramatically reduces the work interior systems must perform.
When exterior solutions are necessary instead: major foundation cracks wider than 1/4 inch or showing signs of ongoing movement indicate structural issues requiring foundation repair rather than waterproofing, widespread structural problems like bowing walls or significant foundation settlement need engineering assessment and stabilization before waterproofing makes sense, and completely failed exterior drainage where water pools against the foundation constantly may require exterior excavation to install proper footing drains before interior systems can effectively manage infiltration.
Common signs that indicate the need for interior waterproofing:
- Damp walls that feel cool and moist to the touch, especially lower sections near the floor
- Musty odors that persist even after cleaning and don’t have an obvious source like wet storage items
- Standing water on the floor after rain or during spring snowmelt, even if it’s just small puddles in corners
- Water stains on walls or floors showing where water has infiltrated previously, visible as discoloration or mineral deposits
- Visible wall cracks that show moisture or efflorescence (white mineral deposits) indicating water movement
- Efflorescence on concrete that appears as white, powdery deposits where water evaporating through concrete leaves dissolved minerals behind
Installation Timeline and Professional vs DIY Considerations
Typical installation timelines run 2 to 3 days for complete interior waterproofing systems in average basements. Day one focuses on concrete removal and drainage trench excavation. Day two covers drainage pipe installation, sump pump setup, and crack sealing. Day three involves concrete restoration, coating application if included, and system testing. Larger basements or complex layouts may extend to 4 days. Work can proceed year round since installation happens inside the conditioned space unaffected by weather.
Six phases of installation:
- Initial inspection and water testing. Contractors assess water entry points, check for active leaks, measure basement dimensions, locate sump pump placement, and test discharge routing options
- Concrete floor excavation along perimeter. Workers cut and remove 12 to 18 inch wide strips at the cove joint using concrete saws and jackhammers, expose footing and drainage zone, excavate trench 12 to 24 inches deep
- Drainage pipe and gravel installation. Line trench with filter fabric, add gravel base layer, position perforated drainage pipe with correct slope toward sump location, surround pipe with additional gravel, drill weep holes through foundation wall at footing level
- Sump pump setup. Excavate sump basin location at lowest point, install basin liner, position pump with float switch, connect discharge piping with check valve, route discharge line through rim joist to exterior, install battery backup if included
- Crack sealing and coating application. Drill injection ports along cracks, seal crack surfaces, inject epoxy or polyurethane under pressure until material fills crack depth, apply waterproof coatings to walls if included in system design
- Concrete restoration and cleanup. Pour new concrete over drainage system to restore floor, smooth finish, allow cure time before heavy use, test pump operation, review maintenance requirements
Disruption is minimal compared to exterior work with the entire project contained within the basement. Noise from concrete cutting occurs mainly on day one, lasting 2 to 4 hours. Dust from cutting and jackhammering is controlled with plastic sheeting and ventilation. Homeowners can typically remain in the home during installation, though basement access is restricted while work proceeds.
DIY appropriate tasks include applying surface sealants like acrylic or cement based coatings to walls following manufacturer instructions for surface preparation and application, installing dehumidifiers which require only setting up the unit and routing the drain line to a floor drain or sump basin, minor crack filling with hydraulic cement for hairline cracks and small gaps where structural repair isn’t needed, and maintaining existing systems through regular sump pump testing, cleaning debris from catch basins, and checking discharge lines for blockages.
Drainage system installation requires professionals because concrete cutting equipment like walk behind saws and electric jackhammers demand experience to operate safely and cut precise lines, proper slope calculation ensures water flows to collection points rather than pooling in low spots and requires laser levels or transit tools plus experience interpreting drainage flow patterns, plumbing knowledge determines correct pipe sizing, connection methods, and gravel types for effective drainage, and electrical work for sump pumps must meet code requirements for GFCI protection, proper circuit sizing, and safe installation in wet locations. Most jurisdictions require licensed electricians for pump installation.
Contractor selection criteria matter since the interior waterproofing industry operates without federal or state regulation. Check for general contractor or specialty waterproofing licensing if your state requires it, verify liability insurance and workers’ compensation coverage by requesting certificates and calling insurers to confirm active policies, check references by contacting at least three previous customers and asking about system performance, warranty service, and installation quality, review warranty offerings including what’s covered, warranty duration, transferability to future homeowners, and the company’s track record for honoring warranty claims, get detailed written estimates breaking down costs for drainage, pump, crack repair, and coatings separately so you can compare like components, and verify established local presence by confirming physical office location, years in business, and Better Business Bureau rating.
Cost benefit analysis between DIY and professional work: DIY saves labor costs which typically represent 40 to 60 percent of total project cost, but professional installation includes warranties typically covering 10 to 25 years for materials and workmanship that protect your investment if problems develop. Warranties typically become void if homeowners attempt DIY installation on major components like drainage systems and sump pumps. Professional work also ensures code compliance for electrical and plumbing connections, reducing liability if future problems occur. For surface coating applications under $500, DIY makes financial sense. For drainage systems costing $3,000 to $6,000, professional installation provides better long term value through warranty protection and proper system design.
Maintenance Requirements for Interior Waterproofing Systems
Interior waterproofing requires minimal but essential maintenance to ensure long term effectiveness and prevent system failures during heavy water infiltration events. Neglected maintenance leads to pump failures, clogged drainage pipes, and water damage that the system should prevent. Regular attention takes only a few hours annually but protects the initial investment.
Maintenance tasks with recommended frequency:
- Quarterly sump pump testing. Pour 5 gallons of water into the sump basin to verify the pump activates at the correct level, runs smoothly without unusual noise, and discharges water through the exterior line without backup
- Annual pump cleaning and float switch inspection. Remove pump from basin, clean inlet screen of debris, check float mechanism for free movement without binding, inspect discharge pipe connections for leaks
- Semi annual discharge line checks. Walk the exterior discharge route to verify water exits at least 10 feet from foundation, check for ice blockage in winter, ensure line hasn’t settled creating low spots that trap water
- Monthly dehumidifier filter cleaning. Remove and wash filters according to manufacturer instructions, check collection bucket if not plumbed to drain
Final Words
Interior basement waterproofing works by combining drainage systems, sump pumps, crack sealing, and moisture barriers to manage water after it enters your foundation.
The best systems pair perimeter drains with reliable sump pumps, seal active cracks with epoxy or polyurethane, and control humidity with dehumidifiers and vapor barriers.
Most installations complete in two to three days without tearing up your yard. You’ll need professional help for drainage and pump work, but you can handle coatings and basic maintenance yourself.
Fix exterior grading and gutters too. Interior waterproofing manages water that gets in, but stopping it outside first makes everything work better and last longer.
FAQ
Q: What is interior basement waterproofing and how does it work?
A: Interior basement waterproofing manages water from inside the basement through drainage systems installed under the floor, combined with sump pumps and crack sealing. The system collects groundwater before it surfaces and directs it to a sump pump that removes it from the foundation.
Q: How long does interior basement waterproofing installation take?
A: Interior basement waterproofing installation typically completes in 2 to 3 days without disturbing outside landscaping. The timeline includes excavation, drainage pipe installation, sump pump setup, crack sealing, and concrete restoration.
Q: What are the main components of an interior waterproofing system?
A: The main components of an interior waterproofing system include perforated drainage pipes surrounded by gravel, a sump pump with battery backup, crack sealants, waterproof coatings, vapor barriers, and a dehumidifier for moisture control.
Q: How much does interior basement waterproofing cost?
A: Interior basement waterproofing costs less than exterior methods because it doesn’t require extensive excavation or landscaping work. Final costs depend on basement square footage, linear feet of drainage required, sump pump type, crack severity, and warranty length.
Q: Can I do interior basement waterproofing myself?
A: DIY interior waterproofing works for minor tasks like applying surface sealants, installing dehumidifiers, and minor crack filling. Professional installation is required for drainage systems, sump pumps, and major crack repairs due to specialized equipment and expertise.
Q: What are the signs I need interior basement waterproofing?
A: Signs you need interior basement waterproofing include damp walls, musty odors, standing water, water stains, visible wall cracks, and efflorescence on concrete. These indicate water intrusion that requires drainage system installation.
Q: How does a sump pump work in interior waterproofing?
A: A sump pump works by activating via float switches when water reaches certain levels in the collection basin. The pump removes thousands of gallons per hour through discharge lines to exterior drainage points.
Q: What’s the difference between interior and exterior basement waterproofing?
A: Interior waterproofing manages water after it enters the foundation through drainage systems and sump pumps. Exterior waterproofing blocks water before entry by applying sealants to outside walls, requiring excavation and landscaping work.
Q: How effective is interior basement waterproofing?
A: Interior basement waterproofing is highly effective for managing hydrostatic pressure, protecting finished basements, and addressing minor leaks. Effectiveness depends on proper installation and addressing contributing exterior factors like grading and gutters.
Q: What maintenance does interior waterproofing require?
A: Interior waterproofing requires quarterly sump pump testing, annual pump cleaning, semi-annual discharge line checks, monthly dehumidifier filter cleaning, and annual drainage system inspection. Regular maintenance prevents system failures and extends lifespan.
Q: When should I choose interior waterproofing over exterior methods?
A: Choose interior waterproofing when you have a finished basement, established landscaping, limited exterior access, budget constraints, or need quick installation. It works best for minor leaks and hydrostatic pressure issues.
Q: What types of sealants are used in interior basement waterproofing?
A: Interior basement waterproofing uses epoxy injections for structural cracks, polyurethane foam for active leaks, hydraulic cement for surface repairs, and acrylic or cement-based coatings for wall moisture barriers.
Q: How do interior French drains work?
A: Interior French drains work by collecting water through perforated pipes installed beneath the basement floor in gravel beds. The pipes run along the perimeter at the cove joint and channel water to the sump pump.
Q: Does interior waterproofing prevent mold growth?
A: Interior waterproofing prevents mold growth by removing water before it surfaces, reducing humidity with dehumidifiers, and maintaining levels below 60%. Vapor barriers and proper ventilation further control moisture transmission through foundation walls.
Q: What causes basement water problems that interior waterproofing fixes?
A: Basement water problems stem from hydrostatic pressure, groundwater infiltration, foundation settlement, water entering through foundation cracks, porous concrete, and floor-wall joints. Contributing factors include poor grading, clogged gutters, and inadequate drainage.
Q: Can interior waterproofing be installed in a finished basement?
A: Interior waterproofing can be installed in a finished basement with minimal demolition. Installation focuses on perimeter floor excavation and targeted wall areas, allowing homeowners to remain in the home during the process.
Q: What is a vapor barrier in basement waterproofing?
A: A vapor barrier in basement waterproofing prevents moisture transmission through foundation walls by creating a protective layer between the concrete and interior space. It works with dehumidifiers to control humidity.
Q: How do I choose a waterproofing contractor?
A: Choose a waterproofing contractor by checking licensing, insurance, references, warranty offerings, and detailed written estimates. Look for established local presence since interior basement waterproofing is currently unregulated.
Q: What are the limitations of interior basement waterproofing?
A: Interior basement waterproofing limitations include not addressing exterior drainage problems, requiring periodic maintenance, not fixing structural foundation issues, and industry being currently unregulated. It won’t solve poor grading or clogged gutters.
Q: How often should sump pumps be tested?
A: Sump pumps should be tested quarterly to ensure proper operation, with annual cleaning and float switch inspection. Battery backup systems require bi-annual testing, and immediate inspection after heavy storms protects against failures.