

Interior waterproofing sounds easier than it is because the coating is only half the fix. If you skip proper prep or miss the real moisture source, you’re basically painting over a problem that’ll come back within months. This guide walks through the actual sequence: finding where water enters, getting walls ready for coating, and applying products that create a real barrier instead of temporary coverage. You’ll learn what works for moderate seepage and when interior methods won’t cut it.
Essential Tools and Materials for Basement Waterproofing
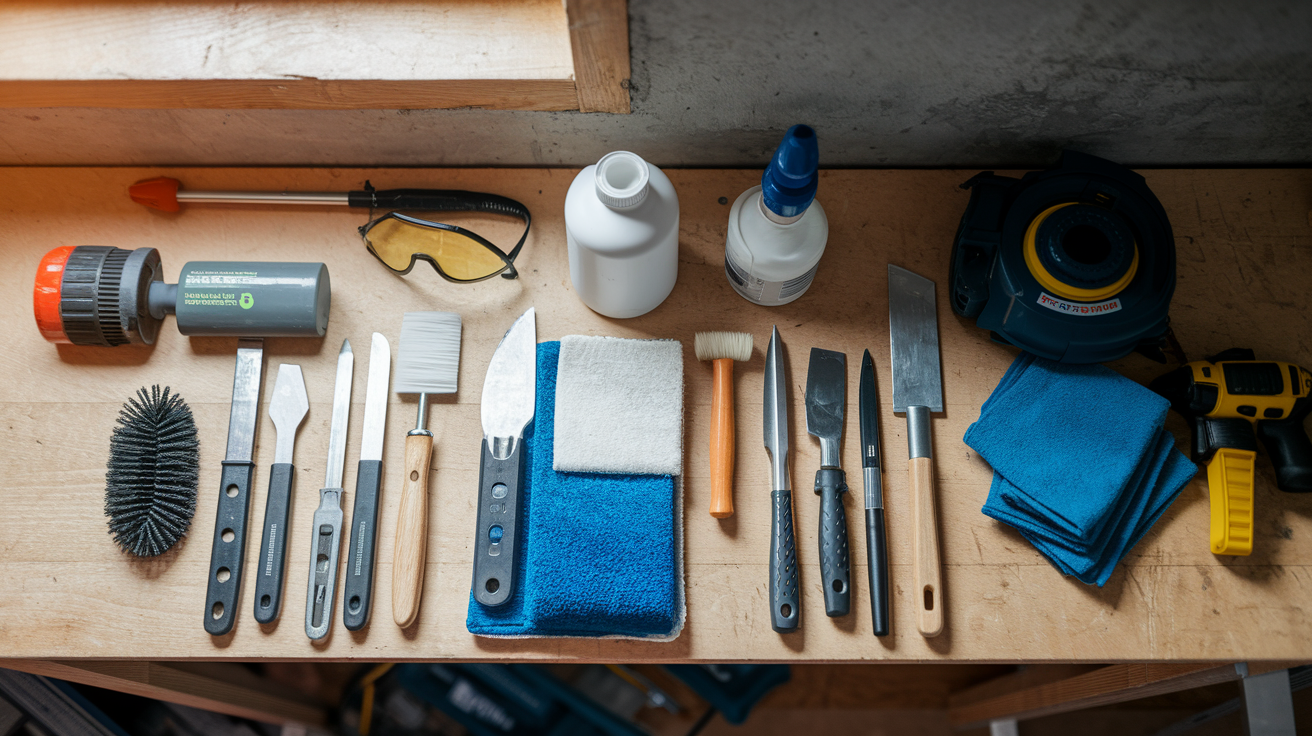
Having everything ready before you start prevents mid-project trips to the hardware store and the frustration of watching concrete dry while you’re missing a critical item. Basement waterproofing requires specific tools designed for masonry work, not just standard painting supplies.
| Item Category | Specific Items | Estimated Cost | Purpose |
|---|---|---|---|
| Surface Preparation Tools | Wire brush, stiff-bristle brush, shop vacuum | $25-$40 | Remove loose material, dirt, and efflorescence from concrete |
| Cleaning Supplies | Muriatic acid (diluted 1:10), bucket, scrub brush | $15-$25 | Etch smooth concrete for better coating adhesion |
| Crack Repair Materials | Hydraulic cement, putty knife, pointing trowel | $20-$35 | Seal cracks, gaps, and pipe penetrations |
| Waterproof Coating | Masonry waterproofing paint (2-3 gallons) | $80-$150 | Create moisture barrier on interior walls |
| Bonding Primer | Wet wall primer (1-2 gallons if needed) | $35-$60 | Enable coating adhesion on chronically damp walls |
| Application Tools | Masonry brush, 3/4-inch nap roller, paint tray, extension pole | $30-$50 | Apply waterproof coating to concrete surfaces |
| Mixing Equipment | Drill with paddle mixer attachment, stir sticks | $25-$45 | Thoroughly mix hydraulic cement and coatings |
| Drop Cloths | Canvas or heavy plastic sheeting (2-3 pieces) | $20-$35 | Protect basement floor and stored items |
| Safety Equipment | Chemical-resistant gloves, safety goggles, N95 respirator | $25-$40 | Protect against acid burns, dust, and coating fumes |
| Ventilation | Box fan or portable ventilator | $25-$50 | Move fresh air through basement during application and drying |
| Moisture Testing | Plastic sheeting squares (12×12 inches), tape | $5-$10 | Test if walls are dry enough for coating application |
| Dehumidifier | 30-50 pint capacity unit (if not owned) | $150-$250 | Speed surface drying and reduce humidity during curing |
| Lighting | LED work light or portable task lighting | $20-$40 | Illuminate dark corners and ensure complete coverage |
Product selection matters more than the initial price difference suggests. Waterproof coatings rated for hydrostatic pressure (they withstand water pushing through from the other side) cost $10-$20 more per gallon than basic sealers, but they actually block moisture instead of just slowing it down. Look for products that specifically mention mildewcide inclusion, which prevents mold growth on the painted surface. Check the label for surface compatibility because some formulas work on poured concrete but not concrete block, or the other way around. Budget products often require three coats instead of two, eliminating any cost advantage.
For an average 800-square-foot basement with 8-foot walls, expect total material costs between $200 and $600. The lower end assumes you already own basic tools, skip the dehumidifier, and buy mid-grade products. The higher end includes all tools from scratch, premium waterproofing coating, wet wall primer for problem areas, and a dehumidifier for faster drying and ongoing moisture control. Surface condition drives the cost more than square footage. Heavily damaged walls require more crack repair materials and may need extra coats for complete coverage.
Complete Interior Basement Waterproofing Process Step by Step
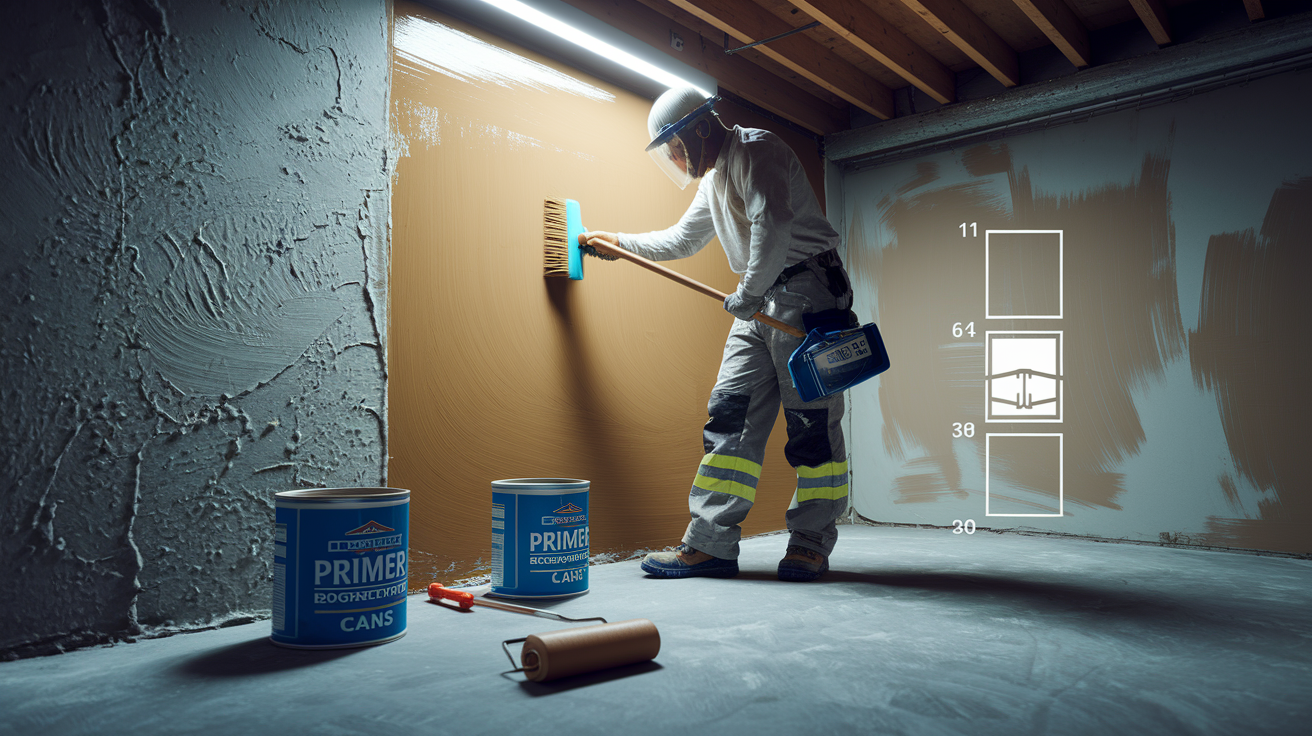
Interior waterproofing creates a moisture-resistant barrier on the inside faces of basement walls, controlling seepage and preventing dampness from entering living spaces. This approach works when moisture problems are moderate and the foundation structure remains sound.
-
Assess moisture sources and severity. Use the plastic sheet test (tape 12×12-inch plastic to walls, check after 24 hours for condensation on either side) and inspect for active leaks, persistent dampness, or efflorescence. Identify whether moisture comes from exterior groundwater, interior condensation, or plumbing leaks. Time required: 2-4 hours.
-
Gather all tools and materials before starting. Confirm you have surface prep tools, cleaning supplies, crack repair materials, waterproof coating, application tools, and safety equipment. Missing items mid-project extends timeline by days. Time required: 1-2 hours shopping.
-
Clean walls thoroughly. Remove all dirt, dust, loose paint, oil stains, and white mineral deposits using wire brushes, scrub brushes, and detergent solution. Etch smooth surfaces with diluted muriatic acid (1:10 ratio) to create texture for coating adhesion. Time required: 4-8 hours depending on wall condition.
-
Dry walls completely. Allow 24-48 hours of drying time after cleaning. Run dehumidifier and provide ventilation. Walls must be dry to touch before coating application. Verify dryness with plastic sheet test. Time required: 1-2 days.
-
Repair all cracks and gaps. Fill active leaking cracks with fast-setting hydraulic cement. Use epoxy or polyurethane for dormant hairline cracks. Seal pipe penetrations and cold joints. Let all repairs cure fully before coating. Time required: 4-6 hours plus 24-hour cure time.
-
Apply bonding primer to chronically damp areas. If certain wall sections never fully dry despite dehumidification, brush on wet wall bonding primer first. This creates a sticky base that allows the waterproof coating to cure properly on damp concrete. Skip this step if walls are dry. Time required: 2-3 hours plus 4-hour dry time.
-
Apply first waterproof coating. Stir coating thoroughly. Cut in edges and corners with masonry brush, then roll large areas with 3/4-inch nap roller. Apply generously for full coverage at approximately 75-100 square feet per gallon. Work in 4-foot sections. Time required: 4-6 hours.
-
Allow proper drying time between coats. Wait minimum 4 hours before touching. Maintain ventilation and moderate temperature (50-90°F). Check that first coat is dry to touch before proceeding. Time required: 4-8 hours.
-
Apply second coat perpendicular to first. Apply second coat at 90-degree angle to first coat direction for complete coverage. Use 100-125 square feet per gallon coverage rate. Inspect carefully for missed spots or thin areas. Time required: 3-5 hours.
-
Final curing period. Wait minimum 24 hours before exposing waterproofed walls to any moisture or high humidity. Keep ventilation running. Basement can receive light use during curing but avoid creating humidity. Time required: 24-48 hours.
For a typical 800-square-foot basement, preparation takes 1-2 days, crack repair and drying takes 1 day, coating application with curing takes 3-4 days. Total project timeline runs 5-7 days when weather cooperates and walls dry on schedule.
This work requires basic painting skills and attention to detail, not advanced construction experience. If you can cut in corners when painting a room and notice when you’ve missed spots, you can handle waterproofing. The critical skill is patience during the preparation phase, which determines whether the coating sticks for years or peels off in months.
Identifying Moisture Sources Before Waterproofing Your Basement
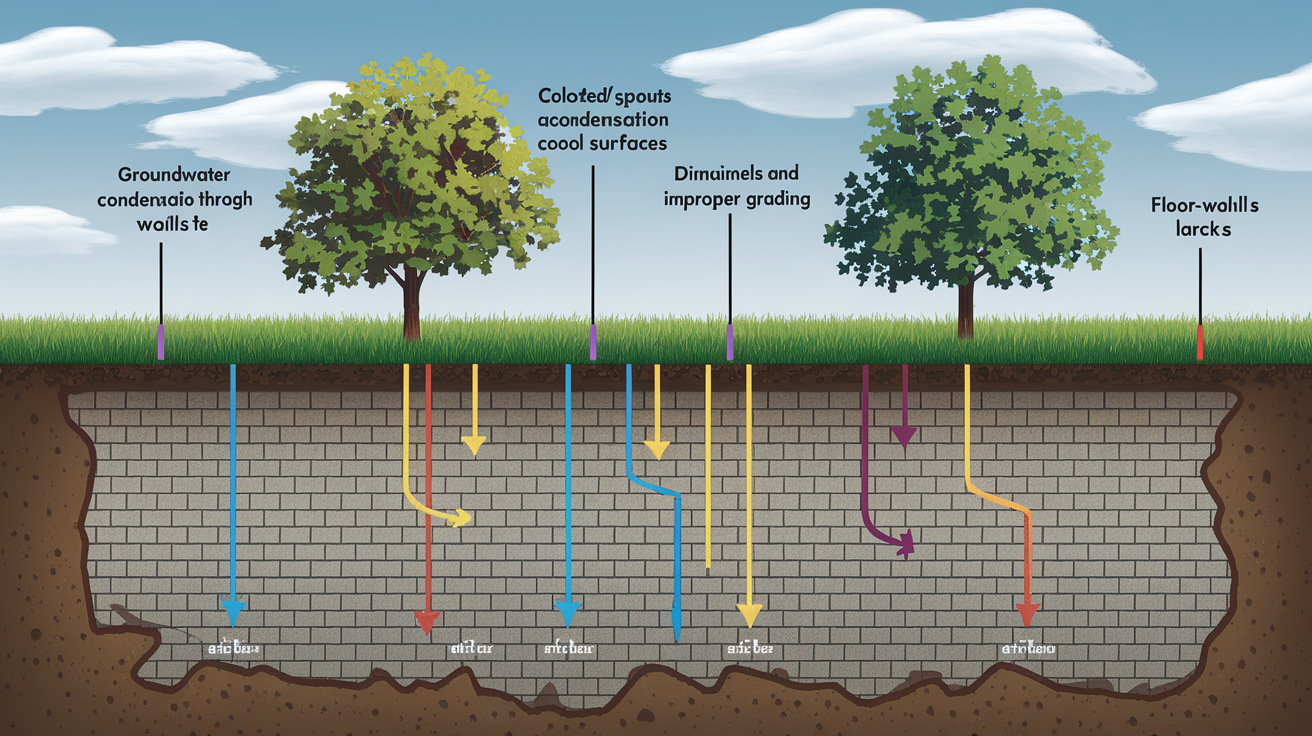
Diagnosis determines which waterproofing method you need and whether interior coating alone will solve the problem or just temporarily hide it. Water takes the path of least resistance, so you’re looking for both the entry point and the source pushing it inside.
Common moisture sources and how to identify them:
Groundwater seepage through walls. Persistent dampness at wall base, especially after rain. Water appears as general moisture without obvious drip points. Hydrostatic pressure forces water through porous concrete. Test: Tape plastic to suspect area, check in 24 hours for moisture on the wall side of plastic.
Condensation from humidity. Dampness appears on cool surfaces during warm weather. Basement feels muggy. Water droplets form on cold water pipes and upper wall sections. Test: Moisture on the room side of taped plastic indicates condensation, not seepage.
Clogged gutters and short downspouts. Moisture appears within 24 hours of heavy rain, concentrated near exterior walls under downspout locations. Walk your foundation during rain to see where water pools. Gutters overflow or discharge directly against foundation.
Improper yard grading. Ground slopes toward house instead of away. Standing water visible against foundation after rain. Moisture enters basement at consistent locations that match exterior low spots.
Window well problems. Water pools in wells after rain. Wells lack drainage or have clogged drains. Dampness appears on walls immediately below ground-level windows. White mineral deposits form below window openings.
Concrete curing cracks. Vertical hairline cracks in poured concrete walls, often appearing as straight lines. Moisture seeps through during wet weather. Cracks usually appear at stress points like window corners.
Floor-wall joint seepage. Water appears where basement floor meets walls. Visible dampness or actual water during heavy rain. This indicates hydrostatic pressure under the slab pushing water up and in.
Plumbing leaks disguised as foundation moisture. Dampness appears near bathroom or laundry areas. Moisture consistent regardless of weather. Check supply lines, drain pipes, and floor drains first.
Hydrostatic pressure builds when soil around and beneath your foundation becomes saturated faster than it can drain away. The water has nowhere to go except through any crack, gap, or porous section it can find. You’ll recognize hydrostatic pressure by persistent dampness even during dry weather, white crusty deposits (efflorescence) where mineral-rich water evaporates on your walls, and moisture entering at floor-wall joints where water pressure is highest. If you see actual water streaming through cracks during rain, you’re dealing with significant hydrostatic pressure that interior coating alone probably won’t control.
Interior waterproofing handles condensation, minor seepage through porous walls, and moisture from fixable exterior problems like bad gutters or grading. It can’t solve active flooding, severe hydrostatic pressure from high water tables, or structural cracks that indicate foundation movement. If water enters forcefully during storms, appears at multiple locations simultaneously, or your sump pump runs constantly during wet weather, you’re looking at exterior drainage problems that need exterior solutions regardless of what you paint on the inside.
Surface Preparation and Crack Repair for Basement Walls
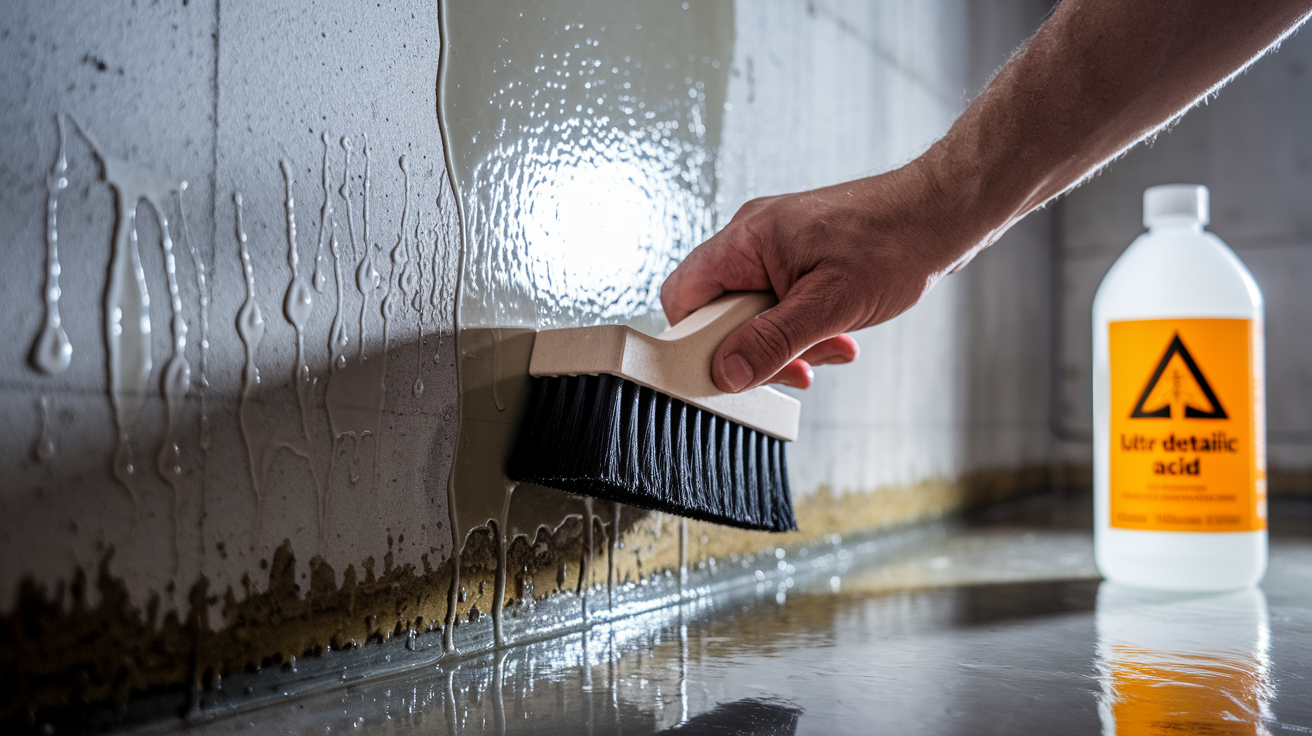
Eighty percent of waterproofing coating failures trace back to inadequate surface preparation and incomplete crack repair. The coating only performs as well as the surface underneath, which means cleaning and repairing take longer than the actual waterproofing step.
Start by removing everything that prevents direct coating contact with concrete. Wire brush the entire wall surface to knock off loose material, dirt, old flaking paint, and white mineral deposits. For oil stains (common near old fuel tanks or workbenches), scrub with degreasing detergent and rinse thoroughly. Efflorescence, the white powder or crusty deposits left behind when water evaporates through concrete, must come completely off because it prevents coating adhesion. Scrub efflorescence with a stiff brush and water, then let the wall dry before checking if more reappears. If it keeps coming back, you haven’t stopped the moisture source yet.
Smooth concrete surfaces sealed during construction won’t accept coating without texture. Mix muriatic acid at 1:10 ratio (1 part acid to 10 parts water, always add acid to water, never the reverse). Wear chemical-resistant gloves, goggles, and respirator because acid fumes are harsh. Apply the diluted acid solution to the wall with a brush, let it fizz for 5-10 minutes, then rinse thoroughly with clean water. The concrete should feel slightly rough to touch, like fine sandpaper. Open all windows and run fans during acid etching because fumes build up quickly in basements. If you can’t achieve adequate ventilation, skip the acid and use a concrete grinder with dust collection to texture the surface instead.
Walls must be completely dry before coating application. Damp concrete prevents proper coating cure even if it looks dry on the surface. After cleaning, run a dehumidifier and provide cross-ventilation for 24-48 hours minimum. Test dryness by taping 12×12-inch plastic squares to several spots on the wall, especially areas that tend to stay damp. Check after 24 hours. Moisture on the wall side of the plastic means the concrete is still releasing water and needs more drying time. Moisture on the room side indicates condensation from humid air and you need to lower basement humidity before coating.
Some concrete is too smooth even after acid etching, particularly modern poured walls finished with steel trowels. If water beads up on the surface instead of soaking in slightly, the concrete needs mechanical texturing. Rent a concrete grinder with dust shroud and vacuum attachment. Grind in overlapping passes until the surface shows consistent texture without gloss spots.
Repairing Cracks and Gaps Before Waterproofing
Distinguish between structural cracks that indicate foundation movement and normal shrinkage cracks from concrete curing. Horizontal cracks, stair-step patterns in block walls, cracks wider than 1/4 inch, or cracks that show displacement (one side higher than the other) need professional evaluation before you seal anything. These suggest foundation settlement or pressure problems that interior coating won’t solve.
For non-structural cracks, use hydraulic cement on active leaks where water currently seeps through. This cement sets in 3-5 minutes even underwater, expanding slightly as it cures to lock into the crack. Mix only enough for 2-3 minutes of work because it sets fast. The consistency should resemble thick peanut butter. Clean the crack with a wire brush, wet it slightly, then pack the hydraulic cement in with a putty knife or gloved fingers, pushing firmly to fill the entire depth. Shape it slightly concave so it doesn’t stick out above the wall surface. Hold pressure on the repair for 2-3 minutes until it starts to set and stops trying to push back out.
Dormant hairline cracks (no active water) seal better with epoxy or polyurethane injection. These materials flex slightly with normal concrete movement instead of cracking out like rigid hydraulic cement. For cracks 1/16 to 1/4 inch wide, install surface-mounted injection ports every 6-8 inches along the crack. Use low-viscosity epoxy for structural cracks or hydrophilic polyurethane for moisture-exposed cracks. The polyurethane expands when it contacts moisture, ensuring complete fill. Follow product instructions for injection pressure and cure time.
Seal all pipe penetrations where plumbing, electrical conduit, or old fuel lines pass through the foundation. Clean around the pipe, removing loose concrete and old caulk. For gaps larger than 1/2 inch, pack backer rod (foam rope) into the gap first, then apply polyurethane or hydraulic cement over it. The backer rod prevents the sealant from falling through while providing a backing surface.
Cold joints (where one concrete pour meets another, common in floors) often leak under hydrostatic pressure. Clean the joint thoroughly with a wire brush and vacuum. For joints wider than 1/4 inch, use backer rod sized to fill 2/3 of the joint depth, then apply polyurethane sealant over the top. Smooth with a wet finger or tool to create a slight concave surface.
Before proceeding to coating, inspect every repair under good lighting. Run your hand over the wall surface checking for remaining loose material, unrepaired cracks, or areas that still feel damp. Address anything questionable now, because you can’t fix it after coating without stripping the coating back off.
Applying Waterproof Coatings to Interior Basement Walls
Waterproof coatings come in three main types, each suited to different basement conditions. Cementitious coatings (the most common) are cement-based formulas that bond directly to concrete and concrete block, creating a rigid moisture barrier. Elastomeric coatings contain rubber-like polymers that flex with minor concrete movement and bridge hairline cracks. Crystalline coatings penetrate into concrete pores and react with moisture to form crystals that block water passage from within the concrete itself.
Choose based on your wall porosity and moisture pressure level. For standard poured concrete or block walls with moderate dampness, cementitious coatings like DRYLOK work well and cost less than specialty products. For walls with many small cracks or slight movement, elastomeric coating provides better long-term performance. If you’re dealing with significant hydrostatic pressure but can’t install exterior drainage yet, crystalline coating penetrates deeper and resists water pressure better than surface coatings alone.
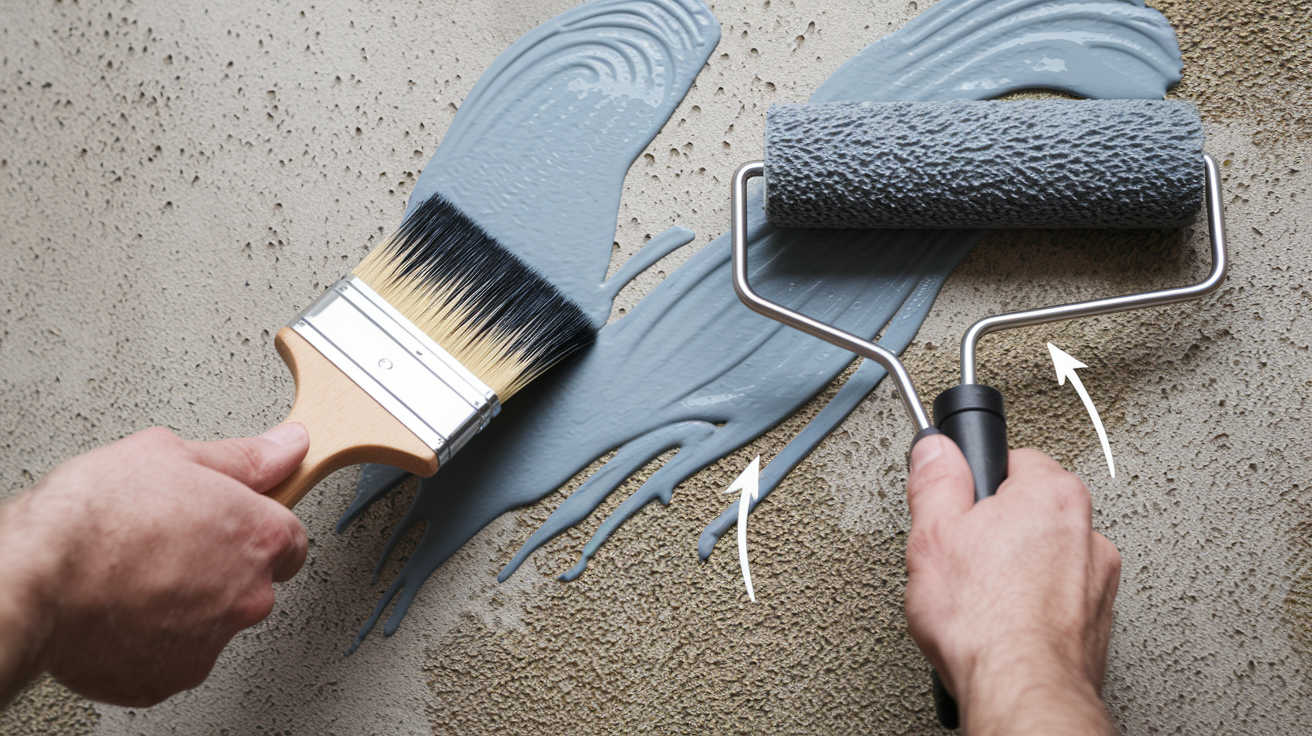
Application method affects both coverage speed and penetration depth. Brush application forces coating into concrete pores and provides the best penetration, especially critical on the first coat. Use a masonry brush with stiff synthetic bristles, not a standard paintbrush. Work the coating into the surface with pressure, not just surface spreading. Brushing takes longer but uses less product and provides better adhesion on rough or porous surfaces. Roller application covers large smooth areas faster and works well for second coats after brush-applied first coats establish good penetration. Use a 3/4-inch nap roller designed for rough surfaces. Standard 3/8-inch nap rollers don’t carry enough coating for proper coverage on concrete. Spray application covers extensive areas quickly but creates significant overspray in enclosed basements and uses 20-30% more material. Reserve spraying for large commercial spaces with proper ventilation.
Proper application sequence:
-
Stir coating thoroughly for 2-3 minutes, scraping bottom and sides of container to mix settled solids.
-
Cut in all edges, corners, floor-wall joints, and around pipes with masonry brush first.
-
Apply first coat with brush or roller in 4-foot sections, working from top to bottom.
-
Use heavy, even pressure to force coating into concrete pores. Coverage should be 75-100 square feet per gallon on first coat.
-
Maintain wet edge by keeping adjacent sections damp while working to avoid lap marks.
-
Check drying after 4 hours by touching inconspicuous area. First coat must be dry to touch before second coat.
-
Apply second coat perpendicular to first coat direction (if first coat was vertical strokes, second coat uses horizontal strokes).
-
Second coat coverage increases to 100-125 square feet per gallon because the sealed surface absorbs less.
-
Inspect carefully while coating is still wet, looking for missed spots, thin coverage, or areas where concrete shows through.
Coatings need minimum 24 hours cure time before moisture exposure. Temperature and humidity affect cure speed. If your basement stays cool (below 55°F) or humid (above 70% relative humidity), extend curing time to 48 hours. Keep ventilation running during the entire curing period to move air across the coated surface and carry away moisture released as the coating cures.
You can use the basement lightly during curing but avoid activities that generate humidity like running a dryer, doing laundry, or bringing in wet items from outside. Don’t store anything against the freshly coated walls for 72 hours. The coating needs air exposure to complete the curing process.
Waterproofing Basement Walls That Stay Wet
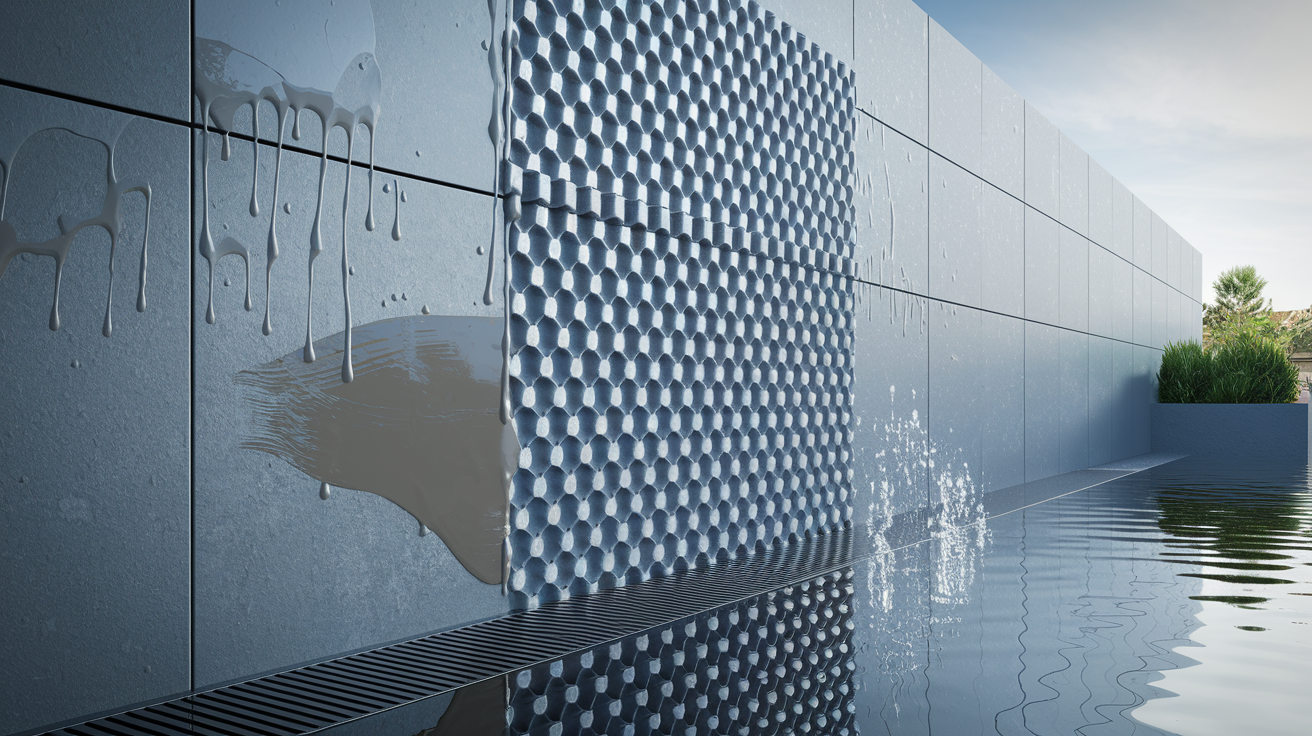
Some basement walls never fully dry even with dehumidifiers running, especially in areas with high water tables, severe hydrostatic pressure, or inadequate exterior drainage. These persistently damp walls present a specific problem because standard waterproof coatings require dry surfaces to cure properly and develop their moisture barrier.
Chronically wet walls occur when groundwater pressure stays constant rather than rising and falling with weather. Your exterior soil may be clay that holds water, your foundation sits below the water table, or exterior drainage simply doesn’t exist. If you’ve run a dehumidifier for a week straight and wall sections still feel cool and damp to touch, or if you see active moisture beading on the surface, you’re dealing with chronic wetness. Interior coating alone is trying to solve an exterior problem, which explains why standard application won’t work here.
Bonding primers designed specifically for damp surfaces solve this challenge by creating a tacky intermediate layer between wet concrete and the waterproof topcoat. These primers contain special polymers that cure even when moisture is present, providing a sticky surface that the topcoat can grab. Apply bonding primer to any wall section that stays consistently damp. The wall doesn’t need to be dry, but wipe off any standing water or droplets before brushing on primer. Work the primer into the concrete with firm brush strokes. Allow 4-6 hours for the primer to become tacky (it won’t fully dry), then apply your waterproof coating directly over it. The coating will cure properly because it’s bonding to the primer, not the wet concrete.
Dimpled membrane systems provide an alternative approach that accepts the moisture reality instead of fighting it. These plastic sheets have raised dimples on the wall side that create a 1/2-inch air gap between the membrane and your foundation wall. Moisture that seeps through the concrete hits the membrane and drains down to your floor or floor drainage system instead of entering your living space. Install the membrane by fastening it to walls with mechanical fasteners, dimple side against the concrete, overlapping seams. The system works best when combined with baseboard drainage that catches the water and directs it to a sump pit. You can frame and finish over dimpled membrane to create usable living space, unlike coatings that leave you looking at painted concrete.
Signs walls are too wet for standard waterproofing:
Water visibly seeping through the surface, even slowly
Dampness returns within hours after wiping walls dry
Dehumidifier runs continuously and catches multiple gallons daily
Efflorescence reappears within days of cleaning it off
You can draw a wet line on the wall by dragging your finger across it
Cool to the touch even when room temperature is warm
If your walls show three or more of these conditions, bonding primer alone may not be enough. The moisture volume suggests you need exterior drainage improvements like proper grading, extended downspouts, or even exterior excavation to install drain tile around the foundation. Interior solutions become temporary fixes that slow the problem without stopping it. Consider professional assessment to determine if exterior waterproofing would be more cost-effective than repeatedly resealing interior walls.
Installing Interior Drainage Systems for Basement Waterproofing
Interior drainage systems address the root cause of persistent basement moisture, which is hydrostatic pressure, rather than just blocking moisture after it reaches the wall surface. By capturing water before pressure builds, these systems prevent both dampness and potential structural damage.
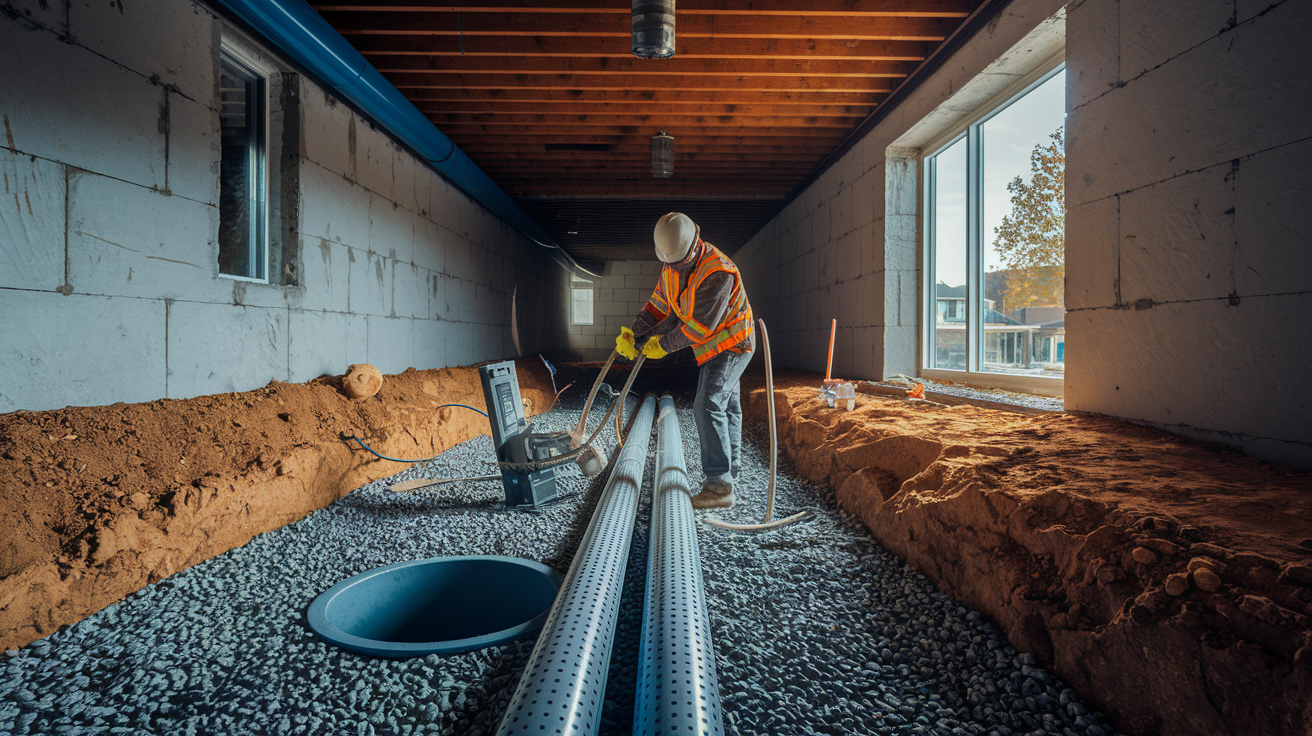
The system consists of several connected components working together. Perforated pipe laid in a gravel bed around the basement perimeter collects water that seeps to the floor-wall joint. The pipe slopes toward a sump pit dug into the floor at the lowest point. A sump pump in the pit activates when water fills to a preset level, pumping it through a discharge line that carries it away from the foundation. The system maintains constant pressure relief so water never builds up enough force to push through walls or damage foundation integrity.
Assess whether DIY installation makes sense for your situation before you start cutting concrete. Check your basement floor thickness by drilling a test hole in an inconspicuous corner. Most residential floors are 3-4 inches thick. Identify what’s beneath by pulling flooring materials in unfinished areas. You should see concrete slab on compacted fill. Verify no major utilities (gas lines, water mains, electrical conduits) run through the perimeter installation zone by checking construction blueprints or using a utility locator. The physical work involves operating a concrete saw or jackhammer for extended periods, trenching through confined crawlspace-like conditions along walls, and moving approximately 50-80 pounds of material per linear foot of trench. If you have back problems, limited mobility, or a basement with restricted access, professional installation avoids injury.
The basic installation sequence starts with marking a line 12-14 inches from the wall all around the basement perimeter. Cut the concrete along this line with a concrete saw to a depth matching your floor thickness. Remove the concrete sections with a jackhammer and pry bar, breaking them into manageable chunks. This creates the loudest, dustiest phase of the project. Excavate the trench to 12-18 inches deep, removing soil and verifying the trench slopes consistently toward your planned sump pit location (minimum 1/8 inch per foot). Place 2-3 inches of drainage gravel in the trench bottom. Lay perforated pipe (4-inch diameter) with holes facing down into the gravel bed. The pipe must maintain consistent slope toward the sump pit. Cover the pipe with 6-8 inches of drainage gravel. Install filter fabric over the gravel to prevent concrete from infiltrating the stone when you seal the trench. Mix and pour concrete to seal the trench, finishing flush with the existing floor.
| Installation Phase | Time Required | Difficulty Level | Key Considerations |
|---|---|---|---|
| Planning and marking | 2-3 hours | Low | Verify no utilities in path, identify lowest point for sump pit location |
| Concrete cutting | 4-6 hours | Medium | Rent concrete saw, requires water supply for dust control, creates slurry |
| Concrete removal | 6-10 hours | High | Heavy jackhammer work, must remove broken concrete from basement, physically demanding |
| Trench excavation | 6-8 hours | Medium-High | Must maintain consistent slope, work in confined space along walls, soil disposal required |
| Sump pit installation | 2-4 hours | Medium | Dig deeper pit (18-24 inches), install pre-formed pit or stack concrete rings, ensure stability |
| Pipe and gravel placement | 3-5 hours | Medium | Check slope frequently, proper gravel coverage critical, don’t disturb pipe after placement |
Sump pump selection depends on how much water your system will handle and how far it must push the water. For basements that see steady seepage but not high-volume flooding, a 1/3 horsepower pump moves 35-40 gallons per minute, adequate for most residential needs. If you experience heavy water intrusion during storms or your water table sits high, upgrade to 1/2 horsepower (50-60 gallons per minute). The pump must discharge through a dedicated line to the exterior, terminating at least 10 feet from your foundation. Install a check valve in the discharge line to prevent water from flowing backward into the pit. Battery backup systems or water-powered backup pumps prevent flooding during power outages, especially critical if you’re in areas with frequent storms.
Maintenance keeps the system functional for decades. Check the sump pit quarterly for debris accumulation that could clog the pump intake. Pour water into the pit to test pump activation and verify discharge flows freely. Clean the pit annually by removing the pump and scooping out sediment. Inspect the discharge line each spring to confirm no ice blockages or disconnections occurred over winter.
Preventing Mold Growth During Basement Waterproofing

Mold and moisture create a circular problem where the waterproofing you’re doing to control moisture might be covering active mold growth, which then continues underneath the coating. Breaking this cycle requires treating both issues separately.
Waterproofing doesn’t kill mold. It just seals it behind the coating if you don’t address it first. Inspect walls thoroughly before cleaning, looking for visible black, green, or white growth patches, dark discoloration in corners or behind stored items, and fuzzy or slimy surface texture. Small affected areas (less than 10 square feet total) can be cleaned safely with household detergent solution. Mix 1/4 cup detergent per gallon of water, scrub with stiff brush, rinse thoroughly, and allow complete drying. Wear N95 respirator, gloves, and eye protection during cleaning to avoid breathing spores. Don’t use bleach on concrete because it doesn’t penetrate porous surfaces and the water in bleach solution actually feeds mold growth deeper in the concrete. For mold coverage exceeding 10 square feet, or if growth returns rapidly after cleaning, professional remediation addresses the full extent of contamination behind wall surfaces and in building cavities.
Controlling humidity after waterproofing prevents mold from establishing on the newly sealed surfaces. Basement air should stay at 50% relative humidity or below, the level where mold growth slows dramatically. Size your dehumidifier to handle your basement volume. Calculate by multiplying length × width × height to get cubic feet, then divide by 2,000 to determine the pint-per-day capacity you need. For an 800-square-foot basement with 8-foot ceilings (6,400 cubic feet), you need approximately 32 pints per day minimum. Round up to a 35-50 pint unit for adequate capacity. Place the dehumidifier centrally with unrestricted airflow on all sides. Set up continuous drainage using a gravity drain if you have a floor drain nearby, or use the condensate pump option if draining to a laundry sink. Empty manually only if neither drain option works, because letting the bucket overfill and shut off the unit allows humidity to spike.
Ongoing mold prevention practices:
Run dehumidifier continuously during humid months, not just occasionally
Maintain basement temperature above 60°F to prevent condensation on cold surfaces
Avoid storing cardboard boxes, papers, or fabric directly against basement walls
Inspect regularly behind stored items where air circulation is restricted
Clean up any water intrusion within 24-48 hours before mold can establish
Ventilate bathroom and laundry areas directly outside, not into basement space
Keep gutters clean and downspouts extended so exterior moisture doesn’t overwhelm interior controls
If mold reappears after waterproofing and humidity controls are in place, you’re looking at moisture still entering from somewhere. The most common causes are inadequate coating coverage that left porous spots, unrepaired cracks that continue seeping, or water entering from areas you didn’t waterproof like floor-wall joints or utility penetrations. Finding and sealing the entry point solves the problem. Repeatedly killing mold without stopping the moisture source wastes time and money.
Troubleshooting Failed Waterproofing and Problem Solving Guide

Recognize waterproofing failure by coating that peels off walls when touched, blistering or bubbling that shows trapped moisture, continued dampness within 2-4 weeks of application, white mineral deposits breaking through the coating surface, musty odors that persist despite coating, or visible mold growth appearing on or behind the coating. Any of these conditions mean the system isn’t performing as designed.
| Problem Symptom | Likely Cause | Diagnostic Test | Solution |
|---|---|---|---|
| Coating peeling off in sheets | Surface wasn’t clean or dry before application | Check if dirt or efflorescence visible under peeled coating | Remove all loose coating, clean surface properly, ensure dryness, reapply on clean surface |
| Blisters or bubbles in coating | Moisture trapped under coating trying to escape | Cut open blister to see if wet inside | Let area dry completely, scrape bubbled coating, recoat after identifying moisture source |
| Persistent dampness behind coating | Coating too thin or single coat only, or major hydrostatic pressure | Tape plastic to wall, check after 24 hours for moisture on wall side |