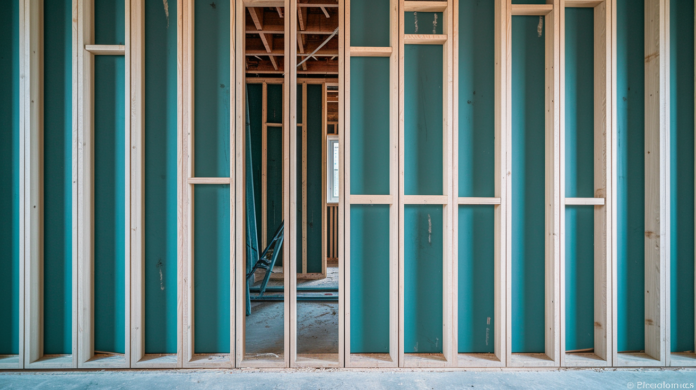

Ever watch a brand-new kitchen cabinet tear away from the wall because the installer’s screws missed the blocking by two inches? That’s a thousand dollar mistake that starts in the framing stage. Cabinet blocking, those horizontal boards hidden behind your drywall, determines whether your cabinets hang solid for decades or become a warranty callback. The difference between a secure installation and a disaster comes down to getting three measurements right: 54 inches for upper cabinet bottoms, 90 inches for tops, and 34.5 inches for base cabinet anti-tip rails.
Where to Install Cabinet Blocking in Your Kitchen Walls

Cabinet blocking is solid wood reinforcement installed horizontally between wall studs during framing, before drywall goes up. Proper spacing determines whether your cabinets hang securely or create callbacks down the road. Getting the blocking heights right the first time means easy mounting later, with screws biting into solid lumber instead of relying on drywall anchors.
Standard blocking locations for kitchen cabinets:
Upper cabinet bottom rail: 54 inches from finished floor, measured to the centerline of the blocking, aligning with where the bottom edge of the cabinet will sit
Upper cabinet top rail: 90 inches from finished floor for standard 36 inch tall upper cabinets, providing a second attachment point at the cabinet top
Base cabinet blocking: 34.5 inches from finished floor at the top edge, catching the upper back rail of base cabinets for anti tip stability
Corner cabinet reinforcement: blocking extending 12 to 18 inches past the corner on both walls to support corner cabinet connections
Appliance mounting areas: additional blocking at 66 inches for over range microwaves and 30 to 36 inches for range hood mounting brackets
Rail system attachment zones: continuous blocking at manufacturer specified heights for European style hanging systems
The standard 18 inch clearance between the countertop surface (typically 36 inches from finished floor including 1.5 inch countertop thickness) and the bottom of upper cabinets creates the 54 inch blocking height. If you’re working with taller or shorter homeowners who want adjusted cabinet heights, shift the upper blocking proportionally. A kitchen designed for someone 6’2″ might move upper cabinet blocking to 56 or 58 inches, while a homeowner who’s 5’2″ might prefer blocking at 52 inches for easier reach. Just remember the countertop thickness when calculating from base cabinet height.
Blocking runs horizontally between vertical wall studs, which are typically spaced at 16 inches on center in residential construction or 24 inches on center in some newer builds and commercial projects. Your blocking needs to cross and attach to each stud it spans. If you’re working with 16 inch centers and a 10 foot cabinet run, that blocking will connect to roughly seven or eight studs.
Always measure blocking heights from the finished floor level, not the subfloor. If you’re installing blocking before flooring goes down, account for the final floor thickness. Tile with underlayment might add 3/4 inch, while engineered hardwood adds 1/2 inch. Mark your heights after adding that measurement to your subfloor reference, or you’ll end up with cabinets mounted too low once flooring is complete.
Cabinet Blocking Material Specifications and Lumber Requirements

Blocking materials need enough thickness to provide solid screw grab and enough width to give you a reasonable target when drilling cabinet mounting holes through drywall. Minimum dimensions matter because undersized blocking leads to screws that pull out or miss the blocking entirely during cabinet installation.
| Material Type | Minimum Dimension | Best Use | Load Capacity |
|---|---|---|---|
| 2×6 lumber | 1.5″ x 5.5″ | Light to medium cabinet runs, minimum acceptable standard | Adequate for standard upper cabinets when properly fastened |
| 2×8 lumber | 1.5″ x 7.25″ | Preferred standard for all cabinet blocking, easier targeting | Strong for fully loaded upper cabinets and heavy base units |
| 1/2″ plywood sheeting | Continuous coverage | Long cabinet runs 8+ feet, entire wall backing | Distributes load across entire wall surface, eliminates miss risk |
| Metal stud blocking | Same as wood dimensions | Metal stud framing, commercial construction | Equal to wood when properly fastened with metal rated screws |
For cabinet runs longer than 8 feet, consider installing a continuous 1/2 inch plywood layer across the entire wall section instead of individual blocking strips. The plywood goes up in place of drywall from roughly 48 inches to 96 inches off the floor, covering both upper blocking heights. This method costs more in materials but eliminates the possibility of missing blocking with cabinet screws and provides rock solid mounting across the full cabinet span. You’ll still drywall above and below the plywood zone.
Scrap framing lumber works fine for blocking as long as it meets minimum dimensions. If you’ve got leftover 2x8s or 2x10s from another part of the framing job, cut them to length for blocking rather than buying new material. Just make sure the lumber is straight, not twisted or severely crowned, since blocking that doesn’t sit flat against stud faces creates problems when drywall goes up.
Installing Blocking During Wall Framing and Rough Carpentry

Cabinet blocking goes in after wall studs are up and plumbing and electrical rough ins are complete, but before drywall installation. Trying to add blocking after walls are closed means cutting drywall, adding the blocking, then patching and refinishing, which nobody wants to do.
- Measure and mark blocking centerline heights on the face of studs across the cabinet wall (54 inches for upper cabinet bottom, 90 inches for upper cabinet top, 34.5 inches for base cabinet upper rail)
- Cut blocking lumber to fit snugly between studs, measuring each bay since stud spacing varies slightly even in good framing
- Secure blocking to studs using two 16d framing nails or 3 inch structural screws at each stud connection, driving fasteners at slight angles for better hold
- Verify blocking face is flush with stud faces using a straight edge laid across multiple studs, planing down high spots or shimming low areas
- Install nail plates (metal protector plates) over blocking wherever plumbing supply lines, drain lines, or electrical cables run within 1.5 inches of the blocking face
Standard residential framing uses 16 inch on center stud spacing, meaning the distance from the center of one stud to the center of the next is 16 inches. In commercial buildings or newer homes, you might see 24 inch on center spacing. Your blocking runs horizontally, perpendicular to these vertical studs. At each point where the blocking crosses a stud, secure it with nails or screws. For a 12 foot wall with 16 inch spacing, blocking will attach to nine studs. For 24 inch spacing on that same wall, it’ll hit six studs. The blocking has to be continuous across the full cabinet run, not just installed in isolated sections.
Blocking Alignment with Stud Centers
Continuous blocking spanning the entire wall provides the strongest installation and the easiest cabinet mounting since installers don’t have to hunt for short blocking sections. Some framers install blocking only where cabinets will mount, leaving gaps elsewhere. That approach saves lumber but creates headaches if cabinet layouts change. If blocking isn’t flush with stud faces, drywall won’t sit flat and you’ll get waves or humps in the finished wall. When blocking sticks out past studs, plane or grind it down. When it sits back from stud faces, sister a shim strip to the blocking edge.
Wood stud blocking attaches with standard framing nails or wood screws. Metal stud blocking requires self drilling metal to wood screws or structural screws rated for metal to wood connections. Don’t use standard wood screws in metal studs. They’ll strip out. Metal stud walls often get two layers of 1/2 inch drywall (fire rating requirement in commercial buildings), creating a total wall thickness of 1 inch before you reach blocking. Cabinet mounting screws need to be long enough to penetrate both drywall layers plus engage at least 1 inch into the blocking, so you’re looking at 2.5 to 3 inch screws minimum.
If you need blocking after drywall is already installed, cut horizontal slots in the drywall at blocking height using a drywall saw or oscillating multi tool, measuring carefully to match the planned cabinet heights. Slide blocking into the wall cavity between studs, secure it to studs with screws driven through the access slot, then patch the drywall. It’s messy, time consuming work that adds hours to the job. Much better to coordinate blocking before drywall crews show up.
Talk to your electrician and plumber during rough in and before blocking installation. If a plumbing vent stack or electrical panel run conflicts with blocking location, adjust the blocking height slightly or notch it around the obstruction. Never notch a stud to accommodate blocking. That weakens the stud. Notch the blocking instead, and install a nail plate over the notch.
Blocking Locations for Appliances and Heavy Fixtures
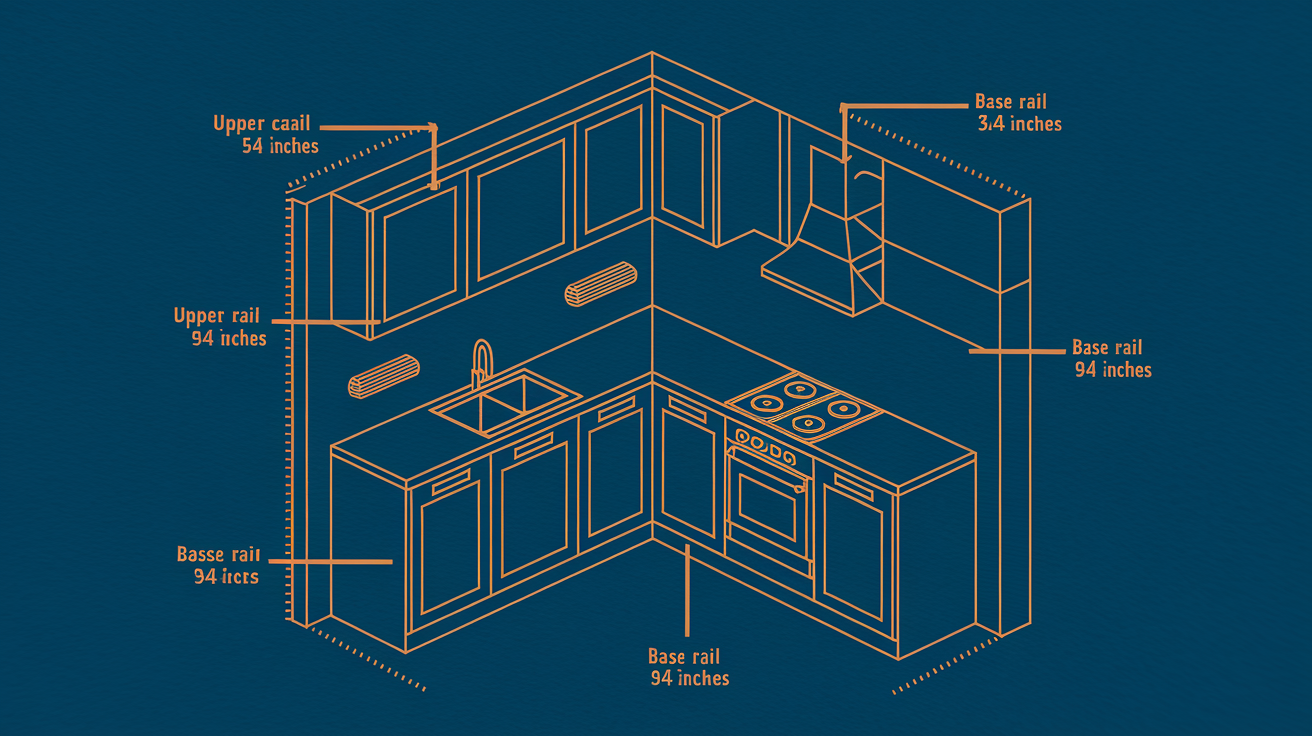
Appliances and heavy fixtures need blocking beyond the standard cabinet heights because their weight, mounting hardware, and load dynamics differ from empty cabinet boxes. Appliance blocking prevents sagging, vibration loosening, and catastrophic mounting failures.
Over range microwave mounting: blocking centered at 66 inches from floor (measure to appliance manufacturer’s mounting bracket specification), with blocking width of 10 to 12 inches minimum to catch both sides of the microwave mounting plate
Range hood ventilation: blocking at the hood manufacturer’s specified height (typically 66 to 72 inches depending on hood style) plus additional blocking where ductwork transitions through the wall, usually 72 to 78 inches for duct support brackets
Wall mounted ovens: full perimeter blocking around the rough opening cutout, creating a continuous wood frame 2 inches larger than the oven cabinet opening on all sides
Heavy pot filler faucets: reinforced 2×8 or 2×10 blocking at the faucet mounting height (typically 20 to 24 inches above the cooktop surface) extending 12 inches minimum on each side of the faucet centerline
Floating shelves: multiple blocking points matching shelf bracket spacing, typically 16 inches apart horizontally for shelves longer than 24 inches, with blocking centered at shelf mounting height
Television mounting in kitchen areas: 2×10 blocking at 60 to 72 inches (adjusted to seated or standing viewing height) spanning at least 32 inches wide to accommodate television mount bracket spread
Appliances concentrate weight on smaller mounting areas compared to cabinets. An over range microwave might weigh 60 pounds loaded with food, but that weight transfers through a mounting plate that’s only 8 inches wide. Standard 2×6 blocking provides adequate screw bite, but wider 2×8 or 2×10 blocking gives installers more margin for error when positioning mounting brackets. The extra width matters when screws have to penetrate drywall before hitting blocking. Slight misalignment on narrow blocking means missed screws and loose appliances.
Get appliance rough in specification sheets before installing blocking. A microwave designed for 66 inch mounting height won’t work correctly if blocking ends up at 64 inches or 68 inches. Manufacturers engineer mounting hardware around specific heights and bracket spacing. Deviating from those specs creates unsafe installations or appliances that don’t fit properly.
Fasteners and Hardware for Cabinet Blocking Installation
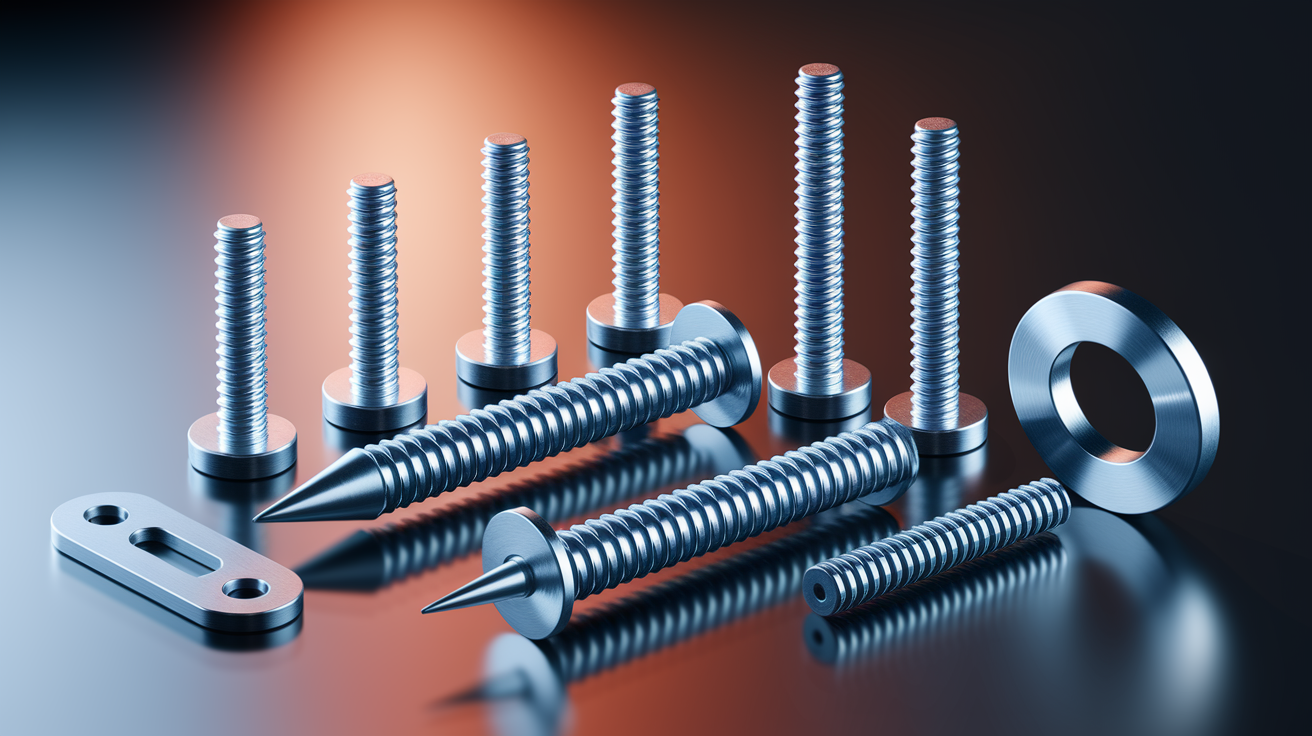
Blocking installation uses different fasteners than cabinet mounting. The first set of fasteners secures blocking to wall studs. The second set of fasteners secures cabinets to blocking. Confusing the two creates weak connections.
| Fastener Type | Size | Application | Quantity per Connection |
|---|---|---|---|
| Framing nails | 16d (3.5″) | Securing blocking to wood studs during framing | 2 per stud, angled slightly |
| Structural screws | 3″ to 3.5″ | Securing blocking to wood or metal studs, more holding power than nails | 2 per stud, straight penetration |
| Cabinet mounting screws | 2.5″ to 3″ | Mounting cabinet boxes through drywall into blocking | 4 to 6 per cabinet (2 to 3 per blocking rail) |
| Nail plates | 1.5″ x 4″ minimum | Protecting wires and pipes from cabinet mounting screws | 1 per blocking run where utilities present |
| Construction adhesive | Standard tube | Supplemental bonding, not structural replacement | Continuous bead along blocking back edge |
Cabinet mounting screws need enough length to penetrate drywall (typically 1/2 inch or 5/8 inch in residential) plus engage blocking with at least 1 inch of thread bite. A screw that only grabs 1/2 inch of blocking will pull out under cabinet weight or when cabinet doors get slammed repeatedly. For standard 1/2 inch drywall over blocking, 2.5 inch screws work. If you’ve got 5/8 inch drywall or double layer drywall (commercial or fire rated walls), step up to 3 inch screws. Calculate total wall thickness first, then add 1 inch for blocking engagement.
Building codes typically require fasteners every 16 inches along blocking runs for framing attachment, and fastener load ratings that support the anticipated cabinet weight. A fully loaded upper cabinet can weigh 200 to 400 pounds when you account for dishes, canned goods, and small appliances. That load distributes across multiple mounting screws into blocking, which distributes load across multiple studs. Check local code for specific requirements, especially in commercial kitchen installations where fire ratings and load calculations get stricter.
Blocking for Base Cabinets and Floor Mounted Units
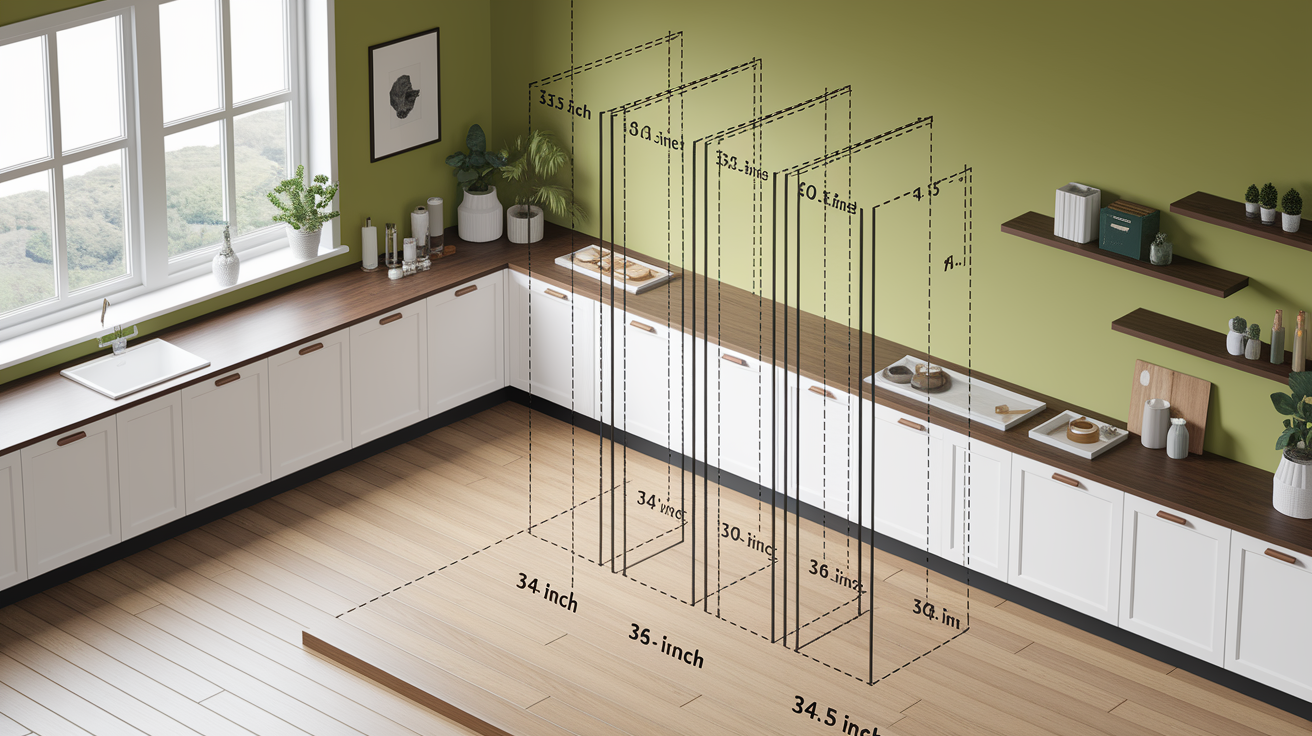
Base cabinets sit on the floor and don’t rely on wall blocking for primary support, but wall blocking still serves important functions. The back upper rail of base cabinets needs wall attachment to prevent tipping when drawers get opened or when someone leans on a countertop overhang.
Standard base cabinets stand 34.5 inches tall before countertop installation. Blocking for the upper back rail goes in at 34.5 inches from finished floor, measured to the top edge of the blocking. This catches the cabinet’s top mounting rail. Some installers prefer blocking at 30 to 32 inches to catch the middle of the cabinet back, which works if cabinet manufacturer specifications allow mid height mounting. Either way, the blocking prevents the cabinet from pulling away from the wall when subjected to forward loads.
Tall pantry cabinets and utility cabinets need multiple blocking heights because they extend floor to ceiling or floor to upper cabinet height. Install blocking every 32 to 36 inches vertically on these tall units, giving you at least two or three mounting points. A 90 inch tall pantry cabinet should have blocking at 30, 60, and 90 inches to distribute tipping loads.
Additional blocking requirements for specific base cabinet situations:
Upper back rail blocking for base cabinets: 34.5 inches from floor, running continuous behind the full base cabinet run
Full height blocking for pantry units: every 30 to 36 inches vertically, creating three or four mounting heights on 84 to 96 inch tall cabinets
Corner base cabinet diagonal blocking: blocking on both intersecting walls extending 12 inches past the corner point to support corner cabinet connections
Peninsula and island cabinets: floor anchoring using brackets screwed to subfloor instead of wall blocking, since these units have exposed sides without adjacent walls
Some building codes require anti tip devices on ranges and certain tall cabinets. Anti tip brackets mount to the floor or wall with blocking, preventing units from tipping forward when loaded improperly. Check local code and manufacturer requirements for specific installations that need anti tip protection beyond standard blocking.
Corner Cabinet Blocking and Special Layout Considerations

Corner cabinets span two walls that meet at 90 degrees, which means blocking has to accommodate cabinet mounting on both wall surfaces. The corner intersection creates dead space behind the cabinet that’s hard to access later, so blocking has to be right the first time.
L shaped corner cabinets and lazy Susan corner cabinets both need blocking running on each adjacent wall, with blocking continuing at least 12 inches past the actual corner point. The extra blocking past the corner catches cabinet sides and ensures solid attachment where the cabinet box transitions around the corner. If blocking stops right at the corner, cabinet installers can’t reach it with screws from inside the cabinet box.
Corner blocking requirements for different cabinet types:
Blind corner cabinets: blocking extended 18 to 24 inches past the corner on the blind return wall, even though this section stays hidden behind adjacent cabinets
Lazy Susan cabinet blocking: reinforced corner posts or continuous blocking on both walls, since rotating shelves create lateral forces that standard blocking might not handle
Peninsula cabinet blocking: blocking on the return wall perpendicular to the main cabinet run, plus blocking for any end panels that mount to walls
Angled cabinet installations: blocking follows cabinet angle, which might not be perpendicular to studs and requires angled cuts on blocking ends
Island cabinets: no wall blocking needed, use floor anchoring and cabinet to cabinet connections instead
For cabinet runs longer than 10 feet without a corner or break, maintain blocking continuity across the entire span. Don’t install blocking in short 4 foot sections with gaps. Cabinets ship in individual boxes that get connected during installation, and cabinet connections don’t always land at predictable points. Continuous blocking ensures every cabinet box has solid backing regardless of where connections occur.
When you’re replacing cabinets during a kitchen remodel, existing blocking might not match new cabinet heights if styles have changed. Modern upper cabinets run 36 or 42 inches tall, while cabinets from the 1980s often topped out at 30 inches. Check existing blocking heights before ordering cabinets, or plan on retrofit blocking installation to match new cabinet specifications. New construction gives you flexibility to block for any cabinet style. Remodels force you to work around what’s already in the walls or commit to opening walls.
Blocking Installation for Frameless and European Style Cabinets

Frameless cabinets, also called European style or full overlay cabinets, mount differently than traditional face frame cabinets. The cabinet box itself provides the mounting surface instead of a separate face frame, which changes how blocking needs to align with cabinet hardware.
Rail systems and bracket systems common in frameless cabinet installation require blocking at very specific heights with minimal tolerance for error. A traditional face frame cabinet gives you a 4 inch wide mounting rail that’s fairly forgiving if blocking is an inch high or low. Rail systems might only provide a 1 inch mounting zone, which means blocking has to hit that exact height or the cabinet won’t hang.
Frameless cabinet blocking requirements:
Rail system blocking: continuous horizontal blocking at the exact height specified by the rail manufacturer (typically 52 to 56 inches for upper cabinets), with blocking perfectly level across the full cabinet run
Adjustable bracket blocking: blocking at multiple predetermined heights (often three separate blocking levels for upper cabinets at 54, 72, and 84 inches) to accommodate bracket adjustment range
French cleat blocking: angled blocking cut at 45 degrees or continuous backing board strong enough to support angled cleat hardware
Frameless cabinet direct mount blocking: same general heights as face frame cabinets but installed with tighter tolerances since frameless boxes have less adjustment range during installation
Manufacturer specific blocking: blocking follows exact specifications from cabinet manufacturer’s installation guide, which supersedes standard blocking practices
Frameless cabinet systems have become more popular in modern kitchen design because they maximize interior cabinet space and create clean contemporary lines. The tradeoff is installation precision. Face frame cabinets tolerate slight blocking misalignment because the face frame provides a forgiving mounting surface and allows shim adjustment. Frameless systems mount directly to the cabinet box, so blocking that’s even 1/2 inch off specification creates installation problems.
Always get manufacturer installation specifications before blocking for frameless cabinets. Generic blocking heights that work for face frame cabinets will likely fail for rail mounted frameless systems. The manufacturer’s installation guide will specify exact blocking heights, blocking levelness tolerances (often plus or minus 1/8 inch over 10 feet), and minimum blocking dimensions for their mounting hardware.
Building Codes and Load Requirements for Cabinet Blocking
Building codes address cabinet mounting to prevent injuries from falling cabinets and to ensure installations meet minimum structural safety standards. Code requirements vary by jurisdiction, but general principles stay consistent across most residential building codes.
Typical building code requirements for cabinet blocking include minimum lumber dimensions of 2×6 (actual dimension 1.5 inches by 5.5 inches), though many jurisdictions prefer 2×8 as the standard. Blocking must attach to wall studs, not just float between studs, which means fastener penetration into studs with adequate depth. Codes typically require two fasteners per stud connection, spaced vertically on the blocking face.
Code compliant cabinet blocking standards:
Minimum lumber dimensions: 2×6 lumber at minimum for most jurisdictions, with 2×8 preferred for easier code compliance and better load distribution
Fastener spacing requirements: two fasteners every 16 inches along blocking length when blocking crosses studs at standard spacing, creating a secure connection at each stud
Load capacity requirements: upper cabinet blocking must support minimum 600 pound capacity when properly installed with code compliant fasteners, accounting for fully loaded cabinets
Blocking requirements for cabinets over 30 inches wide: wider cabinets need blocking across their full width without gaps, some jurisdictions require additional blocking height rows for cabinets wider than 36 inches
Inspection timing: blocking must remain visible for building inspection before drywall installation, inspectors verify blocking placement, fastening, and nail plate installation over utilities
Blocking distributes weight loads across multiple wall studs rather than concentrating cabinet weight on a single stud or relying on drywall anchors. An upper cabinet loaded with dishes might weigh 300 pounds. If that cabinet spans 36 inches and blocking crosses three studs, each stud carries roughly 100 pounds of vertical load. The blocking spreads that load horizontally, and proper fastening transfers the load to the stud framing, which carries loads to the bottom plate and foundation.
When cabinet installations exceed typical residential loads, consult a structural engineer or follow commercial building code requirements. Commercial kitchen cabinets holding heavy equipment, stone countertop installations on full height cabinets, or custom built ins storing extremely heavy items might need blocking upgrades beyond standard residential specifications. An engineer can calculate required blocking dimensions and fastening patterns for unusual load conditions.
Blocking Methods for Metal Studs and Alternative Wall Types
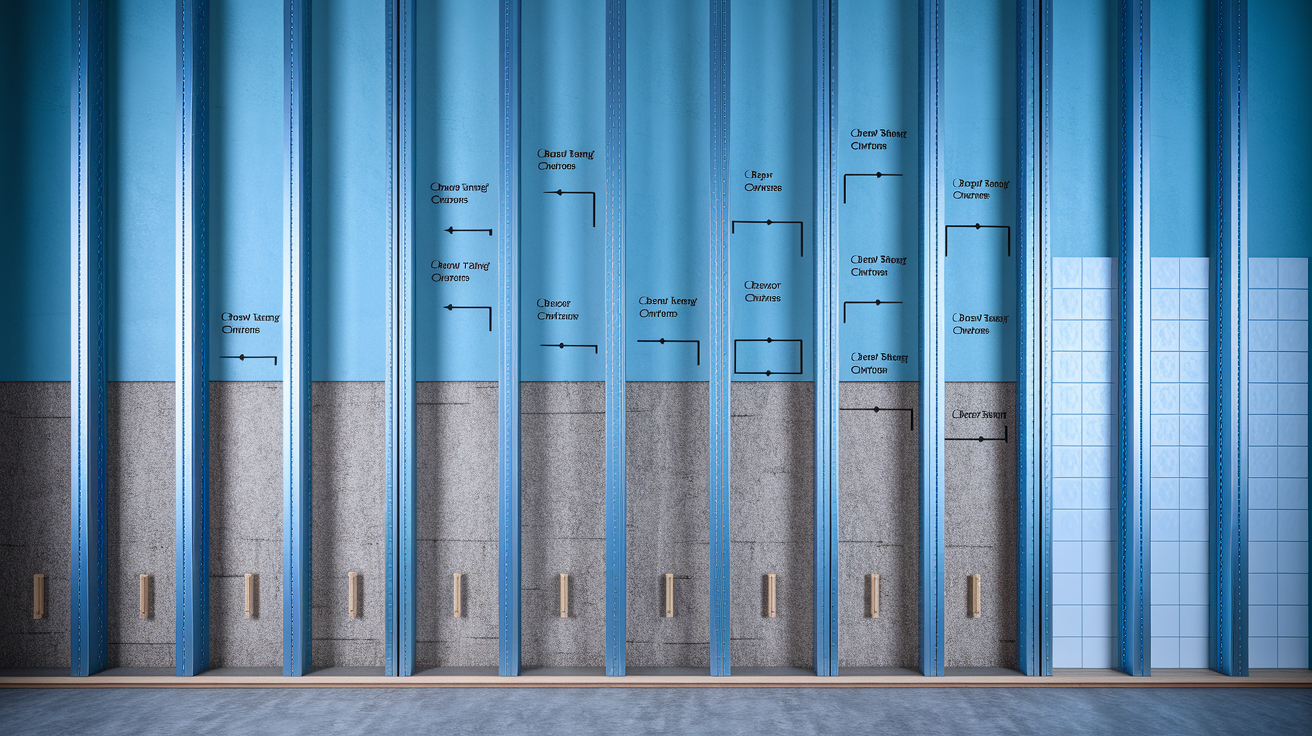
Metal stud framing requires the same blocking locations as wood framing but uses different attachment methods. Metal studs don’t hold nails well, and standard wood screws can strip out metal stud walls under load. You need fasteners designed for metal to wood connections.
Installing blocking in metal stud walls:
- Cut wood blocking to fit snugly between metal studs, measuring each stud bay since metal framing can have spacing variations
- Attach blocking using self drilling metal to wood screws (often called zip screws) or structural screws rated for metal connections, driving two screws through the metal stud flange into each end of the blocking
- Verify blocking is secured to at least two studs for proper load distribution, never float blocking in a single stud bay
- Check that blocking installation doesn’t compress or deform metal stud walls, which can happen if screws over tighten or if blocking is forced into undersized openings
Metal stud walls in commercial buildings or residential high rises often use double layer 1/2 inch drywall for fire rating requirements. The total wall thickness becomes 1 inch before reaching blocking, compared to 1/2 inch or 5/8 inch in wood frame residential construction. Cabinet mounting screws need to be 2.5 to 3 inches long minimum to penetrate both drywall layers and engage blocking with sufficient depth.
Concrete walls and masonry walls don’t accept traditional blocking installation. For cabinets on concrete walls, use concrete anchors (wedge anchors or sleeve anchors) rated for the cabinet load, typically spaced every 16 to 24 inches horizontally. Alternatively, install a furring strip system (wood or metal channels attached to concrete) that creates a mounting surface similar to traditional wall framing, then install blocking between furring strips.
Tile backed walls in kitchens complicate cabinet mounting because tile adds thickness and creates a hard drilling surface. If you know cabinets will mount on a tile wall, install blocking during framing as you would for any wall, then ensure cabinet mounting screws are long enough to penetrate tile, thinset, backer board, and drywall before engaging blocking. For retrofit cabinet installation on existing tile, mark blocking locations before tile installation if possible, or use a deep scan stud finder to locate blocking through tile and plan screw placement accordingly.
Measuring and Marking Cabinet Blocking Layout
Accurate measurement prevents blocking misalignment that forces retrofit blocking installation later. Once drywall covers the framing, you can’t easily adjust blocking heights. Measure twice, mark clearly, verify measurements against cabinet specifications.
Establish the finished floor reference line first. If you’re installing blocking before finished flooring goes down, measure up from the subfloor and add the flooring thickness. Ceramic tile with mortar bed might add 3/4 inch to 1 inch. Engineered hardwood adds 1/2 inch. Luxury vinyl plank adds 1/4 inch. Mark a level line around the room at finished floor height before measuring any other blocking heights.
Step by step blocking layout marking:
- Establish finished floor reference line accounting for final flooring thickness, typically by measuring up from subfloor and adding flooring material thickness
- Mark base cabinet height line at 34.5 inches above finished floor reference, using a laser level or 4 foot level to extend the line across the full wall
- Mark countertop height line at 36 inches above finished floor (34.5 inch base cabinet plus 1.5 inch countertop), this creates the reference for upper cabinet spacing
- Mark upper cabinet bottom line at 54 inches from finished floor (36 inch countertop height plus 18 inch clearance), or adjust based on homeowner height preferences
- Mark upper cabinet top line by adding cabinet height to bottom line (add 30, 36, or 42 inches depending on cabinet style), creating the second blocking height for upper cabinets
- Use chalk line to snap horizontal lines across the entire wall run at each blocking height, giving framers clear installation guides that show on multiple studs
Laser levels maintain consistent heights across multiple walls and around corners better than bubble levels and measuring tapes. Set up a rotary laser level at the finished floor reference height, then mark each blocking height by measuring up from the laser line at multiple points around the room. This ensures blocking on perpendicular walls aligns properly when cabinets wrap corners.
A story pole (a straight board marked with all blocking heights, cabinet heights, and key reference points) lets you transfer measurements quickly without re measuring at each wall section. Mark all critical heights on the story pole, then use it like a large ruler to transfer marks to wall studs. One story pole serves the entire kitchen, reducing measurement errors from repeated tape measure readings.
Double check all measurements against actual cabinet specifications before cutting any blocking lumber. Cabinet manufacturers sometimes vary from industry standard heights. A custom cabinet order might spec 33 inch tall base cabinets instead of 34.5 inches, or 40 inch tall upper cabinets instead of 36 inches. If your blocking follows standard heights but cabinets don’t match standards, you’ve got a problem. Confirm cabinet dimensions in writing before installing blocking.
Temporary Support and Ledger Installation During Cabinet Hanging
Permanent blocking installed during framing provides the mounting surface for cabinets, but temporary ledger boards make the actual cabinet installation process easier and more accurate. A ledger is a straight board temporarily screwed to the wall at cabinet bottom height that supports cabinet weight during positioning, leveling, and final fastening.
Even with blocking in the walls, upper cabinets are awkward to hold in position while drilling mounting screws. A ledger board screwed directly into the blocking creates a shelf that supports the cabinet bottom while you adjust level, check alignment, and drive permanent mounting screws. The ledger carries the cabinet weight, freeing your hands for installation work.
Ledger board applications in cabinet installation:
Ledger board installation: screw a straight 1×4 or 2×4 board horizontally into the blocking at the exact height of the cabinet bottom edge (typically 54 inches from floor), using the blocking you installed during framing
Ledger board removal: after all cabinets are permanently mounted with screws through their backs into blocking, remove the ledger board and patch the screw holes
Cabinet weight support during installation: rest the cabinet bottom on the ledger while checking level side to side and front to back, adjusting shims as needed before driving permanent mounting screws
French cleat systems: permanent angled ledger systems that hook into matching cleats on cabinet backs, creating a hanging system that replaces traditional screw mounting
Temporary support for base cabinets: ledger boards at floor level or shim stacks that support base cabinet fronts at the correct height during countertop installation and final leveling
The typical cabinet installation sequence starts with the ledger. Measure and mark the cabinet bottom height (54 inches for standard uppers), then screw a ledger board to the wall at that exact height. The ledger needs to be perfectly level across its length. Install the first upper cabinet by setting it on the ledger, checking it for level, then driving mounting screws through the cabinet back into the blocking. Add the next cabinet, align it with the first cabinet, level and mount it. Continue across the wall. After the last cabinet is secured, remove the ledger and fill the screw holes.
One ledger board works for multiple installation projects. Use a straight, knot free 1×4 or 2×4 that’s 6 to 8 feet long. After one kitchen installation, pull it off the wall, patch the holes, and use the same board on the next job. Some installers keep a dedicated ledger board in their truck for years, re using it on every cabinet job.
Troubleshooting Cabinet Blocking Issues and Retrofit Solutions
Blocking problems usually surface during cabinet installation when mounting screws miss the blocking, when blocking isn’t where cabinets need it, or when blocking interferes with utilities. Some problems can be fixed without major wall demolition. Others require cutting drywall and adding or adjusting blocking.
| Problem | Cause | Solution | Prevention |
|---|---|---|---|
| Blocking not aligned with cabinet mounting points | Measurement error during blocking installation or cabinet specs don’t match standard heights | Cut horizontal drywall strips at correct cabinet height, install new blocking, patch drywall, or use heavy duty toggle bolts rated for cabinet loads | Verify cabinet specs before installing blocking, mark blocking heights with laser level |
| Blocking not flush with studs | Blocking installed proud of stud faces or recessed behind studs | Remove drywall section, plane down blocking high spots, or add shim strips to bring blocking flush | Check blocking alignment with straight edge during installation, before drywall |
| Insufficient blocking for cabinet weight | Undersized blocking lumber (2×4 instead of 2×6 minimum) or inadequate fastening to studs | Sister additional blocking alongside existing blocking, or install plywood backing over insufficient blocking | Use 2×6 minimum, 2×8 preferred, with two fasteners per stud connection |
| No blocking in existing walls | Previous construction didn’t include cabinet blocking or blocking was installed at wrong heights | Cut horizontal drywall strips at cabinet mounting heights, install blocking between studs, patch and refinish drywall | Not applicable for existing construction, always install blocking during new framing |
| Blocking obstructs plumbing or electrical | Poor coordination between trades during rough in, blocking installed before utility routing finalized | Notch blocking around utilities and install nail plates, or relocate blocking slightly if cabinet mounting allows adjustment | Walk walls with electrician and plumber before blocking installation, install blocking after utilities roughed in |
Retrofit blocking installation in existing kitchens requires careful drywall cutting to minimize finish damage. Mark the exact blocking height on the wall, then use a drywall saw or oscillating multi tool to cut a horizontal strip 6 to 8 inches tall at blocking height. Cut carefully along stud locations so the drywall edges land on stud faces for easier patching later. Remove the drywall strip, install blocking between studs, then patch with a new drywall strip screwed to studs above and below the blocking.
When blocking can’t be installed because walls are finished or because building construction makes blocking installation impractical, heavy duty toggle bolts provide an alternative mounting method. Use toggle bolts rated for at least 100 pounds each, and install enough toggles to support the cabinet load with a safety margin. For a cabinet expected to hold 300 pounds when fully loaded, you’d want at least four 100 pound toggles distributed across the cabinet back. But toggle bolts are a second choice. Proper blocking beats toggles every time.
Final Words
Proper blocking spacing for kitchen cabinets determines whether your installation stays secure for decades or starts sagging within months.
Start measuring from your finished floor height, account for standard clearances, and mark every blocking location before the drywall goes up. If you’re working with existing walls, cutting access now beats fighting a sloppy installation later.
Use the right lumber size for the load, align with your stud spacing, and verify everything’s flush before closing the walls.
Get the blocking right during framing, and the cabinet install becomes straightforward instead of a battle with toggle bolts and hope.
FAQ
Where should blocking be placed for kitchen cabinets?
Cabinet blocking should be placed at 54 inches from the finished floor for the upper cabinet bottom rail and at 34.5 inches for base cabinet upper rails. Upper cabinet top rails need blocking approximately 90 inches from the floor when using 36-inch tall cabinets. Install horizontal blocking between wall studs at these heights to provide secure mounting surfaces.
What is the 1-3 rule for cabinets?
The 1-3 cabinet rule isn’t a standard building term. You might be thinking of the common 18-inch clearance between countertops and upper cabinets, which affects blocking placement at 54 inches from the floor. This spacing provides workspace and allows proper backsplash installation while keeping upper cabinets accessible for most users.
What is the 3×4 kitchen rule?
The 3×4 kitchen rule typically refers to minimum kitchen dimensions for functional work triangles, not cabinet blocking. For blocking purposes, focus on standard measurements: 18 inches between countertop and upper cabinets, 36-inch base cabinet height, and blocking aligned with cabinet mounting rails at 54 inches and 90 inches from finished floor.
Can you use 2×4 lumber for cabinet blocking?
You cannot use 2×4 lumber for cabinet blocking because it lacks sufficient load-bearing capacity. Minimum blocking material is 2×6 lumber, with 2×8 preferred for standard cabinet installations. The wider dimension provides better screw engagement and distributes cabinet weight across more surface area, preventing mounting failures.
What thickness plywood works for continuous cabinet backing?
Half-inch plywood works for continuous cabinet backing behind long cabinet runs and provides superior mounting support compared to individual blocking pieces. Install the plywood layer directly to wall studs before drywall installation, creating a solid mounting surface along the entire cabinet length that eliminates concerns about missing blocking locations.
When should blocking be installed during wall construction?
Blocking should be installed during the rough framing stage before drywall installation, when wall studs are exposed and accessible. Once drywall covers the framing, adding blocking requires cutting out sections, installing the blocking, and patching drywall. Coordinate blocking installation with electricians and plumbers before closing walls to avoid conflicts.
How far apart should cabinet blocking be spaced horizontally?
Cabinet blocking should be spaced to align with wall stud centers at 16-inch or 24-inch intervals, depending on your framing pattern. Secure each blocking piece to every stud it crosses using framing nails or structural screws, ensuring the blocking runs continuously across the wall where cabinets will mount for maximum load distribution.
What blocking is needed for over-range microwaves?
Over-range microwave blocking should be installed at approximately 66 inches from the finished floor with extra-wide blocking, typically 2×8 or 2×10 lumber. This appliance requires reinforced blocking because microwaves weigh 50 to 80 pounds and create leverage on mounting points. Include blocking wide enough to accommodate both mounting bracket locations.
Do base cabinets need wall blocking?
Base cabinets need wall blocking at the upper back rail, approximately 34.5 inches from the finished floor, even though they primarily rest on the floor. This blocking prevents cabinet tipping, provides lateral stability, and ensures secure attachment where countertops and backsplashes will be installed, distributing forces across the wall structure.
How do you install blocking in metal stud walls?
Install blocking in metal stud walls by cutting wood blocking to fit between metal studs and securing it with metal-to-wood structural screws rated for the application. Attach blocking to multiple studs for proper load distribution and verify the blocking doesn’t compress the metal studs, which could reduce holding strength and create installation problems.
What size screws mount cabinets to blocking through drywall?
Cabinet mounting screws should be 2.5 to 3 inches long when mounting through drywall into blocking, accounting for half-inch drywall thickness plus adequate penetration into blocking material. The screw must pass completely through drywall and engage at least 1.5 inches into solid blocking to meet typical load requirements for cabinet installations.
Can you add blocking after drywall is installed?
You can add blocking after drywall installation by cutting horizontal access strips at blocking heights, installing the blocking between studs, then patching and refinishing the drywall. This retrofit method works but creates extra work and visible repair lines, which is why blocking installation during initial framing saves time and produces cleaner results.
How is corner cabinet blocking different from standard blocking?
Corner cabinet blocking requires installation on both adjacent walls with blocking extending into the corner intersection point to support the cabinet where two walls meet. Blind corner and lazy Susan cabinets need reinforced corner posts and extended blocking into blind areas because these cabinets create unusual load distribution patterns across perpendicular walls.
What are nail plates and why install them over blocking?
Nail plates are metal protective covers installed over blocking where plumbing pipes or electrical wiring run through or near the blocking. These plates prevent cabinet mounting screws from accidentally puncturing pipes or wires when screws are driven through cabinets into blocking, protecting utilities from damage during and after installation.
Do frameless cabinets need different blocking than face-frame cabinets?
Frameless cabinets need more precisely placed blocking because European-style mounting hardware is less forgiving than traditional face-frame installations. Rail systems and adjustable brackets require continuous horizontal blocking at exact specified heights, and blocking placement must match manufacturer specifications since frameless cabinets offer minimal adjustment range during installation.