

You can’t fix basement water from the inside if you don’t know where it’s coming from. Most homeowners waste money on sealant products that fail within months because they’re treating symptoms instead of addressing hydrostatic pressure, capillary action, or actual drainage failure. Interior waterproofing works when you match the method to the moisture source. This guide covers the four core systems that actually stop water, how to choose between them, and what reliable installation looks like so you’re not doing this twice.
Core Interior Waterproofing Solutions for Basement Protection
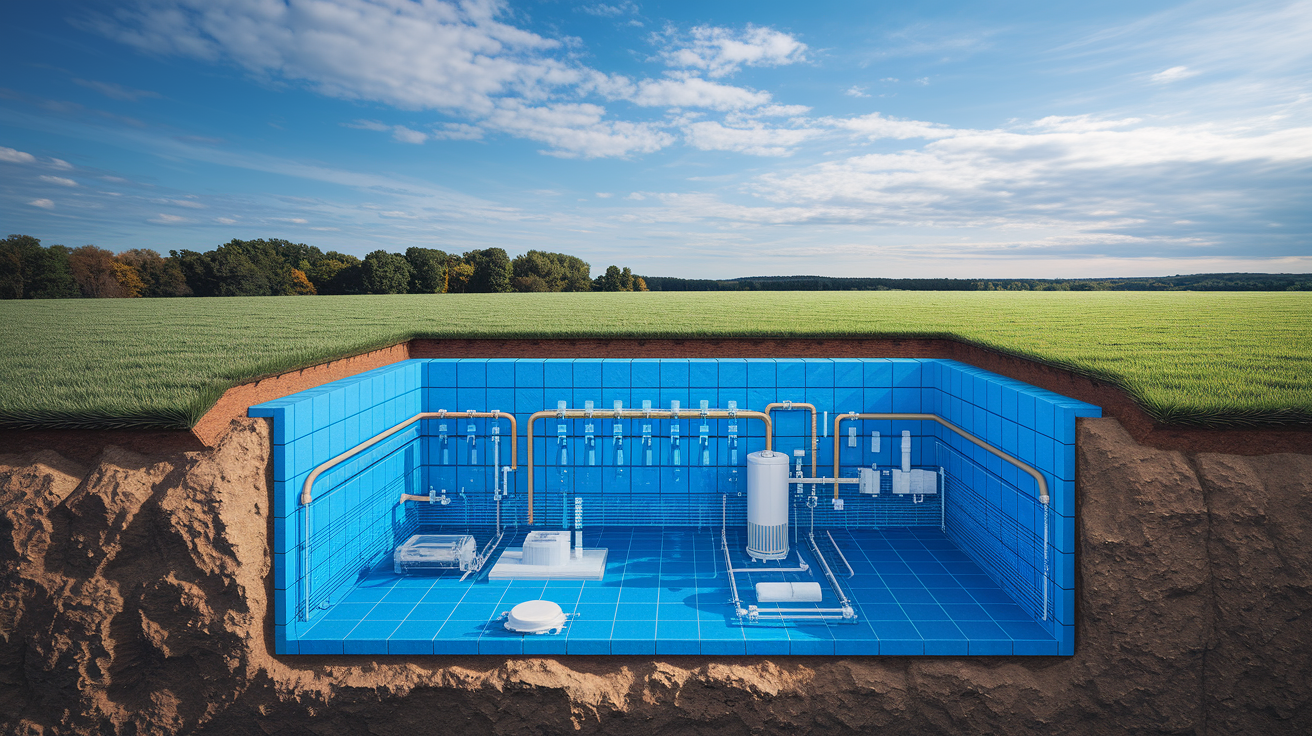
Interior basement waterproofing treats surfaces from inside the building using specialized materials that stop water from penetrating walls and floors. This approach works for existing homes regardless of age, whether they’re six months or 100 years old. It’s the preferred method when excavation around the foundation isn’t practical, costs less than digging up your yard, and addresses water that’s already making its way into the basement.
These systems manage moisture after it enters the foundation envelope, creating pressure relief and drainage paths that prevent accumulation. Instead of trying to stop water at the exterior foundation surface, interior methods intercept and redirect it before damage occurs.
The four core interior waterproofing methods include sealants and coatings (epoxy, urethane, and penetrating products that fill cracks and create waterproof barriers on concrete surfaces), interior drainage systems (French drains and perimeter channels that collect water at the foundation footing and direct it to removal points), sump pump installations (mechanical systems that collect water from drainage channels and eject it away from the building), and vapor barriers (plastic sheeting or foam board systems that control humidity and prevent condensation on basement surfaces).
These methods work individually for minor problems or in combination for comprehensive protection. A homeowner dealing with slight dampness might spend $500 to $2,000 on sealants and a dehumidifier. Moderate seepage typically requires $3,000 to $8,000 for drainage and pump systems. Severe flooding situations demand full perimeter drainage with encapsulation, running $8,000 to $15,000 or more. Properly installed French drain and sump pump systems often come with lifetime warranties, making them cost effective compared to repeated temporary fixes. The pressure relief created by opening the basement floor perimeter prevents hydrostatic buildup that causes foundation damage over time.
Understanding Basement Moisture Sources Before Waterproofing

Identifying your specific moisture problem determines which waterproofing method will actually work. Applying the wrong solution wastes money and can trap moisture, making the problem worse.
Hydrostatic Pressure Issues
Saturated soil around your foundation creates hydrostatic pressure. That’s water weight in the ground pushing against basement walls and floor. This force drives moisture through any crack, joint, or porous section in the concrete. You’ll see water actively seeping through wall cracks during heavy rain or after spring thaw when soil saturation is highest. The pressure can widen existing cracks, create new ones, and even cause structural movement in severe cases. Foundation walls bow inward under sustained pressure, and floor cracks spread as water pushes up from underneath.
Capillary Action Through Concrete
Water moves through tiny pores in concrete like a sponge wicking up liquid, even without direct pressure. Concrete is porous material, and groundwater travels through these microscopic channels when it contacts the foundation. This capillary action becomes a serious problem when combined with poor site drainage. Water pools against the foundation, saturates the concrete, and continues moving through the wall into the basement. You’ll notice damp spots that seem to appear from nowhere, efflorescence (white mineral deposits), and walls that feel cold and moist to the touch.
Condensation and Humidity Problems
Warm humid air hitting cool basement surfaces creates condensation, just like a cold drink sweating on a summer day. Basements stay cooler than upper floors, especially concrete walls that contact the ground. Without adequate ventilation or dehumidification, moisture accumulates on surfaces, drips down walls, and creates perfect conditions for mold growth. This happens even in basements with no groundwater issues. You’ll see water droplets on pipes, damp cardboard boxes, and musty odors that indicate mold spores are reproducing.
Check your basement during different weather conditions to determine which moisture source is active. Hydrostatic problems worsen during wet seasons. Capillary action stays relatively constant. Condensation peaks during humid summer months when temperature differences are greatest.
Interior Drainage Systems and French Drain Installation
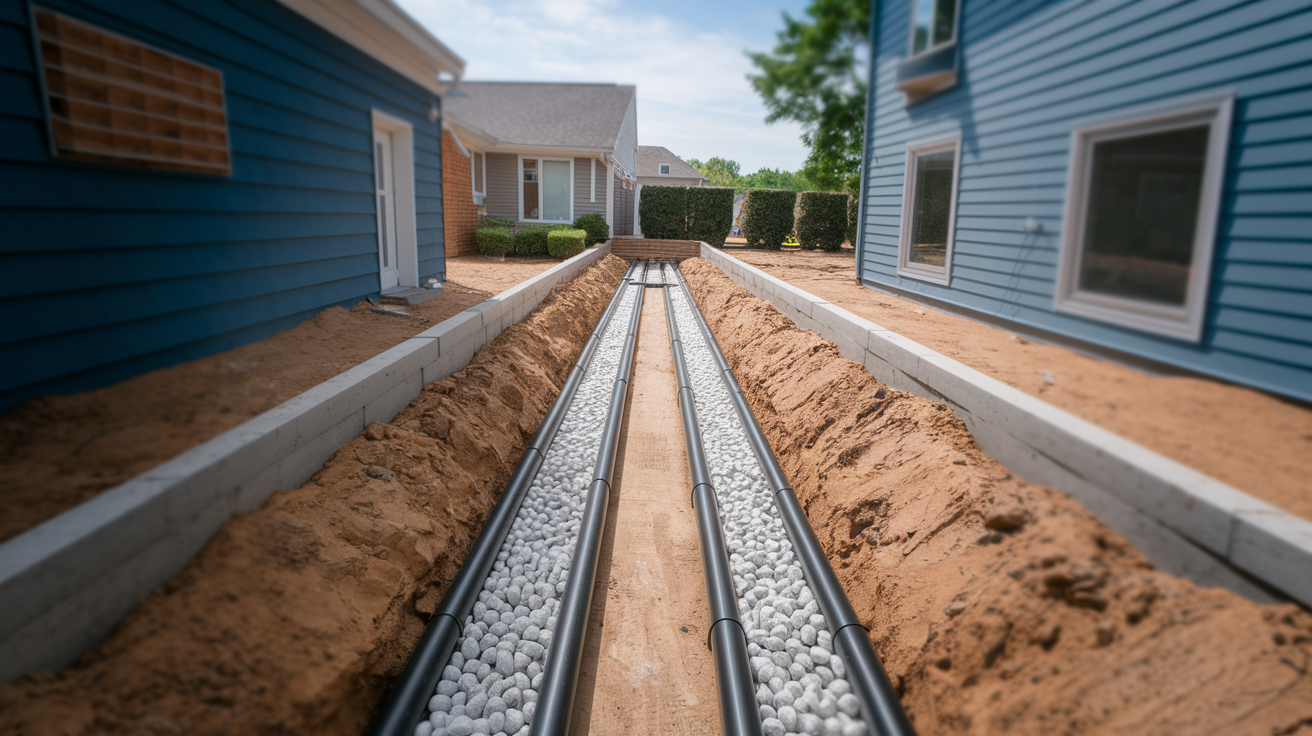
Interior drainage systems create a pressure relief mechanism by intercepting water at the foundation footing level before it can accumulate in the basement. A properly installed French drain system manages both hydrostatic pressure and water traveling underneath the floor slab, which is why this method forms the foundation of permanent basement waterproofing.
The system uses a 4 inch perforated pipe installed around the entire basement perimeter, positioned right next to the foundation footing where the wall meets the floor. Water traveling down the inside of the foundation wall, through the cove joint (where wall meets floor), or pushing up from underneath flows into this collection pipe. Gravity moves the water through the pipe to a sump basin, which holds the water until a pump ejects it outside and away from the building.
Installation sequence for a perimeter French drain starts with removing a 12 inch strip of concrete around the basement floor perimeter, exposing the foundation footing. Then you position 4 inch perforated drainage pipe next to the footing, with perforations facing down and toward the wall. Surround the pipe with washed gravel or drainage stone to prevent soil from clogging perforations. Install a sump basin at the lowest point of the system where water will collect by gravity. Finally, restore the concrete floor, creating a slight slope toward the drain to encourage water movement.
Baseboard drainage systems mount at the base of walls rather than requiring floor removal. These work when water intrusion happens primarily through wall cracks and joints rather than floor areas. They’re less disruptive to install but don’t manage water coming up through the floor slab.
Advanced drainage systems include sensors and monitoring technology that detect water presence and automatically activate pumps. Some systems include multiple drainage layers and redundant pump mechanisms. These are worth the added cost in areas with severe flooding risk or homes where the basement contains finished living space or valuable equipment. The sensors identify which section of the perimeter is receiving water and track frequency to help diagnose changing site drainage conditions.
Complete Encapsulation Systems
Encapsulation integrates perimeter drainage with a heavy duty vapor barrier system that covers basement walls from floor to ceiling. The typical barrier measures 16 mils thick (thicker than standard plastic sheeting) and gets mechanically fastened to the top of foundation walls, then runs down to tuck into the perimeter drain channel.
This barrier serves two purposes. First, it forces any water seeping through walls to run down the inside surface of the barrier rather than into the basement space. That water drains directly into the French drain system underneath, where pumps remove it. Second, the barrier prevents moisture vapor from passing through porous concrete into the basement air, controlling humidity even when water isn’t actively leaking.
Reinforced wall liners work with drainage systems in high water table situations where hydrostatic pressure is constant and severe. These rigid panels create a drainage plane against the foundation wall, with dimples or channels that give water a path to flow downward to the collection system. Water that would otherwise push through wall cracks gets intercepted and directed to the drainage pipe instead.
Encapsulation prevents moisture from reaching building materials when finishing a basement. Insulation, wood framing, and drywall never contact damp concrete when the vapor barrier creates a separation layer. This is critical because moisture trapped in wall assemblies leads to mold, rot, and eventually structural damage to the finished walls. The barrier maintains a dry environment regardless of what’s happening on the other side of the foundation wall.
This represents the strongest comprehensive approach because it addresses water at multiple points. Interception at the wall surface, collection at the footing, and mechanical removal through pumping. Systems installed correctly often carry lifetime warranties because they manage the root causes rather than just treating symptoms.
Sump Pump Systems for Basement Water Removal
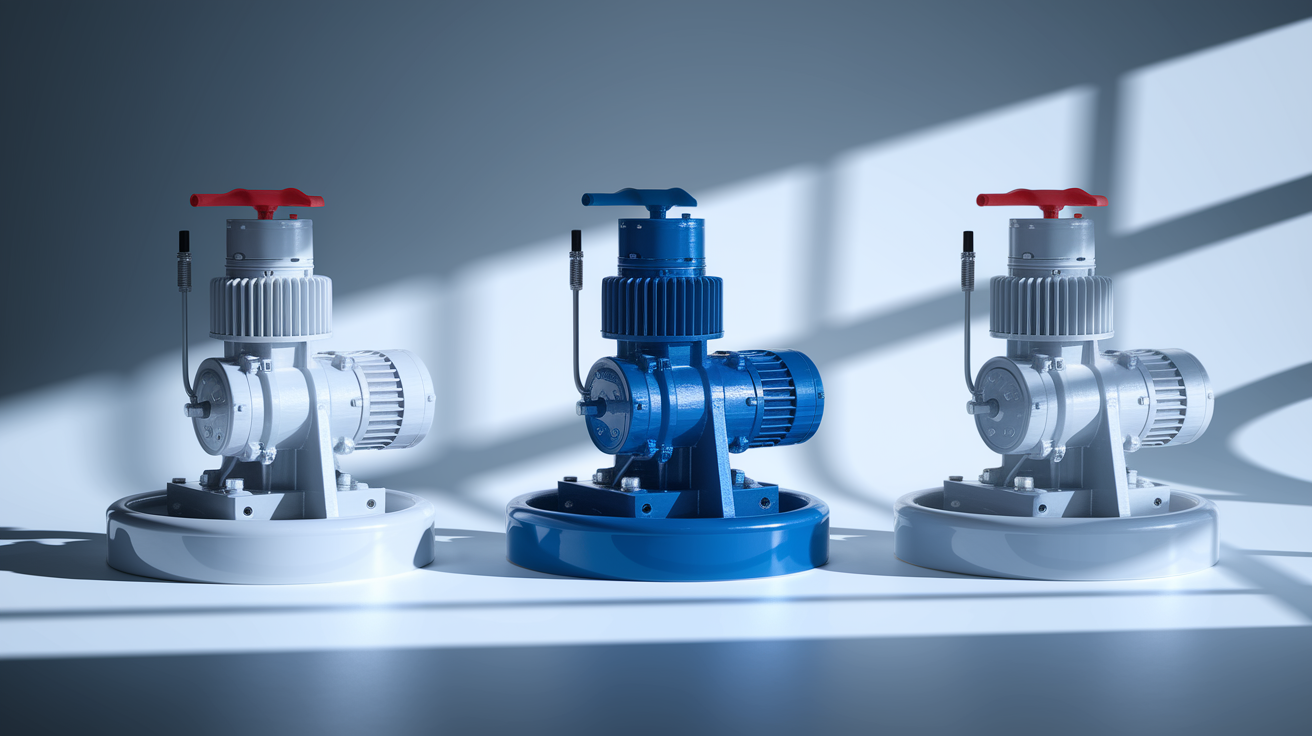
Sump pumps provide the mechanical removal component that completes interior drainage systems. Water collected by French drains flows by gravity into a sump basin (a pit dug into the basement floor), where the pump activates when water reaches a trigger level. Without a functioning pump, collected water just sits in the basin and eventually overflows back into the basement.
| Pump Type | Installation Location | Power | Best For |
|---|---|---|---|
| Pedestal | Motor above pit, pump shaft extends down | 1/3 to 1/2 HP | Smaller pits, easy maintenance access, budget installations |
| Submersible | Entire unit sits inside pit below water | 1/2 to 1 HP | Heavy water flow, quieter operation, larger pit capacity |
| Battery Backup | Above or below water, uses battery power | Varies by model | Storm protection, power outage scenarios, critical installations |
Pedestal pumps mount the motor on a stand above the sump pit, with a pipe extending down to move water. The motor stays dry, which makes these pumps last longer when properly maintained. You can access the float switch and motor without reaching into the pit. They’re ideal for narrow or shallow pits where a submersible unit wouldn’t fit. The trade off is noise. You’ll hear the motor running when it activates, which might matter if the basement is used as living space.
Submersible pumps sit entirely inside the sump basin, submerged when water enters. These units are enclosed and rated for constant water contact. They operate more quietly because water muffles motor noise. Submersible pumps typically provide more power (up to 1 HP), making them necessary for situations with high water volume or when the discharge point is far from the house. The basin needs to be deep enough to fully contain the pump, usually 24 inches minimum.
Battery backup systems are essential in situations where basement flooding risk is highest, during storms that knock out power. A primary AC powered pump handles normal operation, but when power fails, the battery backup activates automatically. Battery systems run on DC power from a marine type deep cycle battery that recharges when AC power is available. Some backup pumps use water pressure from municipal supply lines instead of batteries, which works as long as water service isn’t interrupted.
Install a check valve on the discharge line to prevent water from flowing backward into the sump basin when the pump shuts off. This backflow wastes pump cycles and can cause premature failure. The discharge line should run at least 10 feet from the foundation and empty onto a slope where water drains away from the house. In cold climates, bury the discharge line below frost depth or use a freeze resistant discharge that prevents ice blockage.
Waterproof Coatings and Sealant Applications
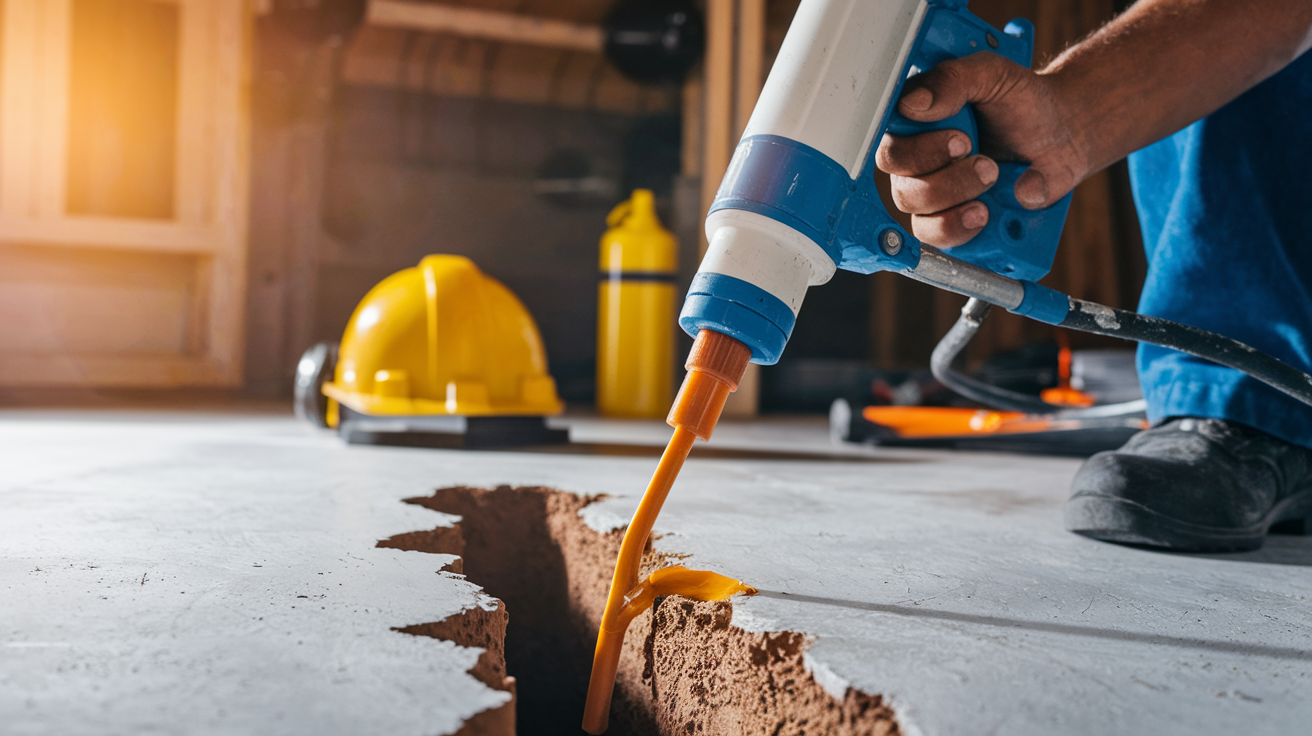
Sealants and coatings represent the most affordable first line defense against minor moisture problems, typically costing $500 to $2,000 for DIY application or professional treatment of an average basement. These products work when moisture intrusion is limited and doesn’t involve active water pressure or flooding.
Epoxy injection repairs active cracks in foundation walls by filling the crack from inside with a two part epoxy resin. The installer mounts injection ports over the crack, then pumps epoxy under pressure to fill the full depth and width. The epoxy creates a durable waterproof barrier that flexes slightly with normal foundation movement. This works for cracks up to 1/4 inch wide that show signs of water seeping through. Epoxy injection costs $1,000 to $3,000 professionally depending on crack length and wall access. If the crack runs floor to ceiling through a finished wall, expect removal and restoration costs on top of the injection work.
Hydraulic cement seals static cracks and joints that aren’t actively leaking but show past water stains. This rapid setting cement expands slightly as it cures, locking into crack edges. It works for cracks that developed from initial foundation settling but aren’t widening. Mix the powder with water to a thick paste, pack it into the crack, and shape it flush with the wall surface. Hydraulic cement sets in 3 to 5 minutes, making application timing critical. Mix small batches and work fast.
Penetrating sealers soak into concrete pores rather than forming a surface film. Silicate based sealers react chemically with concrete, forming crystals that block capillary water movement through pores. Crystalline waterproofing technology continues reacting with moisture over time, which means minor cracks that develop later can self seal when water reactivates the crystals. These products work well for controlling dampness from capillary action in walls that aren’t cracked.
Epoxy based coatings offer high durability and water resistance, best for floors and areas with minor water contact, with a 10 to 15 year lifespan. Urethane based sealants are flexible and crack resistant, effective for joints and areas with slight movement, lasting 8 to 12 years. Acrylic waterproofing paint is a budget option for minor dampness only, requiring recoat every 3 to 5 years and failing under pressure. Silicate based penetrating sealers provide deep penetration and permanent bonding, working for capillary action control with one time application.
Waterproof paint alone is insufficient for significant water intrusion. If you’re seeing active leaks, water pooling after rain, or white mineral deposits (efflorescence), paint won’t solve the problem. These coatings work as a final barrier in combination with drainage systems, or as standalone treatment when dealing with minor condensation and surface dampness. Applying paint to a wall with active hydrostatic pressure just traps moisture inside the concrete, leading to deterioration you can’t see until the wall surface starts crumbling.
Vapor Barriers and Basement Humidity Control
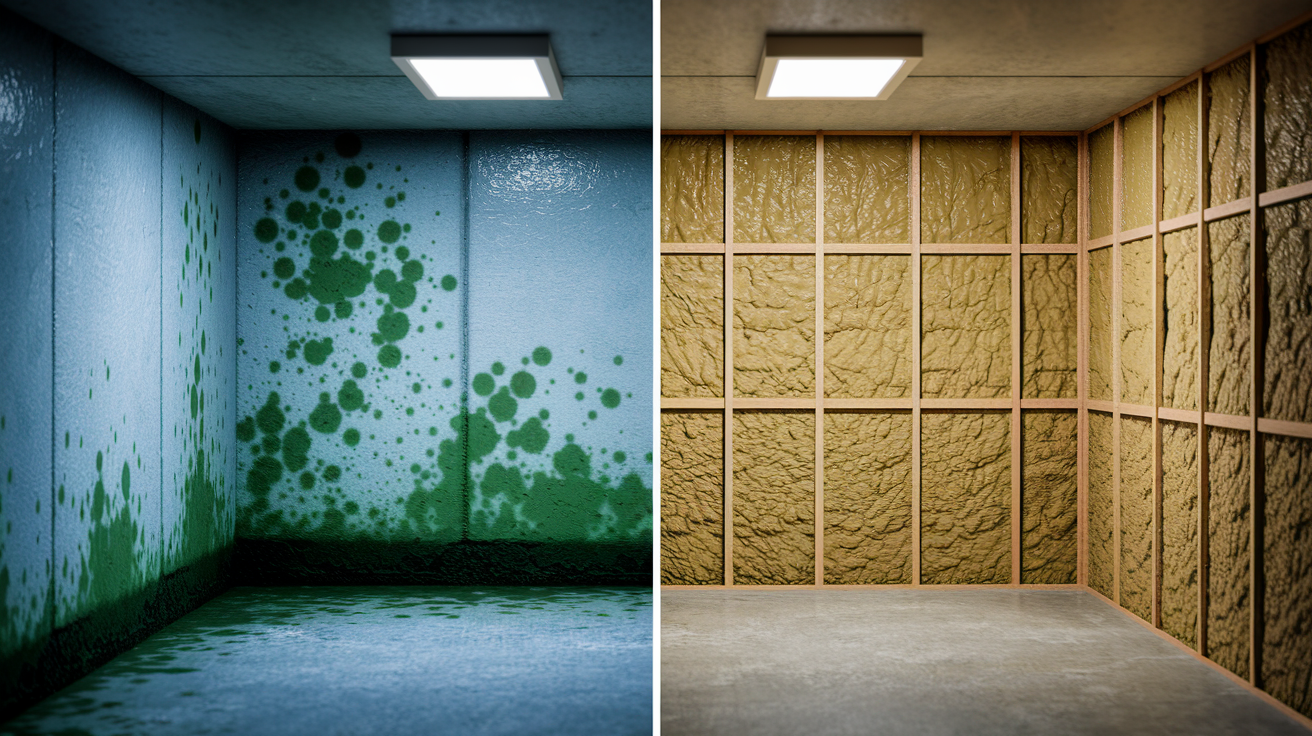
Vapor barriers address condensation and humidity problems rather than active water intrusion. When warm humid air contacts cool basement walls, moisture condenses on the surface. This creates damp conditions even when no groundwater is entering the basement, and it’s a primary cause of musty odors and mold growth.
Plastic sheeting creates an affordable moisture barrier when installed directly on basement walls and floors. Use 6 mil polyethylene at minimum, though thicker material resists tears during installation. Overlap seams by at least 6 inches and tape them with moisture resistant construction tape. Fasten the top edge to the rim joist or top of the foundation wall, then let it run down to the floor. This prevents humid basement air from contacting the cold concrete surface, eliminating condensation. The moisture stays in the air where dehumidifiers can remove it.
Foam board insulation with integrated vapor barriers prevents moisture seepage while improving energy efficiency. Rigid foam panels (XPS or polyiso) include a foil or plastic facing that blocks vapor transmission. Install these against foundation walls using construction adhesive and mechanical fasteners rated for concrete. The insulation keeps the wall surface warmer, reducing the temperature difference that causes condensation. This matters when finishing a basement. The insulation layer prevents cold spots that create moisture problems inside finished walls.
Vapor barriers are appropriate when moisture testing shows high humidity but no evidence of water entry points like cracks or floor seepage. If walls feel cool and damp to the touch but you don’t see actual water or staining, condensation is likely the issue. Barriers work in this scenario because they prevent air from contacting the surface where condensation forms.
Dehumidifiers remove moisture from basement air to maintain humidity levels between 30 to 50% relative humidity. Portable units work for smaller basements (under 1,000 square feet) or specific problem areas like storage rooms. These typically remove 30 to 70 pints of water per day depending on model capacity and basement conditions. You’ll need to empty the collection bucket daily or connect a drain hose to a floor drain for continuous operation. Whole house dehumidifiers integrate into HVAC ductwork and maintain consistent humidity throughout the entire basement and house. These systems cost more ($1,500 to $3,000 installed) but provide better moisture control for finished basements or homes with severe humidity issues. They include automatic controls that cycle based on measured humidity levels and drain directly to a floor drain or sump basin. Maintaining humidity below 50% prevents mold spore germination, protects stored items from moisture damage, and eliminates musty odors caused by mold and mildew growth on organic materials.
DIY Waterproofing Mistakes to Avoid
True waterproofing manages water through drainage and removal systems, while surface sealing just applies a coating to concrete. Sealers might stop minor dampness temporarily, but they fail when water pressure increases. The coating eventually cracks, peels, or gets pushed off the wall by hydrostatic pressure underneath.
Using waterproof paint on active leaks doesn’t work. Paint can’t withstand water pressure and traps moisture inside concrete, causing spalling and deterioration. Applying Drylok or similar sealers without addressing pressure sources fails when hydrostatic pressure builds up behind the coating, and trapped moisture damages the concrete itself. Painting over efflorescence without removal is another mistake. The white mineral deposits indicate water movement, and paint won’t adhere properly to the crystalline surface. Sealing floor cracks without drainage just forces water to find another path, often creating new cracks nearby. And relying on exterior damp proofing as permanent waterproofing doesn’t work long term because the tar like coating applied during construction breaks down over time and wasn’t designed to handle continuous water exposure.
Trapped moisture deteriorates masonry from inside when sealers prevent evaporation. Water enters through tiny pores and capillary channels in concrete, but sealed surfaces won’t let it exit. The moisture accumulates inside the concrete, leading to freeze thaw damage in cold climates, rust expansion of embedded rebar, and concrete spalling where the surface layer breaks away. Painting creates conditions for mold growth between the paint layer and the wall surface because moisture that penetrates from outside gets trapped in that space. The mold isn’t visible until the paint bubbles or peels, by which point contamination is extensive.
Failed sealing products must be removed completely before proper waterproofing can be installed. Paint, thick sealers, and old waterproofing membranes require mechanical grinding or chemical stripping. This removal process adds $2 to $5 per square foot to waterproofing costs, doubling the total price of a project that should have been done right initially. Some epoxy and urethane coatings bond so aggressively that removal damages the concrete surface, requiring repair before new waterproofing can be applied.
DIY sealants are appropriate only for minor dampness without active water entry. If you’re seeing condensation or slight moisture on walls during humid weather, a penetrating sealer might control the issue. When water is actually entering the basement (visible leaks, puddles after rain, or foundation cracks that stay wet) you need drainage and pumping systems installed by professionals who understand foundation mechanics and water management.
Cost Analysis for Interior Waterproofing Methods

Interior waterproofing costs significantly less than exterior excavation methods, which run $20,000 to $40,000 or more due to the labor intensive process of digging around the entire foundation. Interior methods avoid excavation while providing permanent solutions for most water intrusion problems.
| Method | DIY Cost Range | Professional Cost Range | Lifespan |
|---|---|---|---|
| Waterproof Sealants | $200 to $800 | $500 to $2,000 | 3 to 5 years |
| Crack Injection | $300 to $1,000 | $1,000 to $3,000 | 10 to 15 years |
| Vapor Barriers | $500 to $1,500 | $2,000 to $5,000 | 20+ years |
| Sump Pump Installation | $800 to $1,500 | $2,000 to $4,500 | 7 to 10 years |
| French Drain System | Not recommended DIY | $4,000 to $12,000 | Lifetime |
| Full Encapsulation | Not recommended DIY | $8,000 to $15,000 | Lifetime |
Several factors affect where your project falls within these cost ranges. Basement square footage directly impacts material quantities and labor hours. A 1,500 square foot basement costs roughly 50% more than a 1,000 square foot space for perimeter drainage systems. Foundation wall height matters when installing vapor barriers or applying sealants, since taller walls require more material and ladder work. Accessibility affects labor costs substantially. A basement with finished walls that need removal before waterproofing can access the foundation runs $3,000 to $8,000 more than an unfinished basement. Moisture severity determines system complexity. Minor seepage might only need partial drainage on one wall ($2,000 to $4,000), while flooding that affects all walls requires complete perimeter systems.
Professional installation costs include site assessment, proper system sizing, warranty coverage, and code compliant work. French drain systems installed by experienced contractors come with lifetime warranties that cover system function, not just materials. If water enters the basement after installation, the contractor returns to diagnose and correct the issue at no additional cost. This warranty makes comprehensive systems cost effective over time compared to repeated temporary fixes that need reapplication every few years. A $10,000 French drain system that functions for 30+ years costs less annually than $500 sealant applications needed every 3 to 5 years, which would total $3,000 to $5,000 over the same period without actually solving the underlying problem.
Selecting the Right Interior Method for Your Basement

Match waterproofing methods to moisture severity levels rather than just choosing the cheapest option. Inadequate solutions lead to repeated failures and wasted money, while over engineering minor problems costs more than necessary.
Minor Moisture and Dampness Solutions
Condensation, slight wall dampness, and musty odors without visible water entry indicate minor moisture problems. These situations typically result from humidity issues rather than groundwater intrusion.
Recommended approach is penetrating concrete sealers ($300 to $800 for materials), waterproof coatings on walls ($400 to $1,200 professionally applied), and a basement dehumidifier ($200 to $600 for portable units). Total investment runs $500 to $3,000 depending on basement size and whether you DIY the sealing work. This level addresses surface moisture and humidity control without requiring drainage systems. Results typically appear within days as humidity drops and surfaces dry. Reapplication of sealers every 5 to 10 years maintains protection.
Moderate Water Intrusion Approaches
Visible wall cracks with water seepage during heavy rain, damp floor areas along perimeter walls, and occasional puddles after storms indicate moderate problems requiring more comprehensive solutions.
Recommended approach includes professional epoxy injection for foundation cracks ($1,000 to $3,000), partial interior drainage along affected walls ($3,000 to $6,000), sump pump installation ($2,000 to $4,500), and vapor barrier installation on treated walls ($1,500 to $3,500). Total investment ranges $3,000 to $8,000 depending on how much of the perimeter needs drainage. This level stops active leaks, manages periodic water entry, and provides mechanical removal through pumping. Most installations complete in 3 to 5 days with minimal disruption.
Severe Flooding and Persistent Seepage
Standing water after every rain, foundation cracks that constantly weep, floor cracks with water pushing through, and high water table situations demand full scale waterproofing systems.
Recommended approach involves complete perimeter French drain installation ($6,000 to $12,000), battery backup sump pump system ($3,000 to $5,000), and full wall encapsulation with vapor barrier ($3,000 to $6,000). Total investment runs $8,000 to $15,000+ depending on basement size and site conditions. This comprehensive approach manages water at every entry point, provides redundant pumping for storm protection, and prevents moisture vapor transmission. Systems typically carry lifetime warranties and protect finished spaces or valuable equipment storage.
Professional assessment value justifies the $200 to $500 cost for complex situations. Experienced contractors use moisture meters to measure concrete moisture content (readings above 4% indicate active water movement), thermal imaging cameras to identify hidden water paths and cold spots, and foundation inspection to assess crack patterns and structural concerns. Qualified contractors carry proper licensing, general liability insurance, and offer clear warranty terms covering both materials and labor. Ask for references from projects completed 3 to 5 years ago to verify long term system performance. A 2 to 3 hour assessment identifies which moisture sources are active, determines appropriate system components, and provides accurate cost estimates based on measured basement conditions.
Proper method selection based on accurate diagnosis prevents wasted money on inadequate solutions. A $2,000 sealer application that fails within two years when the real problem requires $6,000 in drainage means you’ve spent $8,000 total instead of solving it correctly at the start. Choose the right system initially based on confirmed moisture sources, and you’ll spend less overall while actually keeping the basement dry.
Maintenance Requirements for Long Term Waterproofing Performance
Even permanent drainage systems require periodic checks to maintain effectiveness. Neglected maintenance leads to pump failures and system backups that allow water into protected basements.
Sump pump testing and float switch inspection should happen quarterly. Pour water into the basin to verify the float activates and the pump ejects water properly, check for unusual noises. Discharge line clearing and check valve verification needs attention spring and fall. Ensure the discharge point isn’t blocked by debris or ice, confirm the check valve prevents backflow. French drain cleaning every 3 to 5 years involves professional flushing to remove accumulated sediment from perforated pipe that reduces drainage capacity. Dehumidifier filter replacement happens monthly during use. Clean or replace filters according to manufacturer specs to maintain efficiency. Battery backup testing semi annually simulates power failure to verify battery charge and backup pump activation. Sealant reapplication assessment every 5 to 10 years inspects sealed cracks and coated walls for deterioration that indicates reapplication is needed.
Sump pump maintenance is critical because pump failure means collected water has nowhere to go. Clean the basin twice per year by removing the pump and scooping out accumulated sediment and debris. Test the float mechanism by lifting it manually. The pump should activate immediately. Verify the discharge pipe isn’t clogged and water exits at least 10 feet from the foundation. In winter, check that the discharge point hasn’t frozen. Ice blockage can cause the pump to run continuously without actually moving water, burning out the motor. Some pumps include thermal overload protection that shuts the unit down before damage occurs, but that still means water isn’t being removed until you clear the blockage.
Sensor equipped drainage systems offer automatic monitoring that reduces manual inspection needs. These systems track pump cycles, monitor water levels in the sump basin, and send alerts when problems develop. Advanced units connect to smartphone apps that log performance data and notify you of battery backup activation, pump failures, or unusual water entry patterns that might indicate new foundation cracks or drainage problems developing. The sensors cost $300 to $800 more than standard systems, but they catch developing problems before failure occurs.
Professional annual inspections cost $150 to $300 and cover complete system checks including drainage flow testing, pump capacity verification, and foundation inspection for new cracks. For comprehensive systems with lifetime warranties, annual inspections are often required to maintain warranty coverage. The contractor documents system condition and performance, which creates a maintenance record that’s valuable if problems develop or when selling the home. Keep inspection reports and maintenance records with other home documentation to demonstrate proper system care.
Final Words
Interior waterproofing gives you proven options whether you’re dealing with dampness or serious flooding.
Sealants handle minor moisture. French drains with sump pumps manage active water intrusion. Full encapsulation stops severe problems permanently.
Match your method to your moisture source. Hydrostatic pressure needs drainage systems. Condensation needs vapor barriers and dehumidifiers.
The best interior basement waterproofing methods work when you diagnose correctly, install properly, and maintain the system.
Fix it once. Keep it dry.
FAQ
What is best for waterproofing interior basement walls?
The best approach for waterproofing interior basement walls depends on your moisture source and severity. For minor dampness, penetrating sealers or epoxy coatings work well. For active water intrusion, a full perimeter French drain system combined with vapor barriers and sump pump installation provides the most reliable long-term protection.
Is there anything better than Drylok?
Yes, there are better solutions than Drylok for most basement moisture problems. Drylok and similar sealers trap moisture inside concrete and cinder blocks, causing masonry deterioration over time. Instead, use epoxy injection for cracks, penetrating crystalline sealers, or install a French drain system that manages water at the foundation footing level rather than trapping it.
What is the best basement waterproofing method?
The best basement waterproofing method is a complete encapsulation system combining perimeter French drains, sump pump installation, and heavy-duty vapor barriers installed floor-to-ceiling on walls. This approach manages water at the footing level, provides pressure relief, and prevents moisture from reaching finished spaces. It costs $8,000-$15,000 but often includes lifetime warranties.
Can you waterproof a basement from the inside?
Yes, you can waterproof a basement from the inside, and it’s the preferred method for existing homes. Interior waterproofing manages water after it enters the foundation using drainage systems, sump pumps, sealants, and vapor barriers. It costs significantly less than exterior excavation ($20,000-$40,000+) and works effectively when properly installed with lifetime warranty coverage available.
How does hydrostatic pressure affect basement waterproofing?
Hydrostatic pressure occurs when saturated soil pushes water through foundation walls, causing cracks and joint failures. Interior French drain systems relieve this pressure by creating a path for water to flow to collection points rather than forcing through walls. Without pressure relief, even the best sealants eventually fail under constant water pressure.
When should I use waterproof paint versus drainage systems?
Use waterproof paint only for minor condensation and slight dampness where no active water intrusion exists. For any visible seepage, wall cracks with moisture, or standing water, drainage systems are necessary because paint traps moisture inside concrete, causing mold growth between the paint layer and wall, and deteriorating the masonry over time.
What’s the difference between pedestal and submersible sump pumps?
Pedestal sump pumps mount motors above the pit, making maintenance easier and working well for smaller basins. Submersible sump pumps install inside the pit, operate more quietly, and handle heavier water flow for larger basements. Both need battery backup systems to maintain protection during power outages when flooding risk peaks.
How long does interior basement waterproofing last?
Interior waterproofing longevity varies by method. Waterproof sealants last 3-5 years, crack injection lasts 10-15 years, vapor barriers last 20+ years, and properly installed French drain systems with encapsulation can last a lifetime. Professional installations often include lifetime warranties when combined with sump pump systems and routine maintenance.
What maintenance do French drain systems require?
French drain systems need quarterly sump pump testing, spring and fall discharge line clearing, and check valve verification. Clean the French drain itself every 3-5 years to remove sediment buildup. Test battery backup systems semi-annually and inspect the sump basin for debris. Advanced systems with sensors reduce manual inspection requirements.
Should I install vapor barriers before finishing my basement?
Yes, install vapor barriers before finishing your basement to prevent building materials like insulation, framing, and sheetrock from touching damp concrete walls. Use heavy-duty 16 mil barriers integrated with your drainage system so wall leaks flow down into French drains underneath rather than wetting finished materials and creating hidden mold.
How do I know which waterproofing method I need?
Match your method to moisture severity. Minor dampness needs penetrating sealers and dehumidifiers ($500-$3,000). Moderate seepage requires crack injection, partial drainage, and sump pumps ($3,000-$8,000). Severe flooding demands full perimeter French drains and encapsulation ($8,000-$15,000+). Get professional assessment with moisture meters for accurate diagnosis.
Why do DIY waterproofing products fail in basements?
DIY products like Drylok fail because they trap moisture inside concrete rather than managing the water source. Trapped moisture deteriorates masonry, creates mold between coating and wall, and makes future proper waterproofing more expensive due to removal costs. These products only work for minor dampness, not active water intrusion or hydrostatic pressure.