

Most bathroom renovations fail before the first swing of the hammer. You skip a shutoff step, hit a live wire, or flood the hallway because you pulled the wrong fixture first. The damage costs more than the materials you planned to install. Bathroom demo looks simple until you’re standing in an inch of water or breathing silica dust without a respirator. This checklist walks through the exact sequence that keeps utilities off, moisture contained, and your lungs protected so the tear-out happens once, safely, without callbacks or hospital trips.
Safety Equipment and Protective Gear for Demolition

Bathroom demo creates conditions that’ll hurt you if you’re not careful. Flying tile pieces, fixtures falling, dust everywhere, sharp metal edges. It’s all there. Broken porcelain acts like glass, and old insulation gets into your skin and lungs. Without the right gear, you’re looking at cuts, eye injuries, breathing issues, or getting crushed by a heavy vanity or tub.
Good protective gear stops injuries right now and health problems later, like silicosis from breathing silica dust or lung damage from mold. Safety equipment runs about $100 to $150, way less than an ER visit or dealing with breathing problems for years.
What you need for bathroom demolition:
- NIOSH approved N95 dust mask or P100 respirator for tile and drywall dust
- Safety goggles or full face shield against flying debris
- Heavy duty leather work gloves rated for demo work
- Hard hat for falling tile or overhead fixture removal
- Steel toed work boots protecting feet from dropped fixtures
- Long pants and long sleeve cotton shirt preventing cuts and scrapes
- Knee pads with hard caps for floor tile removal
- Ear protection (foam plugs or muffs) when using reciprocating saws or hammers
- First aid kit within easy reach for minor cuts
Essential Demolition Tools and Equipment
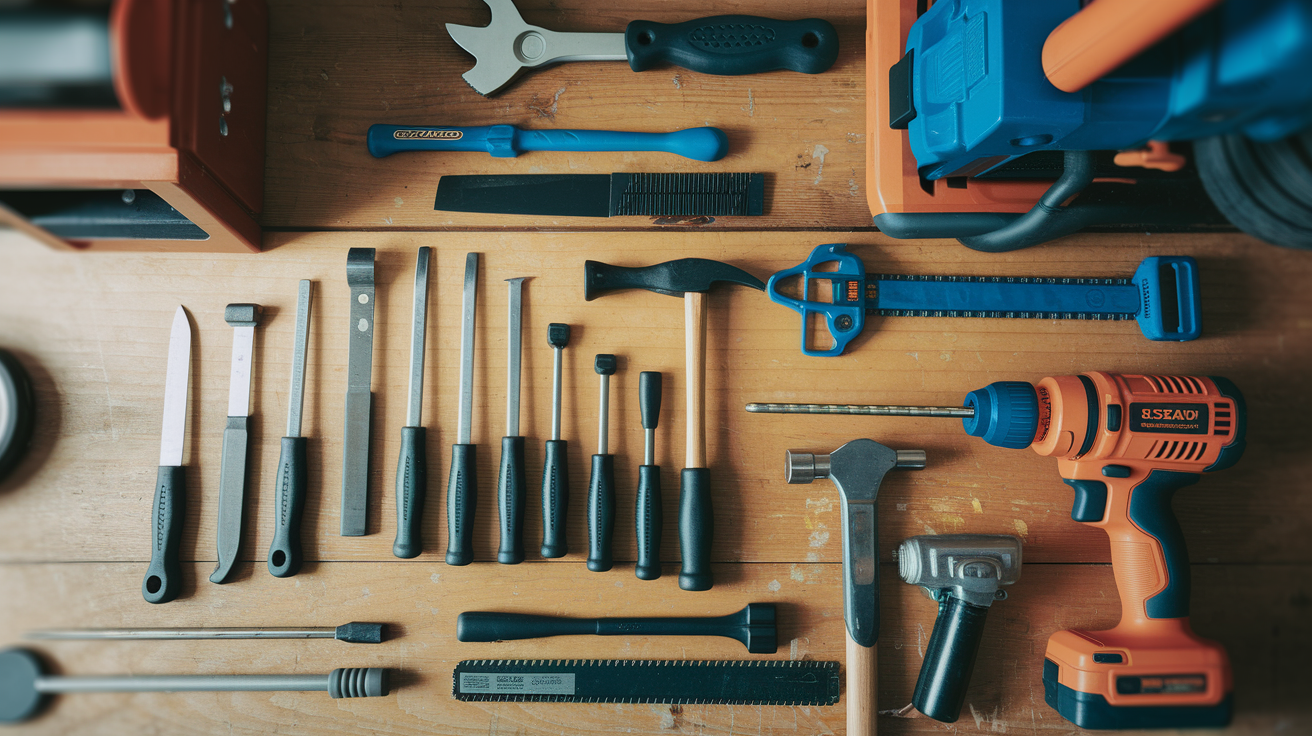
Get all your tools together before you start. Otherwise you’ll make three trips to the hardware store and turn a one day job into three. Most demo tools are basic, but each one matters in the sequence.
| Tool | Primary Use in Demo |
|---|---|
| Adjustable wrench | Disconnecting plumbing supply lines and P-trap nuts |
| Utility knife | Cutting caulk around vanity, tub, and toilet base |
| Hammer | Breaking tile and driving chisel for grout removal |
| Cold chisel (1-inch wide) | Prying up floor tile and chipping wall tile |
| Flat pry bar | Removing baseboards, trim, and loosening fixtures |
| Reciprocating saw | Cutting drywall, cement board, and tub into sections |
| Jigsaw | Cutting cast iron or fiberglass tub into pieces |
| Drywall saw (manual) | Scoring and cutting drywall without hitting studs |
| Screwdrivers (Phillips and flat) | Removing fixture mounting screws and cabinet hardware |
| Shop vac (wet/dry) | Removing dust, debris, and residual water from toilet bowl |
| Crowbar (36-inch) | Leveraging heavy fixtures and prying up cement board |
| Drill with bits | Removing door hinge pins and stubborn screws |
Power tools cut demo time roughly in half compared to doing it by hand. A reciprocating saw takes 30 seconds to cut through drywall. Manual scoring and breaking? Ten minutes. If you don’t own these tools, rental costs about $40 to $60 per day for a basic package with reciprocating saw, hammer drill, and shop vac. For a weekend project, buying mid grade tools often costs less than renting and you’ve got them for next time.
Pre-Demolition Room Preparation and Protection
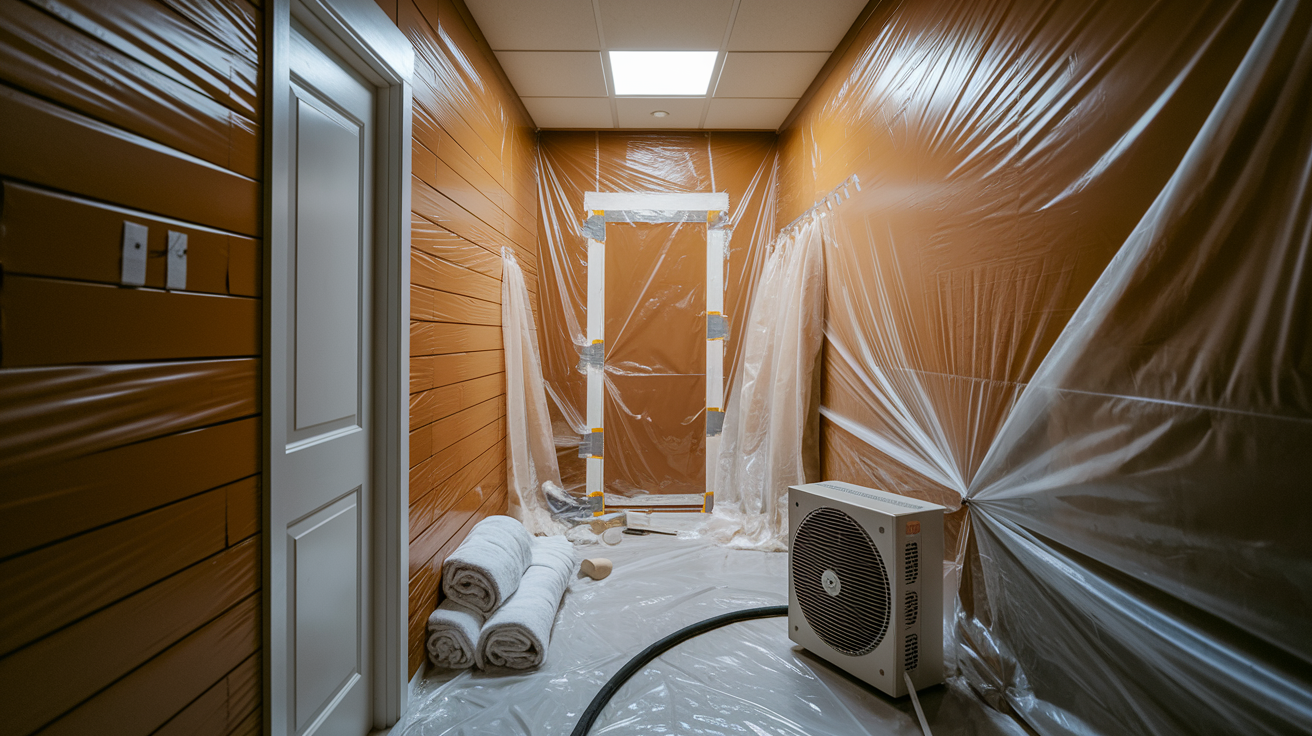
Start by clearing out everything that isn’t attached. All toiletries, medications, cleaning stuff, trash cans, storage contents, shower curtains, bath mats, decorative items. Remove towel bars, toilet paper holders, robe hooks, wall mounted soap dispensers with a screwdriver. Take down pictures, mirrors, medicine cabinets. These things become tripping hazards and get covered in dust if you leave them. Clear the hallway right outside the bathroom to create staging space for filled debris bags waiting for disposal trips.
Dust containment keeps a bathroom demo from becoming a whole house cleaning disaster. Seal every vent and register in the bathroom with plastic sheeting and duct tape. Cover supply vents, return air grilles, exhaust fan openings. Takes about 10 minutes but stops dust from traveling through your HVAC into every room. Hang heavy plastic in the doorway using duct tape across the top of the frame. Either install a zipper door kit ($15 at hardware stores) or create an overlap flap you can duck through. If there’s a window, open it and point a box fan outward to create negative pressure that pulls dust out instead of into the house.
Protect the path from bathroom to dumpster or exit door with heavy drop cloths, old carpet scraps, or flattened cardboard boxes taped together. Debris bags leak fine dust, and you’ll walk this path dozens of times with sharp tile pieces. Protect hardwood floors, tile, and carpet in hallways and any rooms between the bathroom and exterior. If stairs are involved, cover each step with cardboard taped at the edges. Set up a staging area just outside the bathroom door where you can place filled contractor bags while you keep working, then haul them out in batches.
Utility Shutoff Procedures: Water and Electricity

Skipping utility shutoff leads to flooded rooms from cut water lines and potentially fatal electrocution from hitting live wires. These shutoffs aren’t optional. They must happen before the first hammer swing.
Water Supply Shutoff Steps
Find the individual shutoff valves for each fixture. Under the sink you’ll see two small oval or football shaped valves where supply lines connect. Behind the toilet, one valve controls the fill line. For tub and shower, the access panel (usually in an adjacent closet or hallway) has shutoff valves. Turn each valve clockwise until it stops. Newer homes with manifold plumbing have a central distribution panel, often in the basement or utility room, with individual quarter turn valves for each bathroom fixture. Use a manifold key to close the bathroom lines.
Can’t find individual fixture valves? Or valves are corroded and won’t turn? You’ll need to shut off the main water supply to the entire house. Main shutoff is typically near where the water line enters your house (basement, crawl space, or exterior wall). After closing all valves, open every faucet in the bathroom and flush the toilet completely until water stops running. This drains remaining water in the lines and confirms the shutoff worked. Use a wet/dry vacuum to remove water sitting in the toilet bowl.
Electrical Shutoff Steps
Find your electrical panel (breaker box) and locate the circuit powering the bathroom. If your panel has a circuit map taped inside the door, look for the bathroom label. If not, plug a lamp into a bathroom outlet and have someone watch while you flip breakers one at a time until the lamp goes off. Test multiple outlets and the light switch to make sure you’ve found the right circuit. Flip the breaker to OFF and tape a piece of paper over it saying “BATHROOM DEMO – DO NOT TURN ON.”
Use a non-contact voltage tester at outlets and light switches to verify power is completely off before starting. These testers cost about $15 and beep or light up when they detect live voltage. Test both the top and bottom outlet receptacles and all light switch locations. If your bathroom shares a circuit with other rooms, you may need to turn off multiple breakers, meaning temporary power loss in those areas.
If a shutoff valve won’t budge, don’t force it. Too much torque on a corroded brass valve will snap it off at the base, causing an immediate flood needing emergency plumber response and main line shutdown. Valves won’t turn? Shut the main supply instead.
Complete Sequential Demolition Guide
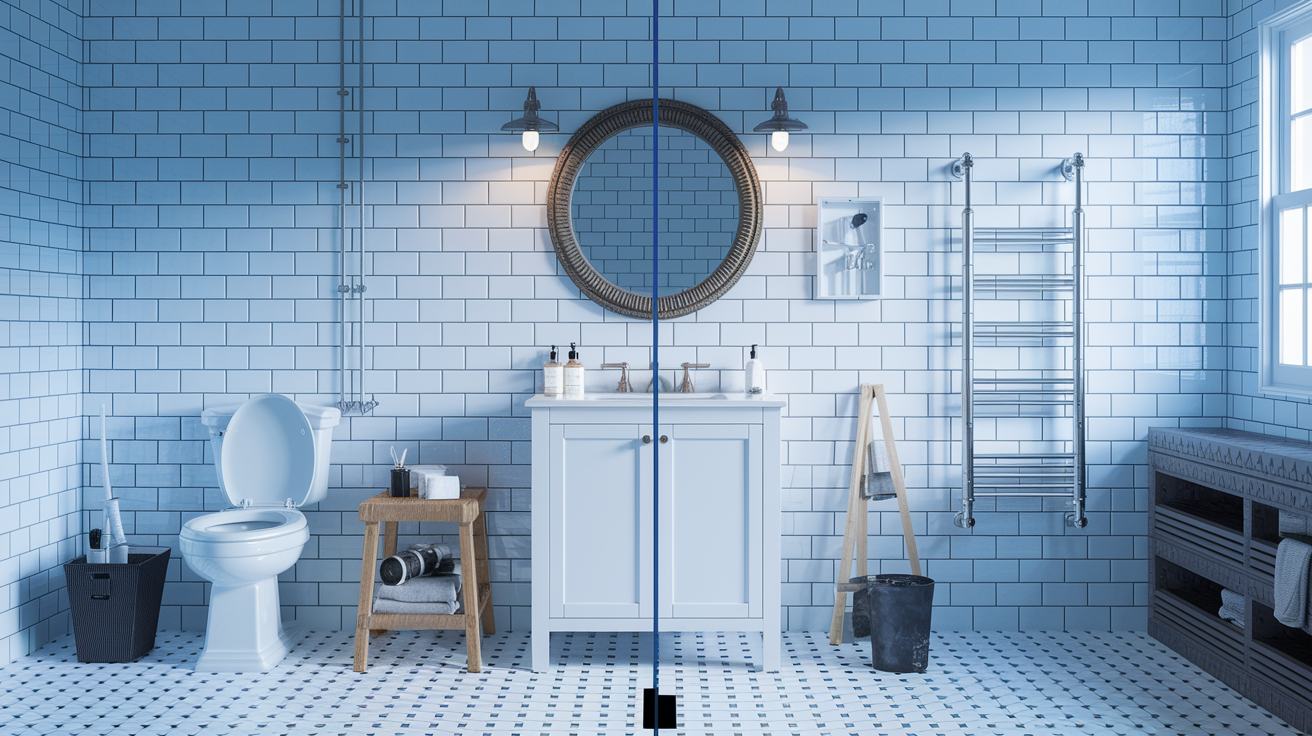
Following demo steps out of order creates problems. Remove the toilet before the vanity and you’re working in a cramped space. Tear out tile before removing fixtures and you risk damaging fixtures you could donate or sell. This sequence maximizes working space as you go while protecting structural elements.
-
Remove all personal items, toiletries, mirrors, pictures, towel bars, toilet paper holders, shower curtains, and bath mats from bathroom and surrounding area
-
Set up plastic sheeting barriers in doorway using duct tape and seal all vents, registers, and ductwork openings to contain dust
-
Lay protective drop cloths or cardboard pathway from bathroom through hallway to exterior exit for debris removal
-
Turn off water supply at individual fixture shutoff valves or manifold control panel, then open all faucets and flush toilet until water stops flowing completely
-
Shut off electrical circuit for bathroom at breaker panel and verify power is off using non-contact voltage tester at all outlets and switches
-
Remove bathroom door from hinges using long drill bit inserted upward into hinge pin, tapping with mallet to release, creating larger opening for debris removal
-
Disconnect vanity plumbing by placing 5 gallon bucket directly under P-trap, using adjustable wrench to unscrew slip nuts connecting trap to drain pipe and tailpiece, then disconnect hot and cold supply lines at shutoff valves
-
Cut through all caulk around vanity top perimeter with utility knife, remove mounting screws securing cabinet to wall studs, then pull entire vanity unit straight out from wall
-
Stuff old towel or rag firmly into exposed drain pipe opening to create seal blocking sewer gases from entering house
-
Disconnect toilet water supply line at wall shutoff valve using adjustable wrench, then use wet/dry vacuum to remove remaining water from bowl after final flush
-
For two piece toilets, unbolt tank from bowl base by removing two or three nuts underneath tank, lift tank off separately and set aside
-
Unscrew two floor bolts at toilet base (apply WD-40 and wait 10 minutes if bolts are rusted), rock toilet side to side to break wax seal, lift straight up off flange
-
Use putty knife or utility knife to scrape away old wax ring completely from flange surface, then stuff rag into drain opening to block sewer gas
-
Remove light fixtures by unscrewing from ceiling or wall mounts, disconnect wire nuts, remove exhaust fan cover and housing, take down medicine cabinets
-
Begin tile demolition at top corner of shower or tub surround using hammer and 1 inch cold chisel, chipping horizontally along top row, then working vertically down edges to expose drywall or cement board backing
-
Once backing material is visible in 12 inch sections, use reciprocating saw with demolition blade to cut drywall or cement board along seams between wall studs without cutting into stud faces
-
If cement board underlayment is present beneath tile, unscrew cement board from wall studs after removing all tile, pulling out sections in manageable 2 foot by 3 foot pieces
-
Use reciprocating saw or drywall saw to cut approximately 8 inches of drywall height above tub rim to expose tub mounting flange and wall attachment screws
-
Cut through all caulk at tub base where it meets floor and walls using utility knife, remove any visible mounting screws from flange, disconnect drain assembly if accessible from below, rock tub forward and back to break any remaining adhesive seal
-
If bathtub won’t fit through bathroom door as one piece, use jigsaw with appropriate blade (metal for cast iron, coarse wood blade for fiberglass) to cut tub into two or three sections for easier handling and disposal
-
Start floor tile removal at doorway working backward toward far wall using hammer and chisel to break tiles, then pry up broken sections with flat crowbar, removing thinset mortar and cement board underlayment to expose plywood subfloor
-
Remove cement board underlayment by unscrewing from subfloor or prying up if adhesive set, pulling up in chunks to expose subfloor completely
-
Use shop vac every 15 to 20 minutes during tile removal to control dust buildup and prevent slipping on loose debris
-
Make frequent trips to dumpster as debris bags fill, keeping bathroom floor clear of loose materials that create tripping hazards, and ensure dumpster load stays level with top rail for legal hauling
Demo work creates a surprising amount of dust even when you’re careful. Run the shop vac continuously during tile removal, and stop every 20 minutes to vacuum your work area. Tile dust mixed with small mortar chunks creates a slippery surface that’s easy to fall on when you’re carrying heavy fixture pieces.
Sequence matters because each completed step creates more working space. Vanity gone? You have room to move around the toilet. Both vanity and toilet out? You can swing a sledgehammer for tile work without hitting fixtures. Remove tile before the tub and you expose the tub’s mounting hardware so you know what you’re dealing with.
Heavy items like vanities and cast iron tubs are two person jobs. A 60 pound vanity with an awkward center of gravity causes back injuries when you lift it solo. Cast iron tubs weigh 300 to 500 pounds and need cutting into sections for one or two people to remove. Don’t skip this part. A $150 urgent care visit for a pulled back isn’t worth the solo hero attempt. Don’t have a helper available? Rent a hand truck designed for appliances and use leverage instead of pure lifting strength.
Floor Removal and Subfloor Inspection

Floor demolition is optional if you’re only renovating walls and fixtures, but most full bathroom renovations include new flooring. Start tile removal at the doorway threshold and work backward toward the far wall. This prevents you from demolishing your exit path and getting trapped in the back corner standing on exposed subfloor.
Use a hammer and cold chisel to break floor tiles into sections, striking the chisel at a low angle to get underneath tile edges. Once a section breaks free, slide a flat pry bar underneath and lever up the chunk. Floor tile usually sits on thinset mortar spread over cement board underlayment. After removing tiles, you’ll need to remove the cement board layer. Some cement board is screwed to the subfloor every 6 to 8 inches. Unscrew it in sections. Other installations use thinset adhesive, needing prying and scraping. Pull up cement board in 2 foot by 2 foot sections to expose the plywood subfloor underneath. Typical bathroom floor demolition takes about 3 hours of continuous work with regular breaks for shop vac cleanup.
Once the subfloor is exposed, you’ll see what’s actually been happening beneath the surface finish. Check the plywood carefully for soft spots by pressing firmly with your hand in multiple locations. Soft areas mean water damage and rot needing replacement. Look for dark brown or black staining showing where water’s been getting in. Test floor bounce by walking across different areas. Too much flex suggests either water damaged plywood or poor joist support below. Green, black, or white fuzzy growth on the plywood surface is mold that developed from chronic moisture exposure. These conditions point to previous leaks, poor waterproofing, or ventilation problems.
Take photos of the exposed subfloor from multiple angles. Measure and note the location of any damaged areas so you can calculate replacement material needs accurately. If damage extends beyond 25% of the floor area, consider hiring a contractor for structural assessment before going further. Document your findings before you forget details. Two weeks from now when you’re ordering materials, you won’t remember if that soft spot was 18 inches or 30 inches across.
Hazardous Material Testing and Safety Protocols

Homes built before 1980 commonly contain materials that are now known health hazards. Testing before demolition isn’t paranoia. It’s a basic safety requirement and often a legal mandate depending on where you live.
Hazardous materials needing testing and special handling:
-
Lead paint must be tested in all homes built before 1978 using swab test kits costing approximately $10 from D-Lead or 3M LeadCheck brands, available at hardware stores
-
Asbestos may be present in older vinyl floor tiles, drywall joint compound, textured ceiling finishes, and insulation materials, needing professional testing by certified lab
-
Existing mold colonies visible as discoloration or fuzzy growth need assessment of extent and contamination level before disturbing
-
Lead paint dust generated during demolition needs HEPA rated vacuum filtration and plastic containment barriers that prevent dust migration
-
Asbestos containing materials can’t be legally removed by homeowners in many jurisdictions and must be handled by licensed abatement contractors
-
Contaminated debris needs disposal at designated hazardous waste facilities with proper manifests, not standard construction dumpsters
-
Professional lead or asbestos remediation dramatically increases project cost, often $3,000 to $8,000 depending on contamination extent
Test results guide your next steps. If lead paint tests positive, you have options. Hire certified lead abatement professionals, use HEPA vacuums and containment methods for careful removal, or encapsulate the surface with new materials rather than removing it. Positive asbestos tests typically need professional removal. Most jurisdictions prohibit homeowner asbestos work because improper handling creates serious long term lung disease risk. Skipping required testing doesn’t make the hazards disappear. It just means you’re exposing yourself and family to materials that cause cancer and neurological damage. Testing costs $50 to $100. Medical treatment for mesothelioma or lead poisoning costs infinitely more and may not be possible.
Permit Requirements and Building Code Compliance
Demolition only work typically doesn’t trigger permit requirements in most jurisdictions. You’re removing materials, not building or installing anything that needs inspection. If your project stops after demolition with no immediate rebuild planned, permits usually aren’t required. Check with your local building department to confirm, rules vary.
Permits become mandatory when your renovation includes plumbing relocations, electrical circuit work, structural modifications, or converting spaces. Moving a toilet from one wall to another needs a plumbing permit and inspection. Adding a new electrical circuit for heated floors needs an electrical permit. Removing a wall between bathroom and adjacent closet needs a structural permit. The permit covers the installation work, but once pulled, inspectors may want to see what demolition exposed before letting you close walls back up.
Typical inspection checkpoints during permitted bathroom renovations include rough plumbing inspection after new supply lines and drains are installed but before walls close up, rough electrical inspection after new wiring and boxes are installed but before drywall covers them, and final inspection after all finish work is complete including fixtures, tile, and trim. Keep permits visibly posted near the work area during all phases. Missing an inspection checkpoint means opening finished walls back up, wasting time and materials.
Permitted work protects you multiple ways. Inspections verify that plumbing won’t leak, electrical won’t cause fires, and structure won’t fail. When you sell the house, permitted renovations add documented value while unpermitted work raises red flags during buyer inspections and appraisals. Insurance companies can deny claims for damage caused by unpermitted work. Fines for discovered unpermitted work range from $500 to $5,000, and building departments can require complete removal of unpermitted installations at your expense.
Debris Disposal and Waste Management Planning
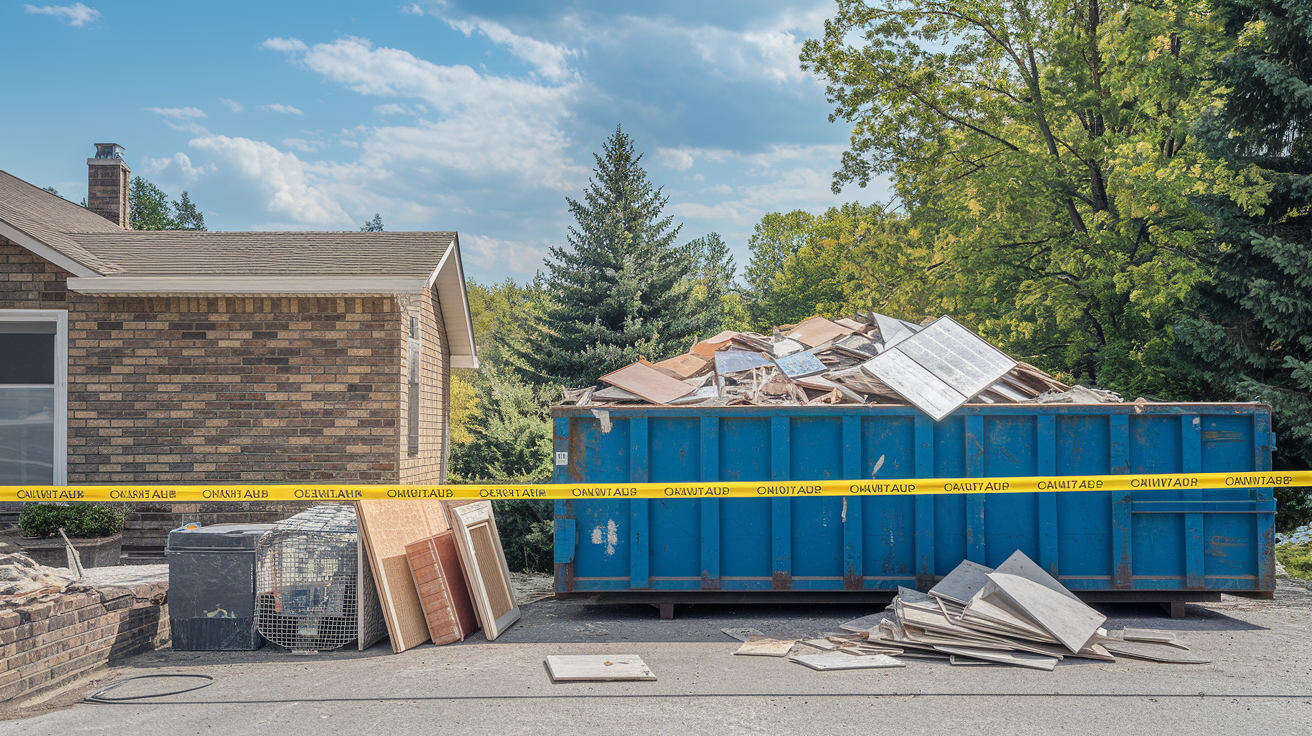
A typical full bathroom demolition generates 1 to 3 tons of debris depending on room size and whether you’re removing tile, fixtures only, or taking walls down to studs. This volume far exceeds what curbside trash service will accept. Sharp porcelain, broken tile, and heavy cast iron fixtures also exceed weight limits for standard trash bags and carts.
Dumpster rental is the standard solution. A 10 yard dumpster handles most single bathroom projects and costs $300 to $500 for a 7 to 14 day rental period depending on your location. A 15 yard dumpster works for larger bathrooms or projects including significant tile removal. Schedule delivery for the day before you start demo so it’s ready when you begin generating debris. Position the dumpster as close to your exit path as possible while leaving access space for the truck to hook and haul it away. Some residential streets or driveways can’t accommodate 20 foot dumpsters. Verify dimensions before ordering.
How to Choose the Right Dumpster Size covers dumpster sizing for various project types with weight and volume calculations.
Rental periods typically run 7 to 14 days. For a weekend demolition project, a 7 day rental is plenty. If you’re demoing the bathroom then waiting a week before starting renovation work, go with 14 days to avoid early removal and re-delivery fees. Keep the dumpster load level below the top rail. Overfilled dumpsters can’t be legally hauled and you’ll need to remove excess debris before pickup, delaying the project.
Disposal and salvage options beyond the dumpster:
-
Functional vanities, medicine cabinets, light fixtures, and mirrors can be donated to Habitat for Humanity ReStore locations for tax deduction
-
Metal fixtures, copper supply lines, and brass drain components can be taken to scrap metal recycling centers for cash payment
-
Hazardous materials including lead painted components, asbestos tiles, and contaminated materials need disposal at designated hazardous waste facilities with proper documentation
-
Broken tile, drywall sections, cement board, and lumber framing pieces go in the rented construction dumpster
-
Schedule dumpster pickup before your rental period expires to avoid daily overage fees of $5 to $15 per day
-
Keep loads level and distributed to meet hauling weight limits, typically 2 to 3 tons for 10 yard residential dumpsters
Project Timeline and Budget Estimation

A two person team can complete bathroom demolition in one full weekend (Saturday and Sunday) working 8 hour days with breaks. Solo workers typically need 2 to 3 full days depending on bathroom size and fixture complexity. Removing a pedestal sink, toilet, and shower takes less time than demolishing a double vanity, soaking tub, and floor to ceiling tile. Professional demolition contractors with experience and commercial tools complete the same work in 4 to 8 hours but charge for that efficiency.
Add extra time to your estimate if lead or asbestos testing comes back positive. Professional hazmat remediation typically needs 2 to 5 days depending on contamination extent and contractor availability. This becomes the critical path item determining your overall project timeline. Schedule testing early (two weeks before planned demo start) to avoid timeline surprises. Taking vacation days for a bathroom renovation? Don’t commit to those days until you have test results back.
DIY demolition costs between $500 and $800 including dumpster rental, safety equipment, disposable supplies, and any tool rentals needed. Professional demolition services cost $1,000 to $2,000 depending on bathroom size, fixture count, tile extent, and regional labor rates. Testing for hazardous materials adds $50 to $200 for lead testing and $200 to $500 for asbestos lab analysis. Budget an additional 10 to 15% contingency for unexpected structural repairs discovered once walls and floors are opened up.
| Expense Category | DIY Cost Range | Professional Cost Range |
|---|---|---|
| Dumpster rental (10-15 yard, 7 days) | $300-$500 | $300-$500 (same cost) |
| Safety equipment (first-time purchase) | $100-$150 | $0 (included in pro rates) |
| Tool rental or purchase | $50-$150 | $0 (included in pro rates) |
| Hazardous material testing (if needed) | $50-$700 | $50-$700 (same cost) |
| Debris hauling labor | $0 (your time) | Included in service rate |
| Demolition labor | $0 (your time) | $700-$1,500 |
| Permits (if structural work included) | $50-$200 | $50-$200 (same cost) |
| Contingency buffer (10-15%) | $50-$120 | $100-$300 |
Common Demolition Mistakes to Avoid
Certain mistakes turn a straightforward one day demolition into a multi day disaster needing emergency repairs. Most are preventable with basic planning and following the proper sequence.
-
Starting demolition without completely shutting off water at fixture valves or main line, leading to flooding when accidentally cutting or pulling on supply lines
-
Forcing stuck or corroded water shutoff valves with too much torque, snapping valve stems and causing immediate uncontrolled water flow needing emergency main shutoff
-
Cutting into wall studs when removing drywall or cement board backing, weakening structural framing that supports upper floors or roof loads
-
Failing to protect finished floors in hallways and stairs from sharp tile pieces and heavy fixtures being carried out, causing permanent gouges and scratches
-
Not sealing HVAC vents and returns with plastic sheeting, letting fine dust circulate through ductwork and settle in every room of the house
-
Removing walls that contain structural supports without installing temporary bracing or consulting structural plans, causing settlement or collapse
-
Skipping required lead and asbestos testing in pre-1980 homes, exposing yourself and family to cancer causing carcinogens during demolition dust creation
-
Disposing of lead painted materials, asbestos tiles, or contaminated debris in standard construction dumpsters instead of certified hazardous waste facilities
-
Neglecting to cap and seal open drain pipes with rags after fixture removal, letting methane and hydrogen sulfide sewer gases enter living space
-
Starting tile demolition without adequate ventilation or respiratory protection, causing acute breathing problems from silica dust and mold spore inhalation
-
Underestimating debris volume and renting 10 yard dumpster for large bathroom with extensive tile, needing mid project dumpster swap and additional rental fees
-
Beginning demolition without clear renovation plans and measurements, removing fixtures or walls that should have stayed for new layout
Most demolition mistakes come from rushing through the prep phase to get to the “real work” of swinging hammers. The prep phase is the real work. Take the two hours to shut off utilities properly, seal vents, and protect floors. Those two hours prevent problems costing thousands in emergency repairs. Proper sequencing matters too. Following the checklist order maximizes safety and efficiency because each step builds on the previous one. Remove the easy stuff first, create working space, then tackle the heavy demolition with room to move around.
Post-Demolition Inspection and Preparation for Renovation
After demolition is complete and debris hauled away, you have a one time opportunity to inspect and repair problems that’ll be covered again during renovation. This inspection phase determines whether you proceed with simple cosmetic renovation or need to address serious underlying issues first.
Post demolition inspection checklist:
-
Check all wall studs for rot, water damage, insect damage, or improper spacing that doesn’t meet current 16 inch on center code requirements
-
Verify subfloor is structurally sound with no soft spots, delamination, water staining, or excessive deflection when walking across surface
-
Inspect all visible plumbing supply lines and drain pipes for corrosion, leaks, outdated materials like galvanized steel, or improper slope on drain lines
-
Examine electrical wiring for damaged insulation, insufficient wire gauge for current loads, backstabbed connections, or knob and tube wiring needing replacement
-
Look carefully for mold growth on wall studs, subfloor, insulation, or any surface that was previously covered, noting locations and extent
-
Assess insulation condition in exterior walls and verify adequate R-value coverage with no gaps, compression, or moisture damage
-
Check ventilation ductwork for proper installation, secure connections, adequate diameter, and rust or damage needing replacement
-
Verify proper 2×6 or 2×8 blocking installed horizontally between studs at grab bar heights (33 to 36 inches) for secure fixture mounting
-
Document all discovered issues with dated photos showing wide shots for location context and close-ups showing damage detail
-
Measure actual rough opening dimensions between studs and between floor and ceiling, comparing to new fixture specifications to verify fit
-
Test that all plumbing stubouts are properly capped with pressure rated caps, not just rags stuffed in pipes
-
Ensure adequate wood blocking exists at all planned locations for mounting vanity, medicine cabinet, towel bars, and toilet paper holders
Understanding Moisture Problems in Bathrooms covers inspection techniques for identifying moisture issues and ventilation inadequacies before renovation begins.
Addressing problems at this stage prevents expensive mid renovation surprises. You discover black mold on 40% of the wall studs? Remediation needs to happen before hanging new drywall. Finding galvanized supply pipes with pinhole leaks means replumbing before tiling. Rotten subfloor sections need replacement before installing cement board underlayment. This phase is also the ideal time for upgrades that are easy now but expensive later. Running new electrical circuits for heated floors, upgrading to PEX plumbing, adding sound insulation between walls, and installing proper moisture barriers are all simple with open walls but costly after everything’s closed up.
Have a contractor or building inspector review your findings if you discover significant problems or plan structural changes. A $200 consultation now prevents $5,000 mistakes during renovation. Take your inspection photos and measurements to the contractor meeting so you can get accurate estimates based on actual conditions, not assumptions. Don’t order new fixtures, tile, or materials until this inspection is complete and you know what repairs are needed. Otherwise you might order a 60 inch vanity only to discover you need to move plumbing 6 inches, making that vanity the wrong size.
Final Words
Tackling demolition the right way means working through your bathroom demolition checklist step by step, starting with utilities shut off and safety gear on.
Follow the sequence, protect your workspace, and don’t rush the floor inspection once everything’s out.
Most mistakes happen when people skip prep or force stuck valves, so take the time to do it clean. You’ll spot hidden problems now instead of halfway through your rebuild, and that saves money and frustration down the road.
FAQ
Q: What is the average cost to demo a bathroom?
A: The average cost to demo a bathroom ranges from $500 to $800 for DIY projects including dumpster rental and tools, or $1,000 to $2,000 for professional demolition services depending on bathroom size and fixture count.
Q: What order to demo a bathroom?
A: The proper order to demo a bathroom starts with shutting off utilities, then removing fixtures beginning with the vanity and sink, followed by the toilet, then tile and wall materials, and finally the bathtub or shower to progressively create working space.
Q: Is $10,000 enough for a bathroom remodel?
A: $10,000 is enough for a bathroom remodel when you complete DIY demolition first (saving $1,000-$2,000), leaving remaining budget for fixtures, materials, and professional installation of plumbing and electrical work where required.
Q: Can you redo a bathroom for $5,000?
A: You can redo a bathroom for $5,000 by handling demolition yourself, keeping existing plumbing and electrical locations, selecting mid-range fixtures, and completing finish work like tile installation and painting without hiring contractors for those tasks.
Q: How long does DIY bathroom demolition take?
A: DIY bathroom demolition takes one to two full days with a two-person team or two to three full days working solo, depending on bathroom size and fixture types being removed.
Q: Do I need a permit for bathroom demolition?
A: You typically don’t need a permit for bathroom demolition alone, but permits are usually required if the renovation includes moving plumbing fixtures, adding electrical circuits, or removing structural walls.
Q: What safety equipment is required for bathroom demolition?
A: Required safety equipment for bathroom demolition includes NIOSH-approved dust mask or respirator, safety goggles, heavy-duty work gloves, steel-toed boots, hard hat for overhead work, and knee pads for floor work.
Q: How do I shut off water before bathroom demo?
A: To shut off water before bathroom demo, turn individual fixture shutoff valves clockwise under sinks and behind toilets, or use a manifold key for newer systems, then open faucets and flush toilets to drain remaining water from lines.
Q: What tools are essential for bathroom demolition?
A: Essential tools for bathroom demolition include pry bar, reciprocating saw, hammer and chisel, adjustable wrench, utility knife, screwdrivers, crowbar, shop vac, and jigsaw for cutting tasks.
Q: How do I test for lead and asbestos before demolition?
A: Test for lead before demolition using $10 test kits like D-Lead or 3M LeadCheck on painted surfaces in homes built before 1978, and hire licensed professionals to test for asbestos in old tile and drywall.
Q: What size dumpster do I need for bathroom demolition?
A: A 10-15 yard dumpster is sufficient for most single bathroom demolition projects, handling 1-3 tons of debris from fixtures, tile, drywall, and other materials while meeting hauling regulations.
Q: How do I remove a toilet during bathroom demo?
A: To remove a toilet during bathroom demo, disconnect the water supply line, unbolt and remove the tank if two-piece, unscrew floor bolts, rock the toilet to break the wax seal, lift straight up, then scrape away old wax and stuff rags in the drain hole.
Q: Should I remove the bathtub or shower first?
A: You should remove the bathtub or shower last during demolition, after removing vanity, toilet, and tile, because it’s the largest fixture and removing other items first creates necessary working space around it.
Q: How do I protect my house during bathroom demolition?
A: Protect your house during bathroom demolition by sealing all vents with plastic sheeting and tape, hanging plastic barriers in doorways, and laying drop cloths from the bathroom to exterior exit for debris removal.
Q: What should I check after demolition is complete?
A: After demolition is complete, check wall studs for rot and damage, verify subfloor has no soft spots, inspect plumbing and electrical for problems, look for mold growth, and document all issues before reconstruction begins.