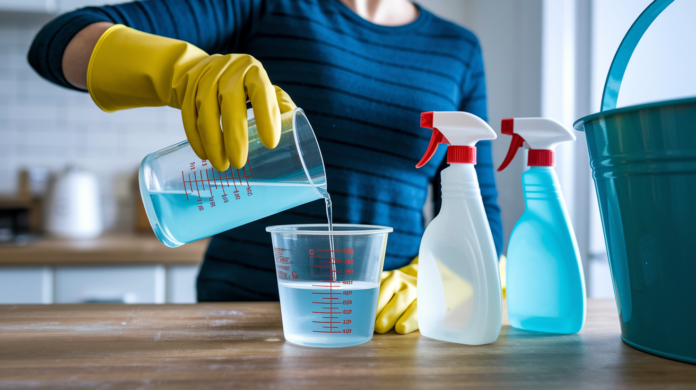

You might think cleaning up after a flood is about getting rid of mud and dirt. It’s not. It’s about stopping disease and mold before they take over your house. The water that floods your home carries sewage, bacteria, chemicals, and viruses that standard household cleaners won’t touch. Use the wrong product or skip the disinfection step, and you’re setting up hidden contamination that creates health problems for months. This guide shows you which EPA registered disinfectants actually work, exact dilution ratios that kill pathogens, and how to match cleaning products to contamination levels so the job stays done.
Recommended Cleaning Products with Dilution Ratios and Applications
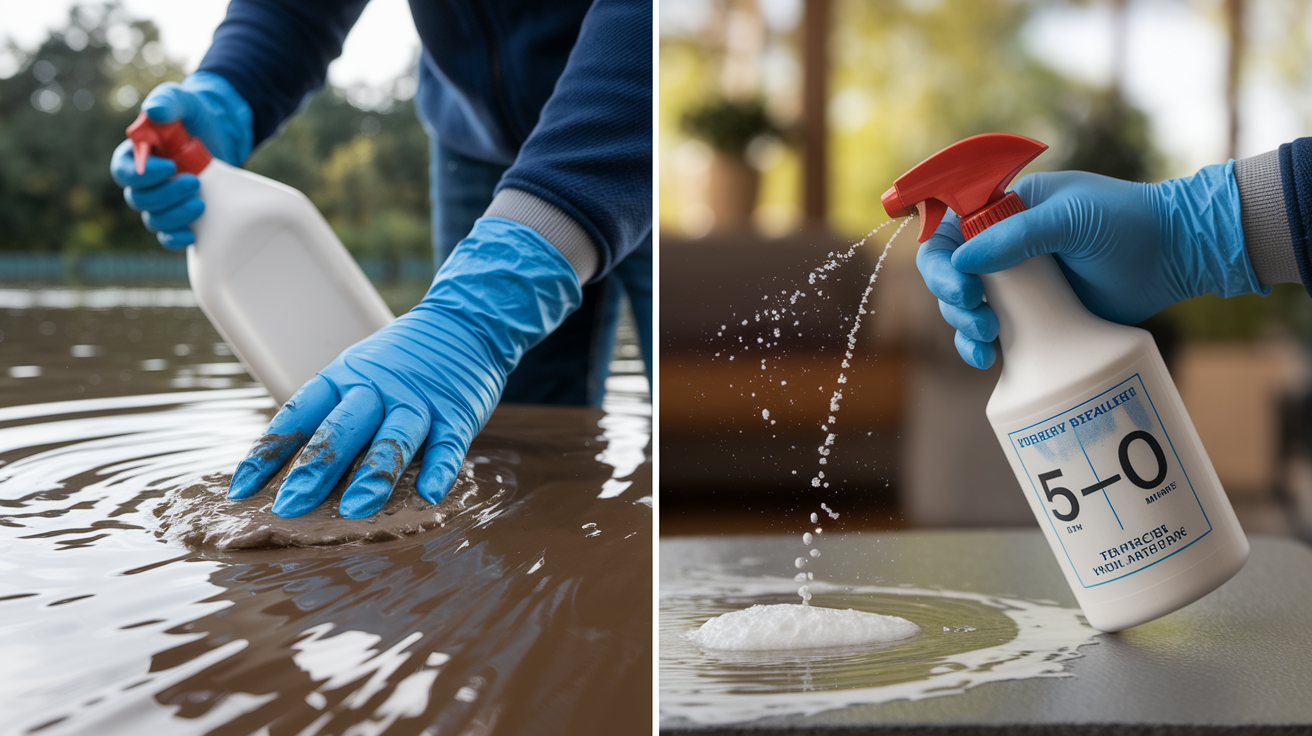
Flood cleanup works in two stages. Clean first with detergent to get rid of dirt and mud. Then disinfect to kill bacteria, viruses, and pathogens. You can’t mix these steps or skip the cleaning part. If you do, contamination stays behind and your disinfectant won’t work right. Dirt blocks contact between the disinfectant and whatever surface you’re trying to clean.
When you’re picking disinfectants, go with EPA registered products. That registration means the product’s been tested and actually works against specific pathogens you’d find in floodwater. Products without EPA registration might clean surfaces, but they won’t reliably kill the harmful organisms that cause illness or create smells that won’t go away.
Here’s what to use, with exact ratios:
Sodium hypochlorite (chlorine bleach) for hard surfaces: Mix ½ cup ultra chlorine bleach with 1 gallon of water. Apply it to contaminated floors, woodwork, tile, and concrete. Let it sit 5 to 10 minutes, then rinse with clean water. This is your go to disinfectant for most non porous surfaces.
Bleach solution for textiles: Use 1 part bleach to 10 parts water (about ¾ cup bleach per gallon) for washable fabrics that can handle chlorine. Check colorfastness first in a hidden spot.
Phosphate free detergents for initial cleaning: Products like Top Job, Ajax, or Spic n Span mixed according to package directions. These remove mud and organic matter before you disinfect. Phosphate free formulas don’t leave residue that messes with disinfectants.
Tri sodium phosphate (TSP) for mildew and heavy staining: Mix 4 to 6 tablespoons per gallon of water. Scrub mildewed surfaces with a stiff brush. TSP is an alkali cleaner that breaks down mildew growth and prepares surfaces for disinfection. Wear gloves because it’s caustic.
Quaternary ammonium compounds (quats): Commercial products like disinfectant sprays often contain quats. Follow manufacturer dilution instructions, typically 1 to 2 ounces per gallon. These work on surfaces where bleach isn’t safe and provide residual antimicrobial protection.
Pine oil disinfectants (Pine Sol and similar): Use for surfaces that can’t tolerate bleach, like certain finished woods or non colorfast materials. Mix according to label directions, usually ¼ cup per gallon. Pine oil kills bacteria and helps control odors.
Hydrogen peroxide cleaners (3% to 6% concentration): Available as spray on disinfectants or concentrate. These work on porous surfaces and around metals where bleach causes corrosion. Allow 10 minute contact time for pathogen kill.
Lysol brand disinfectants: EPA registered products containing quaternary ammonium or phenolic compounds. Use ready to use sprays on small areas or dilutable concentrates for large jobs. Check the EPA registration number on the label and follow dilution charts.
Washing soda solutions: Mix 4 to 6 tablespoons per gallon for scrubbing alkaline resistant surfaces. Similar to TSP but less caustic. Good for preparing surfaces and breaking down organic contamination.
All purpose laundry detergents for textiles: Products like Tide, Wisk, and Cheer work for moderately to heavily soiled salvageable fabrics. Use hot water if fabric allows, and run through two wash cycles for items exposed to floodwater.
Choose products based on contamination level. Clean water flooding (burst pipes, rain) requires standard disinfection with bleach or quaternary ammonium products. Category 3 water contamination, which is floodwater mixed with sewage or rising water carrying waste, demands EPA registered hospital grade disinfectants with broader pathogen kill claims. Standard household cleaners don’t provide adequate protection against the bacteria and viruses in sewage contaminated water.
Never use chlorine bleach on or near HVAC systems, metals, fine woods, or non colorfast surfaces. Bleach corrodes metal ductwork and fasteners, discolors wood with tannins, and permanently stains fabrics. Test any product on a hidden spot first if you’re unsure about material compatibility.
Safety Equipment Required During Flood Cleanup
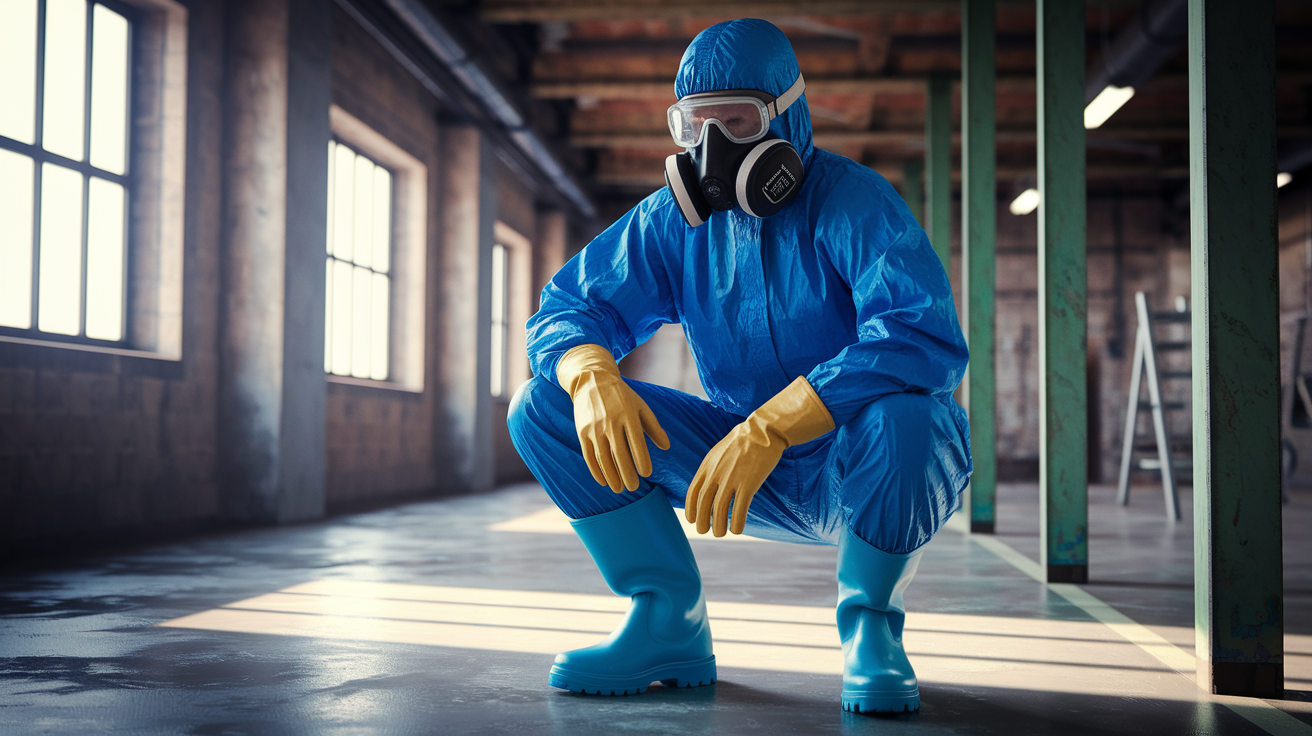
Contaminated floodwater carries bacteria, viruses, chemicals, and sewage. Cleaning products, especially disinfectants, create fumes and skin irritation. You need barrier protection before you start any cleanup work.
Wear this gear during all flood cleaning:
Waterproof rubber gloves: Not dishwashing gloves. Use heavy duty rubber or nitrile gloves that extend past your wrists. Floodwater soaks through thin gloves.
Rubber boots: Waterproof boots with good tread. Standing water hides sharp debris, nails, and broken glass. Leather work boots absorb contaminated water.
N95 respirator mask or better: Protects against mold spores, bacteria, and dust from dried contamination. Standard dust masks don’t seal properly. Upgrade to a half face respirator with P100 filters if you’re working in heavy mold or using strong chemicals in enclosed spaces.
Safety goggles: Not just safety glasses. You need full eye protection that seals around your eyes. Splashing disinfectants and dirty water cause serious eye injuries.
Protective clothing or coveralls: Long sleeves and pants minimum. Disposable Tyvek coveralls work better because you can throw them out when you’re done instead of trying to decontaminate work clothes.
Knee pads: You’ll spend hours scrubbing floors. Knee pads prevent injury and keep you off contaminated surfaces.
Upgrade to a full face respirator if you’re working with concentrated chemicals, in poorly ventilated basements, or around visible mold growth covering large areas. If you’re feeling dizzy, nauseous, or short of breath, stop work immediately, get fresh air, and call for help. Some contamination levels exceed safe DIY limits.
Never mix chlorine bleach with ammonia. The combination produces chloramine gas, which causes immediate breathing problems, chest pain, and fluid buildup in your lungs. Even small amounts in an enclosed space are dangerous. Read product labels before you use anything together because some all purpose cleaners contain ammonia even when it’s not obvious from the name.
Preparing Surfaces and Removing Contaminated Materials
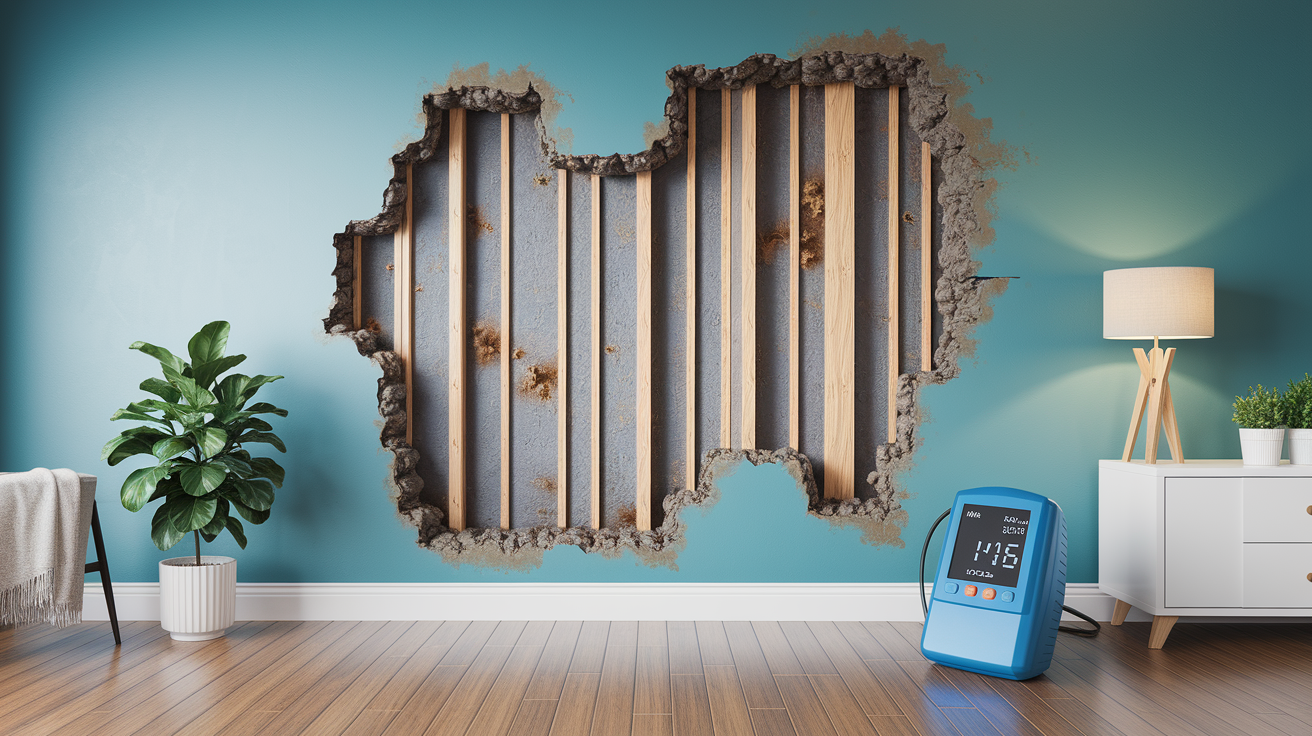
You have 24 to 48 hours to get materials surface dry before mold starts growing. That’s not enough time to clean everything, but it’s your window to prevent the damage from getting worse. Focus on water removal and contaminated material disposal before you start cleaning.
Pump standing water out in stages if you’re dealing with a flooded basement. Remove about one third of the water per day. Pumping it all out at once changes the pressure against your foundation walls too fast, which can cause cracking or structural movement. Exterior soil stays saturated and pushes inward while interior pressure suddenly drops.
These materials must be removed before you clean:
Soaked carpet and padding: Carpet exposed to floodwater is contaminated all the way through. Padding never dries properly and grows mold between the carpet and floor. Both have to go.
Wet insulation: Insulation absorbs water, gets contaminated, and prevents walls from drying. Fiberglass batts turn into soggy mats. Cellulose insulation stays damp for months. All wet insulation gets removed and discarded immediately.
Contaminated furniture: Upholstered furniture and mattresses soaked by floodwater are generally not salvageable. The padding inside never fully dries and becomes a mold reservoir.
Flood damaged clothing and textiles: Items that were submerged can sometimes be saved with proper laundering, but anything with sewage contact or heavy contamination should be discarded.
Drywall up to 1.5 feet above the water line: Water wicks up through drywall in a process called capillary action. The high water mark isn’t where the damage stops. Cut and remove drywall to at least 18 inches above where the water reached to account for absorbed moisture that traveled upward.
Saturated baseboard and trim: Wood trim that stayed wet swells, delaminates, and holds moisture against wall framing.
Porous items exposed to sewage: Anything porous that contacted category 3 water (sewage contaminated) should be tagged and removed according to local health department requirements.
Document everything you remove with photos and a written list before it goes to the curb. Insurance claims require proof of what was damaged. Take pictures showing the item in place, close ups of the damage, and photos as you load it for disposal.
Mold Prevention and Antimicrobial Treatment Products
Mold spores are everywhere, all the time. They only become a problem when they land on a wet surface and start growing. That process starts within 24 to 48 hours after flooding. Once mold establishes itself, it spreads fast, releases more spores, and creates health problems plus persistent musty odors.
Standard disinfectants like bleach kill mold on non porous surfaces, but they don’t penetrate deep into porous materials like wood framing and drywall. Antimicrobial products designed for flood remediation provide longer lasting protection and work on materials that can’t be fully cleaned with surface disinfectants.
Apply these mold prevention products after initial cleaning and disinfection:
EPA registered fungicides: Look for products specifically labeled for mold prevention after water damage. These contain active ingredients that prevent new growth for weeks or months after application. Apply according to label directions, typically as a spray or fog.
Antimicrobial coatings for porous surfaces: These penetrate into wood, bare drywall, and concrete to prevent mold growth while the material continues drying. Apply after disinfection but before sealing or repainting.
Borax solutions: Mix ½ cup borax powder per gallon of water. Scrub into wood framing and subfloors. Borax leaves an alkaline residue that inhibits mold growth. It’s less aggressive than commercial fungicides but provides good protection for structural lumber.
Commercial mold inhibitors: Products like Microban or Concrobium are designed to coat surfaces and prevent fungal growth. They work by creating an unfriendly environment for mold spores trying to germinate.
Encapsulant sealers: After surfaces are completely dry and treated, encapsulants seal in any remaining contamination and provide a moisture barrier. These are specialty primers used before repainting or refinishing.
Temperature maintenance at 50°F minimum: Not a product, but a critical requirement. Mold growth slows significantly in cold conditions, but wood and building materials develop other moisture problems below 50 degrees Fahrenheit. Use portable heaters to maintain this minimum temperature while materials dry.
Keep monitoring moisture levels with a moisture meter even after surfaces feel dry to the touch. Mold grows in places you can’t see, inside wall cavities, under flooring, and in structural spaces. If you’re detecting musty odors after thorough cleaning and drying, you have hidden mold that requires professional remediation with specialized antimicrobial fogs and vapor treatments.
Cleaning Products for Sewage Contaminated Flood Water

Category 3 water means the floodwater contains sewage, rising water that mixed with waste systems, or water contaminated with biological hazards. This isn’t the same as a burst water pipe. Sewage contaminated water carries bacteria like E. coli and Salmonella, viruses including hepatitis, and parasites that cause serious illness.
Standard household cleaners and regular strength bleach solutions don’t provide adequate protection against these pathogens. You need EPA registered hospital grade disinfectants with specific kill claims for the organisms found in sewage.
Use these products for sewage contaminated flooding:
EPA registered disinfectants labeled for sewage: Check the product label for EPA registration numbers and specific pathogen kill claims. Look for statements about effectiveness against enteric bacteria, viruses, and parasites. Commercial products like Vital Oxide or Sporocidin meet these requirements.
Quaternary ammonium compounds at commercial strength: Consumer level quat products are too dilute for sewage contamination. Use commercial formulations at the higher concentration ranges specified on the label for hospital grade disinfection.
Sodium hypochlorite solutions at higher concentrations: For sewage contamination, increase bleach solutions to ¾ cup per gallon of water (about a 1:20 dilution). Allow 10 to 15 minutes of contact time instead of the standard 5 to 10 minutes.
Phenolic disinfectants: These contain phenol compounds effective against a broad range of pathogens including viruses. They’re common in hospital settings and work on surfaces where bleach isn’t compatible.
Specialized biocide treatments: Professional remediation companies use EPA registered biocides specifically formulated for category 3 water cleanup. Products like Sporicidin or Benefect contain multiple active ingredients for broader pathogen coverage.
Items contaminated with sewage water often can’t be salvaged. Local health departments require tagging and proper disposal of sewage exposed materials. Contact your local health department or state environmental agency before disposing of large amounts of contaminated materials because some jurisdictions have special handling requirements for sewage contaminated debris.
Porous materials like drywall, insulation, carpet, and upholstered furniture that contacted sewage almost always need disposal rather than cleaning. The contamination penetrates too deep for surface disinfection to work reliably.
Drying Equipment and Moisture Control Products

Disinfectants only work on dry or actively drying surfaces. If materials stay wet, contamination returns, mold starts growing despite your cleaning, and odors come back. Drying equipment isn’t optional. It’s part of the cleaning process.
Use this equipment alongside your cleaning products:
Commercial grade dehumidifiers: Household dehumidifiers can’t keep up with flood level moisture. Rent commercial units rated for 50 pints per day or more. Run them continuously until moisture readings normalize.
Wet/dry vacuums for extraction: Use these to pull standing water from floors, extract water from carpet before disposal, and vacuum up dirty cleaning solution. Don’t use regular vacuums because they’re not built for wet work and create electrical hazards.
Air movers and fans: Position high velocity fans to create airflow across all wet surfaces. Place them at angles that push air up walls and across floors. You need continuous air movement, not just occasional ventilation.
Moisture meters for monitoring: Pin type and pinless moisture meters tell you what’s actually happening inside materials. Wood should read below 15% moisture content before you seal it. Drywall and concrete have different target ranges. Don’t guess. Test.
HEPA air scrubbers: These filter airborne mold spores and particles while everything is drying. They’re especially important if you’re living in the space during cleanup or if anyone has respiratory issues.
Desiccants and absorbent materials: Calcium chloride products and silica gel desiccants help pull moisture from enclosed spaces where airflow is limited. Use them inside cabinets, closets, and storage spaces.
Heating equipment maintaining 50°F minimum: Portable electric heaters or construction heaters keep air temperatures above 50 degrees Fahrenheit. Warm air holds more moisture and speeds evaporation. Temperature below 50 degrees slows drying to the point where you’re losing the race against mold.
Position air movers to create a circular airflow pattern. Place one fan pointing at the wet wall, another pointing away from the wall to move saturated air out, and use the dehumidifier to pull moisture from the air before it recirculates. Change the direction every day to prevent air pockets where moisture accumulates.
Total drying time takes weeks to months depending on your building materials and construction type. Concrete dries much slower than wood frame construction. Solid masonry walls can take three months to fully dry. Use moisture meters every few days to verify progress. When readings stop dropping, you’re close to done. Wait until readings are consistently in the safe range for at least a week before sealing surfaces or starting any reconstruction.
Odor Elimination Products for Post Flood Restoration
You’ve cleaned, disinfected, and dried everything, but the smell won’t go away. That happens because flood odors aren’t just surface dirt. They’re bacterial breakdown, absorbed organic contamination, and volatile compounds trapped in porous materials.
Disinfecting removes most odors by killing the bacteria creating them, but stubborn smells need specialized products that break down or neutralize odor molecules rather than just masking them.
Enzymatic cleaners contain live bacteria and enzymes that digest organic matter. Spray them on concrete, wood subfloors, and other porous surfaces where contamination soaked in. The bacteria literally eat the source of the odor, breaking down urine, feces, decomposed organic matter, and other compounds that create persistent smells. Follow label directions for application because most need to stay wet on the surface for several hours to work properly.
Use these odor elimination products when disinfection alone isn’t enough:
Enzymatic odor neutralizers: Products like Nature’s Miracle or Bio Clean contain bacterial cultures that digest odor causing organic compounds. Apply to concrete floors, wood framing, and anywhere contamination penetrated below the surface. Reapply every 24 hours until the odor stops.
Activated charcoal products: Place buckets or bags of activated charcoal in affected areas. The porous carbon structure traps odor molecules from the air. Replace every week until odors are gone. This works for enclosed spaces like closets and cabinets.
Commercial odor encapsulants: These spray on products seal odor molecules into surfaces. Use them as a final step after cleaning and drying, but only if you’ve addressed the moisture source. Encapsulants trap smells but don’t solve underlying contamination problems.
Hydroxyl generators: These machines produce hydroxyl radicals that break down odor molecules and VOCs (volatile organic compounds) at a molecular level. Unlike ozone, you can run hydroxyl generators in occupied spaces. Rent them from restoration supply companies for 24 to 48 hour treatments.
Ozone treatment: Ozone generators produce O3 gas that destroys odor molecules. This works, but requires complete evacuation of people, pets, and plants. Ozone is toxic to breathe and corrodes rubber, electronics, and some materials. Use this only as a last resort when other methods fail.
Professional thermal fogging or ozone generation makes sense when you’re dealing with severe sewage contamination odors or large scale flooding where odors have penetrated throughout the structure. Thermal foggers atomize deodorizers into particles small enough to penetrate the same places where odor molecules hide. Expect to pay $500 to $1,500 for professional odor treatment depending on square footage and severity.
DIY approaches with enzymatic cleaners and activated charcoal work fine for most situations. If you’ve cleaned properly and given everything enough drying time, odors usually resolve within two to four weeks without expensive professional treatments.
Chemical Safety and Proper Product Disposal
The most dangerous chemical accidents during flood cleanup happen when someone mixes products together thinking it will work better or faster. It won’t. Mixing creates toxic gases, reduces cleaning effectiveness, or causes chemical burns.
| Product 1 | Product 2 | Dangerous Result |
|---|---|---|
| Chlorine bleach | Ammonia | Toxic chloramine gas causes immediate breathing problems, chest pain, fluid in lungs |
| Chlorine bleach | Acids (vinegar, toilet bowl cleaners) | Chlorine gas release causes severe respiratory damage, can be fatal in confined spaces |
| Hydrogen peroxide | Vinegar | Creates corrosive peracetic acid that causes burns to skin and eyes |
| Different disinfectants mixed together | Any combination | Reduced effectiveness, potential for toxic fumes, unpredictable chemical reactions |
Ventilation matters with every disinfectant you use. Open windows, run fans pointing outward, and work in sections so you’re not breathing concentrated fumes. If you’re working in a basement or enclosed area, wear a respirator. Air movement alone isn’t enough protection in tight spaces with poor natural ventilation.
Dispose of unused cleaning products properly. Never pour concentrated disinfectants or bleach directly down the drain in large quantities. Small amounts of diluted solution from cleaning are fine, but full bottles or buckets of unused product need hazardous waste disposal. Contact your local solid waste authority to find household hazardous waste collection days or drop off facilities.
Contaminated rags, sponges, and mop heads should be bagged and thrown away with flood debris. Don’t try to wash and reuse cleaning materials that touched sewage contaminated water. The contamination risk isn’t worth saving a few dollars on cleaning supplies. Bag them in plastic and dispose with regular trash unless your local health department specifies different handling requirements.
For disposal guidance specific to your area, contact your state environmental agency or local health department. EPA regional offices also provide information about disaster debris removal and hazardous material handling during flood cleanup. Rules vary by location, especially for sewage contaminated materials and chemical products.
Professional Grade vs. Consumer Cleaning Products

Professional water damage restoration products contain higher concentrations of active ingredients and carry broader EPA registration for pathogen kill. Consumer products work fine for small scale cleanup, but large flooding, sewage contamination, or structural damage requires different chemistry.
The main difference is concentration. A consumer bleach disinfectant might contain 3% to 5% sodium hypochlorite. Professional formulations run 6% to 12.5%, which means less product needed, faster contact times, and better penetration into contaminated materials. Higher concentration also means more careful handling and better ventilation.
These situations require professional intervention and products beyond consumer grade supplies:
Extensive sewage contamination: Category 3 water covering more than a single bathroom needs professional treatment with hospital grade disinfectants and specialized equipment.
Structural damage: When flooding affects floor joists, wall framing, or foundation components, professional assessment prevents hidden problems that show up months later as rot or continued moisture issues.
Large scale flooding (over 1000 square feet): Cleaning a whole house or large basement exceeds practical DIY scope. The time and product volume needed makes professional service more cost effective.
Contamination in HVAC systems: If ductwork or HVAC components got wet, professional duct cleaning and antimicrobial treatment are necessary. DIY approaches can’t reach deep into duct runs or properly disinfect air handlers.
Professional grade product advantages:
Higher active ingredient concentrations: Faster kill times and better efficacy against resistant pathogens.
Broader EPA pathogen kill claims: Professional products are tested and registered for specific bacteria, viruses, and fungi common in flood damage.
Commercial equipment compatibility: Professional disinfectants work with foggers, sprayers, and injection systems for treating wall cavities and inaccessible spaces.
Bulk pricing for large areas: Buying professional products in 5 gallon pails or larger cuts per square foot cost significantly when you’re treating thousands of square feet.
IICRC compliant formulations: Products meet Institute of Inspection Cleaning and Restoration Certification standards for water damage restoration.
Faster contact times: Professional disinfectants often require 5 minutes or less of contact time versus 10 to 15 minutes for consumer products.
DIY cleanup with consumer products makes sense when flooding is limited, water is clean (category 1), you’re dealing with under 500 square feet, and you have time to work methodically. Save receipts and buy cleaners and disinfectants in the largest available sizes because you’ll use more than you expect, and bulk pricing cuts costs substantially.
The cost benefit calculation changes when you factor in time away from work, the risk of incomplete drying leading to mold, and potential long term structural problems from inadequate treatment. Professional remediation costs $3 to $7 per square foot on average but includes industrial dehumidification, antimicrobial treatment of hidden spaces, and moisture monitoring that prevents problems from recurring.
If you’re planning to remodel after cleanup, wait at least 6 months. Moisture levels in framing, concrete, and hidden spaces stay elevated for months after visible surfaces feel dry. Closing up walls or installing new flooring before materials reach equilibrium moisture content traps moisture and creates perfect conditions for hidden mold growth.
Cleanup Timeline and Surface Specific Application Sequence

Timing and sequence determine whether your cleanup actually works or whether you’re just moving contamination around. Flooding happens fast, but effective cleanup requires methodical steps in the right order.
Here’s the chronological sequence with product applications matched to each phase:
Hour 0 to 24: Document and extract. Before touching anything, photograph all damage from multiple angles for insurance. Take close ups of water lines on walls, damaged items, and visible contamination. Extract standing water using pumps or wet vacuums. If you’re pumping a basement, remove one third of the water per day maximum to prevent structural damage from sudden pressure changes. Remove all items that got wet. Furniture, carpet, clothing, rugs. Take them outside. Don’t wait on this. Wet items prevent everything else from drying.
Hour 24 to 48: Rinse and initial scrubbing. Hose down walls and floors before mud and silt dry and harden. Use plain water first, working from top to bottom on walls. Rinse walls several times until runoff is mostly clear. Now apply phosphate free detergent cleaning, working bottom to top. Mix detergent according to package directions. Products like Top Job, Ajax, or Spic n Span at normal cleaning strength. Scrub all hard surfaces with stiff brushes to remove organic matter and loose contamination. This step removes the dirt that blocks disinfectants from reaching contaminated surfaces. For salvageable textiles and clothing, start washing in hot water with all purpose detergents like Tide, Wisk, or Cheer. Run moderately to heavily soiled items through two complete wash cycles.
Hour 48 to 72: Surface specific disinfection. After surfaces are clean, apply disinfectants matched to each material type. Mix bleach solution at ½ cup per gallon of water. Apply to tile, concrete, vinyl flooring, and painted surfaces. Let it sit 5 to 10 minutes. Set a timer because cutting contact time short leaves pathogens alive. For wood floors and trim, test bleach solution in a hidden area first. Bleach can lighten or discolor certain woods with tannins. If wood shows discoloration, switch to pine oil disinfectant (Pine Sol) or quaternary ammonium products mixed according to label directions. Apply disinfectants to walls starting at the bottom and working upward, covering the cleaned surface completely. Don’t skip areas. Partial disinfection leaves contaminated spots that smell and support bacterial growth.
Hour 72 to Day 7: Rinse, ventilate, and antimicrobial treatment. After disinfectant contact time, rinse all surfaces with clean water, working top to bottom this time so dirty rinse water flows down onto areas you haven’t rinsed yet. Run dehumidifiers and air movers continuously. Check moisture readings daily with a moisture meter. Different materials dry at different rates. Concrete holds moisture much longer than drywall, and hardwood flooring can take weeks to release absorbed water. Once surfaces are surface dry to the touch but before they’re completely dry inside, apply antimicrobial treatments to porous surfaces like wood framing and concrete where you removed drywall. These products need slightly damp conditions to penetrate properly and prevent mold growth during the long drying process.
Week 2 and beyond: Odor treatment and drying verification. If odors persist after disinfection, apply enzymatic odor eliminators to concrete and wood surfaces where contamination soaked in. Monitor with moisture meters every few days. You’re looking for readings below 15% in wood and readings that have stopped dropping in concrete. When readings stay stable in the safe range for a week, drying is complete. Only then can you seal surfaces, apply encapsulants, or start reconstruction.
The bottom to top cleaning approach prevents clean areas from getting recontaminated by dirty water running down from above. The top to bottom rinsing approach prevents you from rinsing clean water over areas you haven’t disinfected yet. The sequence matters.
Scrub floors and woodwork within 48 hours of flooding to prevent mildew from establishing. Once mildew forms, you’re not just cleaning contamination. You’re fighting active growth that spreads while you work. Hit it early with detergent scrubbing and stiff brushes before it gets a foothold.
Adjust this timeline based on flooding severity and contamination type. Clean water flooding from burst pipes can move faster through the sequence. Category 3 sewage contamination needs longer contact times, stronger disinfectants, and more thorough rinse steps. Cold weather slows everything down. Drying times double when outdoor temperatures are below 40 degrees Fahrenheit.
Basement Flooding Specific Cleaning Product Needs
Basements present unique challenges. Poor ventilation, porous concrete that absorbs contamination deep, hydrostatic pressure forcing water through foundation walls, and below grade moisture problems that continue after you’ve cleaned.
Concrete and masonry are alkaline, which means acid based cleaners damage them and neutralize disinfectants. You need pH compatible products and treatments that address how water moves through and sits in concrete.
Pump basement water in stages. One third of the total volume per day. Fast pumping creates a pressure differential between saturated soil outside and empty space inside. That pressure can crack foundation walls or cause them to bow inward. Slow, staged removal gives exterior soil time to drain and pressure to equalize.
After water removal and initial rinsing, use these basement specific products:
Masonry cleaners: Products formulated for concrete and block remove efflorescence (white mineral deposits), oil stains, and organic matter without damaging alkaline surfaces. Look for phosphate free alkaline cleaners or products specifically labeled for concrete.
Concrete sealers with antimicrobial properties: After concrete is completely dry (verified with a moisture meter), apply penetrating sealers that contain antimicrobial additives. These help prevent mold growth and reduce future moisture absorption. Products like RadonSeal or similar penetrating sealers work better than surface coatings.
Efflorescence removers: White crusty deposits on concrete walls are mineral salts deposited by evaporating water. Acidic efflorescence removers dissolve these deposits, but you must rinse thoroughly afterward so acid residue doesn’t interfere with sealers or antimicrobials.
Penetrating concrete disinfectants: Standard bleach solutions disinfect concrete surfaces but don’t penetrate deep. Use products designed to soak into concrete porosity and kill bacteria in the substrate, not just on the surface. Apply after cleaning and before sealing.
Vapor barrier treatments: Once concrete is dry and sealed, consider vapor barrier paints or coatings on foundation walls. These reduce ongoing moisture transmission from exterior soil into the basement. Use them only after moisture readings confirm the concrete has dried. Trapping moisture creates worse problems than you started with.
Continue hosing down walls and floors before they completely dry. Wet cleaning removes contamination more effectively than trying to scrub dried mud and silt. Rinse walls multiple times, then clean and disinfect working from bottom to top. Gravity pulls cleaning solution and contamination downward, so starting at the bottom prevents recontamination as you work upward.
Long term moisture control is critical in basements. Even after cleanup, high humidity returns without ongoing dehumidification. Run a commercial dehumidifier continuously until humidity drops below 50%. That might take months. Waterproofing paints help but don’t solve hydrostatic pressure or poor exterior drainage. If water returns every time it rains, exterior waterproofing is needed, not just better cleaning products.
Final Words
Knowing what cleaning products to use after a flood comes down to matching the right chemical to the contamination level and surface type.
Clean with detergent first, disinfect second, and always check dilution ratios before you start. Bleach at ½ cup per gallon handles most hard surfaces, but have alternatives ready for metals, wood, and HVAC areas where bleach doesn’t belong.
Document everything, dispose of porous materials fast, and don’t skip the drying phase. Get moisture meters involved if you’re serious about preventing callbacks.
Done right, you’ll stop mold before it starts and avoid redoing the same work in six months.
FAQ
What is the best cleaner to use after a flood?
The best cleaner to use after a flood is a two-stage approach: start with phosphate-free detergent solutions like Top Job, Ajax, or Spic-n-Span to remove dirt and mud, then follow with an EPA-registered disinfectant such as a bleach solution (½ cup per gallon of water) or quaternary ammonium-based cleaner. This clean-first-then-disinfect method removes contaminants before killing bacteria and viruses on hard surfaces.
How to clean your house after flooding?
To clean your house after flooding, first remove all wet materials like carpet and insulation within 24-48 hours, then hose down walls and floors before they dry. Next, scrub surfaces with phosphate-free detergent starting from the bottom and working upward, rinse thoroughly from top to bottom, and finally apply disinfectant with a 5-10 minute contact time before a final rinse.
What to spray on walls after a flood?
To spray on walls after a flood, use a bleach solution mixed at ½ cup ultra chlorine bleach per 1 gallon of water for disinfection, or use pine oil disinfectants like Pine Sol on surfaces that cannot tolerate chlorine bleach. Apply the solution, allow 5-10 minutes of contact time, then rinse with clean water to remove residue and prevent surface damage.
How quickly does mold grow after a flood?
Mold grows within 24 to 48 hours after a flood if materials remain wet, which is why surface drying with heat and air circulation during this window is critical for prevention. Use dehumidifiers, air movers, and maintain room temperature at minimum 50°F to facilitate drying and stop mold before it establishes on wood, drywall, and other building materials.
Should I use bleach or ammonia after a flood?
You should use bleach after a flood, never ammonia, and absolutely never mix the two because the combination creates toxic chloramine gas. Bleach solution (½ cup per gallon) is effective for disinfecting flood-contaminated hard surfaces, while ammonia-based cleaners can be used separately during the initial dirt-removal stage before disinfection.
What cleaning products work on sewage-contaminated flood water?
Cleaning products that work on sewage-contaminated flood water include EPA-registered hospital-grade disinfectants, quaternary ammonium compounds at commercial strength, and sodium hypochlorite solutions specifically labeled for sewage or category 3 water. Standard household cleaners are insufficient for biological hazards present in sewage backup, so only use products with EPA pathogen kill claims for viral and bacterial contamination.
Do I need special safety equipment for flood cleanup?
You need special safety equipment for flood cleanup including waterproof rubber gloves, rubber boots, N95 or better respirator masks, and safety goggles to protect against contaminated water and chemical exposure. Add protective coveralls when dealing with sewage contamination, and never enter flood-damaged buildings before shutting off gas and electricity to prevent shock and explosion hazards.
How long does it take to dry a house after flooding?
Drying a house after flooding takes weeks to months depending on building materials and construction type, even with dehumidifiers and continuous heated air circulation. Use moisture meters to verify when walls and floors are dry enough to re-insulate and close up, and wait at least 6 months before beginning remodeling due to elevated humidity levels in structural materials.
What surfaces should never be cleaned with bleach after a flood?
Surfaces that should never be cleaned with bleach after a flood include HVAC systems, metals, fine woods, and non-colorfast materials because bleach causes corrosion, discoloration, and equipment damage. Use alternative disinfectants like pine oil cleaners or quaternary ammonium products on these surfaces, following manufacturer’s instructions for proper dilution and contact time.
When should I call a professional instead of DIY flood cleanup?
You should call a professional instead of DIY flood cleanup when dealing with extensive sewage contamination, structural damage, large-scale flooding over 1000 square feet, or contamination in HVAC systems. Professional remediation uses higher-concentration EPA-registered products, IICRC-compliant methods, and commercial equipment that prevent costly long-term damage from incomplete drying or inadequate disinfection.
How do I remove flood odors after cleaning and disinfecting?
To remove flood odors after cleaning and disinfecting, use enzymatic cleaners that break down organic matter on porous surfaces, or apply commercial odor encapsulants and activated charcoal products. For persistent odors, professional thermal fogging or ozone generation may be necessary, though ozone treatment requires complete property evacuation during application and proper ventilation afterward.
What’s the difference between cleaning and disinfecting after a flood?
The difference between cleaning and disinfecting after a flood is that cleaning removes visible dirt and mud with detergent solutions, while disinfecting kills bacteria, viruses, and pathogens with EPA-registered products. Always clean first with phosphate-free detergents to remove contamination, then disinfect with bleach solutions or quaternary ammonium compounds to eliminate health hazards on cleaned surfaces.