

Sealing basement walls from the inside feels backwards, like mopping up water while the faucet’s still running. But here’s what most contractors won’t say up front: interior waterproofing actually works for the majority of basement moisture problems, costs a fraction of exterior excavation, and you can start this weekend without destroying your landscaping. The catch is knowing which moisture issues you can fix from inside and which ones need a different approach entirely.
How to Apply Waterproof Paint to Basement Walls
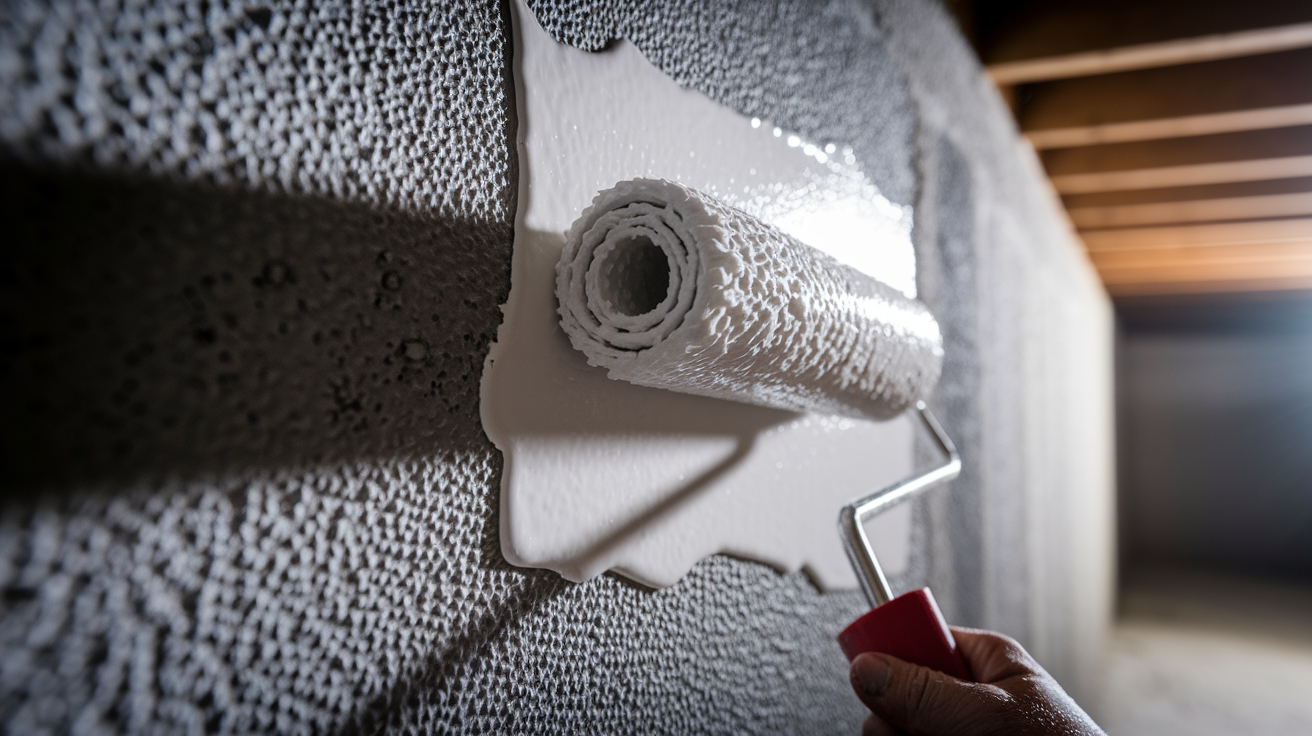
Waterproof paint is your most accessible starting point when you’re dealing with minor to moderate basement moisture that isn’t coming from serious hydrostatic pressure.
You’ve got three main types to pick from. Masonry sealer creates a water resistant film right on top of the concrete. Penetrating sealer soaks down into the concrete pores and blocks water from the inside through a chemical reaction. Cementitious coating is thick, cement based, and fills small surface imperfections while creating a rigid waterproof layer. For most basement walls with minor dampness, something like DRYLOK Extreme gets the job done without needing specialty skills.
Expect 75 to 100 square feet per gallon, and you’re doing at least two coats. Measure your wall height and perimeter to get total square footage, then double it since you’re applying twice. A basement with 200 square feet of wall needs 400 square feet of coverage. That’s four to six gallons depending on how porous your walls are. Rough or heavily textured concrete drinks up more product and pushes you closer to 75 square feet per gallon.
Work the first coat into every pore and irregularity using a three quarter inch nap roller or nylon bristle brush. Don’t skim the surface. You’re forcing the coating into the concrete, not painting over it. Push hard with the roller and use overlapping vertical strokes so you’re not leaving thin spots. Corners, mortar joints, anywhere the wall meets the floor—these spots need extra attention because they leak first if you skip coverage.
Wait two to three hours minimum between coats. Make sure temperature stays above 50 degrees the whole time. Cold slows curing and weakens the bond. Apply the second coat in the opposite direction from the first. If you rolled vertically the first time, go horizontal on the second pass. This crosshatch approach catches what you missed and builds up a thicker, more reliable moisture barrier.
After everything dries completely, inspect under good lighting for pinholes or thin spots where concrete shows through. Those become leak points. Stir up your leftover product and spot treat anything that looks questionable with a brush.
Complete Application Process:
- Ensure walls are completely clean, dry, and grease free
- Stir waterproof paint thoroughly without thinning
- Verify temperature is at least 50°F
- Apply first coat with ¾ inch nap roller or nylon brush
- Work coating into all pores, cracks, and surface irregularities
- Allow 2 to 3 hours drying time minimum
- Apply second coat in opposite direction from first coat
- Inspect for pinholes after complete drying and spot treat as needed
Recognizing Signs Your Basement Walls Need Waterproofing

Catching moisture problems early prevents expensive structural repairs and keeps mold from spreading into your HVAC system and living spaces.
Start with what you can see. Water stains show up as dark patches or discoloration, usually along the base of the wall or around cracks. Efflorescence looks like white chalky deposits or crusty salt formations on the concrete surface. It forms when water moves through the wall and leaves minerals behind as it evaporates. Peeling paint or wallpaper means moisture is pushing through from behind and breaking the bond. If you see any of these, you’ve got active water movement even without puddles.
Then check what you can feel and smell. Run your hand along the wall. If it feels cold and clammy instead of dry and cool, moisture is present. A musty odor that won’t go away even with ventilation means mold is growing somewhere, often behind finished walls or inside wall cavities. Concrete that flakes when you scrape it or wood that feels soft and spongy indicates long term water exposure that’s breaking down the material. For help identifying mold in basements, check for visible growth that looks like black, green, or white patches spreading across surfaces.
10 Warning Signs Your Basement Needs Waterproofing:
- Visible water pooling on basement floor
- Water trickling or seeping down walls
- Damp feeling when touching walls
- White salt deposits (efflorescence) on concrete
- Mold or mildew growth visible on surfaces
- Persistent musty odor
- Peeling paint or wallpaper
- Deteriorating carpet or flooring
- Concrete surface flaking or crumbling
- Rust on metal fixtures or appliances
Preparing Basement Walls for Waterproofing Treatment

Preparation determines whether your waterproofing lasts two years or twenty years.
Remove all standing water first so you can see where it’s actually coming from. Use a wet vac or pump if needed, then let the space dry completely. This might take several days if the concrete is saturated. Run a dehumidifier to pull moisture out of the air and speed up drying. You need bone dry walls before you seal anything, or you’re just trapping water inside.
Efflorescence is that white powdery or crusty buildup that shows up on concrete when water evaporates and leaves salt deposits behind. It has to come off or the waterproofing won’t stick. Use a product like DRYLOK Etch instead of muriatic acid. It’s safer because it doesn’t activate until you mix it with water, and you’re not dealing with dangerous fumes in a confined basement space. Scrub the affected areas with the etch solution, rinse thoroughly, and let everything dry again.
Wire brush the entire surface to knock off loose paint, dirt, broken concrete, and any deteriorating material. You’re looking for solid concrete that’s not flaking or crumbling. If chunks come off easily, keep brushing until you hit sound material. Pressure washing works for stubborn dirt and grime, but then you’re back to waiting for walls to dry completely before moving forward.
Mold and mildew need to be killed and removed before you waterproof, not sealed under a coating where they keep growing. Use a mold killing cleaner, scrub affected areas, rinse, and dry thoroughly.
Cracks are leak highways. Even small ones will compromise your waterproofing. Active leaks where water is currently seeping through need hydraulic cement that sets up in three to five minutes even underwater. Mix it, pack it into the crack, and hold it in place while it hardens. Dormant cracks that aren’t currently leaking get filled with acrylic crack filler fortified with silicone. It stays flexible, dries to match concrete color, and cleans up with soap and water before it sets.
Complete Preparation Process:
- Remove all standing water and locate leak sources
- Allow walls to dry completely (use dehumidifier if needed, may take several days)
- Identify and remove efflorescence with appropriate cleaning solution
- Wire brush loose paint, dirt, broken masonry, and deteriorating concrete
- Pressure wash or scrub walls thoroughly and allow to dry
- Remove any mold or mildew growth with appropriate cleaners
- Identify all cracks and holes requiring repair
- Fill cracks with hydraulic cement (active leaks) or acrylic crack filler (dormant cracks) and allow to cure fully
Installing Interior Drainage Systems for Basement Waterproofing
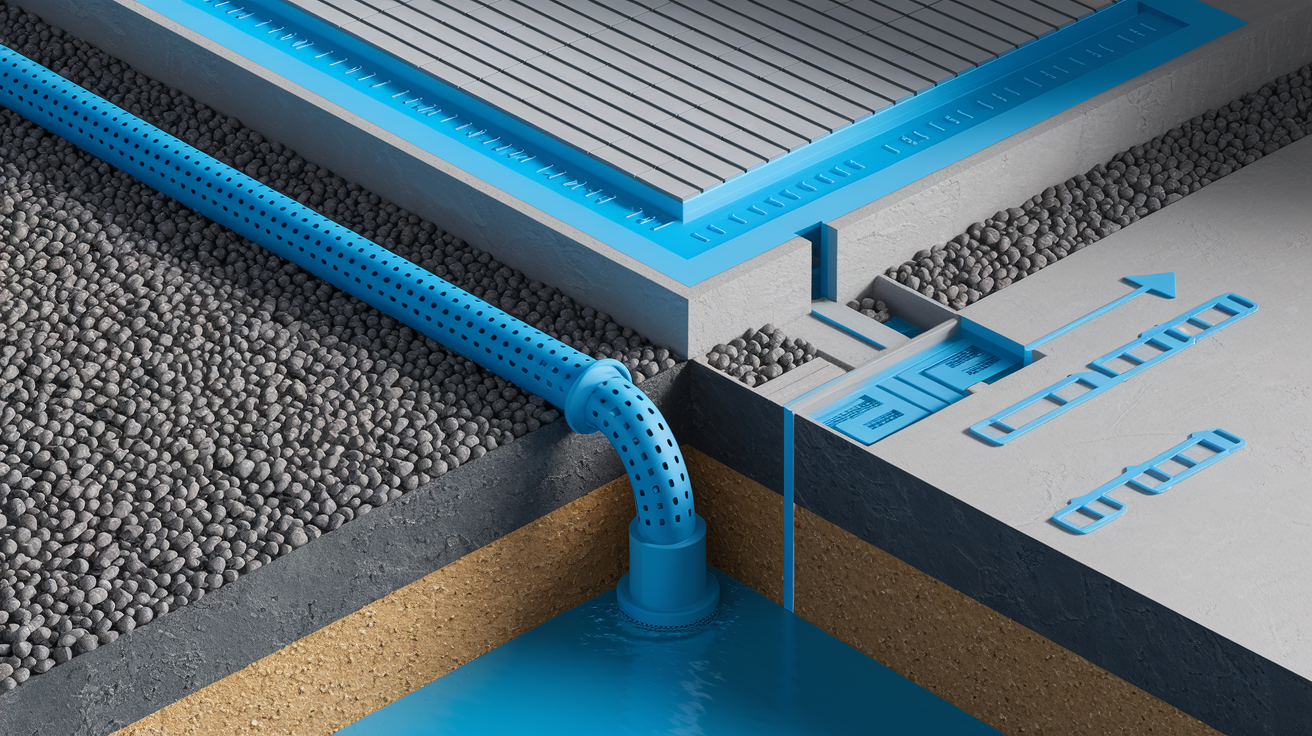
Interior drainage systems handle the problem that waterproof paint can’t. Hydrostatic pressure from saturated soil pushing water through your foundation.
Hydrostatic pressure builds up when the ground around and under your foundation becomes waterlogged and has nowhere to drain. That water creates force against the concrete. Since concrete is porous, the pressure drives moisture through the material and through any cracks. Sealants work for vapor and minor seepage, but when you’ve got groundwater pressure shoving water through the wall, you need to relieve that pressure by giving the water somewhere else to go.
Installing an interior drainage system means breaking up the basement floor around the perimeter with a jackhammer. You’re cutting out a section of slab that’s typically 12 to 18 inches wide, then digging a trench alongside the footing. Perforated pipe goes into that trench on a bed of gravel, then gets covered with more drainage aggregate before you seal everything back up with new concrete. This isn’t a weekend DIY project unless you’ve got concrete demo and finishing experience.
The perforated pipe collects water as it seeps down the inside of the foundation wall and directs it to a sump pit. A sump pump in that pit automatically kicks on when the water level rises and discharges it away from your foundation through a pipe that runs outside. For proper sump pump installation practices, the discharge line needs to terminate at least 10 feet from the foundation so you’re not just cycling the same water back to the problem area.
Interior drainage systems cost more and make a bigger mess during installation than rolling on waterproof paint. But they address the root cause when groundwater pressure is the issue. You’ll know you need drainage instead of sealants if you’ve got consistent water infiltration, if the walls stay damp even after sealing, or if you see water coming up through floor cracks. This is the fix for moderate to severe water problems where surface treatments keep failing.
Interior Versus Exterior Basement Waterproofing Approaches
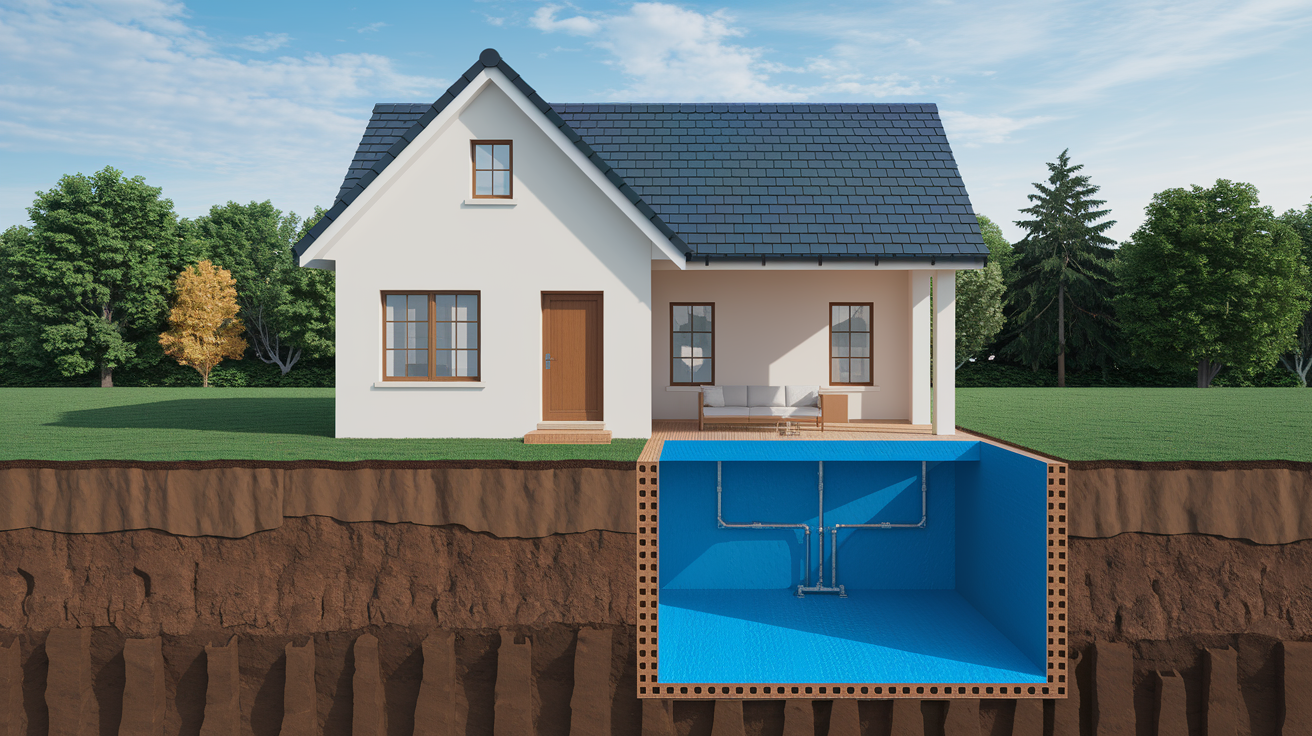
Exterior waterproofing stops water at the source by treating the outside of your foundation wall. That’s called positive side waterproofing because you’re blocking water before it reaches the concrete. It requires excavating all the way down to the footing around your entire foundation perimeter, installing drain tile in gravel trenches, and applying waterproof membrane to the outside wall. Most new construction includes exterior drainage, but adding it to an existing house means tearing up landscaping, driveways, and anything else in the way.
Interior waterproofing works on the negative side, the inside face of the wall where water has already penetrated the foundation. You’re managing water after it’s moved through the concrete instead of stopping it on the outside. Interior methods are less disruptive because you’re not digging up the yard, and they’re often more affordable since you’re working in accessible space instead of excavating.
Positive side waterproofing (exterior) addresses the problem at its source and keeps the foundation itself dry, which is better for long term structural protection. Negative side waterproofing (interior) handles the water after it’s entered the wall, which still keeps your basement dry but doesn’t protect the concrete from prolonged moisture exposure.
If your landscaping is established, you’ve got buried utilities close to the foundation, or the budget doesn’t support excavation, interior methods make more sense. If you’re building new or doing major renovation work that already has the foundation exposed, exterior waterproofing is worth the extra cost. For severe hydrostatic pressure problems, you might need both. Exterior drainage to reduce the pressure and interior drainage as backup when groundwater is consistently high.
| Factor | Interior Waterproofing | Exterior Waterproofing |
|---|---|---|
| Installation disruption | Minimal exterior impact, work confined to basement | Major excavation, landscaping removal, driveway/walkway disruption |
| Typical cost | $3,000 to $7,000 for drainage system | $8,000 to $15,000+ for full perimeter |
| Water management approach | Negative side (manages water after foundation penetration) | Positive side (stops water before foundation contact) |
| Best application | Existing homes, established landscaping, budget constraints | New construction, major renovation, long term foundation protection |
| Longevity | 20 to 30 years with proper maintenance | 30 to 50 years, better foundation preservation |
Basement Wall Panels and Membrane Systems

Basement wall panels are prefabricated sheets made from fiberglass, vinyl, or foam insulation wrapped in moisture resistant barriers. They attach directly to your foundation walls and give you a finished surface that also improves thermal efficiency. Your heating and cooling costs drop because you’re insulating the concrete instead of leaving it exposed.
Dimpled membranes and cavity drain systems work differently than solid panels. They’re plastic sheets with raised bumps that create an air gap between the membrane and the wall. Water that seeps through the foundation hits the membrane and runs down the dimpled surface to a drainage system at floor level instead of soaking into drywall or creating damp conditions behind finished walls. The air gap also lets water vapor escape so you don’t trap moisture.
Wall panels and membranes don’t solve hydrostatic pressure problems on their own. They manage water that’s already getting through the foundation. If you install panels without addressing the source of water infiltration, you’ll just hide the problem until it gets worse. These systems work best when you pair them with interior drainage at the floor perimeter. The membrane directs wall moisture down to the drain tile, the drain tile carries it to the sump pit, and the sump pump gets rid of it.
Use wall panel systems when you’re finishing basement space and you’ve got minor moisture issues that don’t require full drainage intervention. Or when you want thermal insulation and a clean finished look while directing occasional moisture to your perimeter drainage. Don’t rely on them as standalone waterproofing for walls that show consistent dampness or active water infiltration.
When Wall Panel Systems Are Appropriate:
- As part of comprehensive system with interior drainage, not standalone
- For finishing basement spaces while managing moisture
- When thermal insulation improvement is desired
- In combination with cavity drain system directing water to perimeter drains
Cost Considerations for Waterproofing Basement Walls Inside

Costs swing based on how big your basement is, how bad the moisture problem is, which method you choose, and what contractors charge in your area.
DIY waterproof sealant projects run $50 to $200 in materials if you’re handling a small to average basement with no drainage work. That covers waterproof paint at $30 to $50 per gallon (and you need at least two coats at 75 to 100 square feet per gallon), plus crack filler at $15 to $30 and hydraulic cement at $10 to $20 for active leaks. Professional installation of interior drainage systems costs $3,000 to $10,000 or more depending on basement size and how much perimeter needs drain tile and sump pump work.
Material costs for waterproof paint work out to roughly $1 to $1.50 per square foot when you factor in two coats. So a basement with 600 square feet of wall area costs $600 to $900 in paint alone. Add another $50 to $100 for crack repair materials, brushes, and rollers. Hydraulic cement and crack fillers are cheap, $10 to $20 per container, but you might need several if you’ve got multiple large cracks to fill.
Surface sealants are the budget friendly option up front, but they need reapplication every five to ten years depending on product quality and moisture conditions. Drainage systems cost more initially but they’re essentially one time investments that last 20 to 30 years with minimal maintenance beyond occasional sump pump replacement. If you’re dealing with persistent moisture that keeps coming back despite sealant attempts, spending more now on drainage saves you from repeating the same failed fix every few years.
| Waterproofing Method | DIY Cost Range | Professional Cost Range | Typical Lifespan |
|---|---|---|---|
| Waterproof paint/sealant | $50 to $200 | $500 to $1,500 | 5 to 10 years |
| Crack injection | $100 to $300 | $500 to $2,000 | 10 to 15 years |
| Interior drainage system | Not recommended DIY | $3,000 to $10,000+ | 20 to 30 years |
| Wall panel system | $500 to $1,500 | $2,000 to $5,000 | 15 to 25 years |
Maintaining Waterproofed Basement Walls Over Time

Check your basement walls every spring and fall to catch new problems before they turn into expensive repairs. Look for fresh cracks, damp spots, or efflorescence that’s formed since your last inspection. Spring is especially important because that’s when groundwater levels rise from snowmelt and heavy rain, putting the most stress on your waterproofing.
Run a dehumidifier during humid months to keep basement air dry and prevent condensation. Condensation forms when warm humid air hits cold concrete walls, creating moisture problems that have nothing to do with leaks. Keep humidity below 50 percent and you eliminate most condensation issues. Clean the dehumidifier filter monthly when it’s running regularly so it keeps pulling moisture efficiently.
Waterproof sealants don’t last forever. Most products give you five to ten years before they need reapplication, depending on how much moisture they’re dealing with and how well you prepped the surface originally. Check sealant condition during your annual inspection by looking for areas where the coating is peeling, flaking, or showing wear. If you start seeing dampness return in spots that used to stay dry, it’s time to clean the surface and apply fresh coating to those areas.
Keep up with supplementary prevention even after you’ve waterproofed. Clogged gutters dump thousands of gallons of water next to your foundation during heavy rain, overwhelming even good drainage systems. Clean them twice a year minimum. Make sure downspouts extend at least six feet from the foundation so roof runoff doesn’t just soak into the soil right next to your basement walls. Check that your yard still slopes away from the house. Settling and landscaping changes can create low spots that collect water.
Maintenance Tasks with Recommended Frequency:
- Visual inspection for new cracks or moisture signs (quarterly)
- Dehumidifier filter cleaning and operation check (monthly during humid months)
- Gutter cleaning and downspout verification (twice yearly)
- Sealant condition inspection (annually)
- Drainage system check if installed (annually)
- Reapplication of waterproof coating as needed (every 5 to 10 years)
Common Mistakes When Waterproofing Interior Basement Walls

Mistakes cost you money and leave you with the same wet basement you started with.
The biggest preparation errors happen when you skip steps to save time. Applying waterproofing to walls that aren’t completely dry traps moisture behind the coating where it keeps causing problems. Leaving efflorescence on the surface means the waterproofing bonds to salt deposits instead of concrete, and it peels off within months. Failing to repair cracks before you seal gives water a direct path through the wall no matter how good your coating is. Using one coat when the product requires two minimum leaves thin spots that leak as soon as groundwater pressure builds up.
Temperature matters more than most people realize. Applying waterproofing products when the basement is below 50 degrees means the coating won’t cure properly and the bond stays weak. Inadequate drying time between coats, rushing the second coat before the first one fully sets, creates a soft unstable barrier that fails early. Improper coverage, especially around floor joints and corners where water shows up first, leaves the most vulnerable spots unprotected.
System selection mistakes waste the most money because you’re using the wrong tool for the problem. Sealants only work for minor moisture and vapor issues. If you’ve got hydrostatic pressure pushing water through the foundation, no amount of surface coating will hold. Expecting membranes or vapor barriers to solve groundwater pressure problems sets you up for failure because those systems manage water movement, they don’t stop the force that’s driving it through your walls. If you’ve sealed your basement twice and it’s still getting wet, the issue isn’t your application technique. You need drainage to relieve the pressure instead of more coatings to fight it.
8 Common Mistakes to Avoid:
- Applying waterproofing to wet or damp walls
- Failing to remove efflorescence before treatment
- Using only one coat of sealant instead of minimum two
- Applying products in temperatures below 50°F
- Relying on surface sealants when drainage system is needed
- Ignoring foundation cracks before waterproofing
- Expecting membranes or barriers to solve hydrostatic pressure problems
- Skipping proper surface cleaning and preparation
When to Hire Professional Waterproofing Contractors

Simple sealant application on small basement areas is reasonable DIY work. But drainage systems and structural repairs require professional equipment and expertise.
Call in professionals when water keeps coming back despite your DIY attempts. That tells you the problem is bigger than surface sealing can handle. Significant structural cracks wider than a quarter inch indicate foundation movement or settling that needs expert diagnosis before you start patching. If you’re seeing consistent signs of hydrostatic pressure like water pooling on the floor, damp walls even after sealing, or water seeping up through floor cracks, you need a drainage system that requires jackhammers, concrete cutting tools, and the skill to install it without damaging your foundation. Widespread water infiltration affecting multiple walls or areas means you’re dealing with a systemic problem that needs comprehensive assessment.
Professionals bring proper diagnosis so you’re not guessing at solutions. They carry warranties that protect you if the work fails. They own the specialized equipment (jackhammers for floor removal, concrete saws, pumps for drainage installation) that you’d have to rent and learn to use safely. Their work meets local building codes, which matters when you sell the house or if insurance gets involved after water damage. And a properly installed professional drainage system lasts 20 to 30 years instead of needing repeated DIY attempts every couple years.
When you’re shopping for contractors, verify their licensing and insurance first. Unlicensed waterproofing work creates liability problems if something goes wrong. Ask for references from jobs they completed at least two years ago so you can see how the work holds up. Get detailed written estimates that break down materials, labor, and exactly what work they’re doing. Compare warranty terms carefully. Some contractors warranty their work for the life of your home, others give you two years.
6 Signs You Need Professional Help:
- Water infiltration continues despite DIY sealant attempts
- Large structural cracks (wider than ¼ inch)
- Signs of foundation movement or settling
- Consistent water pooling requiring drainage system installation
- Mold growth indicating ongoing moisture problem
- Lack of access to specialized equipment (jackhammer, concrete tools)
Final Words
Waterproofing interior basement walls is manageable when you match the method to the actual problem. Surface sealants handle minor dampness. Hydrostatic pressure needs drainage.
Skip the prep or apply coatings to wet walls, and you’re throwing money away.
Fix the source, clean thoroughly, fill cracks, and follow the product instructions on temperature and coat count. If water keeps coming back or you’re seeing structural movement, call a pro.
Most basements stay dry with the right approach and basic ongoing maintenance.
FAQ
Can you waterproof a basement wall from the inside?
You can waterproof a basement wall from the inside using waterproof paint, crack fillers, and drainage systems. Interior methods work for minor to moderate moisture but won’t solve severe hydrostatic pressure problems without addressing the water source outside.
When should you not use waterproof sealant products like Drylok?
You should not use waterproof sealant when hydrostatic pressure is forcing water through the foundation, when walls are still wet or damp, when efflorescence hasn’t been removed, or when temperatures drop below 50°F during application.
What is the best thing to waterproof basement walls with?
The best thing to waterproof basement walls with depends on the moisture severity: waterproof masonry paint works for minor dampness, while moderate to severe water infiltration requires interior drainage systems with sump pumps to address hydrostatic pressure.
Should you waterproof basement walls?
You should waterproof basement walls if you notice water stains, efflorescence, musty odors, dampness, or mold growth. Early waterproofing prevents structural damage, protects stored items, and stops mold problems before they spread throughout your home.
How many coats of waterproof paint do basement walls need?
Basement walls need a minimum of two coats of waterproof paint for effective moisture protection. Allow two to three hours drying time between coats, and apply the second coat in the opposite direction from the first.
What preparation is required before waterproofing basement walls?
Preparation before waterproofing basement walls requires removing all standing water, cleaning surfaces thoroughly with wire brushes, eliminating efflorescence with appropriate cleaners, repairing cracks with hydraulic cement, and ensuring walls are completely dry before application.
How much does it cost to waterproof basement walls from the inside?
Waterproofing basement walls from the inside costs $50 to $200 for DIY sealant projects covering small areas, while professional interior drainage system installation typically runs $3,000 to $10,000 depending on basement size and moisture severity.
What is efflorescence and why must it be removed?
Efflorescence is white salt-like deposits that appear on concrete when water evaporates and leaves minerals behind. It must be removed before waterproofing because it prevents proper sealant adhesion, causing the coating to fail.
Can waterproof paint stop active water leaks in basements?
Waterproof paint cannot stop active water leaks or solve hydrostatic pressure problems pushing water through foundations. You must first repair leaks with fast-setting hydraulic cement, then apply waterproof coatings after walls dry completely.
How long does waterproof coating last on basement walls?
Waterproof coating lasts five to ten years on basement walls with proper application and maintenance. Longevity depends on moisture severity, surface preparation quality, number of coats applied, and ongoing humidity control with dehumidifiers.
What’s the difference between interior and exterior basement waterproofing?
Interior basement waterproofing manages water on the negative side after it reaches the foundation, while exterior waterproofing stops water at the source on the positive side but requires extensive excavation around the foundation perimeter.
Do basement wall panels provide waterproofing protection?
Basement wall panels provide a finished appearance and thermal insulation but don’t waterproof by themselves. They work best when combined with interior drainage systems, creating air gaps that channel water down to perimeter drains.