

Most contractors assume mold resistant drywall solves moisture problems. It doesn’t. This product buys you time and reduces risk in spaces that get damp, but it won’t stop water from coming through a leaky shower pan or a cracked foundation. What it will do is resist mold growth better than standard drywall when you pair it with proper ventilation and waterproofing. The question isn’t whether to use it, it’s where it works and where you’re wasting money on the upgrade.
Pricing, Availability, and Brand Options for 5/8 Mold Resistant Drywall
You’re looking at $25 to $40 per 4×8 sheet for 5/8 mold resistant drywall, depending on what you pick. Purple board products (the premium stuff with mold and moisture resistance) sit at the top of that range. Green board (standard moisture resistant) comes in cheaper. Regular 5/8 Type X without moisture protection runs about $18 per sheet, so you’re paying an extra $7 to $22 for mold protection.
| Feature | Purple Board | Green Board | Standard 5/8 Type X |
|---|---|---|---|
| Mold Resistance Level | Superior, paperless fiberglass | Moderate, treated paper face | None, paper face |
| Moisture Resistance Rating | Continuous exposure rated | Intermittent exposure only | Not rated for moisture |
| Price Per Sheet Range | $32-$40 | $20-$28 | $18-$22 |
| Suitable Applications | Bathrooms, basements, kitchens | Non-shower bathrooms, laundry | Dry interior walls only |
| Typical Brands | PURPLE XP, DensArmor Plus | CertainTeed M2Tech, USG Sheetrock | All major manufacturers |
| Code Compliance | Type X, moisture areas approved | Type X option, limited moisture use | Type X fire rating only |
Home Depot and Lowe’s stock both purple and green board in most areas, but what’s on the shelf varies by location. Special orders take 3 to 7 days. Building supply places like Campbell Supply Company have bigger selections and contractor pricing, though you’ll usually need a business account or a minimum order of 20 to 50 sheets. Local drywall suppliers often sell smaller amounts with same day pickup. Online construction sites ship full pallets nationwide, which makes sense if you’re doing several rooms or a whole house. Delivery runs $75 to $150, or it’s free over $1,000.
Price depends on what the facing’s made of (fiberglass costs more than paper), brand positioning (purple board commands extra), and where you buy it. For a 200 square foot bathroom, you need about five 4×8 sheets. Add 10% for waste and you’re at six sheets. At $35 per sheet for purple board, that’s $210 in material. Green board drops it to $138. Standard Type X is $108. If your space gets humid or you’ve dealt with mold before, the extra $102 for purple board beats a $3,000 cleanup later.
Product Specifications and Key Features of 5/8 Mold Resistant Drywall
5/8 mold resistant drywall gives you moisture protection and Type X fire rating in one panel. You don’t need separate products for fire code and wet areas. Most manufacturers use fiberglass mat facing or paperless gypsum core to eliminate the paper that mold feeds on.
You can get 4×8 panels (most common), 4×10, or 4×12. Weight’s around 2.6 pounds per square foot, putting a 4×8 sheet at 70 to 74 pounds. That’s 15 to 20 pounds heavier than 1/2 inch standard drywall.
Core specs:
- Thickness measurement: Exactly 5/8 inch (15.9mm), thicker than the 1/2 inch you see in most houses
- Type X fire rating: One hour fire resistance when installed per code on wood or steel framing
- Facing construction: Fiberglass mat or paperless surface gets rid of the cellulose mold colonizes
- Gypsum core composition: Treated with antimicrobial additives and water resistant polymers throughout
- Water absorption rate: 5% or less by weight after two hour immersion, compared to 15 to 20% for standard drywall
- ASTM standards compliance: Meets C1396 (Standard Specification for Gypsum Board) and C1178 (Type X requirements)
- Weight per sheet: 70 pounds for 4×8, 88 pounds for 4×10, 105 pounds for 4×12
- Load bearing capacity: Supports typical wall mounted fixtures when anchored to studs at 16 inches on center
Mold resistance works through several layers. Fiberglass or paperless facing eliminates the paper food source. The gypsum core includes antimicrobial additives that stop fungal growth. Water resistant polymers in the core keep moisture absorption under 5% by weight, compared to 15 to 20% for regular drywall. The treated core also dries faster after getting wet, limiting the damp conditions mold needs. “Mold resistant” means the product resists growth under normal moisture exposure. It’s not mold proof. Continuous saturation or standing water will still allow mold to develop, especially at cut edges or damaged spots where the core’s exposed.
These specs deliver real advantages over thinner options. The 5/8 thickness gives you better sound dampening (STC rating of 39 versus 33 for 1/2 inch), more abuse resistance, and less sag on ceilings. Fire protection meets code for garage ceilings and multi family common walls. The moisture resistance extends how long it lasts in bathrooms and basements. But understand the limits. This product resists moisture, it doesn’t block it. You still need ventilation, exhaust fans, and waterproofing membranes in direct spray zones. The panel won’t stop water from plumbing leaks or foundation problems. It buys you time and reduces risk, but it’s not a substitute for fixing where the moisture’s coming from.
Best Applications for Mold Resistant Drywall in Moisture-Prone Areas
Where you use this determines whether it works or fails. Use it where moisture shows up regularly but doesn’t puddle or spray continuously. Pick wrong and you’ll deal with warranty denials, failed inspections, and callbacks. Here’s where this product belongs and where it doesn’t.
Bathroom and Shower Applications
5/8 mold resistant drywall works on bathroom ceilings where steam collects, walls next to tubs and showers that get splash but not direct spray, and toilet room walls with humidity. Behind tile in shower surrounds, you can use it if you apply a waterproofing membrane like RedGard or Kerdi over the drywall before setting tile. The membrane carries the water load, the mold resistant drywall acts as backing. Without the membrane, don’t do it. Direct water spray saturates panel edges, joints, and fastener holes. Walls outside the shower but inside the bathroom benefit from mold resistant drywall because of humidity and occasional splash from sinks.
Basement and Below-Grade Installation
Basement walls see condensation when humid summer air hits cool foundation walls. 5/8 mold resistant drywall handles that better than standard drywall, especially on exterior walls and rim joist areas. It works for below grade spaces with typical humidity but no active water coming in. If your basement gets standing water, puddles near the footer, or visible moisture through the foundation, fix that first. Mold resistant drywall can’t overcome active leaks or chronic flooding. Install it after waterproofing the exterior, adding interior drainage, and confirming the space stays dry through a full wet season. Pair it with a dehumidifier to keep relative humidity under 60%.
Kitchens and Utility Spaces
Kitchen walls behind sinks and dishwashers get regular splash and high humidity during cooking. 5/8 mold resistant drywall makes sense here. Kitchen ceilings above ranges and cooktops see steam and grease laden moisture, another good spot. Laundry rooms with front load washers and dryers benefit from moisture resistant walls, especially where the washer drain line connects or where humidity builds during drying. Utility closets with water heaters see moisture from temperature cycling and occasional drip pan overflow. These are all appropriate uses.
Cement board is required instead of mold resistant drywall in specific high exposure zones. Shower walls receiving direct water spray need cement board or foam tile backer board. Steam rooms and saunas need cement board. Tub surrounds under tile need cement board. Any surface with continuous water contact needs cement board. Commercial kitchens and car washes need cement board. You can use mold resistant drywall as backing in the same room, just not in the direct water zones. For example, cement board goes on shower walls, but mold resistant drywall can go on the ceiling above the shower and on bathroom walls outside the enclosure. Cement board’s harder to cut, heavier to hang, and costs $15 to $25 per sheet. Use it only where water exposure demands it.
Mold resistant drywall works best when paired with mechanical ventilation. Install exhaust fans rated for the room size (80 CFM minimum for bathrooms under 100 square feet). Run the fan during and 20 minutes after showers. Use a dehumidifier in basements to keep relative humidity between 30% and 50%. In kitchens, vent range hoods to the exterior, not just recirculating. The drywall resists mold, but standing moisture and poor air circulation overwhelm any building material. If condensation forms on windows, mirrors, or walls, your ventilation isn’t adequate. Fix that before blaming the drywall.
Installation Methods and Framing Requirements for 5/8 Drywall
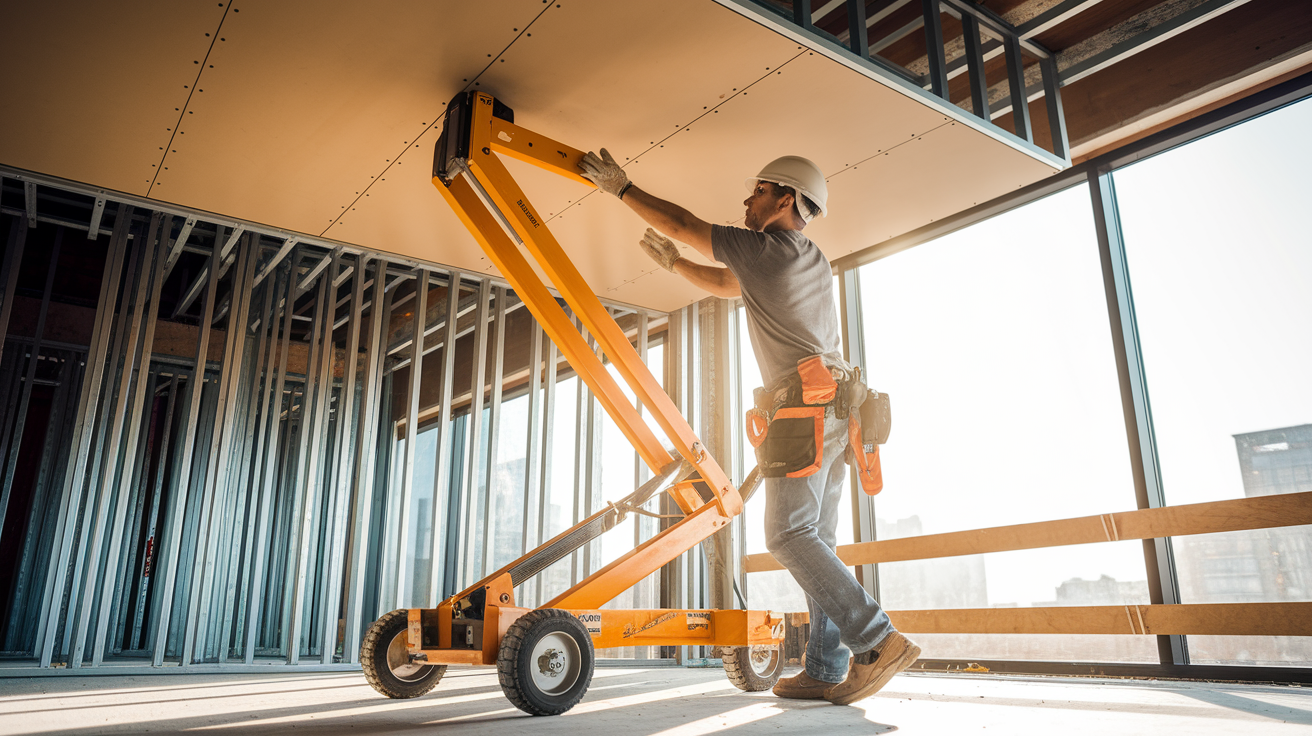
5/8 drywall weighs 70 to 74 pounds per 4×8 sheet, compared to 50 to 55 pounds for 1/2 inch panels. That extra weight changes how you handle, cut, and fasten it. Plan for two people on walls and ceilings. One person can wrestle 1/2 inch sheets solo, but 5/8 panels will hurt you if you try.
Framing needs to support the extra weight. Ceilings require studs or joists at 16 inches on center maximum. Some places allow 24 inch spacing for walls, but 16 inches gives better screw holding and less sag. If your framing’s already in at 24 inches on center, add horizontal blocking or hat channel to tighten the support grid.
Installation steps:
-
Acclimate panels for 48 hours minimum in the installation space at the temperature and humidity level you’ll maintain after finishing. This prevents expansion or contraction after installation.
-
Verify stud spacing at 16 inches on center for walls, 12 to 16 inches for ceilings. Measure from center of stud to center of stud. If spacing exceeds 16 inches, add blocking.
-
Cut panels using score and snap for straight cuts. Score the face paper with a utility knife using a T-square or straight edge. Snap the panel backward along the score line, then cut the back paper. Use a keyhole saw or spiral saw for outlet and fixture cutouts. Wear a dust mask when cutting.
-
Fasten with screws at 12 inches on center in the field, 8 inches on center along edges and ends. Use 1 5/8 inch coarse thread screws for wood framing, 1 1/4 inch fine thread screws for steel studs. Drive screws just below the surface without breaking the face. Dimple the surface slightly so joint compound can cover the head.
-
Place seams away from moisture prone corners like the tub to wall junction or the floor to wall joint where condensation collects. Offset vertical seams at least 12 inches from door and window openings to prevent cracking.
-
Install backing at all joints where panel ends meet. If studs aren’t positioned at seams, add blocking or backing strips. Unsupported joints crack and show through tape and compound.
-
Install corner bead at all outside corners using screws or adhesive. Metal corner bead provides straight lines and impact protection. Vinyl corner bead works but dents easier.
Ceiling installation requires a lift or two helpers because 5/8 panels sag under their own weight while you’re fastening. Rent a drywall lift for $40 per day. It’s worth it. If you’re hand holding panels, work in short sections and secure the center first, then work outward to edges. If the panel sags between fasteners, reduce spacing to 8 inches on center across the entire ceiling.
Professional installation makes sense if you’re tackling ceilings, have limited help, or lack taping experience. Most drywall contractors charge $1.50 to $3.00 per square foot installed and finished. That includes hanging, taping, two coats of compound, and sanding. DIY is doable for walls if you have a helper and don’t mind learning taping through trial and error.
Finishing Techniques for Moisture Resistant Drywall Panels

Joint compound selection matters on fiberglass faced or paperless drywall because the surface doesn’t absorb moisture like paper faced panels. Use setting type joint compound (Durabond, Easy Sand) for the first coat. Setting type compound cures through a chemical reaction rather than drying, which gives better adhesion on non porous surfaces. Mix to a peanut butter consistency. Apply a thin coat over seams with a 6 inch knife, embedding tape fully. Let it set for 45 to 90 minutes depending on the formula (20 minute, 45 minute, or 90 minute set time). Don’t rush it. If the compound’s still soft, wait.
Mesh tape works better than paper tape on moisture resistant drywall in wet areas. Fiberglass mesh tape doesn’t absorb moisture and doesn’t bubble or fall apart when humidity spikes. Paper tape can work if you’re using all purpose compound and the space has good ventilation, but mesh eliminates a failure point. Embed mesh tape in setting type compound for the first coat. Press it flat with the knife, removing excess compound. Leave a thin layer over the tape, just enough to cover the mesh texture. Thick coats crack as they cure.
After the setting type base coat hardens, apply two more coats of all purpose or lightweight joint compound. The second coat goes on with an 8 or 10 inch knife, feathering 6 to 8 inches beyond the first coat. The third coat uses a 10 or 12 inch knife, feathering 10 to 12 inches beyond the second coat. Sand lightly between coats with 120 grit paper. In humid bathrooms and basements, extend drying time to 24 hours between coats. Standard drywall dries in 8 to 12 hours, but moisture resistant panels in damp spaces need longer. If the compound feels cool to the touch, it’s still releasing moisture. Don’t apply the next coat yet.
Prime with a moisture resistant primer before painting. Ordinary drywall primer soaks into paper faced drywall, but it sits on top of fiberglass faced panels and can cause paint adhesion problems. Use a primer labeled for moisture resistant drywall or a stain blocking primer like Zinsser BIN or Kilz. These primers bond to non porous surfaces and seal the joint compound. Apply one coat, let it dry fully (usually 2 to 4 hours), then paint with moisture resistant bathroom paint or semi gloss latex. Flat paint in bathrooms traps moisture and fails faster. Run exhaust fans during priming and painting to speed drying. If you’re working in a basement with high humidity, rent a dehumidifier and drop the relative humidity to 40% before finishing.
Building Code Compliance and Fire Rating Standards

Type X fire rating means the drywall core includes fiberglass and other additives that slow heat transfer during a fire. A 5/8 inch Type X panel provides one hour fire resistance when installed per code on wood or steel framing with proper joint treatment. The panel doesn’t burn away or collapse for 60 minutes in a standard fire test. That one hour rating gives people time to escape and firefighters time to respond.
5/8 thickness is the standard path to Type X rating. Some 1/2 inch panels carry Type X ratings, but 5/8 is more common and more trusted by inspectors. The thickness matters because it increases the thermal mass between the fire and the framing. More mass means slower heat transfer.
Code required applications where Type X is mandatory:
- Garage ceiling separations between the garage and living space above. The ceiling must have one hour fire resistance to prevent a car fire from spreading to bedrooms.
- Common walls between attached dwelling units in duplexes, townhomes, and condos. These walls need one or two hour fire ratings depending on jurisdiction.
- Ceiling assemblies protecting floor joists in multi story buildings where fire could spread vertically through floor cavities.
- Commercial building fire rated assemblies in offices, retail, and industrial spaces where code requires compartmentalization.
- Basement ceiling fire protection when the basement serves as a separate dwelling unit or contains fire hazards like furnaces and water heaters.
- Shaft walls and corridor protection in commercial and multi family buildings where escape routes must remain passable during fire.
Building inspectors verify Type X compliance during framing inspection before drywall goes up, and again during final inspection. They check for proper fastener spacing, joint treatment, and penetrations. Electrical boxes, HVAC ducts, and plumbing pipes that penetrate fire rated assemblies need fire stopping material around them. Inspectors will fail the inspection if you skip fire stopping. Keep the product label or receipt showing the Type X rating. Some inspectors ask for it. If you’re using 5/8 mold resistant drywall with Type X rating in a fire rated assembly, it satisfies both the moisture resistance need and the fire code. You don’t need two layers.
Repair and Maintenance for Damaged Mold Resistant Drywall

How fast you respond to water damage determines whether you dry out the panel or cut it out. Mold resistant drywall resists moisture, but it’s not waterproof. If a panel gets saturated, the mold resistance is compromised until it dries completely, and sometimes the panel won’t recover.
Water damage response:
-
Test saturation levels with a moisture meter within 24 hours of water exposure. Pin type or pinless meters work. Readings above 17% moisture content mean the panel’s too wet. Under 15% means it’s drying or already dry.
-
Determine if drying or replacement is needed based on the saturation level and how long it was exposed. If the panel stayed wet for less than 48 hours and moisture content is under 20%, you can usually dry it. Over 48 hours or over 20% moisture content, cut it out.
-
Set up drying equipment with dehumidifiers and air movers if you’re attempting to save the panel. Pull baseboards to allow air circulation behind the wall. Drill 1/2 inch weep holes every 16 inches along the bottom plate if water pooled inside the wall cavity. Run equipment for 3 to 5 days, testing moisture levels daily until readings drop below 15%.
-
Inspect for mold growth behind the surface after drying. Remove a small section of drywall at the wettest area and check the backside and framing with a flashlight. If you see mold on the studs or back of the panel, drying isn’t enough. You need remediation.
-
Cut out saturated sections using a utility knife and drywall saw. Cut to the nearest stud centers so you have backing for the patch. Remove insulation if it’s wet. Treat any mold on framing with a biocide or replace affected studs if decay is present.
-
Patch with matching mold resistant material, not standard drywall. If you patch mold resistant drywall with standard drywall, the patch becomes the weak point. Moisture will accumulate there. Cut the patch to fit the opening, leaving 1/8 inch gaps on all sides. Screw it to studs and backing, then tape and finish the joints.
Patching requires matching the mold resistant properties of the original material. Use fiberglass faced or paperless drywall if that’s what’s on the rest of the wall. If you can’t source the exact product, any 5/8 mold resistant drywall works as long as it’s the same thickness. You can’t patch 5/8 drywall with 1/2 inch material because the surface won’t be flush. Build up the thinner patch with extra layers or shim the studs, but matching thickness is simpler.
Maintenance for high humidity areas includes annual inspections. Check for paint failure, especially at seams and corners where moisture collects. Paint that’s peeling, bubbling, or discolored means moisture problems. Look for soft spots by pressing on the wall surface. Mold resistant drywall should feel solid. Soft or spongy areas mean the core is wet or damaged. Check for discoloration, which shows up as brown, yellow, or gray staining. Use a moisture meter annually in bathrooms, basements, and laundry rooms. Test at the floor line and around fixtures. Readings over 15% need investigation. Check caulk and grout joints at tubs and showers. Failed sealant allows water behind the wall, which overwhelms mold resistant drywall if it continues. Re caulk every 2 to 3 years or as soon as you see gaps or cracks.
Final Words
5/8 mold resistant drywall offers solid protection in moisture-prone spaces when you match the product to the job and install it right.
Purple board costs more than green board, but it delivers better mold resistance where humidity runs high. Standard Type X gives you fire rating without moisture protection, so know what you’re solving for before you buy.
Pair it with proper ventilation and waterproofing details. The board resists mold, but it won’t fix poor airflow or active leaks.
Check your framing spacing, use the right fasteners, and give joints time to dry between coats. If water damage happens, test moisture levels and replace saturated sections with matching material.
Done correctly, this upgrade keeps walls healthier longer.
FAQ
How much does 5/8 mold resistant drywall cost per sheet?
The 5/8 mold resistant drywall costs between $25 and $40 per sheet depending on the brand and specific type. Purple board premium options with fiberglass mat facing typically cost $30-$40, while green board moisture-resistant versions run $25-$35 per sheet at major retailers.
What’s the difference between purple board and green board drywall?
Purple board and green board differ in moisture and mold resistance levels. Purple board offers premium mold resistance with fiberglass mat facing and enhanced moisture protection, while green board provides standard moisture resistance with treated paper facing at a lower price point.
Where can I buy 5/8 mold resistant drywall?
You can buy 5/8 mold resistant drywall at Home Depot, Lowe’s, specialized building supply distributors like Campbell Supply Company, local drywall suppliers, and online construction material marketplaces. Most retailers offer delivery options for bulk orders with minimum quantity requirements.
What is the fire rating for 5/8 Type X drywall?
The 5/8 Type X drywall provides a one-hour fire rating when properly installed. The Type X designation indicates fire-resistant properties achieved through special gypsum core additives that slow fire spread and meet building code fire separation requirements.
Can you use mold resistant drywall in shower surrounds?
You can use mold resistant drywall behind tile in shower surrounds only with proper waterproofing membranes applied. For direct water spray areas, cement board is required instead. Mold resistant drywall works for bathroom walls away from direct water contact.
What stud spacing is required for 5/8 drywall installation?
The stud spacing required for 5/8 drywall is 16 inches on center for walls and 12 to 16 inches on center for ceilings. This spacing provides adequate support for the heavier weight of 5/8 panels compared to thinner drywall options.
Does mold resistant drywall need special joint compound?
Mold resistant drywall needs setting-type joint compound for best results, especially with fiberglass-faced or paperless varieties. The different surface characteristics of fiberglass mat facing bond better with setting-type compounds than standard all-purpose joint compound.
How do you know if water damaged drywall needs replacement?
Water damaged drywall needs replacement if it’s soft, swollen, or shows visible mold growth after drying attempts. Use a moisture meter to test saturation levels. If readings stay elevated after 72 hours of drying, cut out and replace the affected section.
What building codes require Type X drywall?
Building codes require Type X drywall for garage ceilings separating living spaces, common walls between attached units, certain ceiling assemblies protecting floor joists, and commercial fire-rated assemblies. Your local building department confirms specific requirements for your project.
How heavy is a 4×8 sheet of 5/8 drywall?
A 4×8 sheet of 5/8 drywall weighs approximately 70 to 74 pounds, or about 2.6 pounds per square foot. This weight requires two-person installation for safe handling, especially for ceiling applications where lifting overhead increases difficulty.
What primer should be used on mold resistant drywall?
A moisture-resistant primer should be used on mold resistant drywall before painting. Choose primers specifically formulated for high-humidity areas and compatible with fiberglass-faced or paperless surfaces. Allow 24 hours drying time in humid conditions between primer and paint.
Can mold resistant drywall be used in basements?
Mold resistant drywall can be used in basements prone to condensation and humidity but not active water intrusion. It works well for foundation walls with moisture concerns and below-grade spaces with proper ventilation. Fix any water leaks before installation.
How much waste factor should I add when ordering drywall?
You should add 10 to 15 percent waste factor when ordering drywall to account for cuts, damaged pieces, and installation errors. Calculate your wall square footage, then multiply by 1.10 or 1.15 to determine total sheets needed for the project.
Is mesh tape better than paper tape for moisture resistant drywall?
Mesh tape is better than paper tape for moisture resistant drywall in high-humidity applications. Fiberglass mesh tape resists moisture better than paper tape and bonds well with setting-type compounds recommended for fiberglass-faced or paperless mold resistant panels.