

Most people treat 3/8 inch mold resistant drywall like standard wallboard, then wonder why it fails in six months. The thinner profile flexes differently, needs tighter fastener spacing, and only works in specific moisture prone situations where thicker panels create clearance problems. If you’re covering an old bathroom ceiling or patching a mold damaged wall section in a rental, 3/8 mold resistant drywall solves the problem without ripping out good framing. But hang it wrong or use it where 1/2 inch belongs, and you’re setting yourself up for callbacks and sagging panels that won’t hold paint.
Brands, Pricing, and Where to Buy 3/8″ Mold Resistant Drywall
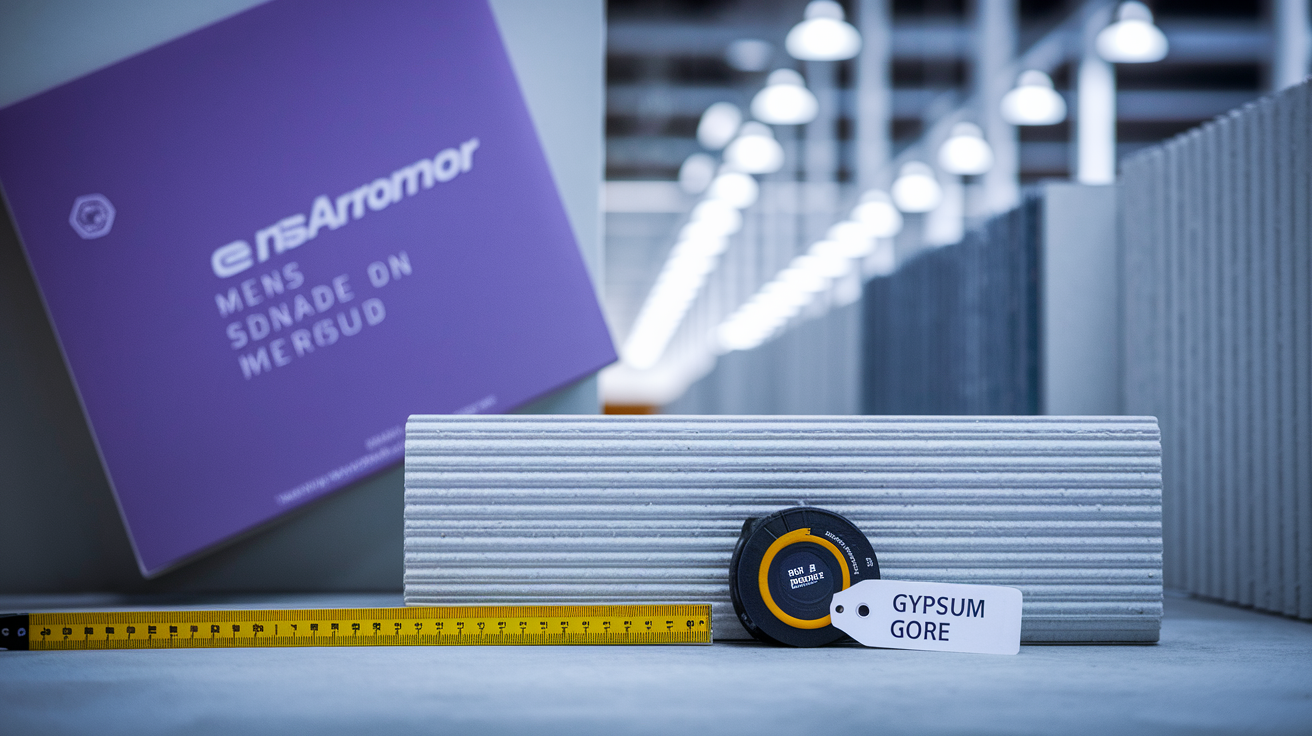
You’ll find 3/8″ mold resistant drywall from a few major manufacturers, with Purple Board (National Gypsum) and DensArmor Plus (Georgia-Pacific) getting the most shelf space. Gold Bond Building Products, made by National Gypsum Company, puts out several mold and moisture resistant configurations through their distributor network.
Price wise, expect $15 to $25 per sheet. Location matters, and so does where you’re buying. Big box stores versus building supply houses can swing the number either direction.
Here’s the thing about Home Depot and Lowe’s: they stock mold resistant drywall, sure, but mostly in 1/2″ thickness. If you want 3/8″ panels, you’re probably placing a special order or driving to a specialty building supply store that keeps deeper inventory on hand.
The 3/8″ mold resistant panel itself? Fire resistive gypsum core, treated with antimicrobial additives, wrapped in moisture resistant facing. Face side gets heavy natural finish paper that takes paint and texture without issue. Back side has strong liner paper for structural stability and moisture protection. That face paper wraps around the long edges to reinforce and protect the core where moisture tries to sneak in at seams. Ends are square cut and finished smooth for proper joint treatment.
Standard sheets run 3/8 inch thick, 4 feet wide, 12 feet long. That’s 48 square feet per panel. When you’re figuring materials, add 10 to 15% for waste. Cutting, damaged pieces, fitting around obstacles. A 10×12 bathroom with 8 foot ceilings? You need about 4 sheets for walls once you account for the door and tub surround eating up coverage.
| Specification | Details |
|---|---|
| Thickness | 3/8 inch (9.5 mm) |
| Width | 4 feet (48 inches) |
| Length | 12 feet (144 inches) |
| Core Type | Fire-resistive gypsum with antimicrobial treatment |
| Facing Material | Heavy natural-finish paper (face), strong liner paper (back) |
| Coverage Area | 48 square feet per panel |
Ideal Applications for 3/8″ Mold Resistant Drywall Thickness

Thickness matters because thinner panels flex more under load. They need tighter fastener spacing. Thicker panels give you better impact resistance and soundproofing. The 3/8″ sits at the thin end, which makes it right for specific jobs where standard 1/2″ or 5/8″ panels create problems or just aren’t needed.
Ceiling applications over existing surfaces, that’s your main use case. When you’re covering old ceiling tiles, plaster, or damaged drywall in a bathroom, laundry room, or basement, the thinner profile cuts down total weight on the joists while keeping mold protection intact. Works well on ceilings with 16 inch joist spacing if you fasten it properly to prevent sagging down the line. Joists spaced 24 inches? Go with 1/2″ instead.
Renovation and repair in older homes comes up a lot. If you’re patching a bathroom wall section where mold developed behind standard 3/8″ drywall that was installed decades back, replacing with mold resistant 3/8″ keeps everything flush without extensive feathering and blending at the edges. Some 3/8″ products carry a High Flex designation, meaning the panel can bend slightly to follow minor irregularities in old framing.
Don’t use 3/8″ mold resistant drywall as your primary wall surface in new construction or high traffic areas. It doesn’t have the impact resistance of 1/2″ panels. Dents easier from doorknobs and furniture. Won’t hold heavy wall mounted fixtures securely. And shower surrounds? Even with mold resistant drywall, you need cement board or a waterproof membrane system, not thin gypsum panels that fail when water gets past the finish surface.
Moisture and Mold Resistance Technology in 3/8″ Panels

Mold resistant drywall uses a treated gypsum core with antimicrobial additives that stop fungal growth. The moisture resistant facing materials cut water absorption compared to standard paper faced panels. Gypsum gets mixed with compounds that make the core less hospitable to mold spores. The heavy paper facings are treated, or in premium products, replaced with fiberglass mat. That face paper folded around the long edges creates a continuous barrier at the panel’s most vulnerable points where moisture usually wicks into the core.
What you’re getting:
Treated gypsum core contains fungicides preventing mold spores from establishing colonies even when moisture shows up. Moisture resistant facing materials (treated paper or fiberglass mat) reduce surface water absorption by 30 to 50% compared to standard drywall. Antimicrobial additives stay active throughout the panel’s service life, providing ongoing spore inhibition. Edge treatment with folded face paper protects the exposed gypsum core at seams where water intrusion happens most. Water damage resistance lets the panel dry out after brief exposure without permanent damage or mold taking hold. High humidity performance up to 90% relative humidity without supporting mold growth, assuming you’ve got proper ventilation.
Standard drywall with untreated paper facing absorbs water fast. Provides an ideal food source for mold once moisture sits there 24 to 48 hours. Green board (moisture resistant drywall) improves this with treated core and facing but doesn’t include the antimicrobial additives that actively prevent mold growth. Mold resistant drywall takes it further by adding those fungicidal compounds, making it harder for spores to take hold even when the surface gets wet.
It’s not waterproof. Don’t make that mistake. But it buys you time to fix leaks and dry things out before mold becomes your problem.
Mold resistant drywall isn’t a substitute for proper moisture management. If you’re trapping humid air behind the panels with no ventilation, or a plumbing leak continuously wets the wall, no antimicrobial treatment saves you. The technology works as part of a layered system. Control moisture sources, provide ventilation to remove humid air, use mold resistant materials as the last line of defense when occasional moisture exposure happens despite your best efforts.
In extreme moisture conditions like poorly ventilated basement bathrooms or walls next to shower pans with marginal waterproofing, combine mold resistant drywall with a polyethylene vapor barrier on the warm side of the insulation. This stops warm humid air from condensing inside the wall cavity where it can saturate the back of the drywall and framing. Without that vapor barrier, even mold resistant panels can fail if the back side stays wet continuously from condensation you never see until the damage shows up.
The antimicrobial additives in quality mold resistant drywall stay effective for decades under normal conditions. Manufacturers don’t typically guarantee a specific timeframe, but the fungicides are mixed throughout the core material rather than applied as a surface coating. They don’t wear off or wash away. As long as the panel stays structurally intact and the facing isn’t damaged, the mold resistance keeps working.
Complete Installation Guide for 3/8″ Mold Resistant Drywall

The 3/8″ thickness is more flexible than standard 1/2″ drywall. Easier to damage during handling but also more forgiving on slightly uneven framing. This flexibility means you need closer fastener spacing and more care during cutting and installation to maintain the panel’s moisture resistant properties at edges and fastener penetrations.
Cutting and Preparing 3/8″ Panels
Score the face paper with a sharp utility knife guided by a T-square, then snap the panel away from the scored line and cut the back paper. Because the panel’s thinner and more flexible, make your score cut in one confident pass rather than multiple light passes that create a ragged edge. Support the panel close to the cut line when snapping to prevent the flex from traveling too far and creating a wavy break.
The folded edge treatment on mold resistant panels means you need clean cuts that don’t tear or delaminate the face paper. A dull blade pulls and fuzzes the paper rather than slicing it cleanly, creating gaps where moisture can reach the gypsum core. Change your blade every 4 to 5 cuts, especially when working in humid conditions where the paper’s slightly damp and tears easier.
Let panels acclimate in the installation space 24 to 48 hours before hanging them. This matters in moisture prone rooms where temperature and humidity might differ from the storage area. If you hang cold panels in a warm bathroom, condensation can form on the back side before you even finish installing.
Fastening to Ceiling Joists and Studs
Use drywall screws every 12 inches on ceilings and 16 inches on walls, compared to the 16 inch and 24 inch spacing acceptable for 1/2″ drywall. The thinner panel needs this closer spacing to prevent sagging under its own weight and to maintain a firm connection that won’t pop loose as the building settles. If you’re hanging 3/8″ panels on a ceiling with 24 inch joist spacing, stop. Switch to 1/2″ thickness because the panel will sag in the middle no matter how many screws you use.
Choose screws long enough to penetrate at least 5/8 inch into the framing member. For 3/8″ panels, that’s 1 1/4 inch screws for wood framing. Set the clutch on your screw gun so the head dimples the paper slightly without breaking through. If you break the face paper, that fastener isn’t holding properly and you’ve created a moisture entry point.
Work from the center of the panel outward toward the edges. Keeps the panel flat against the framing and prevents bowing. On ceilings, use a deadman (a T shaped brace) to hold the panel tight to the joists while you’re fastening. Don’t try to muscle a ceiling panel into place by yourself. The flex in 3/8″ panels makes them nearly impossible to hold flat overhead while driving screws.
Taping and Joint Treatment
Use setting type joint compound (Durabond, Easy Sand) for the base coats on mold resistant drywall in humid areas. Premixed compounds dry by evaporation, which takes forever in a damp bathroom and can support mold growth during the extended drying period. Setting compounds cure through a chemical reaction and aren’t affected by humidity.
Paper tape provides a stronger joint than mesh tape on thinner panels, though mesh tape’s faster and easier for DIY installers who struggle with bubbles under paper tape. If you choose paper tape, embed it in a thin layer of compound, then squeegee it flat with firm pressure to eliminate voids where moisture can collect. Butt joints (where two square cut ends meet) require extra attention on 3/8″ panels because the joint’s more prone to cracking and needs a wider feathering area to hide.
In humid environments, wait for each coat to cure completely before applying the next. Setting compound’s ready when it’s hard to the touch. Premixed compound needs to feel dry and slightly cool. If it’s still slightly tacky or warm, it’s still releasing moisture and will show through your paint as a different texture.
Finishing and Painting Procedures
Wipe down the finished surface with a damp cloth to remove sanding dust without using harsh cleaners that might affect the antimicrobial treatment. The dust from mold resistant drywall can contain trace amounts of the fungicides, so wear a dust mask during sanding and clean up thoroughly.
Prime mold resistant drywall with a moisture resistant primer designed for bathrooms and kitchens before applying finish paint. This creates another layer of protection against moisture penetration and ensures uniform paint adhesion across joint compound and bare panel surfaces. Cheap flat primer soaks into the paper facing inconsistently, leaving you with visible joint lines and texture differences.
Use light pressure when sanding 3/8″ panels because it’s easier to sand through the thin face paper into the gypsum core. If you expose the core, seal it with primer before painting. Raw gypsum absorbs moisture and causes paint adhesion problems. Knockdown and light orange peel textures work better than heavy textures on thin panels because the weight of thick texture can cause sagging over time.
Choose low VOC or zero VOC paints for moisture prone areas where ventilation might be limited. High VOC paints release compounds that feed mold growth if they don’t fully off gas before the space is enclosed and humidity builds up. Semi gloss or satin sheen paints resist moisture better than flat paints and clean easier when condensation leaves water spots.
Seven Common Installation Mistakes to Avoid
Using 16 inch or 24 inch fastener spacing instead of the required 12 inch ceiling and 16 inch wall spacing for 3/8″ panels. Hanging 3/8″ panels on ceiling joists spaced 24 inches apart, guaranteeing future sagging. Tearing face paper during cutting because of dull utility knife blades or insufficient support during snapping. Installing panels immediately after delivery without allowing acclimation period in the installation space. Using standard construction adhesive instead of moisture resistant adhesive formulated for high humidity areas. Applying premixed joint compound in humid rooms where setting type compound’s necessary for proper curing. Skipping vapor barriers in basements and other areas where condensation will wet the back of the panels.
Blistering in the face paper indicates moisture trapped behind the facing, usually from applying compound before the previous coat dried or from high humidity during installation. Sagging ceilings mean fastener spacing was too wide or joist spacing exceeded 16 inches. Both defects require removing and replacing the affected panels because trying to patch over them leaves you with a visible repair and doesn’t fix the underlying problem.
DIY installation of 3/8″ mold resistant drywall’s manageable for experienced homeowners comfortable with tools and willing to work carefully. Professional installation makes sense in critical moisture areas like bathrooms adjacent to showers, where improper installation creates an expensive callback to fix mold growth behind new walls. The labor cost for professional installation typically runs $1.50 to $3.00 per square foot, which includes hanging, taping, and finishing ready for paint.
Building Codes and Drywall Thickness Compliance

Most building codes specify minimum drywall thickness based on the application and framing member spacing rather than mandating specific thicknesses for every situation. Single layer wall applications typically require 1/2″ minimum thickness, though 3/8″ is acceptable as a second layer over existing surfaces or in ceiling applications meeting specific framing requirements. Check with your local building department before starting work because some jurisdictions have adopted stricter requirements than the base code, especially for moisture prone areas like bathrooms where mold prevention is a recognized health concern.
The fire resistive gypsum core in 3/8″ mold resistant drywall provides Class A fire rating (flame spread 0 to 25), meeting code requirements for interior finish materials in residential construction. This rating’s based on the gypsum core itself, which contains chemically bound water that releases as steam when exposed to fire, slowing flame spread and heat transfer. The antimicrobial treatments don’t reduce fire resistance, though you should verify this on the product datasheet since formulations vary between manufacturers.
Maximum framing member spacing for 3/8″ panels is 16 inches on center for ceilings and 24 inches on center for walls when applied as a single layer. Exceed these spacings and the panel lacks adequate support, leading to sagging ceilings or walls that flex and crack when bumped. If your existing framing doesn’t meet these requirements, add blocking between joists or studs rather than trying to make thin drywall work on wide spacing.
Cost Comparison: 3/8″ Mold Resistant Versus Standard Drywall

Expect to pay $15 to $25 per sheet for 3/8″ mold resistant drywall, which works out to $0.31 to $0.52 per square foot based on the 48 square foot coverage per panel. Prices vary significantly by region, brand, and whether you’re buying from a big box store or building supply specialist who stocks professional grade products. Add 10 to 15% waste factor to your square footage calculation, covering cutting waste, damaged pieces, and fitting around obstacles.
| Drywall Type | Typical Price Per Sheet | Moisture Resistance Level |
|---|---|---|
| Standard 3/8″ Drywall | $8-12 | None |
| 3/8″ Mold Resistant | $15-25 | Moderate to High |
| 1/2″ Green Board | $12-18 | Low to Moderate |
| 1/2″ Cement Board | $20-35 | Very High (waterproof) |
Professional installation adds $1.50 to $3.00 per square foot for labor, covering hanging, taping, and finishing ready for paint. A typical 10×12 bathroom with 8 foot ceilings (approximately 240 square feet of wall area minus fixtures) costs $360 to $720 in labor plus materials. DIY installation eliminates labor costs but requires tools (screw gun, taping knives, mud pan) and skills that take time to develop. Renting a drywall lift for ceiling work runs $40 to $75 per day, which is worth it for safety and quality results.
The long term value proposition of mold resistant drywall comes from avoiding the $3,000 to $10,000+ cost of mold remediation and repair work when standard drywall fails in humid conditions. If your bathroom or laundry room develops mold behind the walls, you’re not just replacing drywall. You’re paying for mold testing, professional remediation to contain and remove contaminated materials, treatment of affected framing, and reconstruction. Spending an extra $100 to $200 upfront on mold resistant panels instead of standard drywall is cheap insurance against problems that compound over time as moisture exposure continues.
Ventilation Requirements When Using Mold Resistant Drywall

Mold resistant drywall buys you time and provides protection against occasional moisture exposure, but it’s not a magic solution that eliminates the need for proper ventilation and moisture management. Even panels with antimicrobial treatments will eventually support mold growth if you trap humid air in a space with no way for moisture to escape. The drywall works best as the last line of defense in a system that actively manages moisture at the source.
Install bathroom exhaust fans rated for at least 50 CFM (cubic feet per minute) in bathrooms up to 50 square feet, with higher CFM ratings for larger spaces, running during and for 20 minutes after showers. Kitchen range hoods should exhaust 100 to 300 CFM to the exterior depending on cooking habits, not recirculate filtered air back into the room. Monitor indoor humidity levels with a hygrometer, keeping relative humidity below 60% year round and ideally between 30 to 50% in winter. Provide air circulation with ceiling fans or HVAC return air to prevent dead spots where humid air accumulates against walls. Inspect regularly for signs of moisture intrusion including condensation on surfaces, musty odors, or visible water stains.
Bathrooms need exhaust fans ducted to the exterior, not into attics or wall cavities where the humid air just moves the problem somewhere else. Common mistake is installing a fan but never running it, or running it for 30 seconds before leaving the bathroom when it needs 20 minutes to clear the moisture from a shower. Automatic humidity sensing fans or timers solve this by running the appropriate duration regardless of whether you remember to flip the switch. Laundry rooms with dryers need exterior vented dryer ducts kept clean and short. Long runs with multiple bends restrict airflow and cause humidity to backdraft into the room.
Combine mold resistant drywall with proper ventilation and you’ve got a system that handles normal moisture exposure without creating conditions for mold growth. Miss either piece (install mold resistant panels but skip the exhaust fan, or run the fan but use standard drywall) and you’re more likely to end up dealing with mold problems that neither solution alone could prevent. The drywall’s antimicrobial properties extend the time before mold establishes, giving ventilation systems a chance to remove moisture before it accumulates to problem levels.
Maintenance and Inspection of Mold Resistant Drywall

Clean mold resistant drywall surfaces with mild detergent and water or bathroom cleaners formulated for painted surfaces. Avoid harsh chemicals like bleach or ammonia that can damage the finish and potentially affect the antimicrobial treatment. Spray cleaners designed for soap scum work fine as long as you wipe them off rather than letting them sit, which can soften the joint compound at seams. The moisture resistant facing holds up to normal cleaning better than standard drywall, but it’s still gypsum based material that will soften and degrade if kept wet continuously.
Inspect mold resistant drywall in moisture prone areas twice a year, looking for early warning signs before problems become expensive. Check for surface mold or mildew, which appears as dark spots or patches and indicates the space isn’t being ventilated properly or a moisture source is overwhelming the panel’s resistance. Feel for soft spots or areas where the face paper is bubbling or delaminating from the core, which means moisture has penetrated behind the facing and the panel is failing. Look for water stains or discoloration, particularly at seams and around fixtures where improper flashing or caulking lets water in. Run your hand along baseboards and corner seams feeling for dampness that might not be visible yet.
Warranty coverage for mold resistant drywall typically covers manufacturing defects but not installation errors or moisture problems caused by poor building design and maintenance. Most manufacturers warranty their products against mold growth for 3 to 5 years when installed properly in applications the product was designed for, meaning appropriate ventilation and no continuous water exposure. If mold grows on or behind the panels, the warranty likely won’t cover replacement because the mold growth indicates an environmental problem (inadequate ventilation, water leak, excessive humidity) rather than product failure. Read the specific warranty terms before counting on coverage.
Patch repairs work for small damaged areas less than 12 inches across where the face paper is torn or the surface is dented but the panel structure remains sound. Cut out the damaged section in a square or rectangle, install blocking behind the opening for screw attachment, and patch with a piece of matching mold resistant drywall. Full panel replacement is necessary when moisture has compromised the gypsum core (soft spots, crumbling, delamination), when mold is growing on or behind the panel indicating the antimicrobial treatment is overwhelmed, or when multiple areas of the same panel are damaged. Don’t try to save a water damaged panel by patching around the wet spots. Once the core is compromised, the entire panel has lost structural integrity and will continue failing.
Final Words
3/8 mold resistant drywall fills a specific niche in ceiling overlays, patch repairs, and renovation work where moisture protection matters but space is tight.
The thinner profile won’t replace proper ventilation, vapor barriers, or fixing the water source. It’s one layer in a moisture-smart strategy.
Check your framing spacing before you buy. Match your installation to the manufacturer specs, and you’ll get the mold resistance you’re paying for without callbacks or sagging panels.
FAQ
Q: Is there a mold-resistant drywall?
A: Mold-resistant drywall does exist and features treated gypsum cores with moisture-resistant facing materials that inhibit fungal growth. Major brands include Purple Board and DensArmor Plus, available at Home Depot, Lowe’s, and building supply distributors for moisture-prone areas.
Q: Is there such a thing as 3/8 drywall?
A: 3/8 drywall does exist and measures 3/8 inch thick by 4 feet wide by 12 feet long in standard configurations. It’s primarily used for ceiling overlays, repair patches matching older thin drywall, and renovation projects with 16-inch joist spacing.
Q: Why is green board being phased out?
A: Green board is being phased out because newer mold-resistant products with fiberglass mat facing and treated cores provide superior moisture protection. Purple Board and DensArmor Plus offer better antimicrobial performance in high-humidity areas compared to green board’s basic moisture-resistant paper facing.
Q: Is mold-resistant sheetrock worth it?
A: Mold-resistant sheetrock is worth it for bathrooms, laundry rooms, and high-humidity areas where standard drywall fails quickly. The upfront cost premium prevents expensive mold remediation and repeat repairs, especially when combined with proper ventilation and moisture management systems.
Q: What is the maximum joist spacing for 3/8 inch mold resistant drywall on ceilings?
A: The maximum joist spacing for 3/8 inch mold resistant drywall on ceilings is 16 inches on center to prevent sagging. Exceeding this spacing creates structural instability and fastener pop-through, compromising both the installation quality and moisture barrier integrity.
Q: Can you paint directly on mold resistant drywall?
A: You cannot paint directly on mold resistant drywall without first applying moisture-resistant primer designed for treated surfaces. Proper primer selection ensures paint adhesion while maintaining the panel’s antimicrobial properties and preventing finish failures in humid conditions.
Q: Does 3/8 inch mold resistant drywall need a vapor barrier?
A: 3/8 inch mold resistant drywall needs a vapor barrier in extreme moisture conditions like shower surrounds and steam rooms. While the panels resist mold growth, they don’t replace polyethylene vapor barriers required for comprehensive moisture protection in high-exposure applications.
Q: How many square feet does a 3/8 inch mold resistant drywall sheet cover?
A: A 3/8 inch mold resistant drywall sheet covers 48 square feet based on standard dimensions of 4 feet wide by 12 feet long. Calculate total material needs by dividing wall or ceiling square footage by 48, then adding 10-15 percent waste factor.
Q: What screw spacing is required for 3/8 inch drywall installation?
A: The screw spacing required for 3/8 inch drywall installation is closer than standard 1/2 inch panels to prevent sagging and fastener pop-through. Space fasteners 8 inches apart on ceilings and 12 inches apart on walls for proper support.
Q: Can you use mesh tape on mold resistant drywall?
A: You can use mesh tape on mold resistant drywall, but paper tape often performs better with moisture-resistant joint compound in humid environments. Both options work when properly embedded with compatible joint compound that maintains antimicrobial surface protection.